57
The Sapling Company, Inc.
670 Louis Drive
Warminster, PA 18974
USA
P. (+1) 215.322.6063
F. (+1) 215.322.8498
www.sapling-inc.com
sbdconfig Installation
Image M
Image N
Step Five:
Installing the USB Programming software on the user computer –
In order to program the clock,
there is a need to install the clock programming software, which is also provided on the CD. For doing so,
please follow the below steps:
a. Copy the clock programming software “
SBDconfig
” ZIP folder provided on the CD to your
computer desktop. This software can also be downloaded from our website.
(https://sapling-inc.com/software/)
b. Un-zip (extract) the “
SBDconfig
” software.
c. Make sure that the USB connector of the USB Programming Cable is properly connected to your
computer, and that the other end of the USB Programming Cable is connected to the clock (as
previously explained). Please also make sure that the clock is powered (as previously explained).
d. Once the clock is properly connected to the computer and powered, and after both software are
installed, go to the “
SBDconfig
” folder on your desktop. In this folder, various file types
will be visible, but only the application file should be opened by double clicking it. Doing so will
open the programming software. This will allow you to browse between the different clock
programming tabs that contain different settings depending on the application needs.
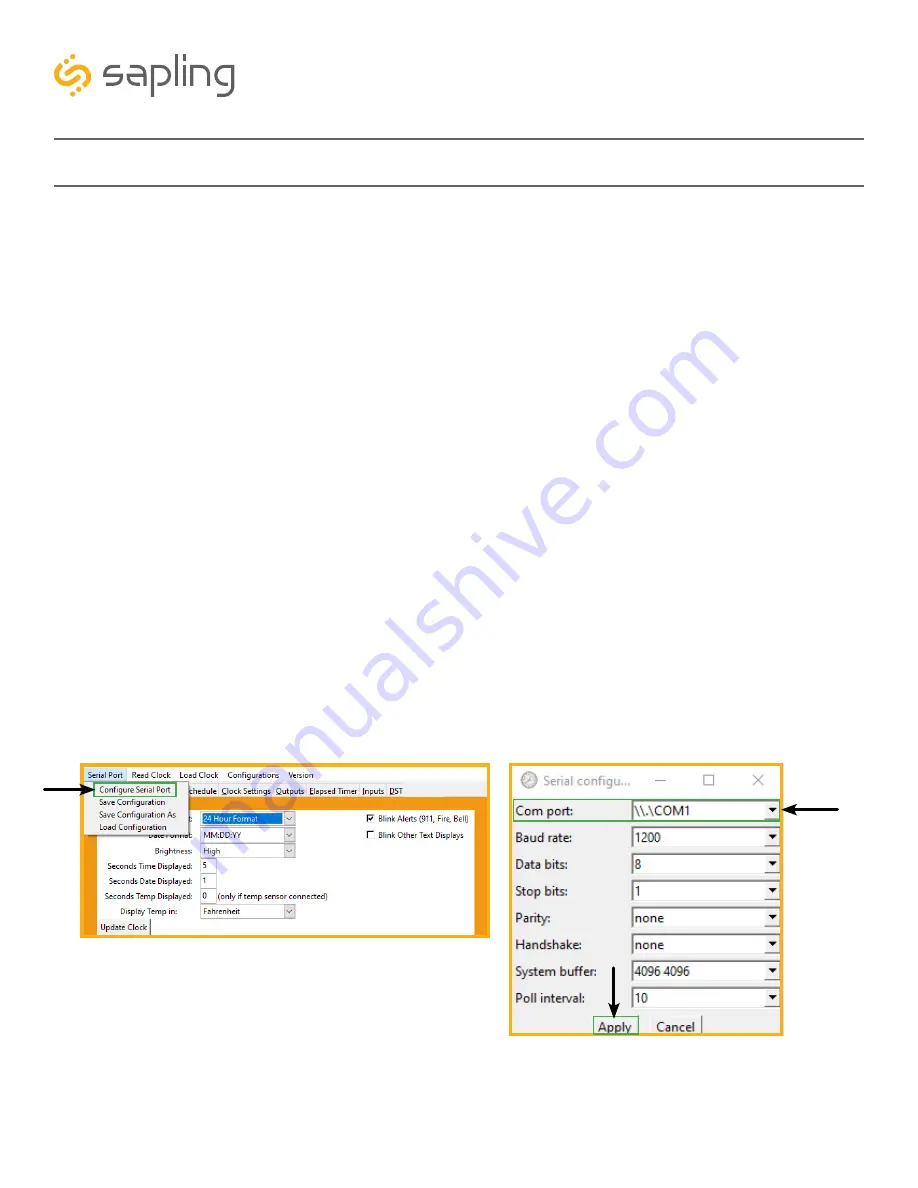
e. After opening the programming software, click on “
Serial Port
” (on the menu bar) and then
“
Configure Serial Port
” as shown in Image M.
f. Make sure that the COM port matches the number you saw on the “Device Manager,” then click
“Apply,” as shown in Image N.


