


Using the Control Panel
(“admin” only)
10
English
B
For cameras with panning and tilting functions
For the functions common to all camera models (
1
-
7
), refer to the description on the left page.
1
2
2
1
3
3
4
5
7
6
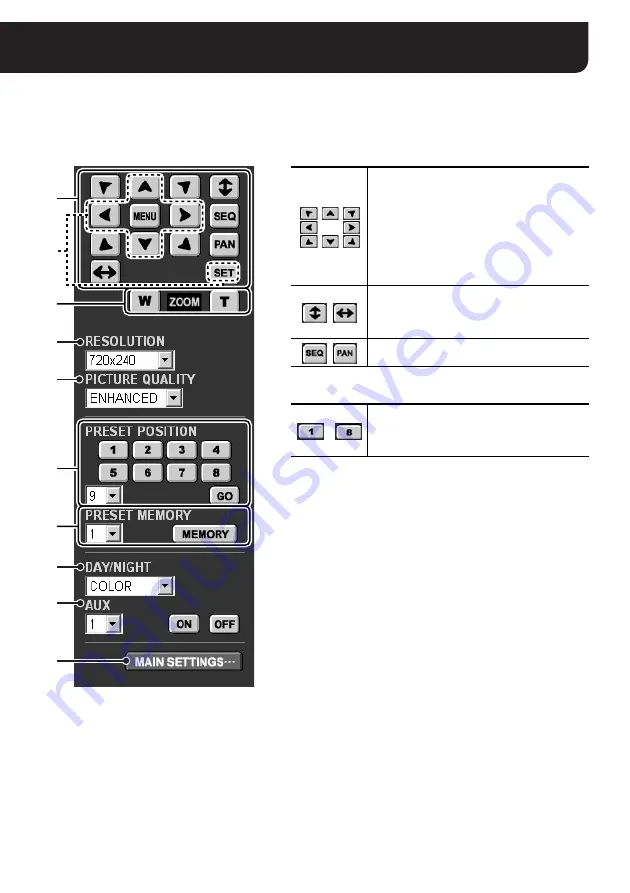
Control Panel
1
Camera control buttons
2
Calling the preset positions
When you call the preset number higher than 8, select the
number from the pull-down menu and click the [GO] button.
3
Registering the preset position
You can register the current camera orientation along with the
zoom and focus settings as the preset position.
To register the preset position, select the number to be used for
current setting from the pull-down menu and click the
[MEMORY] button.
Changes the camera orientation toward the
direction indicated by arrow mark.
• Clicking the video image changes the
camera’s orientation so that the point
where you click is located at the center of
the image.
The camera control buttons cannot be
operated while the camera configuration
menu is displayed.
Scans the monitored area end to end
vertically or horizontally for respective
buttons, and stops at the current camera
position.
Starts the sequence or auto-panning action
respectively.
-
For camera’s orientation and the zooming and
focusing status, calls the preset position
registered in “Registering the preset position”
(
3
) below.


