20
English
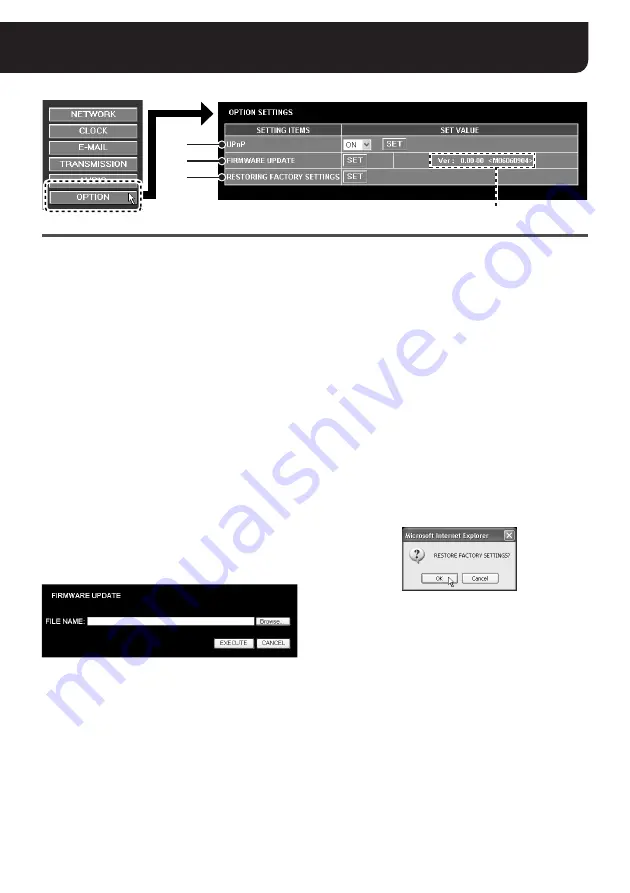
OPTION SETTINGS
(“admin” only)
1
UPnP
When you access the camera through the UPnP
connection, make sure that the [UPnP] option is set
to “
ON
” (factory setting value).
Note:
• When your operating system is Windows 2000,
you cannot access the camera through the UPnP
connection.
• When you access the camera through the UPnP
connection, enable the UPnP component on your
PC (See page 7).
• After you change the [UPnP] settings, use the
[Close] button to terminate the camera
connection and access the camera again.
After you change the [UPnP] setting from “ON” to
“OFF”, take a note of the camera’s IP address
shown in the [NETWORK SETTINGS] screen so
that you can access the camera from the Web
browser.
2
FIRMWARE UPDATE
You can update the option board firmware to the
latest version.
Click the [SET] button to display the [FIRMWARE
UPDATE] screen.
Click the [Browse...] button to locate the firmware
update file, and click the [EXECUTE] button.
• This starts the firmware update process.
Note:
• Neither make any operations on the screen nor
turn power off while the “LOADING FIRMWARE
FILE...” message is displayed.
• You cannot update the firmware while recording a
video. Trying to update the firmware during
recording causes the operation confirmation
dialog to appear.
When the firmware update completes, the system
restarts automatically. About 90 seconds after the
restart, the connection to the camera will be
established again.
Check the version number indication in the
[OPTION SETTINGS] screen to confirm whether the
firmware update has been successful or not.
3
RESTORING FACTORY SETTINGS
All the settings made in the screens can be reset to
the factory setting values.
Click the [SET] button to display the dialog for
confirming the operation. Click the [OK] button.
1
2
3
Version number


