background image


Page 31/67 


Step 5: Process motion detection alarm


Move cursor to “Alarm” button of motion detection and press [Menu] to enter “Motion detection processing” 

interface. The interface of motion detection processing is same to video mask interface. (Refer to: Alarm setting in this 
manual.)  

Step 6: Select motion detection type 


The recording of motion detection will be saved as alarm/normal recording. In normal recording process: when the 

setting of time period takes effect, it will be activated immediately after exit the menu; if alerting is activated, normal 
motion detection will be disabled. In alarm recording process, if buzzer is activated, the device will buzz. The time of 
alarm recording depends on recording time before and after alarm. Alarm recording will take effected only when alerted.   

Step 7: Motion Detection Time 

It is just used in common motion detection, refers to the time after motion detection while recording still last. It is 

not set too long, usually about 60s. 

Содержание SA-2204

Страница 1: ...id stuff onto it Install the device in suitable humidity and temperature environment Statement We strive to ensure the exactness and integrality of the manual in the process of preparation but still error or omission is inevitable The copy transmission plagiary storage in retrieval system or translation into any language without written authorization is prohibited ...

Страница 2: ...ATION 14 3 3 MENU OPERATION 15 3 4 INPUT METHOD 17 IN MENU OPERATION INTERFACE ENTER TEXT EDIT BOX E G NAME BOX IN IMAGE SETTING AND INPUT METHOD WILL BE DISPLAYED IN STATUS BAR AT THE BOTTOM OF THE SCREEN AS SHOWN BELOW 17 3 5 ICON INSTRUCTION 17 4 1 TURN ON 19 4 2 TURN OFF 19 4 3 TIME ADJUST 19 4 4 RECORD CONFIGURATION 20 4 5 SEARCH AND PLAY 21 4 5 1 FAST SEARCH AND PLAY 21 STEP ONE CHOOSE CHANN...

Страница 3: ...ACTIVATED ALERT IS NO NEED OF PWD BUT EACH DISALERT IS NEED OF PWD DEAFULT CODE 88888888 23 ACTIVATE AND USE ALERT THE FUNCTION SUCH AS VIDEO MASK VIDEO LOOSE OR MOTION DETECTION SHOULD BE WORKING AT THIS ALERT CONDITION PRESS ALERT KEY ON FRONT PANEL RED SHIELD APPEAR ON THE IMAGE IF IT IS NOT UNDER ALERT CONDITION THE SETTING PARAMETERS WILL NOT WORK 23 DISALERT DISALERT THE MACHINE TO CHECK ITS...

Страница 4: ...LECT THE CONFIRM IN VIDEO CONFIG THE CONTENT WILL BE SAVED AND BACK TO MAIN MENU CHAPTER V MENU AND PARAMETER SETTINGS 23 CHAPTER V MENU AND PARAMETER SETTINGS 24 5 1 BASIC CONFIGURATION 24 5 2 LIVE CONFIGURATION 25 THIS PART INCLUDES MOTION DETECTION VIDEO MASK VIDEO LOOSE VIDEO QUALITY ADJUST 25 25 5 3 RECORD CONFIGURATION 32 THIS PART IS FOR RECORDING SETTING INCLUDING VIDEO QUALITY RESOLUTION ...

Страница 5: ...EVICE IS EQUIPPED THE BUZZER IS BUILT IN THE DVR HOST 44 5 6 1 AUTOMATIC ABNORMITY SEARCH 44 SELECT TYPE HDD FULL OR DISK WRONG DIFFERENT DEVICE WILL BE WITH DIFFERENT METHODS TO DEAL WITH ABNORMITY PLEASE FOLLOW THE ACTUAL EQUIPEMT INSTRUCTION 44 BUZZER SET DOWN IT WILL BUZZER TO REMIND 44 ALARM UPLOAD WHILE WRONG INFORMATION RECEIVED IT WILL CONNECT ALARM CENTER AND UPLOAD THE SITUATION 44 ALARM...

Страница 6: ...T THE SAME TIME 48 5 9 USER CONFIGURATION 48 5 9 1 Authorization setting 49 The administrator is enabled with full authority by default and the authority setting of administrator is invalid e g cancel certain authority of administrator in menu 50 5 10 SEARCH AND BACKUP 50 ...

Страница 7: ...Page 7 67 51 5 11 MANAGER TOOLS 52 53 5 11 1 LOAD DEFAULT 53 ...

Страница 8: ...c bit steam are available Live configuration Compound video input built in anti lightning protection Double output BNC output and VGA output Each channel at 25 F S PAL or 30 F S NTSC is real time playing no delay Live configuration adjusting contrast brightness hue sharpness adjusting Chinese name for channel support Chinese input Video recording Synchronized A V recording the parameters of video ...

Страница 9: ...ome camera presetting positions cruising pattern ID setting and adjusting Alarm function Alarm input output without trigging point Upload alarm manually or by remote control network Customize alarm input type NC NO Remote control function Support 10 100MB self adaptive network Support remote set time remote download revise data Provide matched network software for free Support WEB browsing Control...

Страница 10: ...Page 10 67 Backup by some pointed channel or backup according time period Backup with USB DVDRW or USB HDD USB 2 0 Backed files can be back played Server update Upgrade by USB Upgrade by network ...

Страница 11: ...ard disk get a cross screwdriver first Step 1 Open the case Step 2 Put the hard disk into the holder and fix it with screws on both left and right Step 3 Using a SATA cord to connect HDD onto SATA connector Step 4 Put the holder back to the device and fix it with screws 2 2 Install device Important Select appropriate installation position to provide good ventilation and prevent overheating of the ...

Страница 12: ... to monitor and output video signals 5 VGA output Connect to VGA display 6 UTP network port Connect to Ethernet devices e g Ethernet switch Ethernet hub etc 7 Power supply Connect to DC12V 3A power adaptor 8 Alarm output Send alarm signals connect to alarm buzzer or lamp 9 Alarm input Receive alarm signals connect to alarm sensor such as wave sensor door status switch and shock sensor 10 RS485 int...

Страница 13: ...art stop video recording manually 4 Search Turn on and search recording list 5 Voice Control the voice up and down 6 Advance Same as Alert Cancel Search PTZ control Exit Info and VGA on front panel 7 PTZ control Control pan tilt zoom in out focus light circle 8 Main menu direction key Control Direction and Menu move confirm cursor control the pan tile direction ...

Страница 14: ...on Connect the mouse to the USB interface in front panel Left click to confirm selection and right click to select menu Right click menu is shown as below The list order will be different while controlled by cursor or by front panel Right click to back to previous menu S N Name Remark 1 Parameters setting Same as Menu key 2 Recording data Same as Search key 3 System information Check information o...

Страница 15: ...n order to operate device user needs to get the correct PWD 8 Cancel alarm Same as Cancel key on front panel 9 Record Start recording manually 10 Stop record Stop recording manually 11 Playback Playback the recorded files 12 PTZ control Start PTZ control 13 Stop PZT Stop PTZ control ...

Страница 16: ... System settings menu directly Menu operation The setting can be set or revised by menu key to enter next submenu or by numerical keys to input directly In System settings menu press key to move cursor and press Menu key to confirm selection In main menu press key to select items in main menu and press Menu key to enter the submenu and set the parameters In the submenu press key to select items in...

Страница 17: ... 0 9 To change input method press Menu key Available input methods include capitalized letter small letter number and location To input letters press numerical keys 1 9 Press a key consecutively to switch letters After input the letter wait for 1 second to input next letter 3 5 Icon instruction Press Display key on front panel consecutively and different symbols will be displayed on the screen Vid...

Страница 18: ...r is in timing state Alert symbol Indicates the video recorder is in alerted state If alarm signals generated the recorder will record and output the alarm automatically When alarm occurs the symbol will turn into solid from hollow Pan tilt symbol Indicates the machine is controlled by pan tilt USB Symbol Indicates the USB interface is connected Time display Display the playing time or recording t...

Страница 19: ...d and you can t record video normally 4 2 Turn off Press the Power key on front panel to turn off the recorder The recorder shouldn t be turned off in backup process otherwise the backup recording will be lost Prompt Cut off the power supply of recorder first and then turn off the peripheral devices If you won t use the recorder for a long time remove the power cord from outlet 4 3 Time adjust You...

Страница 20: ... adjusting as shown below Date time Setting Move cursor to the item and press numerical keys on front panel to enter the values Step 3 Select OK and press Menu to save and exit If it is in recording state the status bar will indicate the state and the settings won t take effect 4 4 Record configuration ...

Страница 21: ...the audio and video will be recorded synchronously Select No and the audio won t be recorded Optional Step 4 After setting click OK to save and exit or click Cancel to exit without saving Step 5 When system setting is finished press button on front panel and a dialogue will popup for you to select channel The green icon indicates manual recording To stop recording press button on front panel Note ...

Страница 22: ...it will play the video next to this time 4 5 3 USB backup Two methods are available for backup period backup and condition backup Period backup select the files in the list and press back up button and select period backup in this button Condition backup Step one insert USB stick into the USB interface Step two press backup right window will popup Step three Enter the recorded time in the date Ste...

Страница 23: ...ess alert then PWD window will popup Input default code 88888888 it will disalert If the machine is recording even disalert it it won t stop recording unless manually stop it Note While activate alert function and the digital video recorder is at the status of alarm recording it cannot stop recording on front panel until disalert it If it alarm and buzzed press clear key on front panel to clear it...

Страница 24: ... Spanish French and Eesti keel are available Menu Brightness Adjust the brightness Menu Transparence Adjust the transparency of menu DVR ID Assign number to every recorder for the convenience of operation If the keyboard is connected to multiple recorders assign number to every recorder to make it convenient to identify and operate the recorders Press numerical keys to customize device NO Enable S...

Страница 25: ...enter time Screen Saver At the status of VGA output it will support screen save VGA Resolution The resolution is higher the video will clearer While it revised the digital video recorder should be restarted then it can activate Activate Watermark The water mark is half transparent While it used it will appear at the right corner of the screen Optional Time adjust Adjust the time Audio Setting Adju...

Страница 26: ...ng It used to envelop the sensitive or privacy area e g the PWD key on ATM machine This parameter is only used for setting channel Each channel can be set 4 mask zone and the setting for each is different Step 1 Select channel Move cursor to Channel to select the image to set mask Press Menu to confirm Step 2 Set mask zone Enter mask setting interface Press Menu key to select Mask alarm to activat...

Страница 27: ...menu Change the direction of the boundary line red line enter the mask zone red line is at left boundary Press and to move the red line up and down to boundary line There are two methods to move the active area to right boundary line as below Method one Press to move red line to upper boundary then press to move to right boundary Method two Press to move red line to bottom boundary then press to m...

Страница 28: ...ers of processing dialogue box Refer to Alarm processing setting in this manual Step 5 Save and activate After the image mask setting of all channels click OK button in Live Config menu to save and exit 5 2 4 Video Loss Some situation will cause video loss such as camera problem video output line cut down or connector loose Setting video loss properly can find the situation as early as possible St...

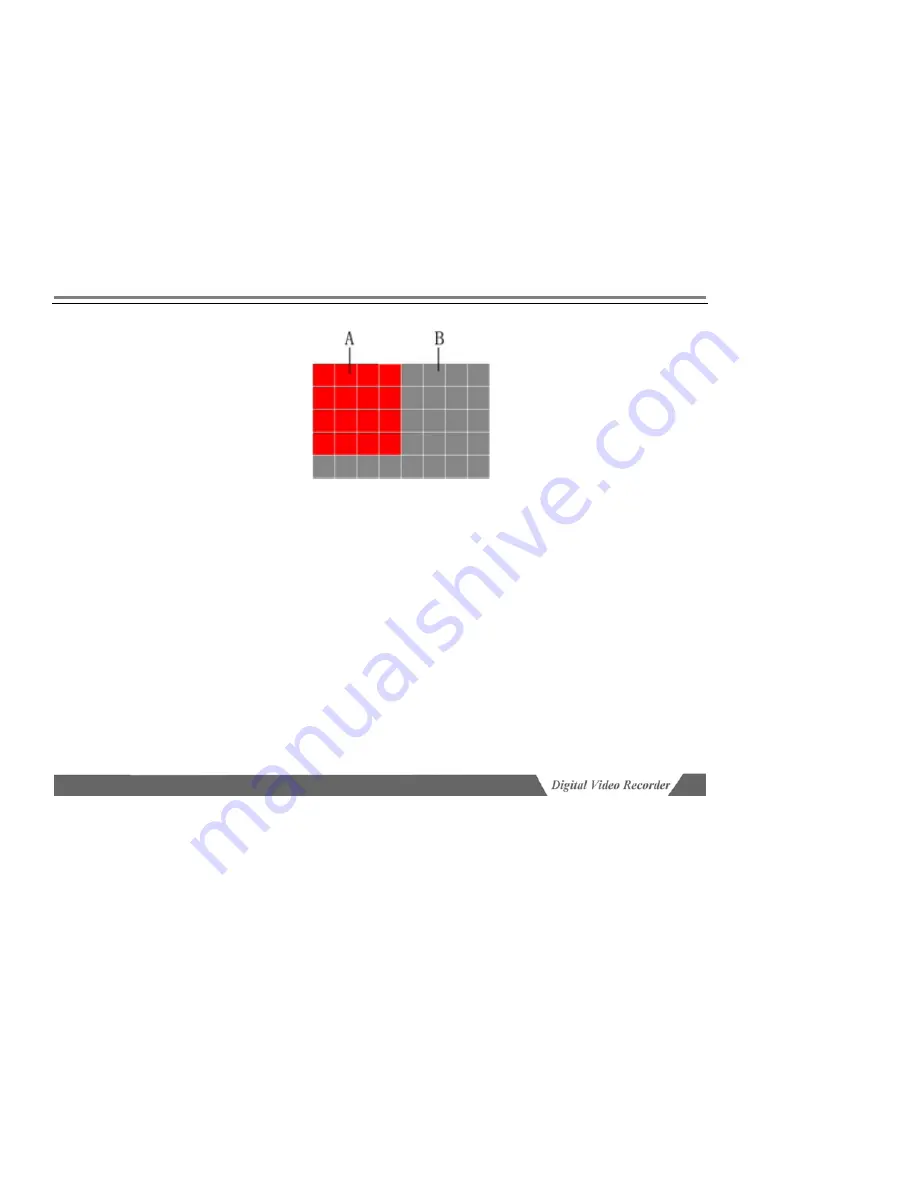
Страница 29: ...ence will also be regarded as monitoring object moving which will affect the correct detection So it needs to set the parameter considering all the aspects and try to get the best effect Step 1 Select channel Enter Live Config interface Move cursor to Channel to select the image to perform motion detection setting Press Menu to confirm Step 2 Activate motion detection Press Menu key to select Moti...

Страница 30: ...these areas are selected green indicates deleting motion detection area and the panes that green cursor moves across will turn into grey indicating that these areas are not selected Press Menu key o switch the color of cursor among yellow blue and green Press and to move cursor and select area If the color changes at selected areas motion detection will be triggered If the color changes at areas t...

Страница 31: ...rding In normal recording process when the setting of time period takes effect it will be activated immediately after exit the menu if alerting is activated normal motion detection will be disabled In alarm recording process if buzzer is activated the device will buzz The time of alarm recording depends on recording time before and after alarm Alarm recording will take effected only when alerted S...

Страница 32: ...t Select the time period first and then input the beginning time and end time Click OK to save and confirm Schedule detection and normal detection will be used at the same time it won t affect the alarm recording 5 3 Record Configuration This part is for recording setting including video quality resolution frame rate and audio parameter setting 5 3 1 Record Quality Setting Select channel Select th...

Страница 33: ...dio will be recorded in monitoring state Channels 1 16 are available The digital video recorder is not built in microphone If you need video and audio at the same time you have to set an audio resource equipment at the audio input port Optional Secret recording In monitoring state the video won t be displayed on the monitor but it will be recorded Copy setting to Copy the setting of channels It wi...

Страница 34: ...n start and stop recording according to setting time Stop all recording before activate timing recording Activate timing recording Press Timing button on front panel to start timing recording The timing symbol will be displayed on the monitor and VFD display Stoptiming recording To stop timing recording press Timing button on front panel first If password protection is enabled the Input PWD dialog...

Страница 35: ...ording The recording will be stopped at specified time The format is 24 hour Press numerical keys on front panel to input time Save setting After setting click OK to save and exit Prompt Manual recording will be invalid in timing recording process Timing recording will be saved in hard disk as alarm recording 5 4 Network Configuration The machine is with RJ45 network port with protocol TCP IP DHCP...

Страница 36: ...e to the IP address Input the IP address of domain server in DNS address 5 4 2 CMS Setting Remote Server 1 It s the upload address while the DVR upload information to network used to remote control the machine If host IP and port are configured for the computer that manages the recorder remotely the digital video recorder will send the signals to remote alarm panel if alarm or abnormal events occu...

Страница 37: ...It makes use of wire connect suitable for 24 hour user Trigger Dial UP Trigged by outer equipment e g after loading up alarm function there is alarm signal sending out the equipment will dial up automatically After it upload message the remote server will instruct it to cut off or it cut off automatically You need to buy a ADSL modular adjuster to dial up DDNS Dynamic domain name service Map user ...

Страница 38: ...Page 38 67 5 4 4 E mail Notification 5 4 4 1 To activate this function click Send a e mail as following shown And please click which channels you want to trigger ...

Страница 39: ...Page 39 67 5 4 4 2 Set correct IP address to keep the network in normal working state 5 4 4 3 Set receiver s e mail address ...

Страница 40: ...Page 40 67 5 4 4 4 When alarm is triggered the picture will be sent to your assigned e mail box automatically 5 5 Alarm Configuration ...

Страница 41: ...ch as beeper and alarm lamp 5 5 1 Outer alarm setting Select Alarm in Select alarm input number which will be set Alarm input type Select N O if the alarm input port is connected to normal opened alarm select N C if it is connected to normal closed alarm 5 5 2 Activate alarm setting While alarm activate the interface will be as below ...

Страница 42: ... on the time of alarm upload Alarm out Select alarm output number which will be set Prerecord time Set the time of recording before alarm is triggered Press numerical keys to enter time The images before alarm will be saved as alarm recording according to preset time If Recording time before alarm is 0 the system won t enter pre alarm state i e the period before alarm won t be recorded Post record...

Страница 43: ...it is connected to normal closed alarm Copy setting Copy the setting of this alarm output to another alarm input device Alerting delay Set the delay of alerting Operator may leave the alerted area within this period of time This period start from pressing alert key 5 5 4 Schedule alert setting The machine is built in effective alert function Setting the parameters you can set manual alert or sched...

Страница 44: ... is equipped the Buzzer is built in the DVR host 5 6 1 Automatic abnormity search Select Type HDD full or disk wrong Different device will be with different methods to deal with abnormity Please follow the actual equipemt instruction Buzzer Set down it will buzzer to remind Alarm upload While wrong information received it will connect alarm center and upload the situation Alarm output Abnormity oc...

Страница 45: ... be revised by customer 5 7 1 Key board central control setting Port Select RS485 Baud rate Available options are 19200 9600 4800 2400 and 1200 The selected value must accord with the protocol and parameters of decoder Device Type Central control keyboard SX326 optional The device is applicable when the option accords with the peripheral device of the recorder and parameters are correct Prompt The...

Страница 46: ...decoder protocol The following decoder protocols are preset in the program including PANNSONIC LLW PELCO D PELCO P LILIN NEON PELCO D YA PELCO D SFD PELCO P MK PELCO D ZT PELCO P ZT ZHIMIN Note different protocols can be used for different channels PTZ address Input the address of the decoder connected to the selected screen The address ID must be insistent with the address of the front end decode...

Страница 47: ...m 00 to 63 Adjust location press the Adjust button to enter control status and adjust the location of the dome by direction buttons Press Menu button to return Save to save current setting to the preset point number Set your required preset points one by one ...

Страница 48: ...e time 5 8 Preview setting It refers to the screen status while no operator control such as providing screen change function While it connects many channels it can change full screen intervals You can see the full screen image from the monitor which is good for actual observation Interval The period for a series of pictures change Original size A full screen Full screen All pictures show out at th...

Страница 49: ...te selected option Without selection operator cannot open menu The menu will be in gray color Load default Operator can just play backup files other functions are operated after administrator Operation PWD There are two options If you choose to activate PWD you will need PWD to enter menu cancel alert or timing if you don t activate PWD you can operate machine directly without PWD We suggest user ...

Страница 50: ... in Operation password setting window null and the password protection will be disabled The operator password will be invalid if administrator password is canceled Therefore you can t keep operator password without administrator password If administrator appoints complete authority to operator and allows the operator to set and operate all items then they will have different passwords and the oper...

Страница 51: ...and all are available Backup channel Set the accuracy of recording searching Exact search will search the entire disk but it has a lower speed Quick search is bisearch which is a higher speed Backup Media External devices flash disk USD hard disk or USB CD R Play Play the desired channel 5 10 1 Playback by time search Step 1 Select time Select the time to play or backup video recording Press numer...

Страница 52: ...play Press Play button to play and press Backup button to backup 5 10 2 Backup recording You can backup the contents in hard disk network interface or CD RW To backup in USB device connect the device to USB interface in front panel and then enter the recording backup option in menu as shown in picture above Select USB device in backup device option Then move cursor to Backup button and press Menu ...

Страница 53: ...network Stop recording before upgrade Select Update and prompt box will popup Two modes are available If network interface is selected you need to input the host IP of server application then select Execute to update The process will be displayed in a message window The special update software must be run on PC at specified IP If USB is selected make sure the USB device has been connected properly...

Страница 54: ...1 3 HDD management HDD info Provide the storage information list and management for the HDD data Covered X Times When the cursor move onto the HDD list it will show that how many times it recycled since it start to be used It s no use while it moves on DVDRW HDD and DVDRW information ID NO 1 8 is 8 ports 8 shows that it has 8 HDD ports support up to 8 SATA disks But this machine just supports 2 SA...

Страница 55: ...ase ask engineer to check If the HDD is not in working status it will skip it without instructions Note All disks will be managed as a whole If the main board is wrong the system will stop working and warn to check HDD or restart Please ask engineer to check Format HDD clear the data in the HDD and format it quickly Execute Press this key to confirm This instruction refers to selected HDD and all ...

Страница 56: ...me function as the info key on the front panel DVR model the model of this machine Version the software version NO Video format the output TV modular Date the production date for software Resolution the pixel for present recording video Current HDD the working disk HD disk the connecting HDD Red working Blue installed but not at working Empty uninstalled CD DVD RW in blue it is connected HDD capac...

Страница 57: ...for HDD Auto Manual is optional Covered the recycled times MAC Address the MAC address for network IC Mainboard the mainboard software NO IP address the IP address for the DVR If it uses the danymic ADSL this IP address will be the WAN IP address Series No the ID of this device 5 11 6 System Management Management of the device such as restart and power off ...

Страница 58: ...s I Start self detection breakdown 1 Why the DVR isn t started when power supply is connected Check whether the power switch at the rear is ON Check whether the indicator on front panel is lit 2 Why system stays in self detection after boot logo Check whether the HDD is connected properly and whether the HDD and cable are in good condition To check the HDD remove it and turn on the DVR The DVR may...

Страница 59: ...ntroller If the infrared indicator on front panel isn t lit please check whether the battery has electricity or whether the remote controller is damaged 7 Why breakdown occurs in the normal video playing or viewing process Check whether the HDD is connected properly replace the HDD if it is damaged 8 Why the monitor TV set has no image or can t be started after update Keep the power supply stable ...

Страница 60: ...ctricity do not install the video cable and the strong electricity circuitry together and also choose qualified shielded cable In the whole system connect only the center DVR to earth otherwise it will cause common mode interference connect the grounding screw at the rear side of DVR to earth Check whether the DVR monitor or the circuitry is aged III Video recording playing recording data backup 1...

Страница 61: ...the Overwriting mode of recording is Auto cycle Check whether the HDD has logical error or physical damage If there is logical error connect the HDD to PC and delete the partition information or repair the HHD and connect it to the DVR If there is physical damage replace the HDD 6 Why there is no response after click Backup when I use client software to backup DVR data Check whether firewall is en...

Страница 62: ...x RAC Alarm input 2 channel input Trigger closed without Voltage Open or Closed Alarm output 1 channel output Trigger closed without Voltage Open or Closed Alarm access Senor input Video motion detection alarm Video loss alarm Disk full remind alarm Network 10 100M self adaptive Ethernet port support LAN WAN and ADSL dynamic IP networking Control mode mouse IR remote control Pan tilt control RS485...

Страница 63: ...5 50 RH 90 Storage temperature 20 70 RH 95 Size 350 58 272mm Weight N G 2 4KG G W 3 8KG Appearance Serial specification parameters Item Specifications and parameters Passway 4 channel 8 channel 16 channel Video signal PAL 625 lines 50f s NTSC 525lines 60f s Video input BNC 1 0V p p 75Ω x 4 BNC 1 0V p p 75Ω x 8 BNC 1 0V p p 75Ω x 16 Video output Composite video 1 0V p p 75Ω BNC connector 1 VGA x 1 ...

Страница 64: ...ynamic IP networking Control mode mouse IR remote control Pan tilt control RS485 x1 Backup mode Network backup external CD R USB interface Resolution PAL Display 704 576 Image 352 288 NTSC Display 704 x 480 Image352 x 240 Compression H 264 HDD capacity Support 2 x 2000G HDD Encryption Data encryption secondary password management Voltage DC 12V 5A Power consumption 6W without HDD 8W without HDD 12...

Страница 65: ...ut 4 x RAC 8 x RAC 16 x RAC Audio output 1 x RAC Alarm input 4 channel 8channel 16channel Alarm output 4channel 4channel 4channel Alarm access Senor input Video motion detection alarm Video loss alarm Disk full remind alarm Network 10 100M self adaptive Ethernet port support LAN WAN and ADSL dynamic IP networking Control mode mouse IR remote control Pan tilt control RS485 x1 Backup mode Network ba...

Страница 66: ...cryption secondary password management Voltage 220V 10 50Hz 180W Power consumption 13W without HDD 13W without HDD 32W without HDD Environmental temperature Working temperature 5 50 RH 90 Storage temperature 20 70 RH 95 Size 432 96 375 mm Weight N G 5 4KG G W 7 0KG ...

Страница 67: ...Page 67 67 This manual is used for below models Appearance Appearance Appearance ...

Отзывы: