background image

6

English 


Important safety instructions

Impor

tant saf

ety ins

truc

tions

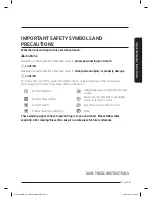
SAVE THESE INSTRUCTIONS

When using any electrical appliance, basic safety precautions should be followed, including 
the following:

WARNING

To reduce risk of burns, electric shock, fire, personal injury or exposure to excessive 
microwave energy:

1. 

Read all safety instructions before using the appliance.

2. 

Read and follow the specific “Precautions to avoid possible exposure to excessive 
microwave energy” on page 4.

3. 

This appliance must be grounded. Connect only to properly grounded outlets. See 
Important “Grounding instructions” on page 8 of this manual.

4. 

Install or locate this appliance only in accordance with the provided installation 
instructions.

5. 

Some products such as whole eggs and sealed containers (for example, closed glass jars) 
can explode if heated rapidly. Never heat them in a microwave oven.

6. 

Use this appliance only for its intended use as described in the manual. Do not put 
corrosive chemicals or vapors in or on this appliance. This type of oven is specifically 
designed to heat, cook, or dry food. It is not designed for industrial or laboratory use.

7. 

As with any appliance, close supervision is necessary when it is used by children. Keep 
children away from the door when opening or closing it as they may bump themselves 
on the door or catch their fingers in the door.

8. 

Do not operate this appliance if it has a damaged cord or plug, if it is not working 
properly, or if it has been damaged or dropped.

9. 

This appliance should be repaired or serviced only by qualified service personnel. Contact 
the nearest authorized service facility for examination, repair, or adjustment.

10. 

Do not cover or block any openings on the appliance.

11. 

Do not tamper with or make any adjustments or repairs to the door.

12. 

 Do not store this appliance outdoors. Do not use this product near water, for example, 
near a kitchen sink, in a wet basement, near a swimming pool, or similar locations.

13. 

Do not immerse the cord or plug in water.

14. 

Keep the cord away from heated surfaces. (including the back of the oven).

15. 

Do not let the cord hang over edge of table or counter.

MS11J5023AS_AC_DE68-04366A-00_EN.indd   6

2015-04-24   �� 6:20:25

Содержание MS11J5023A Series

Страница 1: ...ww samsung com ca_fr support French Please be advised that the Samsung warranty does NOT cover service calls to explain product operation correct improper installation or perform normal cleaning or maintenance Scan the QR code or visit www samsung com spsn to view our helpful How to Videos and Live Shows Requires reader to be installed on your smartphone MS11J5023AS_AC_DE68 04366A 00_EN indd 56 20...

Страница 2: ...Microwave Oven User manual MS11J5023A MS11J5023AS_AC_DE68 04366A 00_EN indd 1 2015 04 24 6 20 21 ...

Страница 3: ... works 24 Checking that your oven is operating correctly 25 Cooking Reheating 26 Setting the time 27 Power levels and time variations 28 Adjusting the cooking time 28 Stopping the cooking 29 Setting the energy save mode 29 Using the auto cook features 30 Using the healthy cooking features 32 Using the defrost features 34 Using the deodorization features 36 Using the child lock features 36 Switchin...

Страница 4: ...de 38 Reheating guide 41 Defrosting guide 43 Quick Easy 44 Cookware guide 45 Troubleshooting 47 Troubleshooting 47 Information code 51 Technical specifications 52 Warranty 53 Samsung microwave oven 53 MS11J5023AS_AC_DE68 04366A 00_EN indd 3 2015 04 24 6 20 21 ...

Страница 5: ...PRECAUTIONS TO AVOID POSSIBLE EXPOSURE TO EXCESSIVE MICROWAVE ENERGY A Do not attempt to operate this oven with the door open since open door operation can result in harmful exposure to microwave energy It is important not to defeat or tamper with the safety interlocks B Do not place any object between the oven front face and the door or allow soil or cleaner residue to accumulate on the sealing s...

Страница 6: ...k of fire explosion electric shock or personal injury when using your microwave oven follow these basic safety precautions Do NOT attempt Unplug the power plug from the wall socket Do NOT disassemble Make sure the machine is grounded to prevent electric shock Do NOT touch Call the service center for help Follow directions explicitly Note These warning signs are here to prevent injury to you and ot...

Страница 7: ...or on this appliance This type of oven is specifically designed to heat cook or dry food It is not designed for industrial or laboratory use 7 As with any appliance close supervision is necessary when it is used by children Keep children away from the door when opening or closing it as they may bump themselves on the door or catch their fingers in the door 8 Do not operate this appliance if it has...

Страница 8: ...bubbling or boiling when the container is removed from the microwave oven is not always present THIS COULD RESULT IN VERY HOT LIQUIDS SUDDENLY BOILING OVER WHEN THE CONTAINER IS DISTURBED OR A SPOON OR OTHER UTENSIL IS INSERTED INTO THE LIQUID To reduce the risk of injury a Do not overheat liquid b Stir liquid both before and halfway through heating it c Do not use straight sided containers with n...

Страница 9: ...s the risk of electric shock by providing an escape wire for the electrical current This appliance is equipped with a cord that includes a grounding wire and a grounding plug The plug must be plugged into an outlet that is properly installed and grounded WARNING Improper use of the grounding plug can result in a risk of electric shock Plug into a grounded 3 prong outlet Do not remove the third gro...

Страница 10: ...electric shock fire an explosion problems with the product or injury Unpack the oven remove all packaging material and examine the oven for any damage such as dents on the interior or exterior of the oven broken door latches cracks in the door or a door that is not lined up correctly If there is any damage do not operate the oven and notify your dealer immediately Make sure to install your oven in...

Страница 11: ...his appliance in a humid oily or dusty location or in a location exposed to direct sunlight or water rain drops This may result in electric shock or fire Plug the power plug into the wall socket firmly Do not use a damaged power plug damaged power cord or loose wall socket This may result in electric shock or fire Do not mount over a sink Do not pull or excessively bend the power cord Do not twist...

Страница 12: ...plug Do not use a ventilating fan A spark may result in an explosion or fire Take care that the door or any of the other parts do not come into contact with your body while cooking or just after cooking Failing to do so may result in burns In the event of a grease fire on the surface units below the oven smother the flaming pan on the surface unit by covering the pan completely with a lid a cookie...

Страница 13: ...terials can be dangerous to children If a child places a bag over its head the child can suffocate Do not let children or any person with reduced physical sensory or mental capabilities use this appliance unsupervised Make sure that the appliance is out of the reach of children Failing to do so may result in electric shock burns or injury Do not touch the inside of the appliance immediately after ...

Страница 14: ...appliance Items such as a cloth may get caught in the door This may result in electric shock fire problems with the product or injury Do not operate the appliance with wet hands This may result in electric shock Do not spray volatile material such as insecticide onto the surface of the appliance As well as being harmful to humans it may also result in electric shock fire or problems with the produ...

Страница 15: ...LEANING INSTRUCTIONS Do not clean the appliance by spraying water directly onto it Do not use benzene thinner or alcohol to clean the appliance This may result in discoloration deformation damage electric shock or fire Before cleaning or performing maintenance unplug the appliance from the wall socket and remove food waste from the door and cooking compartment Failing to do so may result in electr...

Страница 16: ...le If the supply cord is damaged it must be replaced by the manufacturer its service agent or similarly qualified persons in order to avoid a hazard For your personal safety plug the cable into a proper AC earthed socket Do not install the microwave oven in hot or damp surroundings like next to a traditional oven or radiator The power supply specifications of the oven must be respected and any ext...

Страница 17: ...yourself Allow only a qualified service technician to perform repairs If the oven is faulty and needs servicing or you are in doubt about its condition unplug the oven from the power outlet and contact your nearest service center Do not use the oven if it is damaged in particular if the door or door seals are damaged Door damage includes a broken hinge a worn out seal or distorted bent casing Do n...

Страница 18: ...ntable 02 Turntable to be placed on the roller ring with the centre fitting to the coupler Purpose The turntable serves as the main cooking surface it can be easily removed for cleaning IMPORTANT DO NOT operate the microwave oven without the roller ring and turntable IMPORTANT If you need an accessory marked with a you can buy it from the Samsung Contact Center 1 800 726 7864 or on line at www sam...

Страница 19: ...such as next to other microwave ovens or radiators Conform to the power supply specifications of this oven Use only approved extension cables if you need to use Wipe the interior and the door seal with a damp cloth before using your oven for the first time Remove all packing materials inside the oven Install the roller ring and turntable Check that the turntable rotates freely Turntable 10 cm behi...

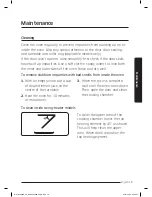
Страница 20: ... of the oven Rinse and dry well To remove stubborn impurities with bad smells from inside the oven 1 With an empty oven put a cup of diluted lemon juice on the centre of the turntable 2 Heat the oven for 10 minutes at max power 3 When the cycle is complete wait until the oven cools down Then open the door and clean the cooking chamber To clean inside swing heater models To clean the upper area of ...

Страница 21: ... you encounter a problem with hinges sealing and or the door contact a qualified technician or a local Samsung service centre for technical assistance If you want to replace the light bulb contact a local Samsung service centre Do not replace it yourself If you encounter a problem with the outer housing of the oven first unplug the power cord from the power source and then contact a local Samsung ...

Страница 22: ...1 The oven beeps 4 times 2 The end reminder signal will beep 3 times once every minute 3 The current time is displayed again If you want to add an extra 30 seconds 1 Press the START 30s button one or more times for each extra 30 seconds that you wish to add 2 By turning the Dial Knob You can set the time as you want 1 2 MS11J5023AS_AC_DE68 04366A 00_EN indd 21 2015 04 24 6 20 32 ...

Страница 23: ...ures Oven 01 02 03 04 05 08 09 06 07 10 01 Door handle 04 Light 07 Coupler 02 Door 05 Door latches 08 Roller ring 03 Ventilation holes 06 Turntable 09 Safety interlock holes 10 Control panel MS11J5023AS_AC_DE68 04366A 00_EN indd 22 2015 04 24 6 20 33 ...

Страница 24: ...4 Pizza Button 05 Microwave Button 06 Soften Melt Button 07 Deodorization Button 08 Child Lock Button 09 Clock Button 10 Dial Knob Weight Serving Time 11 Select Button 12 Stop Eco Button 13 Start 30s Button 05 09 10 11 12 13 06 01 02 03 04 07 08 MS11J5023AS_AC_DE68 04366A 00_EN indd 23 2015 04 24 6 20 34 ...

Страница 25: ...e microwaves are absorbed by the food up to a depth of about 1 inch 2 5 cm Cooking then continues as the heat is dissipated within the food 3 Cooking times vary according to the container used and the properties of the food Quantity and density Water content Initial temperature refrigerated or not IMPORTANT As the centre of the food is cooked by heat dissipation cooking continues even when you hav...

Страница 26: ...essing the START 30s button the appropriate number of times Result The oven heats the water for 4 or 5 minutes The water should then be boiling NOTE The oven must be plugged into an appropriate wall socket The turntable must be in position in the oven If a power level other than the maximum 100 900 W is used the water takes longer to boil Open the oven door by pulling the handle on the right side ...

Страница 27: ... by turning the Dial Knob Refer to the power level table And then press the Select button 3 Set the cooking time by turning the Dial Knob Result The cooking time is displayed 4 Press the START 30s button Result The oven light comes on and the turntable starts rotating Cooking starts and when it has finished 1 The oven beeps 4 times 2 The end reminder signal will beep 3 times once every minute 3 Th...

Страница 28: ...lock Result The time is displayed whenever you are not using the microwave oven Setting the time When power is supplied 88 88 and then 12 00 is automatically displayed on the display Please set the current time The time can be displayed in either the 24 hour or 12 hour notation You must set the clock 1 5 4 3 When you first install your microwave oven After a power failure NOTE Do not forget to res...

Страница 29: ...o increase cooking time turn to right and to decrease cooking time turn to left Power levels and time variations The power level function enables you to adapt the amount of energy dissipated and thus the time required to cook or reheat your food according to its type and quantity You can choose between ten power levels Power level Percentage Warm 10 Defrost 20 Low 30 Medium low 40 Medium 50 Simmer...

Страница 30: ...the cooking settings press the STOP ECO button again Setting the energy save mode The oven has an energy save mode Press the STOP ECO button Result Display off To remove energy save mode open the door or press the STOP ECO button and then display shows current time The oven is ready for use NOTE Auto energy saving function If you do not select any function when appliance is in the middle of settin...

Страница 31: ... setting selected 1 The oven beeps 4 times 2 The end reminder signal will beep 3 times once every minute 3 The current time is displayed again Using the auto cook features You do not need to set either the cooking times or the power level You can adjust the size of the serving by turning the Dial Knob 1 3 2 IMPORTANT Use only recipients that are microwave safe First place the food in the centre of...

Страница 32: ...ructions 1 Melt Butter 1 stick Remove the wrapping and then cut the butter in half vertically Place the butter in a dish and cover with wax paper Stir well after finishing and let stand for 1 2 minutes 2 Melt Butter 2 sticks 3 Melt chocolate 1 cup chips or 1 square Place the chocolate chips or squares in a microwave safe container When the oven beeps stir the chocolate and then restart the oven St...

Страница 33: ...rammed setting selected 1 The oven beeps 4 times 2 The end reminder signal will beep 3 times once every minute 3 The current time is displayed again Using the healthy cooking features The cooking time and temperature will be adjusted according to the selected recipe 1 3 2 IMPORTANT Use only recipients that are microwave safe First place the food in the centre of the turntable and close the door MS...

Страница 34: ...d Stir after cooking Stand for 1 2 minutes 5 Corn on the Cob 500 g Rinse and clean corn on the cobs and put into an oval glass dish Cover with microwave cling film and pierce film Stand for 1 2 minutes 6 Peeled Potatoes 250 g Wash and peel the potatoes and cut into a similar size Put them into a glass bowl with lid Add 45 60 ml 3 4 tbsp water Put bowl in the centre of turntable Cook covered Stand ...

Страница 35: ...ess the START 30s button Result Defrosting begins The oven beeps through defrosting to remind you to turn the food over 4 Press the STOP ECO button to finish defrosting Result 1 The oven beeps 4 times 2 The end reminder signal will beep 3 times once every minute 3 The current time is displayed again 1 3 4 2 NOTE Use only containers that are microwave safe Open the door Place the frozen food on a c...

Страница 36: ...arly defrosted Let stand covered for 5 10 minutes Ground Meat 0 5 3 5 lbs After each stage remove any pieces of food that are nearly defrosted Let stand covered with foil for 5 10 minutes Whole Chicken 2 5 3 5 lbs Remove giblets before frozen poultry Start defrosting with the breast side down After the first stage turn the chicken over and shield any warm portions with narrow strips of aluminum fo...

Страница 37: ...pecified as 5 minutes It increases by 30 seconds whenever the START 30s button is pressed NOTE The maximum deodorization time is 15 minutes 1 Press the Child Lock button at the 3 second Result The oven is locked no functions can be selected The display shows L 2 To unlock the oven press the Child Lock button at the 3 second Result The oven can be used normally Using the child lock features Your mi...

Страница 38: ... button again at the same time Result The oven operates normally 2 1 Demonstration mode You can use the demonstration mode to see how your microwave oven operates without the oven heating 1 Press hidden button during 1 second the Select button Child Lock button Result The display shows On 2 Press the START 30s button Now Demonstration mode is on NOTE To turn demo mode off repeat 1 2 step It will b...

Страница 39: ...e only microwave safe cookware Stir twice during cooking and once after cooking and then add seasoning to your preference Food Serving Size g Power Time min Spinach 150 60 5 6 Add 15 ml 1 tbsp cold water Stand for 2 3 minutes Broccoli 300 60 8 9 Add 30 ml 2 tbsp cold water Stand for 2 3 minutes Peas 300 60 7 8 Add 15 ml 1 tbsp cold water Stand for 2 3 minutes Green Beans 300 60 7 8 Add 30 ml 2 tbs...

Страница 40: ...50 90 4 5 Cut carrots into even sized slices Stand for 3 minutes Cauliflower 250 500 90 5 5 7 8 Prepare even sized florets Cut big florets into halves Arrange stems to the centre Stand for 3 minutes Courgettes 250 90 4 4 Cut courgettes into slices Add 30 ml 2 tbsp water or a knob of butter Cook until just tender Stand for 3 minutes Egg plants 250 90 3 4 Cut egg plants into small slices and sprinkl...

Страница 41: ...tainer with a lid Note that rice doubles in volume during cooking Pasta Use a large sized glass Pyrex container Cook uncovered Add boiling water and a little salt and stir well Stir several times during and after cooking Cover with a lid while letting stand and then drain well Food Serving Size Power Time min White Rice Parboiled 250 g 375 g 90 15 16 17 18 Add 500 ml cold water 250 g Add 750 ml co...

Страница 42: ...our into cups and reheat uncovered 1 cup in the centre 2 cups opposite of each other 3 cups in a circle Keep in microwave oven during standing time and stir well Stand for 1 2 minutes Soup Chilled 250 g 350 g 450 g 550 g 90 2 3 3 3 3 4 4 5 Pour into a deep ceramic plate or deep ceramic bowl Cover with plastic lid Stir well after reheating Stir again before serving Stand for 2 3 minutes Stew Chille...

Страница 43: ... this reheating guide for baby food Baby food Use a deep ceramic plate and cover it with a plastic lid Recommended serving temperature is 30 40 C Baby milk Use a sterilised glass bottle and reheat it uncovered Remove the teat before reheating Otherwise the milk in the bottle boils over Food Serving Size Power Time sec Baby Food Vegetables Meat 190 g 60 30 Empty into ceramic deep plate Cook covered...

Страница 44: ...kin side down whole chicken first breast side down on a flat ceramic plate Shield the thinner parts like wings and ends with aluminium foil Turn over after half of defrosting time Stand for 15 60 minutes Fish Fish Fillets 200 g 20 6 7 Whole Fish 400 g 11 13 Put frozen fish in the middle of a flat ceramic plate Arrange the thinner parts under the thicker parts Shield narrow ends of fillets and tail...

Страница 45: ... g fruits for example mixed berries in a suitable sized glass pyrex bowl with lid Add 300 g preserving sugar and stir well Cook covered for 10 12 minutes using 90 Stir several times during cooking Empty directly into small jam glasses with twist off lids Stand on lid for 5 minutes Cooking pudding custard Mix pudding powder with sugar and milk 500 ml by following the manufacturers instructions and ...

Страница 46: ...not preheat for more than 8 minutes China and earthenware Porcelain pottery glazed earthenware and bone china are usually suitable unless decorated with a metal trim Disposable polyester cardboard dishes Some frozen foods are packaged in these dishes Fast food packaging Polystyrene cups containers Can be used to warm food Overheating may cause the polystyrene to melt Paper bags or newspaper May ca...

Страница 47: ...ome other plastics may warp or discolour at high temperatures Do not use Melamine plastic Cling film Can be used to retain moisture Should not touch the food Take care when removing the film as hot steam will escape Freezer bags Only if boilable or oven proof Should not be airtight Prick with a fork if necessary Wax or grease proof paper Can be used to retain moisture and prevent spattering Recomm...

Страница 48: ... Remove the foreign matter and try again The oven stops while in operation The user has opened the door to turn food over After turning over the food press the Start button again to start operation The power turns off during operation The oven has been cooking for an extended period of time After cooking for an extended period of time let the oven cool The cooling fan is not working Listen for the...

Страница 49: ...s being cooked or improper cookware is being used Put one cup of water in a microwave safe container and run the microwave for 1 2 minutes to check whether the water is heated Reduce the amount of food and start the function again Use a cooking container with a flat bottom Heating is weak or slow The oven may not work too much food is being cooked or improper cookware is being used Put one cup of ...

Страница 50: ...ation The oven is not level The oven is installed on an uneven surface Make sure the oven is installed on flat stable surface There are sparks during cooking Metal containers are used during the oven thawing functions Do not use metal containers When power is connected the oven immediately starts to work The door is not properly closed Close the door and check again There is electricity coming fro...

Страница 51: ...ating The microwave oven is designed to operate by pressing the 30sec button when it was not operating Turntable While turning the turntable comes out of place or stops turning There is no roller ring or the roller ring is not properly in place Install the roller ring and then try again The turn table drags while turning The roller ring is not properly in place there is too much food or the contai...

Страница 52: ...e is water on the surface around key If it occurs again turn off the microwave oven over 30 seconds and try setting again If it appears again call your local SAMSUNG Customer Care Centre NOTE If the suggested solution does not solve the problem contact your local SAMSUNG Customer Care Centre MS11J5023AS_AC_DE68 04366A 00_EN indd 51 2015 04 24 6 20 45 ...

Страница 53: ...nge without notice Model MS11J5023A Power source 120 V 60 Hz AC Power consumption Microwave 1500 W Output power 900 W Magnetron OM75P 31 Cooling method Cooling fan motor Operating frequency 2450 MHz Dimensions W x H x D Outside Inclued Handle Oven cavity 20 X 11 X 16 in 14 X 10 X 14 in Volume 1 1 cu ft Weight Net Gross 31 9 lbs 35 2 lbs MS11J5023AS_AC_DE68 04366A 00_EN indd 52 2015 04 24 6 20 45 ...

Страница 54: ...ce procedures Warranty service can only be performed by a SAMSUNG authorized service center The original dated bill of sale must be presented upon request as proof of purchase to SAMSUNG or SAMSUNG s authorized service center SAMSUNG will repair or replace this product at our option and at no charge as stipulated herein with new or reconditioned parts or products if found to be defective during th...

Страница 55: ...ilities services parts supplies accessories applications installations repairs external wiring or connectors not supplied or authorized by SAMSUNG which damage this product or result in service problems incorrect electrical line voltage fluctuations and surges customer adjustments and failure to follow operating instructions cleaning maintenance and environmental instructions that are covered and ...

Страница 56: ...URCHASE PRICE OF THE PRODUCT SOLD BY SAMSUNG AND CAUSING THE ALLEGED DAMAGE WITHOUT LIMITING THE FOREGOING PURCHASER ASSUMES ALL RISK AND LIABILITY FOR LOSS DAMAGE OR INJURY TO PURCHASER AND PURCHASER S PROPERTY AND TO OTHERS AND THEIR PROPERTY ARISING OUT OF THE USE MISUSE OR INABILITY TO USE THIS PRODUCT SOLD BY SAMSUNG NOT CAUSED DIRECTLY BY THE NEGLIGENCE OF SAMSUNG THIS LIMITED WARRANTY SHALL...

Страница 57: ...que la garantie Samsung n inclut pas les déplacements du service après vente pour expliquer le fonctionnement de l appareil corriger une installation non correcte ou exécuter des travaux de nettoyage ou d entretien réguliers Scannez le code QR ou rendez vous sur le site www samsung com spsn pour voir nos vidéos et démonstrations en direct d utilisation Requiert l installation d un lecteur sur votr...

Страница 58: ...Four micro ondes Manuel d utilisation MS11J5023A MS11J5023AS_AC_DE68 04366A 00_CFR indd 1 2015 04 24 6 22 55 ...

Страница 59: ...ation du bon fonctionnement de votre four 25 Cuisson Réchauffage 26 Réglage de l horloge 27 Niveaux de puissance et variations de temps 28 Réglage du temps de cuisson 28 Arrêt de la cuisson 29 Réglage du mode d économie d énergie 29 Utilisation des fonctions de cuisson automatique 30 Utilisation des fonctions de réalisation de plats sains 32 Utilisation des fonctions de décongélation 34 Utilisatio...

Страница 60: ...o ondes 38 Guide de réchauffage 41 Guide de décongélation 43 Simple et rapide 44 Guide des récipients 45 Dépannage 47 Dépannage 47 Code d information 51 Caractéristiques techniques 52 Garantie 53 Four à micro ondes Samsung 53 MS11J5023AS_AC_DE68 04366A 00_CFR indd 3 2015 04 24 6 22 55 ...

Страница 61: ... micro ondes CONSIGNES PERMETTANT D ÉVITER UNE EXPOSITION EXCESSIVE AUX MICRO ONDES A N utilisez jamais le four alors que la porte est ouverte vous risqueriez d être exposé à une quantité trop importante de micro ondes Ne tentez jamais de neutraliser ou de modifier les verrouillages de sécurité B Ne placez aucun objet entre la façade du four et la porte et ne laissez aucun résidu alimentaire ou de...

Страница 62: ... électrocution ou de blessures lors de l utilisation du four à micro ondes vous devez respecter ces règles de sécurité de base NE PAS tenter Débranchez la fiche d alimentation de la prise murale NE PAS démonter Assurez vous que l appareil est relié à la terre afin d éviter tout risque d électrocution NE PAS toucher Contactez le service d assistance technique Suivez scrupuleusement les consignes Re...

Страница 63: ... de vapeurs à caractère corrosif dans ce four Ce type de four est spécialement conçu pour faire réchauffer cuire ou déshydrater des aliments Il n est pas conçu pour être utilisé dans un laboratoire ou à des fins industrielles 7 Comme pour tout appareil une vigilance extrême s impose lorsque le four est utilisé par des enfants Veillez à ce que les enfants soient éloignés de la porte lors de son ouv...

Страница 64: ... de dépasser le point d ébullition sans que le phénomène soit pour autant visible Un bouillonnement n est par conséquent pas toujours visible lorsque vous retirez le récipient du four EN CAS DE MOUVEMENT BRUSQUE OU DE CONTACT AVEC UNE CUILLÈRE OU UN AUTRE USTENSILE DE L EAU BOUILLANTE RISQUE DE SOUDAIN DÉBORDER DU RÉCIPIENT Consignes pour réduire les risques de blessure a Ne faites pas surchauffer...

Страница 65: ...cas de court circuit Ce four est équipé d un cordon d alimentation disposant d une fiche de mise à la terre La fiche doit être branchée sur une prise secteur posée et mise à la terre conformément à la législation en vigueur AVERTISSEMENT Toute utilisation non conforme de la fiche de mise à la terre peut entraîner un risque d électrocution Branchez l appareil sur une prise murale tripolaire reliée ...

Страница 66: ...u des blessures Déballez l appareil retirez tous les éléments d emballage et vérifiez que le four n est pas endommagé traces de choc à l intérieur ou à l extérieur loquets cassés fissures au niveau de la porte ou porte mal alignée En cas de dommages n utilisez pas le four et contactez immédiatement votre revendeur Veillez à ce que le four soit installé dans un emplacement suffisamment grand Retire...

Страница 67: ... directement à la lumière du soleil ou à une source d eau eau de pluie Cela pourrait entraîner un risque d électrocution ou d incendie Branchez correctement la fiche dans la prise murale N utilisez jamais une fiche ou un cordon d alimentation endommagé e ou une prise murale mal fixée Cela pourrait entraîner un risque d électrocution ou d incendie N installez pas l appareil au dessus d un évier Ne ...

Страница 68: ...he N utilisez pas de ventilateur La moindre étincelle risquerait de provoquer une explosion ou un incendie Veillez à ne toucher aucune des parties du four ex porte lorsque celui ci est en marche ou vient juste de fonctionner Le non respect de cette consigne risque d entraîner des brûlures En cas de départ de feu sur la cuisinière située sous le four étouffez les flammes à l aide d un couvercle d u...

Страница 69: ... enfants afin d éviter tout accident Risque d asphyxie avec les sacs plastique Ne laissez pas les enfants ou toute personne à capacités physiques sensorielles ou mentales réduites utiliser cet appareil sans surveillance Veillez à ce que l appareil se trouve hors de portée des enfants Le non respect de cette consigne peut entraîner un risque d électrocution d incendie ou de blessures Ne touchez pas...

Страница 70: ... couvercle de four bougies allumées cigarettes allumées plats produits chimiques objets métalliques etc Des articles peuvent rester coincés dans la porte Cela pourrait entraîner un risque d électrocution d incendie de défaillance de l appareil ou des blessures N utilisez pas l appareil avec les mains mouillées Cela pourrait entraîner un risque d électrocution Ne vaporisez pas de substances volatil...

Страница 71: ...YAGE IMPORTANTES Ne nettoyez pas l appareil en pulvérisant directement de l eau dessus N utilisez pas de benzène de diluant ou d alcool pour nettoyer l appareil Cela pourrait entraîner une décoloration une déformation des dommages sur l appareil ainsi qu un risque d électrocution ou d incendie Avant de nettoyer l appareil ou d effectuer un entretien débranchez le cordon d alimentation de la prise ...

Страница 72: ...imentation de l appareil est endommagé il devra être remplacé par le fabricant son réparateur agréé ou par toute personne qualifiée afin d éviter tout danger Pour votre propre sécurité branchez le câble sur une prise de terre CA appropriée N installez pas le four dans un environnement chaud ou humide ex à côté d un radiateur ou d un four traditionnel Respectez les caractéristiques électriques du f...

Страница 73: ... vous même les éléments du four Seul un technicien qualifié peut effectuer les réparations Si le four est en panne ou nécessite une intervention technique débranchez le de la prise d alimentation et contactez le service après vente le plus proche N utilisez pas le four si la porte paraît endommagée ex porte ou joints il peut s agir d une charnière cassée d un joint usé ou d un habillage déformé Ne...

Страница 74: ...e en enclenchant la partie centrale sur le coupleur Fonction Ce plateau constitue la principale surface de cuisson il peut être facilement retiré pour être nettoyé IMPORTANT N utilisez JAMAIS le four à micro ondes sans l anneau de guidage et le plateau tournant IMPORTANT Si vous souhaitez acheter un accessoire repéré par un astérisque vous pouvez le commander auprès du Centre d assistance Samsung ...

Страница 75: ... ou d un radiateur Respectez les spécifications électriques de ce four Utilisez uniquement les câbles d extension agréés si vous devez en utiliser Avant d utiliser votre four pour la première fois nettoyez l intérieur de celui ci ainsi que le joint d étanchéité de la porte à l aide d un chiffon humide Retirez tout élément d emballage de l intérieur du four Installez l anneau de guidage et le plate...

Страница 76: ...incez et séchez minutieusement Pour retirer les impuretés incrustées produisant de mauvaises odeurs à l intérieur du four 1 Lorsque le four est vide mettez une tasse de jus de citron dilué sur le centre du plateau tournant 2 Faites chauffer le four pendant 10 minutes à puissance maximale 3 Une fois le cycle terminé attendez que le four refroidisse Ensuite ouvrez la porte et nettoyez le compartimen...

Страница 77: ...cer ou de réparer le four vous même Si vous rencontrez un problème avec les charnières les joints et ou la porte contactez un technicien qualifié ou un centre de service Samsung local pour obtenir de l assistance technique Si vous souhaitez remplacer l ampoule contactez un centre de service Samsung local Ne la remplacez pas vous même Si vous rencontrez un problème avec la protection extérieure du ...

Страница 78: ...it 4 fois 2 Le signal de rappel de fin de cuisson retentit 3 fois une fois toutes les minutes 3 L heure actuelle s affiche à nouveau Si vous souhaitez ajouter 30 secondes supplémentaires 1 Appuyez sur le bouton START 30s DÉPART 30s autant de fois que vous souhaitez ajouter de tranches de 30 secondes 2 En tournant le bouton de réglage vous pouvez choisir le temps de cuisson comme vous le souhaitez ...

Страница 79: ... 06 07 10 01 Poignée de la porte 04 Éclairage 07 Coupleur 02 Porte 05 Loquets de la porte 08 Anneau de guidage 03 Orifices de ventilation 06 Plateau tournant 09 Orifices du système de verrouillage de sécurité 10 Tableau de commande MS11J5023AS_AC_DE68 04366A 00_CFR indd 22 2015 04 24 6 23 01 ...

Страница 80: ...icrowave Micro ondes 06 Bouton Soften Melt Ramollir Faire fondre 07 Bouton Deodorization Désodorisation 08 Bouton Child Lock Sécurité enfants 09 Bouton Clock Horloge 10 Bouton de réglage Poids Quantité Durée 11 Bouton Select Sélection 12 Bouton Stop Eco Arrêt Éco 13 Bouton Start 30s Départ 30s 05 09 10 11 12 13 06 01 02 03 04 07 08 MS11J5023AS_AC_DE68 04366A 00_CFR indd 23 2015 04 24 6 23 01 ...

Страница 81: ...plateau sur lequel sont placés les produits Ce procédé assure donc une cuisson homogène des aliments 2 Les micro ondes sont absorbées par les aliments sur une profondeur d environ 2 5 cm La cuisson se poursuit au fur et à mesure que la chaleur se diffuse dans les aliments 3 Les temps de cuisson varient en fonction du récipient utilisé et des propriétés des aliments quantité et densité teneur en ea...

Страница 82: ...ton START 30s DÉPART 30s autant de fois que nécessaire Résultat L eau est chauffée pendant 4 ou 5 minutes L eau doit entrer en ébullition REMARQUE Le four doit être branché sur une prise murale appropriée Le plateau doit être correctement positionné dans le four Si une puissance autre que la puissance maximale 100 900 W est utilisée l eau mettra plus longtemps à bouillir Ouvrez la porte du four en...

Страница 83: ...uton de réglage Reportez vous au tableau des puissances Puis appuyez sur le bouton Sélection 3 Sélectionnez la durée de cuisson en tournant le bouton de réglage Résultat le temps de cuisson s affiche 4 Appuyez sur le bouton START 30s DÉPART 30s Résultat L éclairage du four est activé et le plateau commence à tourner La cuisson démarre Lorsqu elle est terminée 1 Le signal sonore retentit 4 fois 2 L...

Страница 84: ...ecte appuyez sur le bouton Sélection pour lancer l horloge Résultat L heure s affiche lorsque vous n utilisez pas le four à micro ondes Réglage de l horloge Lors de la mise sous tension 88 88 puis 12 00 s affiche automatiquement Réglez l heure actuelle Vous pouvez afficher l heure au format 12 ou 24 heures Vous devez régler l horloge 1 5 4 3 à l installation initiale après une coupure de courant R...

Страница 85: ...durée de cuisson Pour augmenter le temps de cuisson tournez à droite Pour diminuer le temps de cuisson tournez à gauche Niveaux de puissance et variations de temps La fonction du niveau de puissance vous permet d adapter la quantité d énergie dispersée et par conséquent le temps nécessaire à la cuisson ou au réchauffage des aliments en fonction de leur catégorie et de leur quantité Vous pouvez sél...

Страница 86: ...les réglages de cuisson appuyez sur le bouton STOP ECO ARRÊT ÉCO Réglage du mode d économie d énergie Le four possède un mode d économie d énergie Appuyez sur le bouton STOP ECO ARRÊT ÉCO Résultat affichage désactivé Pour désactiver le mode Économie d énergie ouvrez la porte ou appuyez sur le bouton STOP ECO ARRÊT ÉCO l écran affiche alors l heure actuelle Le four peut alors être utilisé REMARQUE ...

Страница 87: ...é sélectionné 1 Le signal sonore retentit 4 fois 2 Le signal de rappel de fin de cuisson retentit 3 fois une fois toutes les minutes 3 L heure actuelle s affiche à nouveau Utilisation des fonctions de cuisson automatique Vous n avez donc besoin de régler ni le temps de cuisson ni la puissance Il vous suffit de définir la quantité en tournant le bouton de réglage 1 3 2 IMPORTANT Utilisez uniquement...

Страница 88: ...e la largeur Placez le beurre dans un plat et couvrez le tout de papier sulfurisé Remuez bien une fois le beurre fondu et laissez reposer pendant 1 à 2 minutes 2 Faire fondre du beurre 2 plaquettes 3 Faire fondre du chocolat 1 tasse de copeaux ou 1 carré Mettez les copeaux ou les carrés de chocolat dans un récipient adapté aux micro ondes Lorsque le four émet un signal sonore remuez le chocolat pu...

Страница 89: ...é réglé sélectionné 1 Le signal sonore retentit 4 fois 2 Le signal de rappel de fin de cuisson retentit 3 fois une fois toutes les minutes 3 L heure actuelle s affiche à nouveau Utilisation des fonctions de réalisation de plats sains La durée et la température de cuisson seront ajustées en fonction de la recette sélectionnée 1 3 2 IMPORTANT Utilisez uniquement de la vaisselle adaptée à la cuisson ...

Страница 90: ...aissez reposer 1 à 2 minutes 5 Maïs en épis 500 g Rincez et nettoyez le maïs sur les épis et placez les dans un plat en verre ovale Recouvrez avec un film plastique résistant aux micro ondes et percez le film Laissez reposer 1 à 2 minutes 6 Pommes de terre épluchées 250 g Lavez et épluchez les pommes de terre et coupez les en morceaux de taille similaire Mettez les dans une cocotte en verre et cou...

Страница 91: ...e bouton START 30s DÉPART 30s Résultat La phase de décongélation commence Un signal sonore vous rappelant de retourner l aliment retentit en cours de décongélation 4 Appuyez sur le bouton STOP ECO ARRÊT ÉCO pour reprendre la décongélation Résultat 1 Le signal sonore retentit 4 fois 2 Le signal de rappel de fin de cuisson retentit 3 fois une fois toutes les minutes 3 L heure actuelle s affiche à no...

Страница 92: ...e décongelés Couvrez et laissez reposer pendant 5 à 10 minutes Viande hachée 0 5 à 3 5 lb Après chaque phase de décongélation retirez tous les morceaux presque décongelés Couvrez d une feuille d aluminium et laissez reposer pendant 5 à 10 minutes Poulet entier 2 5 à 3 5 lb Retirez les abats avant de faire la volaille surgelée Posez le poulet côté poitrine vers le bas puis lancez la décongélation A...

Страница 93: ...nte de 30 secondes chaque fois que vous appuyez sur le bouton START 30s DÉPART 30s REMARQUE La durée de désodorisation maximale est fixée à 15 minutes 1 Appuyez sur le bouton Child Lock Sécurité enfants au bout de 3 secondes Résultat Le four est verrouillé aucune fonction ne peut être sélectionnée La lettre L s affiche 2 Pour déverrouiller le four appuyez sur le bouton Child Lock Sécurité enfants ...

Страница 94: ... Résultat Le four fonctionne normalement 2 1 Mode de démonstration Vous pouvez utiliser le mode de démonstration pour savoir comment votre micro ondes fonctionne sans chauffage du four 1 Appuyez sur le bouton masqué pendant 1 seconde le bouton Sélection Child Lock Sécurité enfants Résultat L écran affiche On Activé 2 Appuyez sur le bouton START 30s DÉPART 30s Maintenant le mode de démonstration es...

Страница 95: ...s adaptés au micro ondes Remuez deux fois pendant la cuisson et une fois après la cuisson puis assaisonnez à votre convenance Aliment Quantité g Puissance Temps min Épinards 150 60 5 6 Ajoutez 15 ml 1 cuillère à soupe d eau froide Laissez reposer 2 à 3 minutes Brocolis 300 60 8 9 Ajoutez 30 ml 2 cuillères à soupe d eau froide Laissez reposer 2 à 3 minutes Petits pois 300 60 7 8 Ajoutez 15 ml 1 cui...

Страница 96: ...500 90 5 5 7 8 Préparez des sommités de taille égale Coupez les plus gros morceaux en deux Orientez les tiges vers le centre Laissez reposer 3 minutes Courgettes 250 90 4 4 Coupez les courgettes en rondelles Ajoutez 30 ml 2 cuillères à soupe d eau ou une noix de beurre Faites les cuire jusqu à ce qu elles soient tendres Laissez reposer 3 minutes Aubergines 250 90 3 4 Coupez les aubergines en fines...

Страница 97: ... l eau bouillante une pincée de sel et remuez bien Remuez de temps en temps pendant et après la cuisson Couvrez à l aide d un couvercle tout en laissant reposer puis évacuez bien Aliment Quantité Puissance Temps min Riz blanc étuvé 250 g 375 g 90 15 16 17 18 Ajoutez 500 ml d eau froide 250 g Ajoutez 750 ml d eau froide 375 g Laissez reposer pendant 5 minutes Riz complet étuvé 250 g 375 g 90 20 21 ...

Страница 98: ...e dans une assiette creuse ou un bol en céramique Recouvrez le récipient d un couvercle en plastique Remuez bien après le réchauffage Remuez de nouveau avant de servir Laissez reposer 2 à 3 minutes Plat mijoté réfrigéré 350 60 4 5 Placez le plat mijoté dans une assiette creuse en céramique Recouvrez le récipient d un couvercle en plastique Remuez de temps en temps pendant le réchauffage puis de no...

Страница 99: ...Il est recommandé de servir les aliments à une température comprise entre 30 et 40 C Lait pour bébé Utilisez un biberon en verre stérilisé et réchauffez le sans le couvrir Retirez la tétine avant le réchauffage Sinon le lait dans le biberon va bouillir Aliment Quantité Puissance Durée secondes Aliments pour bébé légumes viande 190 g 60 30 Versez les aliments dans une assiette creuse en céramique F...

Страница 100: ... le bas dans le cas d un poulet entier dans une assiette plate en céramique Recouvrez les parties les plus fines ex ailes et extrémités d aluminium Retournez à la moitié du temps de décongélation Laissez reposer 15 à 60 minutes Poisson Filets de poisson 200 g 20 6 7 Poisson entier 400 g 11 13 Placez le poisson surgelé au centre d une assiette plate en céramique Glissez les parties les plus fines s...

Страница 101: ...ts ex mélange de fruits dans une cocotte en Pyrex et couvrez Ajoutez 300 g de sucre spécial confiture et remuez bien Couvrez et faites cuire pendant 10 à 12 minutes à 90 Remuez plusieurs fois en cours de cuisson Videz directement dans de petits pots à confiture munis de couvercles quart de tour Laissez reposer 5 minutes à couvert Préparer un pudding de la crème Française Mélangez la préparation po...

Страница 102: ...Le temps de préchauffage ne doit pas excéder 8 minutes Porcelaine et terre cuite S ils ne comportent pas d ornements métalliques les récipients en céramique en terre cuite en faïence et en porcelaine sont généralement adaptés Plats jetables en carton ou en polyester Certains aliments surgelés sont emballés dans ce type de plat Emballages de fast food Tasses en polystyrène Peuvent être utilisés pou...

Страница 103: ...ler ou se décolorer lorsqu elles sont soumises à des températures élevées N utilisez pas de plastique mélaminé Film étirable Peut être utilisé afin de retenir l humidité Ne doit pas entrer en contact avec les aliments Soyez particulièrement vigilant lorsque vous retirez le film du récipient la vapeur s échappant à ce moment est très chaude Sacs de congélation Uniquement s ils supportent la tempéra...

Страница 104: ... corps étrangers et réessayez Le four s arrête en cours de fonctionnement L utilisateur a ouvert la porte pour retourner les aliments Après avoir retourné les aliments appuyez de nouveau sur le bouton Start Départ pour démarrer le fonctionnement L appareil s éteint lors du fonctionnement La four a effectué une très longue cuisson Après une longue cuisson laissez le four refroidir Le ventilateur de...

Страница 105: ...onner trop d aliments ont été mis à cuire ou un ustensile incorrect est utilisé Placez une tasse d eau dans un récipient adapté aux micro ondes et lancez le micro ondes durant 1 à 2 minutes pour vérifier si l eau chauffe Réduire la quantité d aliments et démarrez à nouveau la fonction Utilisez un récipient de cuisson à fond plat Le chauffage est faible ou lent Le four peut ne pas fonctionner trop ...

Страница 106: ...liments appuyez de nouveau sur le bouton Start Départ pour redémarrer le fonctionnement Le four n est pas de niveau Le four est installé sur une surface irrégulière Assurez vous que le four est installé sur une surface plane et stable Des étincelles apparaissent durant la cuisson Des récipients métalliques sont utilisés durant l utilisation du four de la décongélation N utilisez pas de récipients ...

Страница 107: ... du four Appuyer sur le bouton 30sec actionne le four Cela se produit lorsque le four n était pas en fonctionnement Le four à micro ondes est conçu pour fonctionner en appuyant sur le bouton 30sec lorsqu il est à l arrêt Plateau tournant Lorsqu il tourne le plateau tournant se déplace ou il cesse de tourner Il n y a pas l anneau de guidage ou de dernier n est pas positionné correctement Installez ...

Страница 108: ...face entourant la touche Si cela se produit à nouveau éteignez le four à micro ondes après 30 secondes et réessayez Si ce phénomène se poursuit contactez votre service d assistance clientèle SAMSUNG local REMARQUE Si la solution suggérée ne suffit pas à résoudre le problème contactez votre service d assistance clientèle SAMSUNG local MS11J5023AS_AC_DE68 04366A 00_CFR indd 51 2015 04 24 6 23 10 ...

Страница 109: ...11J5023A Alimentation 120 V 60 Hz CA Consommation d énergie Micro ondes 1500 W Puissance de sortie 900 W Magnétron OM75P 31 Système de refroidissement Moteur de ventilation Fréquence de fonctionnement 2450 MHz Dimensions l x H x P Extérieures y compris la poignée Intérieures 20 X 11 X 16 pouces 14 X 10 X 14 pouces Capacité 1 1 pi Poids Net Brut 31 9 lb 35 2 lb MS11J5023AS_AC_DE68 04366A 00_CFR ind...

Страница 110: ...ance ne peut être effectuée que par un service technique agréé SAMSUNG Lors de la remise d un produit défectueux à SAMSUNG ou à un centre de service SAMSUNG agréé l acquéreur est tenu de présenter le coupon d achat d origine à la demande des intéressés à titre de preuve d achat La société SAMSUNG prendra en charge à sa convenance la réparation ou le remplacement du produit à ses frais tel que stip...

Страница 111: ...reils services pièces fournitures accessoires applications installations réparations câblages externes ou connecteurs non fournis ou autorisés par SAMSUNG et susceptibles d endommager ledit appareil ou de nuire à son fonctionnement toute surtension fluctuation ou tension de ligne électrique incorrecte tout réglage effectué par l acquéreur et non respect des instructions de fonctionnement de nettoy...

Страница 112: ...AMSUNG ET À L ORIGINE DES DOMMAGES ALLÉGUÉS SANS LIMITER CE QUI SUIT L ACQUÉREUR PREND EN CHARGE TOUS LES RISQUES ET RESPONSABILITÉS CONCERNANT LA PERTE LES DOMMAGES OU LES BLESSURES INFLIGÉES À L ACQUÉREUR ET AUX BIENS DE CELUI CI ET À TOUTE AUTRE PERSONNE ET BIENS RÉSULTANT DE L UTILISATION LA MAUVAISE UTILISATION DE L APPAREIL ET L INCAPACITÉ À UTILISER LE PRÉSENT APPAREIL VENDU PAR SAMSUNG ET ...

Отзывы: