


www.safehome.dk
www.safehome.dk
26
27
Reaction of Camera in different modes:
ARM Mode
Once the Camera or any sensor is triggered, the Camera will auto-
matically start to take a two minutes video. Meanwhile, the panel will
emit a loud and shrill siren. You can check the video from SD card
inside the camera or choose to take a live view from the APP.
ALERT Mode
Once
the Camera
is triggered, it will send signal to the smart panel
which will then emit a doorbell sound.
HOME Mode
The HOME mode allows all the enrolled sensors including the
Camera to be in either one of three states: Off, ALERT or ARM. The
reaction of the Camera depends on the preset state.
5.2 Power up and get home network ready
Connect the power adaptor, Camera and network router as shown above, and connect
to the electrical outlet. Power up the Camera and it will automatically rotate camera lens
for initialization. The network indicator light will start flashing.
5.3 Camera installation
5.3.1 Download the mobile APP and set a passcode
Use of the SmartPhone offers users a convenient and readily accessible means to
remotely interact with their home protection system and keep an eye on their property
for 24 hour. Search for ‘SafeHome WiFi Alarm’ APP on your Apple iPhone® in App store
or Android® Phone in Google Play to download it to your terminal device (smartphone,
tablet, etc.).
After installation of the APP, you will need to set it up as follows:
• When you first enter the APP, you need to determine your personalized 4-digit PIN and
key it in. This 4-digit PIN is to protect unauthorized personnel from accessing the APP.
• Re-enter your personalized 4-digit PIN.
• Input passcode hint and press “Done” button to enter.
Note: The “Done” button can only be available when user has filled in all blank space.
SafeHome Cam Alarm APP works with iPhone, iPad, iPad mini and iPod touch running
iOS7.0 or above and Android devices running Android 4.0 or above.
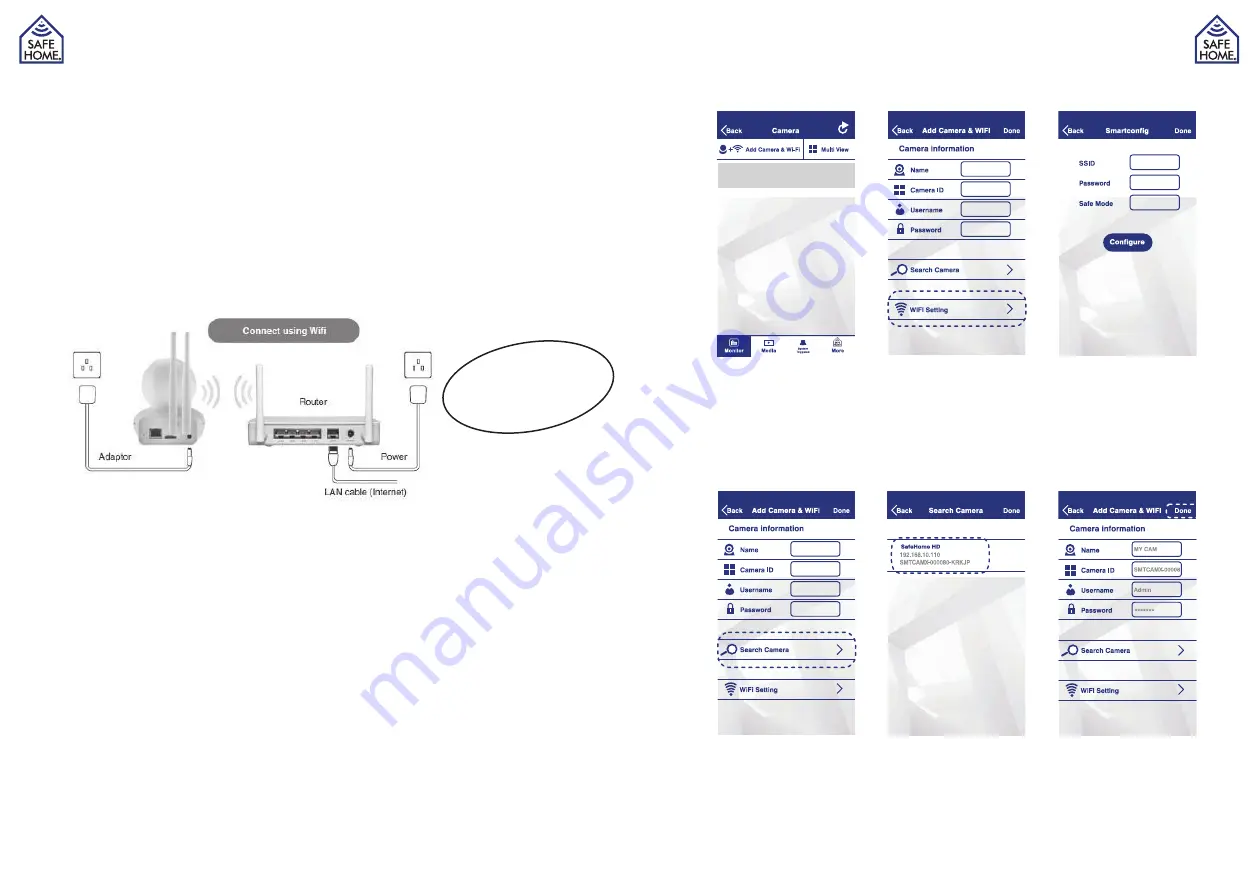
5.3.2 Add new device to your APP
• Tap on the icon of “Add Camera & Wi-Fi” at the top left corner of the Monitor page.
• Choose “Wi-Fi Setting”.
• Select your home Wi-Fi SSID and input Wi-Fi password. Tap on “Configure”.
• Pay attention to the network indicator light. Once network is successfully connected,
the network indicator light will change from flashing status to continuous on. Tap on
“Done” to go back to Add Camera & Wi-Fi page.
• Choose “Search Camera” and you will see the device list.
• Choose your device.
• Once you choose the device, the camera ID will be automatically filled in. You only
need to input the password of the camera (default: 23570104) and press “Done” to go
back to the Monitor page.
WARNING:
Only insert MicroSD when
no power is connected
Содержание WS200X
Страница 1: ...DK Brugsanvisning Alarm Start Kit 01 med HD Overv gnings kamera...
Страница 22: ...www safehome dk 42...
Страница 23: ...UK User Guide Alarm Starter Kit 01 with HD Surveillance Camera...
Страница 44: ...SE Anv ndarhandbok Larmstartpaket 01 med HD vervakningskamera...
Страница 65: ...NO Bruksanvisning Startsett for Alarm 01 med HD overv kingskamera...
Страница 86: ...FI K ytt opas H lytin 01 HD valvontakameralla...