


www.safehome.dk
www.safehome.dk
24
25
4.4 House Code
You can change the house code on each sensor, smart panel and other modules of your
security system to avoid interference with other systems.
In most cases you will NOT need to change the factory settings of the house code.
If the Smart Panel and sensors activate intermittently or do not work at all, you may be
able to solve the problem by changing the house codes on all system units.
There are 4 jumpers/dip-switches on each device. Remove the battery compartment
cover, then pull out the Jumper to change the house code setting and make sure the
jumpers on the Smart Panel, sensors and remotes match exactly.
Jumpers for
house code
Smart Panel, Motion Sensor, Door/Window
Sensor
Default house code:
1: ON, 2: ON, 3: ON, 4:ON
Dip-Switches for
house code
Remote Control Code
Default house code:
1: ON, 2: ON, 3: ON, 4: ON
4.5 Zone Code Settings
Sensors are supplied with pre-assigned Zone settings to make setup easy – the Door/
Window Sensors are pre-assigned to Zones 1 and the Motion Sensor to Zone 8.
To assign a Sensor to a different zone, the Zone Code on the Sensor needs to be
changed. To change this code, take the following steps:
1) There is a Zone Code Jumper on each Sensor which can be located by removing the
Jumper compartment cover.
2) Then pull out the Jumper and reassign it to the new Zone (Zones 1 to 8) as shown in
the diagram below.
3) Replace and screw back the cover to complete the Zone Code setting.
Jumpers for
zone code
There is 1 jumper in each sensor. Determine
the location of the sensor in your home, then
remove the jumper compartment cover. Pull
out the jumper and reassign it to the target
zone (zone 1 to 8), replace and screw the
cover to complete the zone code setting.
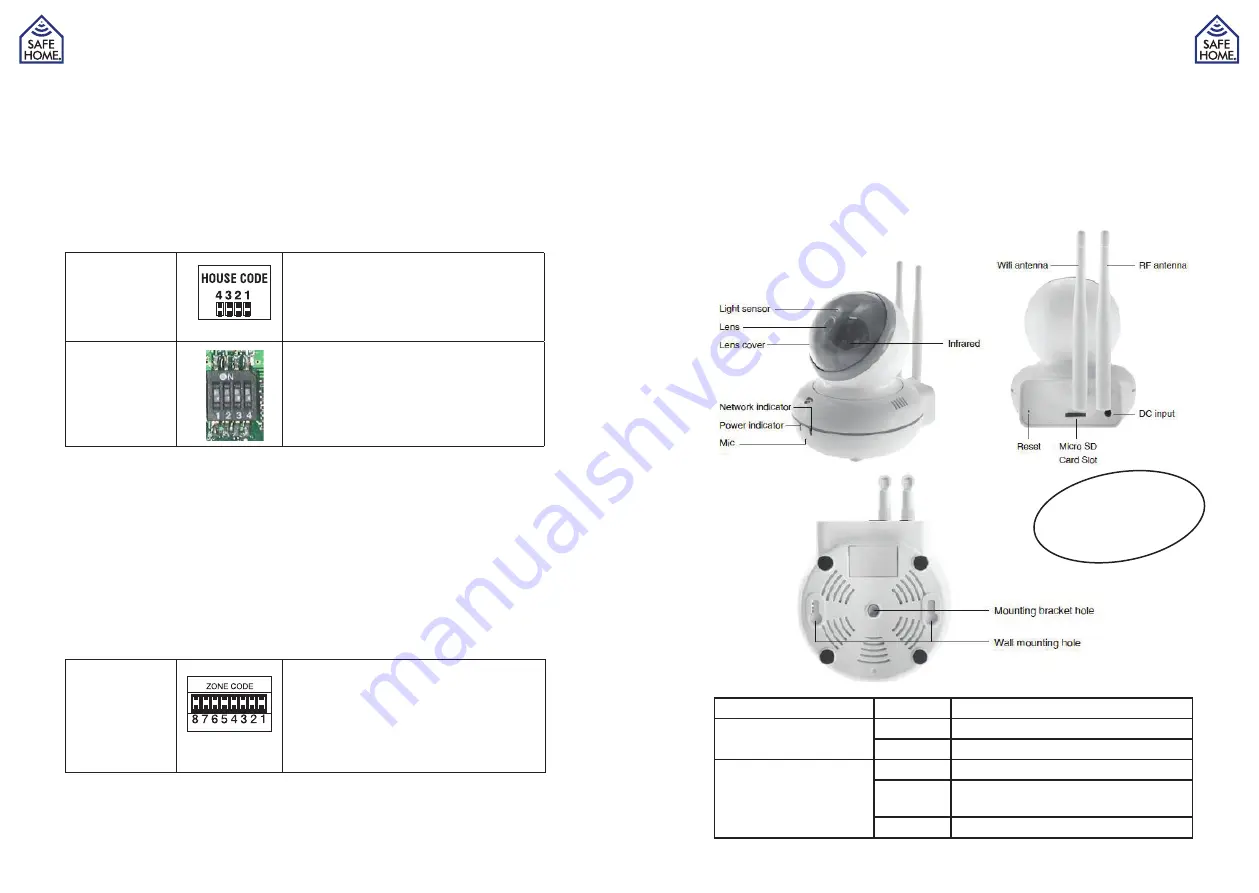
5. Installing HD Surveillance Camera
5.1 Introduction of HD-Camera
The HD Surveillance Camera features motion detection, smart alert and remote access.
After simple installation and enrollment, it can work with the smart panel in all 4 modes:
ARM, HOME, ALERT and STANDBY. With the Smartphone APP, users can remotely
monitor their property and control the system from anywhere in the world. It makes home
surveillance simple and easy.
Status
Description
Network Indicator
On
Wi-Fi connected
Flashing
Wi-Fi NOT connected
Power Indicator
On
Power on
Off
Power off - Network indicator will be off at
the same time
Flashing
Initialization to factory default setting
WARNING:
Only insert MicroSD when
no power is connected
Содержание WS200X
Страница 1: ...DK Brugsanvisning Alarm Start Kit 01 med HD Overv gnings kamera...
Страница 22: ...www safehome dk 42...
Страница 23: ...UK User Guide Alarm Starter Kit 01 with HD Surveillance Camera...
Страница 44: ...SE Anv ndarhandbok Larmstartpaket 01 med HD vervakningskamera...
Страница 65: ...NO Bruksanvisning Startsett for Alarm 01 med HD overv kingskamera...
Страница 86: ...FI K ytt opas H lytin 01 HD valvontakameralla...