❸
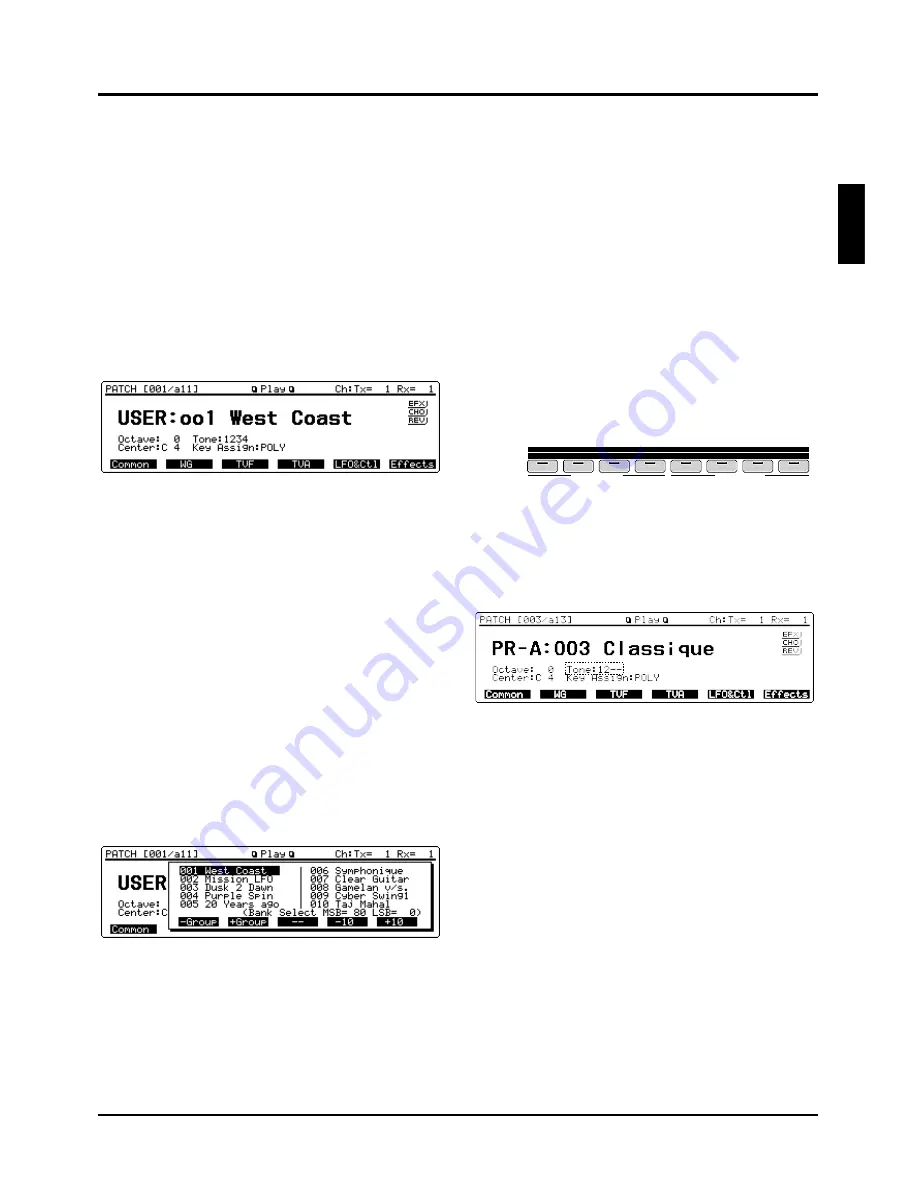
Use numeric keys to input a Patch number (001–128).
The Patch number and Patch name are boxed, meaning the
entry has not yet been finalized.
❹
Press [ENTER] to finalize the entry.
...........................................................................................................
<Express Patch select (Digit Hold)>
With the Digit Hold function turned on, the 100’s position
and 10’s position will be fixed when the numeric keys are
used to select a Patch. This means that the numeric keys will
only change the 1’s position, and you won’t have to press
[ENTER] for each selection. The same applies to selecting
Performances and Rhythm Sets.
<Procedure>
❶
Hold down [SHIFT] and press [ENTER] to turn on
Digit Hold.
The numbers in the 100’s position and 10’s position will be
displayed in a smaller size to indicate Digit Hold is on.
❷
When you enter a numeric key number, the 1’s posi-
tion will change immediately without having to press
[ENTER].
❸
To turn off Digit Hold, hold down [SHIFT] and press
[ENTER] once again.
...........................................................................................................
Displaying a Patch list
You can view a Patch list when selecting a Patch. Ten
Patches are displayed at once for each Patch group, allowing
your desired Patch to be quickly accessed. This Patch list is
called the ‘Sound List window.’
<Procedure>
❶
Make sure that the Play display (PATCH) is showing.
❷
Press [SOUND LIST] to display the Sound List win-
dow. The cursor is on the currently selected Patch.
(Bank Select MSB=, LSB=) at the bottom line indicates
the Bank Select (MSB and LSB) of the current Patch.
❸
When changing Patches in units of 10, press either [F5]
(-10) or [F6] (+10).
Patch groups can also be changed by pressing [F2] (-
Group) or [F3] (+Group).
❹
When selecting a Patch, turn the VALUE dial, or press
[INC]/[DEC] or cursor buttons to move the cursor to
the desired Patch.
❺
Press [EXIT] to close the Sound List window.
Making a Patch sound thick or thin
(turning a Tone on/off)
Since a Patch is a combination of up to four Tones, you can
switch unwanted (Tones out of the four) off and get just the
sound of a specific Tone.
✳
Use the Tone Switch parameter (PATCH/WG/Wave
Param) to set each Tone on/off. This setting can be
stored as a part of Patch data. So if you want just one
or two Tones to sound in a Patch, turn the others off
and store that setting on a Patch. This cuts nonessential
use of the XP-80’s simultaneous voices.
<Procedure>
❶
Make sure that the Play display (PATCH) is showing.
❷
Press any button from [F1] (Common)–[F6] (Effect).
❸
Use TONE SWITCH [1]–[4] (BANK [1]–[4] ) to turn
Tones on (indicator lights) or off (indicator off).
TONE SWITCH buttons switch Tones 1, 2, 3, and 4 on/off in
sequence going from left to right.
❹
Press [EXIT] to return to the Play display (PATCH)
and start playing the Patch.
“Tone:” at the display bottom center shows the numbers of
Tones which are turned on. The Tones turned off are indicat-
ed with “-.”
1
2
3
4
5
6
7
8
1
2
3
4
TONE 1
TONE 2
TONE 3
TONE 4
5
6
7
8
TRACK / PART
BANK
TONE SWITCH
TONE SELECT
27
Chapter 2. Playing
2
Содержание XP-60
Страница 245: ...245 ...
Страница 248: ...OWNER S MANUAL 01458056 99 7 E3 51K ...


