108
Performing realtime recording
When you have completed preparatory steps correctly, it’s
time to realtime record.
<Procedure>
❶
Make sure that the Play display (SEQ(Song)) is up.
❷
Move the cursor to the song number and select the
song you wish to record.
When recording a new song, select “00:InternalSong.” When
recording over a song saved on the disk, choose the number
of that song.
❸
Press [REC] to call up the Realtime Rec Stand-by dis-
play (SEQ).
The [REC] indicator will blink and the metronome will start
sounding.
✳
If you have selected a song saved on disk, a window
will ask “This Song is not Internal Song. Load any-
way?” If you want to erase the song from the internal
memory and load the new song, press [F5] (OK). If you
decide not to erase the song from the internal memory,
press [F6] (Cancel).
✳
To turn off the metronome, set the Mode parameter
(SEQ/Setup/SEQ System Setup) OFF.
✳
To interrupt recording, press [REC] or [EXIT] to return
to the Play display (SEQ(Song)).
❹
Move the cursor to “M” and set the recording start
measure.
❺
Move the cursor to “
” and set the tempo.
❻
If you want to use loop recording, move the cursor to
“Loop” and make settings for the loop recording. If
not, set it OFF.
❼
Move the cursor to “Mode” and select the recording
mode.
❽
Move the cursor to “Qntz” and select quantization
type. If you don’t want to quantize when recording, set
it OFF.
When applying quantization to recording, press [F4]
(Quantize) to open the Recording Quantize window and
make Quantize settings. After you have completed your set-
tings, press [EXIT] or [F4] (Quantize) to close the Recording
Quantize window.
❾
Move the cursor to “Count In” and specify the record-
ing start method.
❿
Select the recording destination. When recording on a
Phrase track, use TRACK/PART [1]–[16]. When
recording in a Pattern, press [PATTERN] and specify
the Pattern number.
The button indicator of the selected recording destination
Phrase track or Pattern will blink. The button indicators of
the Phrase tracks containing sequencer data stay lighted.
If you wish to record using a Part of a number differ-
ent from the Phrase track’s, or recording in a Pattern,
select the Part used for recording. Move the cursor to
“PART,” and either turn the VALUE dial or press
[INC]/[DEC] to choose the Part.
✳
When the cursor is at “PART,” pressing TRACK/
PART [1]–[16] will also select the correspondingly
numbered Phrase track.
When changing the Patch or Rhythm Set, move the
cursor to the group or number and select a different
Patch/Rhythm Set.
If you want to change the Performance, press [PERFORM] to
call up the Play display (PERFORM) and select another
Performance. To return to the Realtime Rec Stand-by display
(SEQ), press [SEQUENCER].
✳
If you select another Patch, Rhythm Set or Performance
on the Realtime Rec Stand-by display (SEQ), the Bank
Select number and Program number of that
Patch/Rhythm Set/Performance will automatically be
recorded at the recording start position. However, if
the Performance Ctrl-Ch parameter (SYSTEM/MIDI
Param) has the same setting as the MIDI channel of the
specified Part (when the Patch assigned to a Part of a
Performance has been selected), be aware that this will
actually select a different Performance.
Begin recording using the recording method selected
by “Count In.” When recording begins, the [REC] indi-
cator will light. The BEAT indicator will also blink in
red for the first beat and in green for other beats.
✳
When recording begins, the Phrase tracks with lighted
indicators will play back. If you don’t want some
Phrase tracks to play back during recording, move the
cursor to a position other than “TRK” or “PART,” and
press TRACK/PART [1]–[16] to turn off the indicators
of unwanted Phrase tracks.
When you finish recording, press [STOP/PLAY].
...........................................................................................................
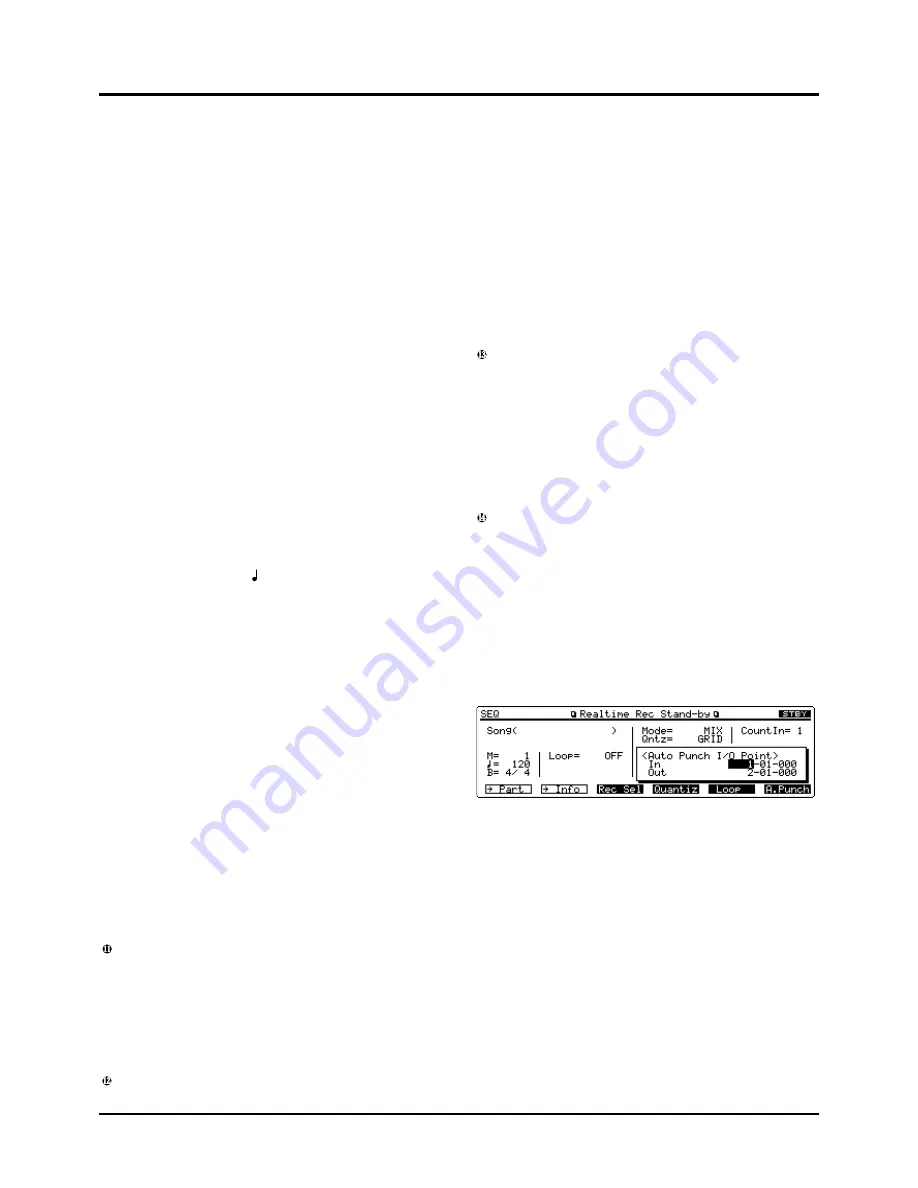
<Preparations for auto punch-in recording>
You can specify Punch points (area auto punch-in recording
is to take place) if you’re going to use this function.
<Procedure>
❶
Make sure that the Mode parameter is set to
A.PUNCH on the Realtime Rec Stand-by display
(SEQ).
❷
Press [F6] (A.Punch) to open the Punch Point window.
❸
Move the cursor to “In” and set the recording start
position.
When you are using a Locate position to specify recording
start position, press [LOCATE] to light the indicator and
specify the Locate position number.
❹
Move the cursor to “Out” and set the recording end
position.
If you are setting the recording start position using a Locate
position, set the Locate position number for the recording
end position in the same way.
✳
The recording end position that is set for “Out” will
not be included in the recording area.
✳
A recording area setting of less than one beat is
invalid.
❺
After you complete settings, press [EXIT] or [F6]
(A.Punch) to close the Punch Point window.
Chapter 4. Playing back and recording a song
Содержание XP-60
Страница 245: ...245 ...
Страница 248: ...OWNER S MANUAL 01458056 99 7 E3 51K ...


