


T
YPE
2 S
PRING
R
EPLACEMENT
The T2 spring sys tem in Ju dy T2 fo rks provide cutting edge pe rfo rm a n ce with the lively action of a coil spri n g
Howeve r,over time the springs can wear out,co m p romising pe rfo rm a n ce. This is ev i d e nt in co m p ression set,w h e n
the coil springs are shorter in a resting state than they we re when new. Fo l l ow the table listed be l ow as a guide
to kn ow when to re p l a ce the T2 Sp ring Sys te m . Fo l l ow the dire ctions to clean and grease the spring stack fo u n d
in Ma i nte n a n ce proce d u re s,“After eve ry week or Ei g ht hours of ri d i n g,”page 9, for re m oval and installat i o n .
T
YPE
2 S
PRING
S
YSTEM
S
PECIFICATION
T
ABLE
Travel
Optimum Coil Replace Coil
Optimum MCU Replace MCU
63mm
51mm
46mm
100mm
94mm
80mm
51mm
46mm
115mm
108mm
U
PGRADING TO
T
YPE
3 S
PRING
S
YSTEM AND
C3 D
AMPER
C
ARTRIDGE
The suspension travel on Judy T2 forks can be changed by upgrading to the Type 3 spring system and damper
cartridge kit. When upgrading, RockShox recommends installing both the Type 3 Spring System and the C3
damper cartridge because these systems were specifically designed to work together to provide optimum
performance.
First, remove one-piece lo wer tube assembly by following the procedure described in, “To Clean and Grease
Bushings and Resi-wiper seal”, page 9 to remove one-piece lower tube assembly.
T
HENFOLLOW THESEDIRECTIONS TO CHANGETRAVEL
:
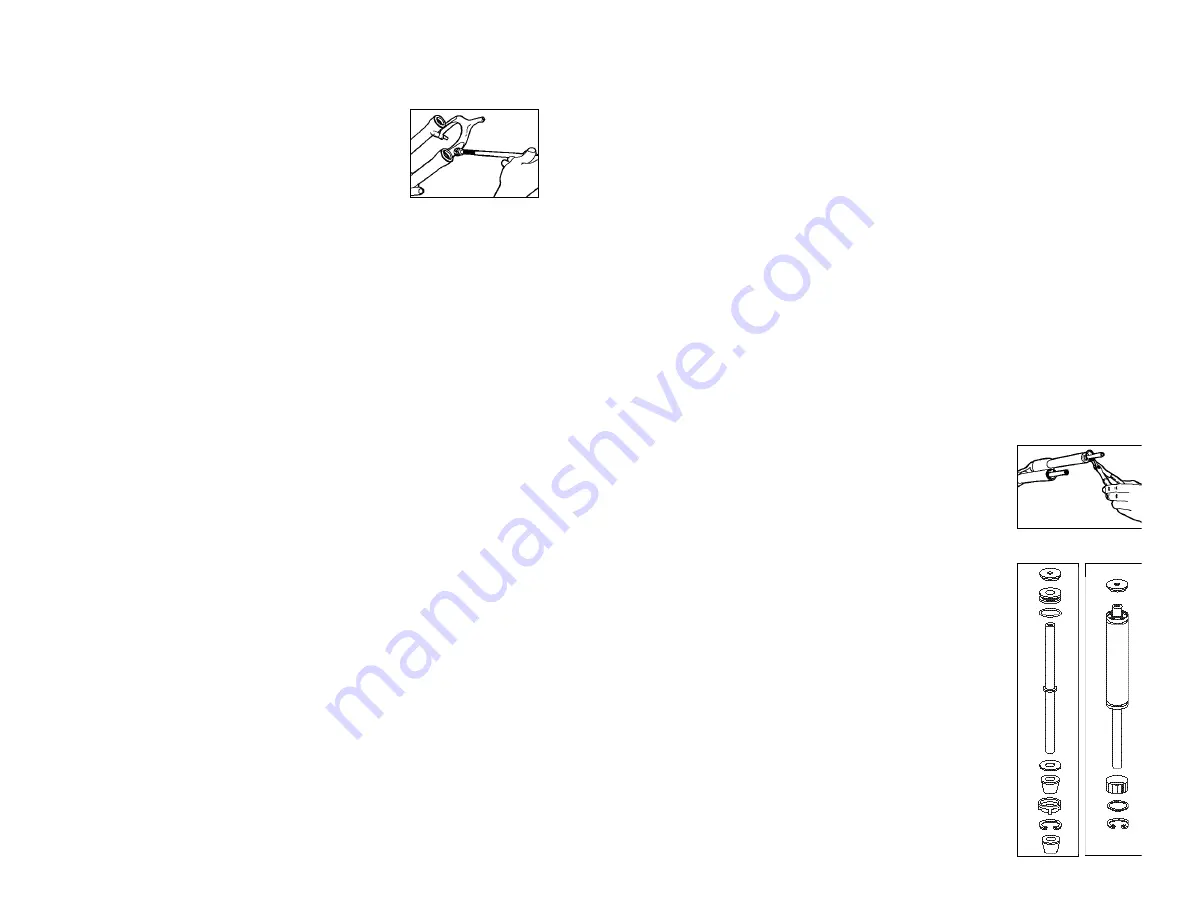
1. Unscrew top cap using a 22mm wrench or socket wrench. Remove the
spring stack assemblies.
2. Remove the snap rings at the bottom of the upper tubes with small tip
internal snap ring pliers (see Fig. 7).
3. Pull the neutral shaft assembly free from the right lower tube. Note
orientation of parts, top to bottom:shaft end plate, upper shaft guide with
o-ring, washer, top-out bumper, lower shaft guide, and snap ring (see Fig.
8). The shaft-end plate and upper shaft guide on the top of the neutral
shaft may remain in the upper tube. Remove the spring stack assembly as
described above. Tap the shaft end plate (through top of upper tube) and
guide out the bottom of the tube with the long socket extension.
4. Install new C3 Cartridge Kit (cartridge assembly and neutral shaft
assembly) into upper tubes. Make sure all parts are clean,greased, and
installed in the proper order (see Figs. 8 & 9). Replace the spring spacer
with the new spacer provided in the kit.
I
MPORTANT
: B
E SURE TO PROPERLY INSTALL CARTRIDGE LOCKRINGBETWEEN CARTRIDGEAND
SNAPRING
.
5. Install snap rings with the sharp outside edge facing out into upper tube
ring grooves. Make certain snap rings are oriented correctly, and the snap
rings are fully seated in the ring groove of the upper tubes.
Fig. 7
Fig. 8
Fig. 9
4. Thoroughly clean upper tubes and inspect for wear or damage (nicks, scratches, or dings).
5. Clean fork boots and slide onto upper tubes.
6. Then clean internals of lower tubes, bushings (two per leg),and Resi-wiper seal. A long 3/8”drive socket
extension wrapped in a lint-free rag works well (see Fig. 6).
IMPORTANT: C
LEAN LOWER BUSHINGS
,
APPROXIMATELY
6”(150
MM
)
FROM TOP
.
7. Apply New and Improved Judy Butter to the surface of the upper bushings
and fill the pocket between the lips of the Resi-wiper seal completely.
MPORTANT
: F
OR BEST PERFORMANCE
,
AVOID LITHIUM
-
BASED GREASES
. S
OME LITHIUM
GREASES CAN BECOME STICKY
,
TURNGR AY AND CAKE UPWHEN USED TO LUBRICATETHE BUSHINGS
. S
MOOTH FORK ACTION IS
GREATLY LIMITEDAND PERFORMANCEIS GREATLY REDUCEDWHEN THIS HAPPENS
. I
F YOUUSE LITHIUM GREASE
,
CHECK GREASE
QUALITY AND CONDITION AT EACH
25-
HOUR SERVICE INTERVAL TO ENSURE GREASE IS PERFORMING PROPERLY
. T
RY USING
ANOTHER TYPEOF LUBRICANTIF YOUEXPERIENCEPROBLEMS
.
8. Smear RockShox fork oil or a thin layer of New and Improved Judy Butter to the upper tubes under the
fork boots.
9. Install lower tubes onto upper tubes, carefully engaging upper Resi-wiper seal lip with upper tubes.
Gently rock the one-piece lower assembly to engage the lower bushings with upper tubes. Stop short of
engaging the neutral shafts into the counterbore in the bottom of the lo wer legs.
10. Turn the fork upside down and fill each lower leg with exactly 10cc of 15wt. RockShox fork oil by pouring
the oil through the shaft bolt holes in the bottom of the lower legs.
11. Now, fully engage the lower tubes with the upper tubes by engaging the neutral shafts into the
counterbores of the lower tubes.When installed properly, the cartridge and neutral shaft threads ar e
visible through the holes in the bottom of the lower tubes.
12.Install new crush washers onto the shaft bolts.
MPORTANT
: T
HECRUSH WASHERSEALSTHEOILINT O THELEGANDMUSTBEREPL ACEDEACHTIMETHESHAFTBOL T ISREMOVED
.
13. Refit shaft bolts, apply blue Loc-tite on steel bolts. Use a 6 or 8mm hex wrench to torque shaft bolts to
50 in-lb. (5.6Nm).
IMPORTANT: IT IS VERY EASY TO OVER TIGHTEN THIS BOLT WITH AN 8MM HEX WRENCH. USE A
TORQUE WRENCH.
14. Refit fork boot into Resi-wiper seal groove using a small blade screwdriver. Engage boot with Resi-wiper
seal groove at the rear and rotate boot around the upper tube to fully engage its lower edge behind the
brace. Compressing the boot and twisting as well as applying a small amount of oil on the mating
surfaces helps.
15.Install the external damping adjuster by applying a light coating of oil to the o-ring and pushing it onto
the shaft bolt with an upward twisting motion.
Se rv i ce
he following section contains detailed service procedures for all individual components of the Jud y T2 fork.
Fig. 6
Содержание Judy T2
Страница 1: ...1998 Judy T2 Owner s Manual...
Страница 44: ......
Страница 45: ...udyT2 Owner s Manual PN 950 000790 00 Rev A 1997 RockShox Inc Printed October 1997...