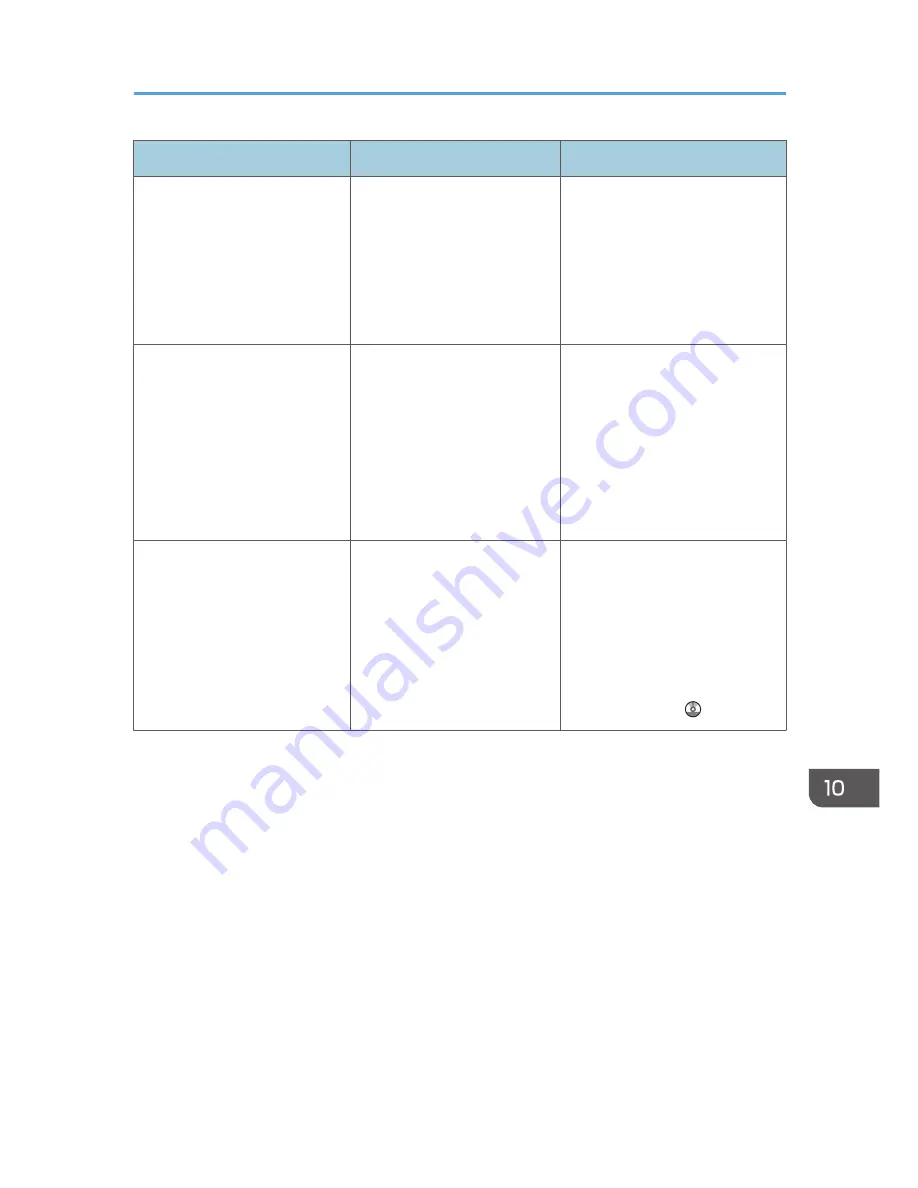
Ricoh MP 401 spf Скачать руководство пользователя страница 185

Message

Causes

Solutions

"Hardware Problem: Wireless
Card"
(A "wireless LAN board" or
"Bluetooth interface unit" is
referred to as a "wireless card".)

The wireless LAN board can
be accessed, but an error was
detected.

Turn off the main power switch,
and then confirm the wireless
LAN board is inserted correctly.
And then, turn on the main power
switch again. If the message
appears again, contact your
service representative.

"Hardware Problem: Wireless
Card"
(A "wireless LAN board" or
"Bluetooth interface unit" is
referred to as a "wireless card".)

• The Bluetooth interface

unit was connected while
the machine was turned
on.

• The Bluetooth interface

unit was removed while
the machine was turned
on.

Turn off the main power switch,
and then confirm the Bluetooth
interface unit is inserted correctly.
And then, turn on the main power
switch again. If the message
appears again, contact your
service representative.

"Out of paper in n. Load paper
of the following size and type.
To cancel the current job, press
[Job Reset]."
(A figure is placed at n.)

The printer driver settings are
incorrect or the tray does not
contain paper of the size
selected in the printer driver.

Check that the printer driver
settings are correct, and then
load paper of the size selected in
the printer driver into the tray. For
details about how to change the
paper size, see "Changing the
Paper Size", Paper Specifications
and Adding Paper .

When Messages Are Displayed on the Control Panel

183

Содержание MP 401 spf

Страница 1: ...First before using the machine For information not in this manual refer to the HTML PDF les on the supplied CD ROM Appendix Troubleshooting Adding Paper and Toner Web Image Monitor Document Server Sca...

Страница 2: ......

Страница 3: ...e Internet 19 Using the Facsimile and the Scanner in a Network Environment 21 Preventing Information Leakage Security Functions 22 Monitoring and Setting the Machine Using a Computer 23 Preventing Una...

Страница 4: ...ne Sided Combine 64 Two Sided Combine 65 Copying onto Custom Size Paper from the Bypass Tray 68 Copying onto Envelopes 69 Sort 71 Changing the Number of Sets 71 Storing Data in the Document Server 73...

Страница 5: ...ting a Locked Print File Using the Control Panel 95 Hold Print 97 Sending a Hold Print File 97 Printing a Hold Print File Using the Control Panel 97 Stored Print 99 Sending a Stored Print File 99 Prin...

Страница 6: ...lopes 146 Adding Toner 149 Sending Faxes or Scanned Documents When Toner Has Run Out 151 Disposing of Used Toner 151 10 Troubleshooting Indicators 153 When an Indicator for the Check Status Key Is Lit...

Страница 7: ...INDEX 217 5...

Страница 8: ...s symbol is located at the end of sections It indicates where you can find further relevant information Indicates the names of keys on the machine s display or control panels Indicates instructions st...

Страница 9: ...cific Read the information under the symbol that corresponds to the region of your machine mainly Europe and Asia If the label contains the following your machine is a region A model CODE XXXX 27 29 2...

Страница 10: ...Names of Major Features In this manual major features of the machine are referred to as follows Auto Document Feeder ADF 8...

Страница 11: ...See Combined Copying Copy Document Server See Combine Two Originals Fax Printing received faxes on both sides of sheets 2 Sided Print See Two Sided Printing Fax Converting received faxes to electronic...

Страница 12: ...ic Procedure for Using Scan to Folder Scan Storing scan files on media See Basic Procedure for Saving Scan Files on a Memory Storage Device Scan Converting transmitted faxes to electronic formats and...

Страница 13: ...estination in the address book manually Scan Using Web Image Monitor to register destinations from a computer See Registering Internet Fax Destination Information Using Web Image Monitor Fax Downloadi...

Страница 14: ...t Functions Registering frequently used printing settings to the printer driver See Using One Click Presets Print Changing the initial settings of the printer driver to frequently used printing settin...

Страница 15: ...ily by pressing the shortcut icons You can display only the icons of functions and shortcuts that you use You can change the order of the function and shortcut icons For details about the features on...

Страница 16: ...nlarging Originals Copy Document Server Copier functions such as Duplex and Combine allow you to save on paper by copying multiple pages onto single sheets See Duplex Copying Copy Document Server See...

Страница 17: ...ich have been previously sent from computers using the printer driver The following types of print jobs can be selected Sample Print Locked Print Hold Print and Stored Print See Storing Documents in t...

Страница 18: ...onverter you can download documents stored in copier Document Server or printer mode to your computer For details about how to use the Document Server see Document Server Copy Document Server For deta...

Страница 19: ...e Monitor to check print delete retrieve or download documents using your computer Storing received documents See Confirming Printing Deleting Received and Stored Documents Fax Transmission You can se...

Страница 20: ...d then specify the destination You can also check the sent image data For details about the machine s settings see Network Settings Requirements Connecting the Machine System Settings For details abou...

Страница 21: ...net Fax or from computers Internet Fax Reception and Mail to Print See Receiving E mail by Internet Fax Mail to Print Fax Internet Fax compatible machines and computers that have e mail addresses can...

Страница 22: ...For details about the machine s settings see Network Settings Requirements Connecting the Machine System Settings 1 What You Can Do with This Machine 20...

Страница 23: ...tion Fax See Basic Procedure for Using Scan to Folder Scan You can use this machine as a delivery scanner for the ScanRouter delivery software 1 Network delivery scanner You can save scan files in the...

Страница 24: ...he use of the machine as well as prevent machine settings from being changed without authorization By setting passwords you can prevent unauthorized access via the network You can erase or encrypt the...

Страница 25: ...ray is running out of paper register information in the Address Book specify the network settings configure and change the system settings manage jobs print the job history and configure the authentic...

Страница 26: ...rity unit the machine beeps to notify users that unauthorized copying is being attempted If the document is copied on a machine without the Copy Data Security Unit the hidden text becomes conspicuous...

Страница 27: ...s machine Guide to Names and Functions of Components Guide to Components Do not obstruct the machine s vents Doing so risks fire caused by overheated internal components Exterior Front view 14 13 23 2...

Страница 28: ...lass 8 Output tray for the ADF Originals scanned with the ADF are output here 9 Stop fence for the ADF Pull out this fence to prevent originals from falling off 10 Control panel See page 31 Guide to t...

Страница 29: ...r the bypass tray Pull this extender out when loading A4 81 2 11 or larger size paper in the bypass tray 23 Paper guides When loading paper in the bypass tray align the paper guides flush against the...

Страница 30: ...board 11 Expansion card slots Optional SD cards can be installed Do not open the cover 12 External telephone connector For connecting an external telephone 13 G3 interface unit connector For connecti...

Страница 31: ...n the screen when consumables need to be replaced see Replenishing and Replacing Consumables Maintenance and Specifications Interior Rear view CXC429 1 1 Fusing unit Pull out the fusing unit and remov...

Страница 32: ...ttach up to two lower paper trays There are two types of trays each holding up to 250 or 500 sheets of paper These trays can be used in any combination 2 Handset mainly North America Used as a receive...

Страница 33: ...e function keys as a factory default You can register often used functions programs and Web pages For details see Configuring function keys Getting Started 3 Display panel Displays keys for each funct...

Страница 34: ...the counter value See Counter Maintenance and Specifications 10 Simple Screen key Press to switch to the simple screen See Switching Screen Patterns Getting Started 11 key Enter key Press to confirm...

Страница 35: ...display the job history and the machine s maintenance information 18 Data In indicator facsimile and printer mode Flashes when the machine is receiving print jobs or LAN Fax documents from a computer...

Страница 36: ...hange the language used on the display English is set as default 1 Press the User Tools Counter key CXC475 2 Press 3 Press language key until the language you want to display appears 4 Press the User...

Страница 37: ...8 2 3 5 4 9 11 10 6 1 Supply Information icon Press to check the toner paper and maintenance guidance 2 Copier Press to make copies For details about how to use the copy function see Copy Document Ser...

Страница 38: ...n add shortcuts to programs stored in copier facsimile or scanner mode or Web pages registered in Favorites using the browser function You can also review icons of functions and embedded software appl...

Страница 39: ...ng Web Image Monitor 1 Start Web Image Monitor For details see Using Web Image Monitor Connecting the Machine System Settings 2 Log in to Web Image Monitor as an administrator For details see Security...

Страница 40: ...3 Press Edit Home 4 Press Add Icon 5 Press Select Icon to Add 6 Press Program 2 Getting Started 38...

Страница 41: ...7 Press Copier Program 8 Select the program you want to add 9 Press Select Destination 10 Specify the position where Blank is displayed How to Use the Home Screen 39...

Страница 42: ...11 Press Exit 12 Press the User Tools Counter key Press on the upper right corner of the Select Destination screen to check the position on the simple screen 2 Getting Started 40...

Страница 43: ...er functions number of prints Facsimile Transmission type memory transmission immediate transmission Select Destination from Address Book except for folder destinations Manual Entry TX Status Report S...

Страница 44: ...its values become the default settings which are displayed without pressing the Program key when modes are cleared or reset and after the machine is turned on See Changing the Default Functions of the...

Страница 45: ...rtcut to a Program to the Home Screen Convenient Functions and page 36 Adding Icons to the Home Screen Shortcuts to programs stored in Document Server mode cannot be registered to the Home screen Exam...

Страница 46: ...gs Scanned documents maintain much of the detail of the originals but the size of the data may be quite large Batch document scan Select Batch in Send Settings You can apply multiple scans to a large...

Страница 47: ...e just examples You can assign any name to a program according to your objectives Depending on your business details or the type of documents to be scanned registering a program cannot be recommended...

Страница 48: ...y when necessary Turning On the Main Power Do not turn off the main power switch immediately after turning it on Doing so may result in damage to the hard disk or memory leading to malfunctions 1 Make...

Страница 49: ...o not turn off the power while the machine is in operation Doing so may result in damage to the hard disk or memory leading to malfunctions Do not hold down the main power switch while turning off the...

Страница 50: ...Ask the user administrator for the Login User Name Login Password and User Code For details about user authentication see Security Guide User Code to enter on User Code Authentication is the numerica...

Страница 51: ...the Control Panel This section explains the procedure for logging out the machine when Basic Authentication Windows Authentication LDAP Authentication or Integration Server Authentication is set To pr...

Страница 52: ...e aligned to the rear left corner Start with the first page to be scanned CXC604 1 1 1 Positioning mark 3 Lower the ADF Placing Originals in the Auto Document Feeder Be sure not to load the original u...

Страница 53: ...When placing originals that are longer than A4 or 81 2 11 open the extenders 2 2 1 CXC606 1 Limit mark 2 Original guides Placing Originals 51...

Страница 54: ...2 Getting Started 52...

Страница 55: ...he ADF see page 50 Placing Originals in the Auto Document Feeder To copy onto paper other than plain paper specify the paper type in User Tools according to the weight of the paper you are using For d...

Страница 56: ...ess the key after all originals are scanned Some functions such as Batch mode may require that you press the key when placing originals in the ADF Follow the messages that appear on screen 8 When the...

Страница 57: ...iginal is scanned When the original is placed on the exposure glass the upper left corner will be the base point When it is placed in the ADF the bottom left corner will be the base point Placing the...

Страница 58: ...originals and then press the Start key Zoom You can specify the reproduction ratio in increments of 1 CKN007 To specify a reproduction ratio enter the ratio using the number keys or specify the ratio...

Страница 59: ...ge The machine automatically calculates the reproduction ratio based on the sizes of the originals and the paper you have specified The machine will rotate enlarge or reduce the image of the originals...

Страница 60: ...o A5 paper select A4 for the original size and orientation select a paper tray containing A5 paper and then press Auto Reduce Enlarge The image is automatically rotated For details about Rotate Copy s...

Страница 61: ...page 2 Sided 2 Sided Copies one 2 sided page on one 2 sided page The resulting copy image will differ according to the orientation in which you place your originals or Original orientation and complet...

Страница 62: ...Top Top to Bottom 1 Press Other Func 2 Press Duplex 3 Select 1 Sided 2 Sided or 2 Sided 2 Sided according to how you want the document to be output To change the original or copy orientation press Ori...

Страница 63: ...ct the paper tray 10 Press the Start key Specifying the Original and Copy Orientation Select the orientation of the originals and copies if the original is two sided or if you want to copy onto both s...

Страница 64: ...2 Select Top to Top or Top to Bottom for Original if the original is two sided 3 Select Top to Top or Top to Bottom for Copy 4 Press OK 3 Copy 62...

Страница 65: ...age by 90 degrees to make copies properly Orientation of the original and image position of Combine The image position of Combine differs according to original orientation and the number of originals...

Страница 66: ...Sided Combine 1 Sided 2 Originals Cmb 1 Side Copies two 1 sided originals to one side of a sheet 1 Sided 4 Originals Cmb 1 Side Copies four 1 sided originals to one side of a sheet 2 Sided 2 Pages Cmb...

Страница 67: ...the orientation by pressing Orientation To specify the original orientation is whether readable or unreadable press Orig s Orientation 7 Press Cmb 1 Side 8 Select the number or pages of originals to...

Страница 68: ...ed 4 Pages Cmb 2 Sides Copies two 2 sided originals to one sheet with two pages per side 2 Sided 8 Pages Cmb 2 Sides Copies four 2 sided originals to one sheet with four pages per side 1 Press Orig 2...

Страница 69: ...lect Top to Top or Top to Bottom for Original and or Copy and then press OK 10 Select the number or pages of originals to combine 11 Press OK twice 12 Select the paper tray 13 Place the originals and...

Страница 70: ...s can be fed in from the bypass tray 1 Load the paper face up in the bypass tray Bypass tray is automatically selected 2 Press the key 3 Press Paper Size 4 Press Custom Size 5 Enter the horizontal siz...

Страница 71: ...see page 146 Envelopes Before using this function press Tray Paper Settings in User Tools and then select Envelope as Paper Type in Paper Type Bypass Tray For details see System Settings Connecting th...

Страница 72: ...5 Place the originals and then press the Start key 3 Copy 70...

Страница 73: ...r the number of copy sets using the number keys 6 Select the paper tray 7 Place the originals and then press the Start key Changing the Number of Sets You can change the number of copy sets during cop...

Страница 74: ...2 Enter the number of copy sets with the number keys 3 Press Continue Copying starts again 3 Copy 72...

Страница 75: ...ich options are installed on your machine this function might not be available For details see Functions Requiring Optional Configurations Getting Started 1 Press Other Func 2 Press 3 Press Store File...

Страница 76: ...3 Copy 74...

Страница 77: ...imultaneously It is recommended that you call the receivers and confirm with them when sending important documents If there is a power failure the main power switch is turned off or the machine is unp...

Страница 78: ...oadcasting specify the next destination 8 If you send documents to Internet Fax or e mail destinations or enable the Email TX Results function specify a sender 9 Press the Start key Sending Originals...

Страница 79: ...K 7 Press to display Title 1 Title 2 and Title 3 8 Press Title 1 Title 2 or Title 3 to select the key for the classification you want to use The keys you can select are as follows Frequent Added to th...

Страница 80: ...fied delivery destination messages to its registered Personal Box for example cannot be delivered Be sure to check the settings in the fax function before deleting any destinations 1 Press the User To...

Страница 81: ...8 Press Delete All and then press OK 9 Press Exit 10 Press OK 11 Press the User Tools Counter key Basic Procedure for Transmissions Memory Transmission 79...

Страница 82: ...ssion mode is automatically switched to Memory Transmission It is recommended that you call the receivers and confirm with them when sending important documents 1 Press the Home key on the top left of...

Страница 83: ...3 Specify a destination 4 Make the scan settings you require 5 Press the Start key 6 Place the next original on the exposure glass within 10 seconds when you send multiple originals and then repeat st...

Страница 84: ...ore pressing the Start key 1 Press the Reset key CXC257 Canceling a Transmission While the Original Is Being Scanned Use this procedure to cancel scanning or transmitting of the original while it is b...

Страница 85: ...ion File 2 Press Standby File List 3 Select the file you want to cancel If the desired file is not shown press or to find it 4 Press Cancel TX 5 Press OK To cancel another file repeat steps 3 through...

Страница 86: ...Transmission File 3 Press Display File List 4 Select the file you want to cancel If the desired file is not shown press or to find it 5 Press Cancel TX 6 Press OK To cancel another file repeat steps 4...

Страница 87: ...documents See Turning Off the Main Power In the Event of Power Failure Troubleshooting If your specified time is within the period for which Power Off is set under Weekly Timer in System Settings the...

Страница 88: ...y assigned names such as FAX0001 or FAX0002 Password You can set this function so as not to send to unspecified people A four to eight digit number can be specified as a password You can also change t...

Страница 89: ...iver 8 Press the Start key Sending Stored Documents The machine sends documents stored with the facsimile function in the Document Server The documents stored in the Document Server can be sent again...

Страница 90: ...range the order of the documents to be sent To view details about stored documents press Details Press to switch the screen to thumbnail display 4 If you select a document with a password enter the pa...

Страница 91: ...tions specified by file number Print per User Prints the results of communications by individual senders 1 Press Comm Status Print 2 Press Print Journal 3 Select the printing method 4 If you selected...

Страница 92: ...4 Fax 90...

Страница 93: ...B Quick Install 5 The software license agreement appears in the License Agreement dialog box After reading the agreement click I accept the agreement and then click Next 6 Select the method to install...

Страница 94: ...ick Install 5 The software license agreement appears in the License Agreement dialog box After reading the agreement click I accept the agreement and then click Next 6 After confirming you are ready t...

Страница 95: ...the printer settings Log on as an Administrators group member You cannot change the machine default settings for individual users Settings made in the printer properties dialog box are applied to all...

Страница 96: ...use 3 Click Preferences 4 In the Job Type list select Normal Print 5 In the Document Size list select the size of the original to be printed 6 In the Orientation list select Portrait or Landscape as t...

Страница 97: ...lick Details 6 Enter a User ID in the User ID box and then enter a password in the Password box 7 Click OK 8 Change any other print settings if necessary 9 Click OK 10 Start printing from the applicat...

Страница 98: ...to step 7 6 Enter the password using the number keys and then press OK Only the first page of the document is displayed on the preview screen A preview cannot be displayed if more than one document i...

Страница 99: ...ame of a Hold Print file 7 To specify the print time of the document select the Set Print Time check box and then specify the time You can specify the time in 24 hour format 8 Click OK 9 Change any ot...

Страница 100: ...w to check the print image of the document Only the first page of the document is displayed on the preview screen A preview cannot be displayed if more than one document is selected Press Exit to clos...

Страница 101: ...in the machine and prints it later using the control panel Store and Print Prints the file at once and also stores the file in the machine Stored Print Shared Stores the file in the machine and allows...

Страница 102: ...Press Stored Jobs 4 Select the files you want to print You can select all the Stored Print files at once by pressing All Jobs after selecting a file 5 If necessary press Preview to check the print ima...

Страница 103: ...d to the entered password and files that do not require a password The number of files to be printed is displayed on the confirmation screen 7 To change the print settings of the document press Det Se...

Страница 104: ...5 Print 102...

Страница 105: ...olders Connecting the Machine System Settings and register the address of the destination computer to the address book 1 Press the Home key on the top left of the control panel and press the Scanner i...

Страница 106: ...canned documents to 1 On the Start menu point to All Programs then Accessories and then click on Command Prompt 2 Enter the command ipconfig all and then press the Enter key 3 Confirm the name of the...

Страница 107: ...more object types select a location and then click Find Now 10 From the list of results select the groups and users you want to grant access to and then click OK 11 In the Select Users or Groups windo...

Страница 108: ...ss New Program 4 Press Names 5 Press Name The name entry display appears 6 Enter the name and then press OK 7 Press to display Title 1 Title 2 and Title 3 8 Press Title 1 Title 2 or Title 3 to select...

Страница 109: ...in Password 17 Enter the password of the destination computer and then press OK 18 Enter the password again to confirm and then press OK 19 Press OK 20 Press Exit 21 Press Folder 22 Check that SMB is...

Страница 110: ...the IP address of the destination computer is 192 168 0 191 and the folder name is Share the path will be 192 168 0 191 Share 3 Press OK four times If the format of the entered path is not correct a m...

Страница 111: ...ge 4 Press Folder 5 Select the name whose folder you want to delete Press the name key or enter the registered number using the number keys You can search by the registered name user code fax number f...

Страница 112: ...epending on the destination setting enter the user name for logging in to the computer Press Enter to the right of the user name field to display the soft keyboard 8 Depending on the destination setti...

Страница 113: ...r Original and specify scan settings according to the original you want to scan Example Scanning the document in color duplex mode and saving as a PDF file Press Original and then press 2 Sided Press...

Страница 114: ...Address Book Mangmnt 3 Press New Program 4 Press Names 5 Press Name The name entry display appears 6 Enter the name and then press OK 7 Press to display Title 1 Title 2 and Title 3 8 Press Title 1 Tit...

Страница 115: ...screen and in the address display on the scanner function screen If Internet Fax Destination Only is specified registered e mail addresses only appear in the internet fax display on the fax function s...

Страница 116: ...registered name user code fax number folder name e mail address or IP Fax destination 6 Press Email 7 Press Email Address 8 Press Delete All and then press OK 9 Press Exit 10 Press OK 11 Press the Us...

Страница 117: ...responsible for any damage that may result from the loss of files For long term storage of files we recommend the use of DeskTopBinder For details contact your local dealer or see the documentation fo...

Страница 118: ...r confirmation and then press OK 8 Press OK twice 9 If necessary press Send Settings or Original to configure settings for resolution and scan size 10 Press the Start key Checking Stored Files Selecte...

Страница 119: ...Specifying Send Settings 1 Press Send Settings 2 Specify resolution scan size and other settings as required 3 Press OK Specifying Send Settings 117...

Страница 120: ...u select a single page file type when scanning multiple originals one file is created for each single page and the number of files sent is the same as the number of pages scanned Multi page PDF High C...

Страница 121: ...transmission or scanning by the scanner make sure that all other operations are ended File Name A file name such as COPY0001 and COPY0002 is automatically attached to the scanned document You can cha...

Страница 122: ...e 5 Press File Name 6 Enter a file name and then press OK 7 Press Password 8 Enter a password with the number keys and then press OK You can use four to eight digits for the password 9 For double chec...

Страница 123: ...details about each function see Copy Document Server 1 Select a document to be printed 2 When printing two or more documents at a time repeat step 1 Up to 30 documents can be printed 3 When specifyin...

Страница 124: ...7 Document Server 122...

Страница 125: ...owser 2 Enter http machine s IP address or host name in your Web browser s URL bar Top Page of Web Image Monitor appears If the machine s host name has been registered on the DNS or WINS server you ca...

Страница 126: ...n Click the Web browser s Refresh button to refresh the entire browser screen Help Use Help to view or download Help file contents 4 Basic Information area Displays the basic information of the machin...

Страница 127: ...ng incorrect user code entry appears If this is the case reprogram a user code 4 Click the property icon of the desired fax document 5 View the content of the fax document 6 To download the received f...

Страница 128: ...8 Web Image Monitor 126...

Страница 129: ...l and paper type using the control panel When printing a document specify the same paper size and type in the printer driver as specified on the machine If you load paper whose size is not indicated o...

Страница 130: ...ch the size and feed direction of the paper in the paper tray CXC663 2 Pull the tray carefully until it stops lift the front side of the tray and then pull it out of the machine CXC664 Place the tray...

Страница 131: ...not stacked higher than the upper limit upper line marked inside the tray CXC666 7 Adjust the paper guides to close any gaps Do not move paper loaded in the tray more than a few millimeters Moving th...

Страница 132: ...ure the tray is securely inserted Letterhead paper must be loaded in a specific orientation For details see page 137 Loading Orientation fixed Paper or Two sided Paper You can load envelopes into Tray...

Страница 133: ...mmended Paper Sizes and Types Do not mix different types of paper After loading paper specify the paper size and type using the control panel When printing a document specify the same paper size and t...

Страница 134: ...ails see page 137 Loading Orientation fixed Paper or Two sided Paper You can load envelopes into the bypass tray For details about loading envelopes see Loading Envelopes Paper Specifications and Addi...

Страница 135: ...ypass Tray is Driver Command Settings remain valid until they are changed For details about setting printer drivers see Printing Documents Print mainly Europe and Asia A4 is the default setting for Pr...

Страница 136: ...ing a custom size paper using the control panel 1 Press the User Tools Counter key CXC251 2 Press Tray Paper Settings 3 Press 4 Press Printer Bypass Paper Size 5 Press Custom Size If a custom size is...

Страница 137: ...type using the control panel Usually only one side of OHP transparencies can be used for printing Be sure to load them with the print side up When printing onto OHP transparencies remove printed sheet...

Страница 138: ...hen printing onto OHP transparencies proceed to step 11 10 When printing onto thick paper make sure that the specified paper thickness is displayed in Paper Thickness 11 Press the User Tools Counter k...

Страница 139: ...eatures menu and then place the original and paper as shown below Printer mode Specify Auto Detect or On Always for Letterhead Setting in System under the Printer Features menu and then place the pape...

Страница 140: ...de Paper trays Bypass tray 1 One sided Two sided 1 If you place originals in the ADF and copy on orientation fixed paper from the bypass tray without specifying the paper size the image might be copie...

Страница 141: ...printing from one sided to two sided printing one sided output after the first copy may be printed facing a different direction To ensure all paper is output facing the same direction specify differe...

Страница 142: ...hin Paper Thick Paper 2 Select the paper size using the paper size dial on the tray A4 A5 A6 81 2 14 81 2 11 51 2 81 2 500 sheets 52 162 g m2 14 lb Bond 90 lb Index Thin Paper Thick Paper 2 Set the pa...

Страница 143: ...dial on the tray to and select the paper size with the control panel A5 B5 JIS B6 JIS 81 2 13 81 4 14 81 4 13 8 13 8 101 2 8 10 71 4 101 2 16K 250 sheets 52 162 g m2 14 lb Bond 90 lb Index Thin Paper...

Страница 144: ...s Horizontal 3 94 8 50 inches 500 sheets Bypass tray Paper type and weight Paper size Paper capacity 52 162 g m2 14 lb Bond 90 lb Index Thin Paper Thick Paper 2 Select the paper size 1 A4 A5 A6 B5 JIS...

Страница 145: ...g thick paper in the bypass tray do not stack paper over the limit mark The number of sheets you can load in the bypass tray varies depending on the weight and condition of the paper 3 Enter the paper...

Страница 146: ...ng envelopes see Loading Envelopes Paper Specifications and Adding Paper When loading thick paper of 106 162 g m2 28 lb Bond 90 lb Index see page 145 Thick Paper When copying or printing onto letterhe...

Страница 147: ...and set the paper direction according to the grain Translucent paper easily absorbs humidity and becomes curled Remove curl in the translucent paper before loading Thick Paper This section gives you v...

Страница 148: ...ow envelopes Fan the envelopes before loading them to separate them and prevent the glue on them from causing them to stick together Some kinds of envelope might cause misfeeds wrinkles or print poorl...

Страница 149: ...chine Side to be printed face up When loading envelopes specify the envelope size and thickness For details see page 69 Copying onto Envelopes In printer mode When printing onto envelopes load them ac...

Страница 150: ...0 6 inches and the other margins to at least 10 mm 0 4 inches each Output quality on envelopes may be uneven if parts of an envelope have differing thicknesses Print one or two envelopes to check pri...

Страница 151: ...ckering inside the vacuum cleaner However it is possible to use a vacuum cleaner that is explosion proof and dust ignition proof If toner is spilled on the floor remove the spilled toner slowly using...

Страница 152: ...you do settings will be lost Store toner where it will not be exposed to direct sunlight temperatures above 35 C 95 F or high humidity Store toner on a flat surface Do not shake the toner cartridge w...

Страница 153: ...form transmission operation The error message disappears Any reports are not printed Disposing of Used Toner This section describes what to do with used toner Toner cannot be re used Pack used toner c...

Страница 154: ...9 Adding Paper and Toner 152...

Страница 155: ...oting Original Misfeed indicator Appears when an original misfeed occurs For details about removing jammed paper see Removing Jammed Paper Troubleshooting Load Paper indicator Appears when paper runs...

Страница 156: ...e used because an error has occurred on the machine 3 Messages Displays a message that indicates the status of the machine and each function 4 Check If an error occurs in the machine or a function pre...

Страница 157: ...Control Panel You can use other functions normally The machine is unable to connect to the network A network error has occurred Press Check in the function which error is occurred And then check the...

Страница 158: ...long beeps Soft alert An auto reset was performed through the Simple Screen of the Copy Document Server function the Facsimile function or the Scanner function Five long beeps repeated four times Soft...

Страница 159: ...ctions other than the copier function are not yet ready Functions appear in the User Tools menu when they become ready for use Time required varies by function Wait a little longer The lamp remains li...

Страница 160: ...s displayed If the machine is not ready in five minutes turn off the main power switch and make sure the main power indicator turns off Wait at least ten seconds and then turn the main power switch on...

Страница 161: ...ing pages that have been scanned Delete unnecessary files by pressing Delete File The user code entry screen is displayed Users are restricted by User Code Authentication For details about how to log...

Страница 162: ...pen the front cover and then close it For details about removing jammed paper see Removing Jammed Paper Troubleshooting An error message remains even if consumables are replaced and or misfed paper is...

Страница 163: ...t removing jammed paper see Removing Jammed Paper Troubleshooting Check that the side or end fences are set properly Also check that the side fences are locked For details about setting the side and e...

Страница 164: ...your service representative The machine makes a loud clicking sound shortly after the main power switch is turned off The main power switch makes a loud clicking sound inside the machine when the mai...

Страница 165: ...e screen is being edited by another function Wait for a while and then try to create the shortcut on the Home screen again The image data size is not valid See the manual for required data appears The...

Страница 166: ...e Security Guide Check paper size An irregular paper size is set If you press the Start key the copy will start using the selected paper 2 Sided Copy is not available with this paper size Select anoth...

Страница 167: ...he Document Server function Cancel the job that is being processed For example press Exit and then press the Home key Next press the Document Server icon on the Home screen and then press the Stop key...

Страница 168: ...a file which you are not authorized to delete contact the person who created the file The selected folder is locked Please contact the file administrator An attempt was made to edit or use a locked f...

Страница 169: ...ges appear follow their instructions Settings that can be confirmed in System Settings or Facsimile Features on the control panel can also be confirmed from Web Image Monitor For details about how to...

Страница 170: ...ted in SIP Settings of Facsimile Features For details about SIP Settings see Initial Settings Fax For details about network problems contact your administrator Check whether there are any network prob...

Страница 171: ...Settings For details about IPv4 address see Interface Settings Connecting the Machine System Settings For details about network problems contact your administrator Check whether there are any network...

Страница 172: ...IP address for the SMTP Server For details about these settings see Interface Settings or File Transfer Connecting the Machine System Settings Check that the folder for transfer is correctly specifie...

Страница 173: ...er ID and password for the computer with the folder for forwarding are correctly specified Check that the folder for forwarding is correctly specified Confirm that the computer with the folder for for...

Страница 174: ...log in to the POP3 IMAP4 server Check that the correct User Name and Password are listed in Fax Email Account of System Settings For details about Fax Email Account see File Transfer Connecting the Ma...

Страница 175: ...Machine System Settings Check that the LAN cable is correctly connected to the machine For details about network problems contact your administrator Check whether there are any network problems 15 12...

Страница 176: ...failed Try the operation again If the message is still shown the network may be busy Check the settings for LDAP server in System Settings For details about settings for LDAP server see Programming th...

Страница 177: ...riod has expired and then resume reception of the Internet Fax For details about reception of the Internet Fax contact your administrator Functional problems with facsimile Data will be initialized Th...

Страница 178: ...ich you do not have permission to delete To check your access permission for stored documents or to delete a document you do not have permission to delete see Security Guide Updating the destination l...

Страница 179: ...ficate destination certificate see Security Guide The specified destination for Email TX Result which is registered to the program has an encryption certificate that is not currently valid The destina...

Страница 180: ...about the user certificate destination certificate see Security Guide The specified destination for Email TX Result which is registered to the program has no encryption certificate There is no user ce...

Страница 181: ...ital signature has expired A new device certificate PDF with digital signature must be installed For details about how to install a device certificate PDF with digital signature see Security Guide XXX...

Страница 182: ...the network be sure to set Display by configuring the appropriate User Parameter If the paper tray runs out of paper Cannot print fax message Load paper appears on the screen asking you to add paper...

Страница 183: ...r the machine and move it to a different location or leave the machine for a while and allow it to adapt to the environment Printing The machine is printing Wait a while Ready This is the default read...

Страница 184: ...as turned on Turn off the main power switch and then confirm that the Bluetooth interface unit was installed correctly And then turn on the main power switch again If the message appears again contact...

Страница 185: ...interface unit was removed while the machine was turned on Turn off the main power switch and then confirm the Bluetooth interface unit is inserted correctly And then turn on the main power switch ag...

Страница 186: ...ray does not match the paper size specified in the printer driver Select a tray containing paper that is the same size as the specified paper size Printer font error An error has occurred in the font...

Страница 187: ...number of destinations to be updated there may be some delay before you can resume operation Operations are not possible while this message is displayed You do not have the privileges to use this func...

Страница 188: ...t files of different formats at the same time Other messages This section describes likely causes of and possible solutions for the error messages that are printed on the error logs or reports Message...

Страница 189: ...ipt 3 On the printer driver s Detailed Settings tab click Effects in Menu Select Unauthorized Copy Prevention and then click Details to display Unauthorized Copy Prevention for Pattern Details Enter t...

Страница 190: ...cation between the computer and the machine is working correctly Check if the correct printer driver is being used Check if the machine s memory size is set correctly in the printer driver Check that...

Страница 191: ...d see Tray Paper Settings Connecting the Machine System Settings Error has occurred A syntax error etc occurred Check that the PDF file is valid Exceeded max capacity of Document Server Cannot store T...

Страница 192: ...incomplete The number of pages exceeds the maximum number of sheets that you can use Collate with Reduce the number of pages to print Exceeded max number of pages Auto While using the error job store...

Страница 193: ...s stored in the machine Reduce the data size of the Temporary Print file and or the Stored Print file I O buffer overflow An input buffer overflow occurred In Printer Features under System set Memory...

Страница 194: ...ntact your service representative No response from the server Authentication has failed A timeout occurred while connecting to the server for LDAP Authentication or Windows Authentication Check the st...

Страница 195: ...ax No of pages per file The maximum page capacity of the Document Server was exceeded Delete some of the files stored in the Document Server or reduce the number of pages that you want to send The sel...

Страница 196: ...figuration Page see List Test Print Print Messages Displayed When Using the Scanner Function This section describes likely causes of and possible solutions for the error messages that appear on the co...

Страница 197: ...to add programs to the exclusion list see the anti virus software Help To prevent a firewall blocking the connection register the machine s IP address in the firewall s IP address exclusion settings F...

Страница 198: ...Replace the memory device If the document is scanned as single page or divided multiple pages data already written to the memory device is saved as is Replace the memory device and then press Retry t...

Страница 199: ...gain For details about a protection code see Registering a Protection Code Connecting the Machine System Settings Entered user code is not correct Please re enter You have entered an incorrect user co...

Страница 200: ...h has been exceeded The maximum number of characters which can be entered for the path is 256 Check the number of characters you entered and then enter the path again Exceeded max number of alphanumer...

Страница 201: ...ring files is unavailable Too many files are waiting to be delivered Try again after they have been delivered Exceeded max page capacity per file Press Send to send the scanned data or press Cancel to...

Страница 202: ...curity Guide Memory device error occurred Check the memory device A non writable medium is being used Use a different medium Memory is full Cannot scan The scanned data will be deleted Because of insu...

Страница 203: ...memory device or check to see whether the memory device is properly inserted in the media slot No paper Load paper of one of the following sizes No paper is set in the specified paper tray Load paper...

Страница 204: ...ls in Scan Features Print Delete Scanner Journal in Scanner Features is set to Do not Print Disable Send and Scanner Journal is full Print or delete Scanner Journal For details about printing or delet...

Страница 205: ...t to select only valid destination s The specified group contains e mail destinations and Scan to Folder destinations either of which are incompatible with the specified transmission method In the mes...

Страница 206: ...de is set cannot be called by the program Cancel the protection code setting or send scanned files to the destination separately The selected file s contained file s without access privileges Only fil...

Страница 207: ...cluding an IP address see your firewall s Help Updating the destination list Please wait Specified destination s or sender s name has been cleared A specified destination or sender s name was cleared...

Страница 208: ...If the scaling factor specified in Reproduction Ratio is too large part of the image may be lost Reduce the scaling factor in Reproduction Ratio and then try to scan the original again If displaying...

Страница 209: ...Digital Signature s device certificate is invalid The file cannot be sent There is no device certificate PDF with digital signature or the certificate is invalid A new device certificate PDF with digi...

Страница 210: ...ted because its encryption certificate is not currently valid The user certificate destination certificate has expired A new user certificate must be installed For details about the user certificate d...

Страница 211: ...n has been denied The logged in user name does not have permission for scanner function For details about how to set permissions see Security Guide Call Service Please call your service representative...

Страница 212: ...Settings Select the scanner used for the previous scan Cannot specify any more scanning area The maximum number of registerable scan areas has been exceeded The maximum number of scanning areas that...

Страница 213: ...eeded the setting range of the machine Check whether the scanning settings made with the application exceed the setting range of the machine Fatal error has occurred in the scanner An unrecoverable er...

Страница 214: ...scan the original again Invalid Winsock version Please use version 1 1 or higher You are using an invalid version of Winsock Install the operating system of the computer or copy Winsock from the opera...

Страница 215: ...e used on this machine Contact your service representative Scanner is not available Check the scanner connection status The machine s main power switch is off Turn on the main power switch Scanner is...

Страница 216: ...Connection Tool For the WIA driver check the Network Connection tab in the properties Use Web Image Monitor to set LLMNR of IPv6 to Active In Windows XP IPv6 addresses cannot be obtained from the hos...

Страница 217: ...D logo are trademarks of SD 3C LLC The proper names of the Windows operating systems are as follows The product names of Windows XP are as follows Microsoft Windows XP Professional Microsoft Windows X...

Страница 218: ...11 Appendix 216...

Страница 219: ...language 34 Display panel 31 Document Server 10 16 73 86 87 119 121 Drum unit 29 Duplex 14 59 Duplex Copy 9 59 E E mail address 112 113 114 E mail destination 112 113 114 Energy Saver key 32 Enlarging...

Страница 220: ...ded Combine 64 Options 30 Orientation fixed paper 137 Output tray for the ADF 26 P Paper capacity 140 Paper guides 27 Paper size 133 140 Paper thickness 140 Paper tray 127 Paper type 140 Paper weight...

Страница 221: ...86 Storing data 73 Storing received documents 17 Storing scan files 115 Symbols 6 T Thick paper 135 145 Toner 149 151 Toner cartridge 28 Trademark 215 Tray 1 27 Turning off the power 46 Turning on the...

Страница 222: ...MEMO 220 EN GB EN US EN AU M161 7530...

Страница 223: ...2013...

Страница 224: ...M161 7530 AU EN US EN GB EN...

Отзывы: