background image

NetWare Configuration

50

4

E

Click 

[

Next >

]

.

F

In  the 

[

command line for  installation program

]

 box,  type the name  of  the CD-ROM

drive followed by “:\NETWORK\PRINTMAN\ADMIN\DISK1\SETUP.EXE”
(do not include the quotation marks) and then click 

[

Finish

]

.

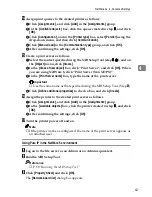
Note

An example would be “D:\NETWORK\PRINTMAN\ADMIN\DISK1\SET-
UP.EXE” when the CD-ROM drive name is “D”.

G

From the 

[

Choose Setup Language

]

 list, select the language you want to use,

and then click 

[

OK

]

.

H

After the 

[

Welcome

]

 dialog box appears, click 

[

Next >

]

.

I

The 

[

Software License Agreement

]

 dialog box appears. 

After reading through all of the contents by clicking 

[

PageDown

]

, click 

[

Yes

]

 to

agree with the License Agreement.

J

Select a folder to install PRINTER MANAGER FOR ADMINISTRATOR
in, and then click 

[

Next >

]

.

If you want to change the displayed folder, click 

[

Browse

]

 to select another

one.
The installation program starts.
When a confirmation dialog box appears, the installation program is com-
plete.

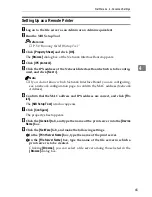
Running the NIB Setup Tool

A

Click 

[

Start

]

, point to 

[

Programs

]

, and then click 

[

NIB Setup Tool

]

 in the 

[

PRINT-

ER MANAGER FOR ADMINISTRATOR

]

 program folder.

Содержание Lanier AP206

Страница 1: ...ting the photoconductor unit be careful not to touch or damage the surface WHERETO PUTTHE PRINTER The printer s location should be carefully chosen because environmental conditions greatly affect its performance Warning Confirm that the wall outlet is near the machine and freely accessible so that in event of an emergency it can be unplugged easily Only connect the machine to the power source desc...

Страница 2: ...ter using a parallel cable Important The parallel cable is not provided with the printer It is your responsibility to provide the parallel cable appropriate for the computer that you are using The printer s parallel connection is a standard bi directional interface It requires a standard 36 pin parallel cable compliant with IEEE1284 and a parallel port on the computer To avoid electrical interfere...

Страница 3: ...Setup Guide Zdgh010j eps Read this manual carefully before you use this product and keep it handy for future reference For safety please follow the instructions in this manual ...

Страница 4: ...bsystem is replaceable in the field by a qualified Customer Engineer The laser chassis is not repairable in the field Customer engineers are therefore directed to return all chassis and laser sub systems to the factory or service depot when replacement of the optical subsystem is required Important Parts of this manual are subject to change without prior notice In no event will the company be liab...

Страница 5: ...ication purposes only and might be trademarks of their respective companies We disclaim any and all rights in those marks Notes Some illustrations might be slightly different from your machine Certain options might not be available in some countries For details please con tact your local dealer Notes The proper names of the Windows operating systems are as follows Microsoft Windows 95 operating sy...

Страница 6: ...t of an emergency it can be unplugged easily Disconnect the power plug by pulling the plug not the cable if the power cable or plug becomes frayed or damaged To avoid hazardous electric shock or laser radiation exposure do not remove any covers or screws other than those specified in this man ual Turn off the power and disconnect the power plug by pulling the plug not the cable if any of the follo...

Страница 7: ...f the equipment or expended supplies at a household waste collection point Disposal should take place at an authorized dealer or an appropriate collection site Our products are engineered to meet the highest standards of quality and functionality When purchasing expendable supplies we recommend using only those specified by an authorized dealer The inside of the machine becomes very hot Do not tou...

Страница 8: ...ontact your sales representative for recommended paper As an ENERGY STAR Partner we have determined that this machine model meets the ENERGY STAR Guidelines for energy efficiency The ENERGY STAR Guidelines intend to establish an international energy saving system for developing and introducing energy efficient office equipment to deal with environmental is sues such as global warming When a produc...

Страница 9: ...necessary information about using the printer and its options The manual is included as a PDF file on the CD ROM RICOH SCRIPT2 Operating Instructions Describes the menus and features you can set using the RICOH SCRIPT2 printer driver The manual is provided as a PDF file which is included on the CD ROM labeled Printer Drivers and Utilities Network Interface Board Operating Instructions Describes th...

Страница 10: ...is not followed paper might be misfed originals might be damaged or data might be lost Be sure to read this Preparation This symbol indicates the prior knowledge or preparations required before op erating Note This symbol indicates precautions for operation or actions to take after misop eration Limitation This symbol indicates numerical limits functions that cannot be used together or conditions ...

Страница 11: ...R FEED UNIT Type206 21 Installing the AD390 Duplex Unit 25 3 Configuring the Printer for the Network Configuring the Printer for the Network with the Operation Panel 29 4 Installing the Printer Driver and Software Installation Method 35 Installing by Auto Run 37 Installing the IPDL C Printer Driver 38 Windows 95 98 Me Installing the IPDL C Printer Driver 38 Windows 2000 Installing the IPDL C Print...

Страница 12: ...viii ...

Страница 13: ...ting Network connectivity This printer is network ready with the optional Network Interface Board Network utility PRINTER MANAGER software consisting of ADMINISTRATOR and CLI ENT versions is provided With this software multiple print devices can be utilized effectively together on a network This software offers several conve nient functions such as parallel printing and recovery printing PostScrip...

Страница 14: ...ssette Type204 Legal is installed Printing Speed 1 24 ppm 2 6 ppm 3 Maximum Print Quality 1200 600 dpi resolutions Emulation IPDL C RICOH SCRIPT2 Maximum Paper Size Paper Tray Custom size 4 length 356mm width 216mm Paper feed unit A4 210 297 mm Standard Memory Size 32 MB Maximum Memory Size with Op tional Memory 256 MB ...

Страница 15: ...drivers are included on the CD ROM that comes with this printer The IPDL C printer drivers allow the computer to communicate with the printer via a printer language P 38 Windows 95 98 Me Installing the IPDL C Printer Driver P 39 Windows 2000 Installing the IPDL C Printer Driver P 40 Windows NT 4 0 Installing the IPDL C Printer Driver RICOH SCRIPT2 printer drivers and PPD PostScript printer descrip...

Страница 16: ...l For more information about using PRINTER MANAGER FOR CLIENT see PRINTER MANAGER FOR CLIENT Help Multidirect Print A utility for printing on a Peer to Peer network Reference For more information about using Multidirect Print see the Operating In structions for the optional Network Interface Board included as a PDF file on the CD ROM PortNavi A utility that helps you to use network printers effect...

Страница 17: ... the output tray Raising this pa per stopper also keeps printed pages from falling from the output tray 3 Front Cover Open this cover when replacing toner cartridges or the waste toner bottle or when removing misfed paper 4 Power Switch This switch enables you to turn the print er power on and off while the main pow er switch on the rear is turned on 5 Paper Tray Load paper into this tray for prin...

Страница 18: ...or obstructed or blocked Doing so creates the dan ger of malfunction due to overheat ing 2 Rear Cover Open this cover when removing misfed paper 3 Power Connector Connect the power cord to this connec tor 4 Printer Board Remove to install optional memory unit or network interface board 5 Parallel Interface Connector Plug the parallel cable that connects the printer to the computer into this connec...

Страница 19: ...age being printed Note Be careful to prevent the green film in the photoconductor unit from becom ing dirty or damaged and do not touch the black belt in the unit The condition of these components direct ly affects output quality 4 Toner Cartridges A K black toner B Y yellow toner C M magenta toner D C cyan toner 5 Waste Toner Bottle This bottle is a receptacle for waste toner generated during the...

Страница 20: ...er indicator Stays on while the printer power is on Stays off when the power is turned off or while the printer is in the Energy Saver mode 4 On Line key Press this key to switch the printer be tween online and offline 5 Error indicator Lights up whenever any printer error oc curs A message describing the cause of the error also appears on the panel dis play Error Status Messages on the Operation ...

Страница 21: ... on if there is data to be printed Turning the Printer On and Off Turning on the printer Note This printer has two power switches the main power switch on the rear and the power switch on the front panel Normally keep the main power switch turned on and use the power switch on the front panel to turn the printer on and off Important If the printer will not to be used for a long period of time firs...

Страница 22: ...en the following message appears on the opera tion panel the printer will be able to begin printing IPDL C Ready Turning off the printer A Confirm that the Data In and Error indicators are off Note The Data In indicator stays on when printing and blinks while receiving data from the computer Do not turn off the printer while it is printing or receiving data When the Error indicator lights up a pri...

Страница 23: ...Guide to the Printer 11 1 B Press the printer s power switch so that it is unlocked from the depressed position The Power indicator turns off ZDGH080J ...

Страница 24: ...Getting Started 12 1 ...

Страница 25: ...re moving the machine unplug the power cord from the outlet If the cord is unplugged abruptly it could become damaged Damaged plugs or cords can cause an electrical or fire hazard When lifting the machine use the inset grips on both sides The machine could break or cause an injury if dropped It is recommended that at least two persons are used to lift the printer Oth erwise the printer might fall ...

Страница 26: ... not use options other than those specified in this manual 1 Memory Unit P 15 Installing the Memory Unit Memory Unit Type B 32MB Memory Unit Type B 64MB Memory Unit Type B 128MB 2 Network Interface Board Type306 P 17 Installing the Net work Interface Board Type306 3 PAPER FEED UNIT Type206 P 21 Installing the PAPER FEED UNIT Type206 4 AD390 duplex unit P 25 In stalling the AD390 Duplex Unit 5 Pape...

Страница 27: ... C Open the two levers on the slot A A A A insert the memory unit by aligning its notch a with the guide on the connector and push it downward so that the two le vers close to lock the memory unit B B B B Note There are two slots for the mem ory units When installing only one memory unit be sure to in sert it into the slot as shown in the above illustration To remove the memory unit open the two l...

Страница 28: ... G Print a configuration page to con firm that the memory unit is prop erly installed Reference Printing the Configuration Page in the Printer Reference included as a PDF file on the CD ROM Note If the memory unit is not prop erly installed follow the above procedure to reinstall it If you fail again contact your sales or service representative Important To make the printer recognize the installed...

Страница 29: ...s and cords from the printer B Remove both screws and remove the printer board from the printer as shown in the illustration Note A coin can be used to remove the screws C Remove both screws and the met al plate from the printer board D Insert the network interface board into the slot and fasten it with both screws that were re moved in step C as shown in the illustration Before installing options...

Страница 30: ...not properly installed follow the above procedure to reinstall it If you fail again contact your sales or service representative Connecting the Printer to the Network Follow these steps to connect the printer to the network A Confirm that you have the correct network cable B Confirm that the printer s power switch is turned off If it is on turn it off C Loop the network cable The loop should be ab...

Страница 31: ...int the network configura tion page Hold down this button for more than five seconds to print system log information 2 Indicator orange Stays on while the network interface board is working 3 Indicator green Stays on while 100BASE TX is working Stays off while 10BASE T is working 4 Indicator green Stays on while the printer is in a network environment 1 2 3 4 ZDGX010E ...

Страница 32: ... printer and place it on a flat surface Note Keep the paper tray with paper in a cool and dark place B Slide the Paper Cassette Type204 completely into the printer The paper tray does not have a stopper When pulling out be careful not to pull it strongly If you do the tray might fall and cause personal injury ZDGY010J ZDHP010E ...

Страница 33: ...t if nec essary You can raise up the right side of the paper feed unit and the print er by adjusting the level adjustors as illustrated This will keep the printer level even if the location for the printer is slightly inclined for example If adjusting the level adjustors is not necessary go to step D It is recommended that at least two persons are used to lift the printer Otherwise the machine mig...

Страница 34: ... feed unit re attach the con nector cover to the printer H Set the locking plate on the paper feed unit to the RELEASE posi tion Important Be sure to set the locking plate to the RELEASE position If you place the printer on the pa per feed unit with the locking plate set to the LOCK posi tion the printer or the paper feed unit may be damaged I Lift the printer using the inset grips on both sides o...

Страница 35: ...ELEASE posi tion in stepH to the LOCK posi tion again L Insert the securing bracket re moved in step D into the groove under the printer and secure the bracket using the screw removed in step D M Connect the paper feed unit cable to the lower socket inside the printer securely Make sure the protruding part of the cable con nector is facing downward ZDGP130J ZDGP510J ZDGP140J ZDGP150J ...

Страница 36: ... PDF file on the CD ROM Note If the paper feed unit is properly installed you can see Tray 2 under the Printer Information of the configuration page If the paper feed unit does not work follow the above proce dure to reinstall it If it still does not work contact your sales or service representative The tray which is selected when the printer is turned on can be changed to the paper feed unit usin...

Страница 37: ...rinter A Turn off the printer s power switch and remove all cables and cords from the printer B Take out the duplex unit cable as shown in the illustration C Remove the three covers from the printer as shown in the illustra tion D Remove the two covers from the paper feed unit as shown in the il lustration Before installing options the ma chine should be turned off and unplugged for at least thirt...

Страница 38: ...ach the duplex unit to the printer Insert the two guide pins on the duplex unit to the cutouts on the paper feed unit and insert the hooks on the duplex unit to the holes on the printer while slightly lifting up the duplex unit Then push in the duplex unit against the printer H Open the upper portion of the du plex unit Gently open the upper portion us ing the left and right inset grips ZDGP420J Z...

Страница 39: ...tion of the du plex unit L Connect the duplex unit cable to the upper socket inside the print er securely Make sure the pro truding part of the cable connector is facing downward M Attach the left side cover N Connect all cables removed in step A O Plug the printer s power cord back into the printer and the out let Turn on the printer s power switch ZDGP460J ZDGP470J ZDGP480J ZDGP490J ...

Страница 40: ...CD ROM Note If the duplex unit is properly in stalled you can see Dx x at the end of the Firmware Version section of the configuration page If the duplex unit does not work follow the above proce dure to reinstall it If it still does not work contact your sales or service representative Important To make the printer recognize the installed option properly you must set up the option with the printe...

Страница 41: ...ol is ac tive A blank cell means that this pro tocol is not active 1 TCP IP 2 NetWare 3 EtherTalk 4 NetBEUI Setting name Default value 32 IP Address 011 022 033 044 33 Subnet Mask 000 000 000 000 34 Gateway Add Gateway Ad dress 000 000 000 000 35 Access CTL Access Control Address 000 000 000 000 36 Access Mask Access Control Mask 000 000 000 000 37 Net Boot Network Boot None 38 Frame NW Frame type...

Страница 42: ...the printer contact your network administrator If you use TCP IP you should assign the IP address to the printer A Press U U U U or T T T T until the fol lowing message appears System Menu j 32 IP Address l B Press Enter The current IP address appears on the panel display 011 022 033 044 j jl C Press U U U U or T T T T to specify the leftmost digit of the IP address 111 022 033 044 j jl D Press En...

Страница 43: ...use RARP TFTP BOOTP or DHCP A Press T T T T or U U U U until the fol lowing message appears System Menu j 37 Net Boot l B Press Enter The current setting appears on the panel display Net Boot j None l C Press U U U U or T T T T until the method you want to use ap pears D Press Enter H If you use NetWare select the NetWare frame type Select one of the items below if necessary Auto Select Default Et...

Страница 44: ...ess Enter D Press Enter The configuration page is now printed Check the contents of the configuration page E Press On Line The Ready message appears on the panel display Address Subnet Mask A number used to mathematically mask or hide the IP addresses on the network by eliminating those parts of the address that are alike for all the machines on the net work Gateway Address A gateway is a connecti...

Страница 45: ...rface Board For example if you assign 192 168 15 16 as the Access Con trol Address to the Network In terface Board the combination of the Access Control Mask and IP address that can have access are as follows Limitation These settings control only printing requests Access Control Mask IP addresses that have access 0 0 0 0 xxx xxx xxx xxx 255 0 0 0 192 xxx xxx xxx 255 255 0 0 192 168 xxx xxx 255 25...

Страница 46: ...Configuring the Printer for the Network 34 3 ...

Страница 47: ... for This Printer For installing the printer drivers see P 38 Installing the IPDL C Printer Driver or P 42 Installing the RICOH SCRIPT2 Printer Driver For more information about the software and utilities see P 4 Software and Utilities Included on the CD ROM Important Before starting this installation close all documents and applications In a net work environment confirm that users who are logged ...

Страница 48: ...printer driver With the RICOH SCRIPT2 printer driver only Off or On can be selected The numerical value cannot be changed If On is selected 99999999 is automatically set as a default So if you want to distinguish between the RICOH SCRIPT2 and IPDL C printer drivers set the different User Code in the IPDL C printer driver In Windows 95 98 Me if you want to change the User Code reinstalling the prin...

Страница 49: ... log on using an account that has Administrators permission Note Auto Run might not automatically work with certain OS settings In this case launch INSTTOOL EXE located on the CD ROM root directory If you want to cancel Auto Run hold down the SHIFT key when your sys tem is Windows 2000 hold down the left SHIFT key while inserting the CD ROM Keep the SHIFT key held down until the computer has finis...

Страница 50: ...allable Options The Installable Options dialog box appears D From the Option Tray and Total Printer Memory boxes select any options you have installed Selecting the wrong tray here will make it impossible to use the tray correctly Selecting the wrong amount of memory here may cause printing problems Be sure to change this setting whenever you add more memory Note If the optional paper feed unit an...

Страница 51: ... Windows 95 98 Me alternate printer driver location select the following folder in the CD ROM DRIVERS IPDL C WIN9X_ME DISK1 Setting up options Limitation Changing the printer settings requires Manage Printers permission Members of the Administrators and Power Users groups have Manage Printers permis sion by default When you set up options log on using an account that has Manage Printers permission...

Страница 52: ...ded as a PDF file on the CD ROM E Click OK Windows NT 4 0 Installing the IPDL C Printer Driver Installing the printer driver Install the driver in accordance with the steps explained P 37 Installing by Auto Run If you want to share the printer on Windows NT 4 0 use the Sharing tab in the Printer Properties to specify the alternate printer driver For details refer to the instructions manual of the ...

Страница 53: ... tray correctly Selecting the wrong amount of memory here may cause printing problems Be sure to change this setting whenever you add more memory Note If the optional paper feed unit and the optional duplex unit are installed simply check the Duplex check box and the paper feed unit will automat ically be selected in the Option Tray box Automatic duplex printing be comes possible with the printer ...

Страница 54: ...r driver The following procedure describes installation when the printer is connected to the computer via a parallel interface A Close all applications that are currently running B Click Start on the taskbar point to Settings and then click Printers The Printers window appears C Double click the Add Printer icon Add Printer Wizard starts D Click Next E Click Local printer and then click Next A dia...

Страница 55: ...he next dialog box asking if you want to print a test page select No and then click Finish The installer copies the printer driver files from the CD ROM to the comput er s hard disk Note Print a test page after completing installation and restarting Windows O If you are asked to insert the Windows 95 98 system disk insert it in the computer and then click OK P If you are asked to provide the locat...

Страница 56: ... Device Options tab D From the Installable options box select the options you have installed The current settings are displayed in the Change settings for list box Note The following items are available here Option Tray VMOption E Use the Change settings for list box to select the appropriate setting for the selected option F Click Apply to apply the settings you made G After making all settings y...

Страница 57: ...llation when the printer is connected to the computer via a parallel interface A Close all applications that are currently running B Click Start on the taskbar point to Settings and then click Printers The Printers window appears C Double click the Add Printer icon Add Printer Wizard starts D Click Next E Click Local printer clear the Automatically detect and install my Plug and Play printer check...

Страница 58: ...box for changing the printer name appears M Change the name of the printer if you want and then click Next N Click Next O In the next dialog box asking if you want to print a test page select No and then click Next A confirmation dialog box appears Note Print a test page after completing installation and restarting Windows P Confirm the settings you have set and then click Finish The installer cop...

Страница 59: ...lication A Click Start on the taskbar point to Settings and then click Printers The Printers window appears B Click the icon of the printer you want to use On the File menu click Prop erties C Click the Device Settings tab D From the Installable Options list select the options you have installed Note The following items are available here Total Printer Memory Option Tray and Duplex Unit E Click Ap...

Страница 60: ...tion The CD ROM containing the Windows NT Server operating system version 4 0 or the Windows NT Workstation operating system is required for install ing the printer driver The following procedure describes installation when the printer is connected to the computer via a parallel interface A Close all applications that are currently running B Click Start on the taskbar point to Settings and then cl...

Страница 61: ...a test page select No and then click Finish The installer copies the printer driver files from the CD ROM to the comput er s hard disk Note Print a test page after completing installation and restarting Windows O If you are asked to insert the Windows NT 4 0 system disk insert it in the computer and then click OK P If you are asked to provide the drive of the system disk use the drive con taining ...

Страница 62: ...pplication A Click Start on the taskbar point to Settings and then click Printers The Printers window appears B Click the icon of the printer you want to use On the File menu click Prop erties C Click the Device Settings tab D From the Installable Options list select the options you have installed Note The following items are available here Total Printer Memory Option Tray and Duplex Unit E Click ...

Страница 63: ...nd PM6 Then double click the folder of the appropriate language You can see the PPD file E Copy the PPD file into the appropriate folder The location of the appropri ate folder may differ depending on the version of software or how you in stalled the software on your operating system The following are examples Adobe PageMaker version 6 0 PM6 RSRC PPD4 Adobe PageMaker version 6 5 PM65 RSRC Language...

Страница 64: ...separated into two categories LaserWriter 8 3x or earlier refers to the LaserWriter 8 3x driver and all driv ers before that LaserWriter 8 4x or later refers to LaserWriter 8 4x 8 6x and 8 7 LaserWriter 8 6x was used to make this manual The settings may differ depending on the version of the LaserWriter driver being used Installing the PPD files Limitation Be sure to install the PPD file correctly...

Страница 65: ...ever OHP Transparency is selected as the paper type Presentation Enhances the reproduction of documents that contain text and graphics This profile is best for printing charts colored graphs presentation materials and so on Photograph Use this profile to enhance the reproduction of photos and graphics that in clude midtones Solid Color Use this profile for printing specific colors logos and so on ...

Страница 66: ...lower left side of the Chooser dialog box D Click the name of the printer and then click Select Note Be sure to select the PPD file correctly If the correct PPD file is not selected certain options may not be available The PPD file is set up and the LaserWriter 8 icon appears at the left of the printer name in the list Next follow the procedure on P 54 Setting up op tions to make the option settin...

Страница 67: ...ow can be found in the CD ROM in the folder named Fonts Screen fonts are 10 12 14 18 and 24 point bitmap fonts Other sizes make char acters appear with ragged edges on the computer screen but they print with smooth edges Note The screen fonts included on the CD ROM are as follows AG Ricoh HN Ricoh CS Ricoh BM Ricoh ZC Ricoh ZD Ricoh A Start the Macintosh B Insert the CD ROM into the CD ROM drive T...

Страница 68: ...uping dots together Be cause of this screen fonts appear jagged on your computer screen when you en large or reduce them It is recommended that you install as many different sizes as possible for each font to avoid such jagged appearances Screen fonts are pro vided for this printer in 10 12 14 18 and 24 point sizes ...

Страница 69: ...osh PPD 52 Macintosh screen fonts 55 memory unit 15 network interface board 17 Paper Cassette Type204 legal 20 PAPER FEED UNIT Type206 21 Windows 2000 IPDL C 39 Windows 2000 RICOH SCRIPT2 45 Windows 95 98 Me IPDL C 38 Windows 95 98 Me RICOH SCRIPT2 42 Windows NT 4 0 IPDL C 40 Windows NT 4 0 RICOH SCRIPT2 48 IP Address 29 IPDL C printer driver 3 IPDL C printer driver Windows 2000 install 39 Windows...

Страница 70: ...or 8 power switch 5 PPD 3 Macintosh install 52 Macintosh set up 54 printer board 6 printer driver 3 Printer Reference v Q Quick Installation Guide v R rear cover 6 Reset key 9 RICOH SCRIPT2 Operating Instructions v RICOH SCRIPT2 printer driver 3 RICOH SCRIPT2 printer driver Windows 2000 install 45 Windows 95 98 Me install 42 Windows NT 4 0 install 48 S screen fonts 55 Setup Guide v simplex printer...

Страница 71: ...ed by the party responsible for compliance could void the user s authority to operate the equipment Caution in case of 100BaseTX environment Properly shielded and grounded cables STP and connectors must be used for connections to host computer and or peripheral in order to meet FCC emission limits Declaration of Conformity Product Name Printer Model Number AP206 SLP6c C7006 Responsible party Ricoh...

Страница 72: ...UE USA G063 8647 ...

Страница 73: ...perating Instructions Printer Reference Zdgh010j eps Read this manual carefully before you use this product and keep it handy for future reference For safety please follow the instructions in this manual ...

Страница 74: ...subsystem is replaceable in the field by a qualified Customer Engineer The laser chassis is not repairable in the field Customer engineers are therefore directed to return all chassis and laser sub systems to the factory or service depot when replacement of the optical subsystem is required Important Parts of this manual are subject to change without prior notice In no event will the company be li...

Страница 75: ...entification purposes only and might be trademarks of their respective companies We disclaim any and all rights in those marks Notes Some illustrations might be slightly different from your machine Certain options might not be available in some countries For details please con tact your local dealer Notes The proper names of the Windows operating systems are as follows Microsoft Windows 95 operati...

Страница 76: ...t of an emergency it can be unplugged easily Disconnect the power plug by pulling the plug not the cable if the power cable or plug becomes frayed or damaged To avoid hazardous electric shock or laser radiation exposure do not remove any covers or screws other than those specified in this man ual Turn off the power and disconnect the power plug by pulling the plug not the cable if any of the follo...

Страница 77: ...oner cartridge out of reach of children For environmental reasons do not dispose of the equipment or expended supplies at a household waste collection point Disposal should take place at an authorized dealer or an appropriate collection site Our products are engineered to meet the highest standards of quality and functionality When purchasing expendable supplies we recommend using only those speci...

Страница 78: ...ive for recommended paper As an ENERGY STAR Partner we have determined that this machine model meets the ENERGY STAR Guidelines for energy efficiency The ENERGY STAR Guidelines intend to establish an international energy saving system for developing and introducing energy efficient office equipment to deal with environmental is sues such as global warming When a product meets the ENERGY STAR Guide...

Страница 79: ...nformation about using the printer and its options The manual is included as a PDF file on the CD ROM this manual RICOH SCRIPT2 Operating Instructions Describes the menus and features you can set using the RICOH SCRIPT2 printer driver The manual is provided as a PDF file which is included on the CD ROM labeled Printer Drivers and Utilities Network Interface Board Operating Instructions Describes t...

Страница 80: ...is not followed paper might be misfed originals might be damaged or data might be lost Be sure to read this Preparation This symbol indicates the prior knowledge or preparations required before op erating Note This symbol indicates precautions for operation or actions to take after misop eration Limitation This symbol indicates numerical limits functions that cannot be used together or conditions ...

Страница 81: ...nceling a Print Job 16 2 Uninstalling the Printer Driver and Software Uninstalling the IPDL C Printer Driver 17 Windows 95 98 Me Uninstalling the IPDL C Printer Driver 17 Windows 2000 Uninstalling the IPDL C Printer Driver 17 Windows NT 4 0 Uninstalling the IPDL C Printer Driver 18 Uninstalling the RICOH SCRIPT2 Printer Driver 19 Windows 95 98 Me Uninstalling the RICOH SCRIPT2 Printer Driver 19 Wi...

Страница 82: ...ng the Image Density 63 Adjusting the Setting of Registration of the Paper Tray 64 Replacing Consumables 66 Replacing the Toner Cartridge 66 Replacing the Photoconductor Unit 68 Replacing the Fuser Oil Bottle and Ozone Filter 72 Replacing the Waste Toner Bottle 75 Replacing the Fuser Cleaner 76 5 Using the Operation Panel Setting Menus 79 Protecting the Menus 81 Protecting the Menus 81 Removing Pr...

Страница 83: ...ing the User Code Record 105 Deleting the User Code Record 106 Using the Job Log 108 Printing the Job Log 109 Reading the Job Log 110 6 Appendix Color Guide 111 Color Printing Basics 111 Memory Capacity and Paper Size 113 Low Memory 114 Moving and Transporting the Printer 115 Specifications 116 Mainframe 116 Options 118 Consumables 120 INDEX 122 ...

Страница 84: ...x ...

Страница 85: ...he Color Management tab are not supported A Click Start on the taskbar point to Settings and then click Printers The Printers window appears B Click the icon of the printer whose default settings you want to change C On the File menu click Properties The Printer Properties appear D Make desired settings and then click OK Making printer settings from an application To make the printer settings for ...

Страница 86: ...fault settings Printer Properties Limitation Changing the printer settings requires Manage Printers permission Members of the Administrators and Power Users groups have Manage Printers permis sion by default When you set up options log on using an account that has Manage Printers permission Note The following tabs are standard Windows tabs For more information about these tabs see the documentatio...

Страница 87: ... click OK Note Settings you make here are used as the default settings for all applications Making printer settings from an application To make the printer settings for a specific application open the Printing Prefer ences Properties from that application The following example describes how to make settings for the WordPad application that comes with Windows 2000 Note The actual procedures you sho...

Страница 88: ...kbar point to Settings and then click Printers The Printers window appears B Click the icon of the printer whose default setting you want to change C On the File menu click Properties The Printer Properties appear D Make desired settings and then click OK Note Settings you make here are used as the default settings for all applications Making printer default settings Default Document Properties Li...

Страница 89: ...tion that comes with Windows NT 4 0 Note The actual procedures you should follow to open the Document Properties may differ depending on the application For more information about the procedures see the documentation that comes with the application you are using Any settings you make in the following procedure are valid for the current application only A On the File menu click Print The Print dial...

Страница 90: ...gement and Sharing Note Profiles set on the Color Management tab are not supported A Click Start on the taskbar point to Settings and then click Printers The Printers window appears B Click the icon of the printer whose default settings you want to change On the File menu click Properties The Printer Properties appear C Make desired settings and then click OK Reference For more information about m...

Страница 91: ...ngs of the ap plications might be applied over the printer driver s setting Any settings you make in the following procedure are valid for the current application only A On the File menu click Print The Print window appears B From the Name box select the printer you want to use and then click Properties The Printer Properties appear C Make desired settings and then click OK Reference For more info...

Страница 92: ...with the Windows operating system General Sharing Ports Advanced Color Management and Security A Click Start on the taskbar point to Settings and then click Printers The Printers window appears B Click the icon of the printer whose default setting you want to change C On the File menu click Properties The Printer Properties appear D Make desired settings and then click OK Reference For more inform...

Страница 93: ...the Printing Prefer ences Properties from that application The following example describes how to make settings for the WordPad application that comes with Windows 2000 Note General users can change the settings in an application s Print window The actual procedures you should follow to open the Printing Preferences Properties may differ depending on the application For more information see the do...

Страница 94: ...se tabs see the documentation that comes with the Windows operating system General Ports Scheduling Sharing and Security A Click Start on the taskbar point to Settings and then click Printers The Printers window appears B Click the icon of the printer whose default settings you want to change On the File menu click Properties The Printer Properties appear Reference For more information about makin...

Страница 95: ...Note General users can change the settings in an application s Print window The actual procedures you should follow to open the Document Properties may differ depending on the application For more information about the procedures see the documentation that comes with the application you are using Any settings you make in the following procedure are valid for the current application only A On the F...

Страница 96: ... click OK Small Size Print Area This printer supports printing on print areas such as A4 Small and Letter Small when printing from a Macintosh only with specific versions of the driver The LaserWriter 8 4x or later driver supports printing on both standard and small print areas However with LaserWriter 8 3x or earlier the small print area options are not displayed With LaserWriter 8 3x or earlier ...

Страница 97: ...at the printer is selected in the Printer box D Make desired settings and then click Print Reference For more information about setting up for printing from an application see the Operating Instructions for RICOH SCRIPT2 included as a PDF file on the CD ROM ...

Страница 98: ... being canceled Important When the printer is being shared by multiple computers be careful not to accidentally cancel someone else s print job Note You cannot stop printing the data that has already been processed internal ly by the printer Because of this printing might continue for a few pages after you press Reset A print job that contains a large volume of data might take considerable time to...

Страница 99: ...a window that shows all the print jobs that are currently queued for printing Check the current status of the job you want to cancel B Click the name of the job you want to cancel C On the Document menu click Cancel Note You can also open the print job queue window by double clicking the printer icon in the Printers window D Press Reset on the operation panel A message appears on the panel display...

Страница 100: ...se icon and then click the trash icon D Press Reset on the operation panel A message appears on the panel display indicating that the print job is being canceled Important When the printer is being shared by multiple computers be careful not to accidentally cancel someone else s print job Note You cannot stop printing data that has already been processed internally by the printer Because of this p...

Страница 101: ...File menu click Delete A confirmation dialog box appears E Click Yes to uninstall the printer driver Windows 2000 Uninstalling the IPDL C Printer Driver Limitation Uninstalling a printer driver requires Manage Printers permission Members of the Administrators and Power Users groups have Manage Printers permis sion by default When you uninstall a printer driver log on using an account that has Mana...

Страница 102: ...and Power Us ers groups have Full Control permission by default When you uninstall a printer driver log on under Full Control permission A Close all the applications that are currently running B Click Start on the taskbar point to Settings and then click Printers The Printers window appears C Click the icon of the printer you want to remove D On the File menu click Delete A confirmation dialog box...

Страница 103: ... the File menu click Delete A confirmation dialog box appears E Click Yes to uninstall the printer driver Windows 2000 Uninstalling the RICOH SCRIPT2 Printer Driver Limitation Uninstalling a printer driver requires Manage Printers permission Members of the Administrators and Power Users groups have Manage Printers permis sion by default When you uninstall a printer driver log on using an account t...

Страница 104: ...ations that are currently running B Click Start on the taskbar point to Settings and then click Printers The Printers window appears C Click the icon of the printer you want to remove D On the File menu click Delete A confirmation dialog box appears E Click Yes to uninstall the printer driver Macintosh Uninstalling the RICOH SCRIPT2 Printer Driver A Drag the PPD file you want to uninstall inside t...

Страница 105: ...K only The supported paper sizes may differ depending on the memory capacity of the printer P 113 Memory Capacity and Paper Size Reference For more information about loading each type of paper see P 24 Types of pa per and other media Paper sizes and paper feed directions supported by each paper tray Metric version Feed direction Size mm Standard tray Tray 1 Paper Cassette Type204 Tray 1 PAPER FEED...

Страница 106: ...is not supported Paper sizes and paper feed directions supported by each paper tray Inch version 8 5 13 K 216 330 8 25 13 K 210 330 8 13 K 203 330 Custom Size Feed direction Size inch Standard tray Tray1 Paper Cassette Type204 Tray1 PAPER FEED UNIT Type206 Tray2 Letter K 8 1 2 11 Legal K 81 2 14 8 5 13 K 8 5 13 8 25 13 K 8 25 13 8 13 K 8 13 A4 K 10 12 14 33 Feed direction Size mm Standard tray Tra...

Страница 107: ...rm that the top of the stack is not higher than the limit mark indicated on the side guide of the tray B5 JIS K 7 17 10 12 A5 K 5 83 8 27 Com 10 Env K 4 1 8 9 1 2 DL Env K 4 33 8 66 Custom Size Supported paper weights Maximum number of sheets plain paper 1 Standard tray 64 163 g m2 18 43 lb 250 82 g m2 22 lb Paper Cassette Type204 optional 64 163 g m2 18 43 lb 250 82 g m2 22 lb PAPER FEED UNIT Typ...

Страница 108: ...en printed on Storing paper Paper should always be stored properly Improperly stored paper might result in poor print quality paper misfeeds or printer damage Recommendations are as follows Avoid storing paper in humid areas Avoid exposing paper to direct sunlight Store on a flat surface Keep open reams of paper in the package in which the paper came Types of paper and other media Plain paper The ...

Страница 109: ...rom the tray after you are finished printing Leaving them in the tray can cause them to curl When printing on adhesive labels you should select the plain paper mode with the printer driver The standard tray or the Paper Cassette Type204 can hold up to 30 sheets of adhesive labels Note The number of sheets that can be loaded may vary depending on the pa per thickness and paper type In auto duplex p...

Страница 110: ...the Operation Panel Recommended types of envelopes are as follows Com 10 Env DL Env Do not stack envelopes over the limit mark Confirm that print side is facing up Confirm that there is no air in the envelopes before loading To get better print quality it is recommended that you set the right left top and bottom print margins to at least 20 mm 0 8 each Do not print on both sides of envelopes Load ...

Страница 111: ... fusing unit of this printer due to different fusing temperatures Coated paper Special paper such as thermal paper aluminum foil carbon paper and con ductive paper Heavily textured paper Glued paper OHP transparencies for ink jet printers Label paper on which glue or base paper is exposed Paper with clips or staples Paper with tape or ribbons attached Paper meant for an ink jet printer Envelopes t...

Страница 112: ...te The above illustration shows the printable area for plain paper For other types of paper the margin width should be 8 6 mm 1 3 As for plain paper when duplex printing is made the top margin width will be 7 mm depending on the page The printable area may vary depending on paper size printer language and printer driver settings 4 3 mm 1 6 4 3 mm 1 6 4 3 mm 1 6 4 3 mm 1 6 ...

Страница 113: ...tandard tray or the Paper Cas sette Type204 option only Both are referred to as Tray 1 A Carefully pull the paper tray out of the printer and place it on a flat surface B Slide the paper guides to posi tions that match the size of paper you want to load C Load paper into the tray with the side to be printed facing up Important Confirm that the top of the stack is not higher than the limit mark T i...

Страница 114: ... size from the printer s operation panel after loading custom size paper into the standard paper tray Note You can set the custom size paper in the standard tray or the Paper Cassette Type204 option only After pressing a key wait until the display changes as described be fore performing the next key oper ation A Press Media The Media menu appears Media j 1 Paper Tray l B Press U U U U or T T T T t...

Страница 115: ...er to the left with Escape and to the right with Enter Press U U U U and T T T T to change the digit where the pointer is located J While the l l l l pointer is located at the first rightmost digit of the length press Enter The Media menu appears K Press On Line The normal display screen ap pears Note To change from the Custom size setting to automatic paper size detection press U U U U and T T T ...

Страница 116: ...id paper feed problems Load only plain paper in the pa per feed unit To print on thick paper adhesive labels OHP transparencies or envelopes use the standard tray To avoid paper multi feeds shuffle sheets before loading them in the tray D Slide the paper tray into the paper feed unit until it stops Important Be sure to insert the paper tray completely or paper misfeeds might occur If the paper siz...

Страница 117: ... using paper set in tray 1 In this case set A4 or Letter size paper in tray 2 optional paper feed unit and then proceed as follows to print a desired sheet using paper set in tray 2 A Press Media The Media menu appears Media j 1 Paper Tray l B After confirming that 1 Paper Tray is on the display press Enter The Paper Tray menu appears Metric version Paper Tray j Tray1 A4 l Inch version Paper Tray ...

Страница 118: ...Paper and Other Media 34 3 ...

Страница 119: ...uality in the printer driver and try again For details please refer to the troubleshooting section in your manual The following are the actions you should take when you encounter memory shortage prob lems If these actions do not solve the problem individually try them in combination with each other P 114 Low Memory A Increase printer memory Install the optional memory unit to in crease the amount ...

Страница 120: ...Filter Add Fuser Oil on the upper line The fuser oil bottle is empty Replace the fuser oil bottle P 72 Replacing the Fuser Oil Bottle and Ozone Filter Add Toner xxx The toner indicated by xxx runs out Replace the indicated toner cartridge P 66 Replacing the Toner Cartridge Change 120K It is time for scheduled mainte nance Contact your sales or ser vice representative Change Fuser It is time to rep...

Страница 121: ...end a job from the comput er to turn the power on Load paper size There is no paper of the indicat ed size in the paper tray being used Load the indicated paper size into the paper tray be ing used P 29 Loading Paper There is no paper of the correct size loaded in the paper tray Load the correct size paper Low on xxx The toner indicated by xxx is low Replace the indicated toner cartridge The color...

Страница 122: ...all the fuser cleaner P 76 Replacing the Fuser Cleaner Reset Fusing Unit Correctly The fusing unit is not installed in the printer Contact your sales or ser vice representative Reset PCU Correctly The photoconductor unit is not installed in the printer Install the photoconductor unit P 68 Replacing the Photoconductor Unit Reset Paper Tray Correctly The paper tray is not installed correctly Install...

Страница 123: ...being sent to the printer B0 Error An error has occurred in the optional memory unit Turn the printer off and on Then try to print again Turn off the printer Re move and reinstall the memory unit and turn on the printer Then try to print again Turn off the printer Re move the memory unit and turn on the printer Then try to print again Note In this case you might not be able print com plex print jo...

Страница 124: ...rn on the printer Then try to print again Note If you remove the Net work Interface Board you cannot print via the network You can send the print job to the print er only via a parallel ca ble connection 85 Error The printer has run out of frame memory There is not enough memory to render the graphic data Reduce the size of the input buffer or add optional memory 86 Error You may be trying to prin...

Страница 125: ...nter Install the fuser cleaner P 76 Replacing the Fuser Clean er Color Toner Not Set Correctly A toner cartridge is not in stalled in the printer Install the toner cartridge P 66 Replacing the Toner Car tridge Duplex Unit Cover Open The cover of the duplex unit is open Close the cover Energy Save Mode The printer is in Energy Saver mode Wait for a while Front Cover Open The front cover is open Clo...

Страница 126: ...aper Misfeed at Output Tray There is a paper misfed in the printer Remove the misfed paper P 57 When the Message Re move Misfeed From Output Tray Appears Paper Misfeed at Rear Cover There is a paper misfed in the printer Remove the misfed paper P 56 When the Message Open Rear Cover Remove Misfeed Appears Paper Misfeed at Tray There is a paper misfed in the printer Remove the misfed paper P 54 When...

Страница 127: ...per dis charger Toner is Empty A toner cartridge runs out Replace the toner cartridge P 66 Replacing the Toner Car tridge Top Cover Open The top cover remains open Close the top cover TransferRoller NotSetCor rectly The transfer roller is not in stalled correctly Contact your sales or service representative Tray2 Not Set Correctly The paper feed unit option is not installed correctly Install the p...

Страница 128: ...on Input Tray No Name PageSize Status List ID number of the paper tray Name of the paper tray 1 Paper size loaded in the paper tray 2 Current status of the paper tray 3 Output Tray No Name Status ID number of the output tray Name of the output tray Fixed to Standard Current status of the output tray Fixed to Normal Emulation No Name Version ID number of the emulation used by the printer Name of th...

Страница 129: ...tion Name Paper size Description A4R A4K A5R A5K B5R B5K LGR 81 2 14 K LTR 81 2 11 K FRE Custom size Status Description Normal NoTray There is no paper tray PaperEnd There is no paper in the paper tray Emulation name Description RWC IPDL C IPDL C RPS RicohScript2 RICOH SCRIPT2 ...

Страница 130: ...k Installa tion Guide Are you using a correct in terface cable The type of interface cable you should use depends on the com puter Be sure to use the correct one If the cable is damaged or worn replace it with a new one For more information about the settings see the Quick Installa tion Guide Did you connect the inter face cable after turning on the power switch Connect the interface cable before ...

Страница 131: ...t the configuration page to check the amount of available memory If the memory size is full increasing the memory may solve this problem If you still cannot clear the problem contact your sales or service representative The print job might be reset Do the following Confirm that you have selected the correct printer driver Try printing again Set a longer Wait Timeout Windows 95 98 Me Set a longer W...

Страница 132: ...g or lit The printer may be resetting the print job Take the following steps to correct the situation Increase the Job Timeout setting of the IPDL C Menu or RPS2 Menu Confirm that the printer driver settings are correct Change the Transfer setting in the System Menu Confirm that the Parallel setting in System Menu is correct Do you print via a net work Confirm that the Ethernet setting is correct ...

Страница 133: ...tart point to Settings and then click Printers B Click the icon of the printer Next on the File menu click Properties C Click the Ports tab D Confirm that the correct port is selected Windows NT 4 0 A Click Start point to Settings and then click Printers B Click the icon of the printer Next on the File menu click Properties C Click the Port tab D Confirm that the correct port is selected Macintosh...

Страница 134: ...et resolution to 300dpi Help of the printer driver RICOH SCRIPT2 Operating Instructions C Turn on Image Memory Use the printer s System Menu to turn on Image Mem ory P 90 System Menu Image is printed on the reverse side of paper Paper in the paper tray is upside down Load paper with the print side up Paper misfeeds occur frequently Make sure you are removing misfed paper correctly Pull the misfed ...

Страница 135: ...done Just wait until it resumes If Warming Up appears on the panel display the printer is now warming up Wait for a while It takes too much time to per form black and white printing Color is selected on the printer driver Change the color mode setting to Black White Note Some applications ignore the color mode setting made with the printer driver The desired tray is not used for the output The pri...

Страница 136: ...d in anyway The printout is different from the specified color Check if a specific color is missing If so replace the toner cartridge of the missing color Toner is not fused well when printing on thick paper or OHP transparencies The printer driver setting is not correct Select Thick Paper or OHP Transparency in the paper type setting with the print er driver The color of the printout is dif feren...

Страница 137: ... Dithering setting with the printer driver Solid areas lines or text are shiny or glossy when created as a mixture of cyan magenta yel low Select K in the Black Text Graphics setting with the printer driver Black gradation is not natural Select CMY K in the Black Text Graphics setting with the printer driver Thin lines are blurred or light With the IPDL C printer driver select the CAD check box on...

Страница 138: ... up Confirm that misfed paper is still not inside the printer when you resume printing If a paper misfeed still occurs con tact your sales or service represen tative Do not touch the photoconductor unit when removing misfed paper If you do the photoconductor unit might be damaged When the Message Remove Misfeed From Paper Tray Appears A Pull out the paper tray Note If your printer has an optional ...

Страница 139: ... If the printer is equipped with the paper feed unit op tional and the duplex unit optional first open the cov er of the duplex unit a then open the paper guide unit in side the duplex unit b and finally open the rear cover of the printer c B Check for misfed paper If you find paper carefully pull it Make sure not to leave any pa per inside the printer C Close the rear cover Note If the printer is...

Страница 140: ...ional and the duplex unit optional first open the cover of the du plex unit a then open the pa per guide unit inside the duplex unit b and finally open the rear cover of the printer c B If the paper has not entered the fusing unit carefully pull it out C If the paper is inside the fusing unit open the top cover Note If the printer is equipped with the paper feed unit optional and the duplex unit o...

Страница 141: ...e duplex unit optional close the paper guide unit cov er and upper portion of the du plex unit When the Message Remove Misfeed From Output Tray Appears Important Toner printed on misfed paper is not fused and can make your hands or clothing dirty Take care to avoid contact with the toner as you remove misfed paper A Open the rear cover of the printer Note If the printer is equipped with the paper ...

Страница 142: ...lex unit and then open the top cover of the printer C Carefully pull the misfed paper from the rear cover side D Return the pressure release levers to their original positions E Close the top cover and rear cover and press the center of the top cover until it locks securely into place Note If the printer is equipped with the paper feed unit optional and the duplex unit optional close the paper gui...

Страница 143: ...sfed paper as shown in the illustration careful ly pull it out C If you find the misfed paper as shown in the illustration careful ly pull it out D Open the cover as shown in the il lustration and if you find the misfed paper carefully pull it out E Close the upper portion of the du plex unit F Open the cover of the duplex unit ZDGP450J ZDGY160J ZDGY170J ZDGY180J ZDGY190J ...

Страница 144: ...stration careful ly pull it out H Open the paper guide unit inside the duplex unit I Lift up the cover of the paper guide unit by using the lever and carefully pull the misfed paper out J Close the paper guide unit and the cover of the duplex unit ZDGY220J ZDGY200J ZDGY210J ...

Страница 145: ... the top cover of the printer C Raise the green lock levers to a vertical position D Hold the inset grip of the photo conductor unit pull it straight up and remove it from the printer Important Exposing the photoconductor unit to light for too long can re duce its performance Clean the charge wire as quickly as possi ble When accessing the inside of the machine do not touch any sections other than...

Страница 146: ...rface of it G Return the green lock levers to their original positions Important Do not return the lock levers forcibly If you cannot lock them easily pull the photoconductor unit from the printer Then rein sert it until the gears mesh se curely After that try returning the levers to their original posi tions H Close the top cover and front cov er Press the center of the top cov er and center cove...

Страница 147: ... display Menu j IPDL C Menu l C Press T T T T or U U U U to display Maintenance and then press Enter Menu j Maintenance l The following message appears on the panel display Maintenance j 1 Toner Level l D After confirming that 1 Toner Level is on the display press Enter The following message appears on the panel display Toner Level j Cyan l E Press T T T T or U U U U to display Ma genta and then p...

Страница 148: ...ed press Enter E Press Enter again This prints the configuration page Important If printing does not start check the panel display for any error messages and take the action re quired to correct the problem P 36 Error Status Messages on the Operation Panel F After confirming that 1 Con fig Page is displayed press Es cape The following the message ap pears on the panel display Menu j List Print l G...

Страница 149: ...ppears on the panel display Tray2 Horiz jl 0 K Press U U U U or T T T T to match the margins and then press Enter When the value is increased by one the image moves 0 5mm to the right Note The setting can be changed from 7 to 7 L Press Enter Config Page Press key This prints the configuration page with the new setting and returns to the Registration menu M Confirm of the registration If you want t...

Страница 150: ...50 F to 90 5 F Humidity 20 to 80 RH no condensation When handling toner cartridges never stand them up on either end or position them upside down A Open the front cover by pulling the front cover open lever Do not incinerate spilled toner or used toner Toner dust might ignite when exposed to an open flame Disposal can take place at our authorized dealer or at appro priate collection sites If you d...

Страница 151: ...t well about 3 to 4 times as shown in the illustration D Remove the tape from the new toner cartridge and remove the protective cover Important Once the protective cover is re moved toner can spill from the cartridge easily Take care to avoid subjecting the toner car tridge to vibration and impact after removing the protective cover E Slowly and carefully slide the new toner cartridge into the pri...

Страница 152: ...performance Replace the unit as quickly as possible Do not touch the surface of the photoconductor unit If you do it may damage the photoconductor unit and reduce the print quality Do not expose the photoconductor unit to a light source greater than 800 luxes for more than two min utes If you do the photoconductor unit will be damaged and the print quality might be reduced ZDGH012J Do not incinera...

Страница 153: ...urn off the power B Open the front cover by pulling the front cover open lever and open the top cover by pulling the top cover open lever Important Be sure to open both the top and front covers before removing the photoconductor unit Fail ure to do so can result in dam age to the surface of the photoconductor unit Note If the printer is equipped with the paper feed unit optional and the duplex uni...

Страница 154: ... unit so that the green axles on both sides are aligned with the tracks inside the green lock le vers Lower it until the gears mesh securely Important When inserting the photocon ductor unit be careful not to damage the surface of it I Return the green lock levers to their original positions Important Do not return lock levers with force If you cannot lock them easily pull the photoconductor unit ...

Страница 155: ...pears on the panel display Menu j IPDL C Menu l M Press T T T T or U U U U to display Maintenance and then press Enter The Maintenance menu appears Maintenance j 1 Toner Level l N Press T T T T or U U U U to display 2 Reinstall and then press En ter Reinstall j Fuser Cleaner l O Press T T T T or U U U U to display PCU and then press Enter PCU Press key P Press Enter This performs the reinstall ope...

Страница 156: ...n the top cover Note If the printer is equipped with the paper feed unit optional and the duplex unit optional first open the upper portion of the duplex unit and then open the top cover of the printer B Rotate the lock levers to release the bottle and then remove the oil bottle from the printer Do not incinerate the oil bottle This action could cause a fire or getting burned Spilt oil is very sli...

Страница 157: ...lace D Close the top cover Press the cen ter of the top cover until it locks into place Note If the printer is equipped with the paper feed unit optional and the duplex unit optional close the upper portion of the duplex unit E Remove the ventilator cover F Remove the ozone filter from in side the ventilator cover G Install a new ozone filter on the ventilator cover H Replace the ventilator cover ...

Страница 158: ...ever to wards the front of the printer and open the top cover B Rotate the lock levers to release the bottle C Remove the oil bottle while plac ing a sheet of paper under the bot tle so that no oil falls into the printer D Put the oil bottle into an oil proof container such as a plastic bag E Remove any excess oil from the printer using the eye dropper Dispose of the oil according to lo cal regula...

Страница 159: ... spread pa per or some other material around the area you are working to keep the toner from making the floor dirty A Turn off the printer s power switch B Open the front cover by pulling the front cover open lever Do not incinerate spilled toner or used toner Toner dust might ignite when exposed to an open flame Disposal can take place at our authorized dealer or at appro priate collection sites ...

Страница 160: ...er s power switch Replacing the Fuser Cleaner Replace the fuser cleaner whenever the following message appears on the panel display IPDL C Chg Cleaner Change Fuser Cleaner R CAUTION A Slide the top cover open lever to wards the front of the printer and open the top cover Note If the printer is equipped with the paper feed unit optional and the duplex unit optional first open the upper portion of t...

Страница 161: ...ntil it locks into place Note If the printer is equipped with the paper feed unit optional and the duplex unit optional close the upper portion of the duplex unit G Press Menu The following message appears on the panel display Menu j IPDL C Menu l H Press T T T T or U U U U to display Maintenance and then press Enter The Maintenance menu appears Maintenance j 1 Toner Level l I Press T T T T or U U...

Страница 162: ...ser Cleaner is on the display press Enter The fuser cleaner reinstall screen appears Fuser Cleaner Press key K Press Enter This performs the reinstall opera tion and returns to the Mainte nance menu L Press On Line The normal display screen ap pears ...

Страница 163: ...enus Describes the basic procedures for changing the printer menu settings Protecting the Menus Describes how to protect the System Menu settings against accidental changes Menu Table A table chart that shows all of the printer menu items Menu Settings Provides short explanations of each printer menu setting and what it does Setting Menus The following procedure describes how to change the I O buf...

Страница 164: ...f the currently selected item I O Buffer j 128KB l D Press T T T T or U U U U to display the screen for the setting you want to change and then press Enter I O Buffer j 1024KB l This registers the setting E Repeat steps C C C C and D D D D to change other settings F Press On Line The following message appears on the panel display Take Offline Then Press Reset G Press On Line The On Line indicator ...

Страница 165: ...ettings restricts changes to the System Menu settings to network administrators Protecting the Menus A Check if the On Line indicator stays on If not press On Line B Press Enter then Escape and then Menu The following message appears on the panel display Menu j IPDL C Menu l C Press T T T T or U U U U to display Maintenance and then press Enter Menu j Maintenance l The following message appears on...

Страница 166: ... display On and then press Enter Menu Protect j On l This registers the setting and the Maintenance menu appears F Press On Line The Ready message appears on the panel display Removing Protection A Check if the On Line indicator stays on If not press On Line B Press Enter then Escape and then Menu The following message appears on the panel display Menu j IPDL C Menu l Power On Line Data In Reset E...

Страница 167: ... Level l D Press T T T T or U U U U to display 5 Menu Protect and then press Enter Maintenance j 5 Menu Protectl The following message appears on the panel display Menu Protect j On l E Press T T T T or U U U U to display Off and then press Enter Menu Protect j Off l This turns off protection and returns to the Maintenance menu F Press On Line The Ready message appears on the panel display ...

Страница 168: ...ray SW 9 Duplex Print A Duplex Bind C Job Timeout D I O Timeout E Feed Timeout F Print Errors G KTalk Mode 1 H Parallel IF System Menu 1 Paper Tray 2 I O Buffer 3 Energy Level 4 Energy Saver 5 Transfer 6 Image Memory 7 Parallel 8 Bi direction 9 PrinterLang 10 Language 32 IP Address 4 33 Subnet Mask 4 34 Gateway Add 4 35 Access CTL 4 36 Access Mask 4 37 Net Boot 4 38 Frame NW 4 39 Active PTL 4 ...

Страница 169: ...nsity 2 Reinstall P 68 Replacing the Photoconductor Unit 3 Menu Reset P 100 Resetting Menus 4 Registration P 64 Adjusting the Setting of Registration of the Pa per Tray 5 Menu Protect 2 P 81 Protecting the Menus 6 Log Protect 2 P 105 Protecting the User Code Record 7 Log Clear 3 P 106 Deleting the User Code Record 8 Ethernet 2 4 P 93 Maintenance Menu 9 Prt Priority P 93 Maintenance Menu List Print...

Страница 170: ...nating a job Setting 000 Off turns off I O timeout 000 Off 1 to 999 seconds by 1 999 seconds RPS2 Menu The following are the settings you can make with RPS2 Menu The settings made with the printer driver normally take priority except when a printer driv er setting is set to use the printer s settings Note Italicized settings indicate default settings 1 Resolution You can select the resolution and ...

Страница 171: ...lorProfile is used Super Fine Like the Fine setting the color rendering dictionary is used however output is more vivid This setting is enabled to make light colors print more vivid 4 ColorProfile You can select the color rendering dictionary CRD The CRD is referred to for color matching so you should select the appropriate CRD for the docu ment you are printing The CRD you select is also referred...

Страница 172: ...ographs Text Select this setting to print text 7 Paper Type You can select the paper type for printing as Plain Paper Thick Paper or OHP Transparency Plain Paper OHP Thick Paper Note Selecting an OHP Transparency as the paper type automatically adjusts in ternal settings to use a color profile specifically for OHP Even though the color profile has been optimized for OHP the adjustments are automat...

Страница 173: ...ting a job The job is automatically can celled if no data is received for the selected time 000 Off 1 to 999 seconds by 1 300 seconds E Feed Timeout You can set how many seconds the printer waits for the correct paper size loaded when paper runs out while printing The job is printed with the paper currently loaded if the correct size is not loaded within the selected time 000 Off 1 to 999 seconds ...

Страница 174: ...the printer Tray 1 Tray 2 option Note If Auto Tray Select is selected on the printer driver printing starts with the tray specified here If the specified type of paper is not set in the tray then the paper will be fed from the other tray 2 I O Buffer You can select the size of the I O buffer Normally it is not necessary to change this setting 16KB 32KB 64KB 128KB 256KB 512KB 1024KB 2048KB 3 Energy...

Страница 175: ...this setting to Normal Hi speed Normal 6 Image Memory This setting controls what the printer does when the printer memory is insuf ficient to print a certain page On Off Note Off causes the message shown below to be printed when there is insuf ficient memory to process Selecting On reduces the resolution of the image to reduce memory re quirements 7 Parallel You can select the parallel interface t...

Страница 176: ...fac turer s print box Original Mode Standard 9 PrinterLang You can select the printer language that is automatically set when the printer is turned on IPDL C RPS 10 Language You can select the language of the text that appears on the panel display English French German Italian Dutch Spanish Japanese 32 IP Address 39 Active PTL These items appear when the optional Network Interface Board is install...

Страница 177: ...e printing and paper feeding at the same time Use the Quality setting so that the printer does not perform paper feeding during printing Thus the print qual ity is more stabilized while printing speed becomes slower than when select ing the Speed setting Speed Quality Changing the Printer Language This section describes how to change the printer language on the operation pan el Changing IPDL C or ...

Страница 178: ...press Enter Menu j Select PDL l C Press T T T T or U U U U to display the printer language you want to use and then press Enter Select PDL j Option 1 RPS2 l D Press On Line The Ready message appears on the panel display Confirm that the selected printer language appears on the panel display ...

Страница 179: ...U U U to display List Print and then press Enter Menu j List Print l The following message appears on the panel display List Print j 1 Config Page l C Confirm that 1 Config Page is on the display and then press Enter The following message appears on the panel display Config Page Press key D Press Enter This starts printing the configuration page E Press On Line The Ready message appears on the pan...

Страница 180: ...This is the paper size specified for the standard paper tray Tray 1 and the PAPER FEED UNIT Type206 option Note If FRE is indicated for Tray 1 it means Custom Size is set for Tray 1 Total Pages This is the total number of pages printed by the printer to date Printer Error This shows information about the status of consumable items etc Status List IPDL C This shows current IPDL C settings P 86 IPDL...

Страница 181: ...he RPS2 mode Memory Status Shows the amount of printer memory VM area and so on Reference For more information about printer memory and VM area see the Oper ating Instructions for RICOH SCRIPT2 included as a PDF file on the CD ROM Font Status This is not used for this printer Installed Fonts Shows the fonts installed on the printer Interface Status Shows that the Network Interface Board is install...

Страница 182: ...splay Menu j IPDL C Menu l B Press T T T T or U U U U to display List Print and then press Enter Menu j List Print l The following message appears on the panel display List Print j 1 Config Page l C Press T T T T or U U U U to display 2 Color Sample and then press Enter List Print j 2 Color Samplel The following message appears on the panel display Color Sample Press key Power On Line Data In Rese...

Страница 183: ...Printing the Color Sample 99 5 D Press Enter This starts printing the color sample E Press On Line The Ready message appears on the panel display ...

Страница 184: ...Registration P 64 Image Density P 63 A Turn on the printer s power switch B Press Menu The following message appears on the panel display Menu j IPDL C Menu l C Press T T T T or U U U U to display Maintenance and then press Enter Menu j Maintenance l The following message appears on the panel display Maintenance j 1 Toner Level l Power On Line Data In Reset Escape Menu Media Enter Error ZDHS031E ...

Страница 185: ...ss key E Press Enter The following message appears on the panel display Take Offline Then Press Reset The Maintenance menu returns F Press On Line The Ready message appears on the panel display G Press On Line The On Line indicator stays off and the printer enters offline H Press Reset This resets all menus to their initial factory defaults The Ready message ap pears on the panel display ...

Страница 186: ...can only change User Codes after reinstalling the printer driver With Windows 95 98 Me if the printer name is changed after installing the printer driver User Codes will be cancelled Note With Windows 95 98 Me set User Codes during the IPDL C printer driver installation With Windows 2000 set User Codes on the Statistics Code tab of the Printer Properties after installing the IPDL C printer driver ...

Страница 187: ...appears on the panel display Menu j IPDL C Menu l B Press T T T T or U U U U to display List Print and then press Enter Menu j List Print l The following message appears on the panel display List Print j 1 Config Page l C Press T T T T or U U U U to display 4 Statistics and then press Enter List Print j 4 Statistics l The following message appears on the panel display Statistics Press key Power On...

Страница 188: ...appears With RICOH SCRIPT2 User Code is fixed to 99999999 2 Total Indicates the total number of pages print ed in Black Two color and Full Col or for each User Code All indicates the combined total of printed pages 3 Black Indicates the number of pages printed in black and white 4 Two color Indicates the number of pages printed with two colors or less excluding black and white 5 Full Color Indicat...

Страница 189: ...wing message appears on the panel display Menu j IPDL C Menu l C Press T T T T or U U U U to display Maintenance and then press Enter Menu j Maintenance l The following message appears on the panel display Maintenance j 1 Toner Level l D Press T T T T or U U U U to display 6 Log Protect and then press Enter Maintenance j 6 Log Protect l The following message appears on the panel display Log Protec...

Страница 190: ...Protect is set to On you can not delete the User Code record Select Off in Log Protect and then follow the procedure below P 105 Protect ing the User Code Record A Check if the On Line indicator stays on If not press On Line B Press Menu The following message appears on the panel display Menu j IPDL C Menu l C Press T T T T or U U U U to display Maintenance and then press Enter Menu j Maintenance ...

Страница 191: ... U U U U to display 5 Log Clear and then press Enter Maintenance j 5 Log Clear l The following message appears on the panel display Log Clear Press key E Press Enter This clears the User Code record F Press On Line The Ready message appears on the panel display ...

Страница 192: ...e Set up a User ID with the printer driver when you print You can change the User ID every time you print You can also browse the job log on the computer using PRINTER MANAGER FOR ADMINISTRATOR CLIENT Turning off the power or resetting the printer deletes the job log Limitation Up to 64 User IDs are available at the same time If the number of IDs exceeds 64 the oldest is deleted Reference For the ...

Страница 193: ...U U to display List Print and then press Enter Menu j List Print l The following message appears on the panel display List Print j 1 Config Page l C Press T T T T or U U U U to display 3 Job Log and then press Enter List Print j 3 Job Log l The following message appears on the panel display Job Log Press key D Press Enter This prints the job log Power On Line Data In Reset Escape Menu Media Enter ...

Страница 194: ...nter language either IPDL C or RICOH SCRIPT2 RPS2 3 Request Time Indicates the time when the job was re quested by the printer driver Note This is not available with RICOH SCRIPT2 4 Black Indicates the number of pages printed in black and white 5 Two color Indicates the number of pages printed with two colors or less excluding black and white 6 Full Color Indicates the number of pages printed with...

Страница 195: ... RGB is also called additive or emitted color The colors on your computer screen are produced by varying the intensities of RGB Printed color is a mixture of cyan magenta and yellow which is normally called the CMY color model When mixed in equal proportions the CMY color model produces black Note CMY is also called subtractive or reflective color The printer uses CMY toner plus K black toner CMYK...

Страница 196: ...xample Complementary colors are red and cyan green and magenta blue and yellow Printed Color The printer produces full color output using four toner colors cyan magenta yellow and black These four colors make up the CMYK color model Note Mixing CMY in equal proportions should hypothetically produce pure black but imperfections in the ink cause an equal measure of these colors to produce a muddy or...

Страница 197: ...data might not be printed in simplex printing and also in duplex printing if duplex printing is allowed Printing is possible in simplex printing and also in duplex printing if duplex printing is allowed Limitation Duplex printing is not allowed with A5 Com 10 Env DL Env 8 5 13 8 25 13 8 13 and Custom Size paper Resolution 300 300 dpi 600 600 dpi 1200 600 dpi Memory capacity MB Paper size 3 2 6 4 9...

Страница 198: ...to install the optional memory unit see the Setup Guide that comes with the printer For more information about kinds of optional memory units see P 118 Options B Reduce the resolution With the IPDL C printer driver On the Print Quality tab select Custom and click Setting Change Then set the resolution to 300dpi With the RICOH SCRIPT2 printer driver Set the resolution to 300dpi C Turn on Image Memo...

Страница 199: ...he machine use the grips on both sides The machine could break or cause an injury if dropped Before moving the machine unplug the power cord from the outlet If the cord is unplugged abruptly it could become damaged Damaged plugs or cords can cause an electrical or fire hazard When you pull out the plug from the socket grip the plug to avoid damaging the cord and causing a fire or an electric shock...

Страница 200: ...a parallel port on the host computer IEEE 1284 B I F Compatible Nibble ECP Do not use a cable more than 2 5 meters 8 2 feet long Printer language IPDL C RICOH SCRIPT2 Paper size P 21 Paper and Other Media Supported by This Printer Paper weight P 21 Paper and Other Media Supported by This Printer Power source Inside of the front cover of this manual Power consumption Standby Maximum 1 350 W or less...

Страница 201: ...capacity 250 sheets 80 g m2 20 lb During printing 62 dB A Stand by 57 dB A During printing 49 dB A Stand by 44 dB A Width Depth Height Printer only 500 mm 19 7 520 mm 20 5 410 mm 16 1 With optional Paper Feed Unit 500 mm 19 7 520 mm 20 5 555 mm 21 9 With optional paper feed unit and option al Paper Cassette 500 mm 19 7 592 mm 23 3 555 mm 21 9 With Optional paper feed unit and option al duplex unit...

Страница 202: ...06 Paper Cassette Type204 Legal AD390 duplex unit Network Interface Board Type306 Memory Unit Type B 32MB Memory Unit Type B 64MB Memory Unit Type B 128MB Options PAPER FEED UNIT Type206 Paper size P 21 Paper and Other Media Supported by This Printer Paper weight P 21 Paper and Other Media Supported by This Printer Paper Cassette Type204 Legal Paper size P 21 Paper and Other Media Supported by Thi...

Страница 203: ...otocols TCP IP IPX SPX NetBEUI AppleTalk Interface connector RJ45 Required cable STP Shielded Twisted Pair cable Category Type5 or better A cable is not enclosed with this option Memory Unit Type B 32MB 64MB 128MB Memory type SD Synchronous Dynamic RAM Number of pins 144 pins Access time PC100 ...

Страница 204: ...he normal life de scribed above Toner cartridges that come with the printer are for setup purposes and will not provide the number of pages described above The average num ber of printable pages that can be expected from the toner cartridges in cluded in the printer are as follows Black toner cartridge about 5 000 pages Cyan magenta and yellow toner cartridges about 3 000 pages for each Our produc...

Страница 205: ...ables also shortens as the consumables be come older All this means that consumables might require replacement sooner than the life indicated 1 For the name of consumables see the inside of front cover of this manual 2 A4 5 test chart 5 pages job for monochrome printing Consumables 1 Service life 2 Waste toner bottle 17 000 pages Photoconductor unit 60 000 pages Fuser oil 12 000 pages Fuser cleane...

Страница 206: ...ttle 72 I image density 63 Image Memory 91 Installed Fonts 97 Interface Status 97 I O Buffer 90 I O Timeout 86 89 IPDL C 96 IPDL C Menu 86 IPDL C printer driver Windows 2000 uninstall 17 Windows 95 98 Me uninstall 17 Windows NT 4 0 uninstall 18 J job log 108 Job Timeout 86 89 K KTalk Mode 89 L Language 92 M Macintosh cancel a print job 16 RICOH SCRIPT2 set up 12 RICOH SCRIPT2 uninstall 20 Maintena...

Страница 207: ...0 Windows 2000 uninstall 19 Windows 95 98 Me uninstall 19 Windows NT 4 0 uninstall 20 RPS2 Menu 86 RPS2 Status 97 S Select PDL 93 Setup Guide v small size print area 12 statistics report 104 Status List 96 status messages 35 System 96 System Menu 90 T thick paper 25 toner cartridge 66 TonerSaving 88 Total Installed RAM 96 total pages 96 Transfer 91 Tray 1 96 Tray 2 96 Tray Status 97 U uninstall Ma...

Страница 208: ...124 Windows NT 4 0 cancel a print job 15 IPDL C properties 4 IPDL C uninstall 18 RICOH SCRIPT2 properties 10 RICOH SCRIPT2 uninstall 20 ...

Страница 209: ...125 MEMO ...

Страница 210: ...126 UE USA G063 MEMO ...

Страница 211: ...ed by the party responsible for compliance could void the user s authority to operate the equipment Caution in case of 100BaseTX environment Properly shielded and grounded cables STP and connectors must be used for connections to host computer and or peripheral in order to meet FCC emission limits Declaration of Conformity Product Name Printer Model Number AP206 SLP6c C7006 Responsible party Ricoh...

Страница 212: ...UE USA G063 8667 ...

Страница 213: ... Interface Board Operating Instructions c1 Network 300 tif Read this manual carefully before you use this product and keep it handy for future reference For safety please follow the instructions in this manual ...

Страница 214: ...ion Microsoft Windows Windows NT are registered trademarks of Microsoft Corporation in the United States and or other countries Netscape Netscape Navigator are registered trademarks of Netscape Communications Corporation Novell NetWare NDS are registered trademarks of Novell Inc PostScript is a registered trademark of Adobe Systems Incorporated PCL is a registered trademark of Hewlett Packard Comp...

Страница 215: ...inter Reference Describes the procedures and provides necessary information about using the printer and its options The manual is included as a PDF file on the CD ROM labeled Printer Drivers and Utilities RICOH SCRIPT2 Operating Instructions Describes the menus and features you can set using the RICOH SCRIPT2 printer driver The manual is included as a PDF file on the CD ROM labeled Printer Drivers...

Страница 216: ...is not followed paper might be misfed originals might be damaged or data might be lost Be sure to read this Preparation This symbol indicates the prior knowledge or preparations required before op erating Note This symbol indicates precautions for operation or actions to take after misop eration Limitation This symbol indicates numerical limits functions that cannot be used together or conditions ...

Страница 217: ...re information about configuring the Network Interface Board with the operation panel see the Setup Guide that comes with this printer Features Support for 100BASE TX and 10BASE T The Network Interface Board is compatible with NetWare IPX SPX Windows NT TCP IP NetBEUI IPP 1 Windows 2000 TCP IP Net BEUI IPP 1 Windows 95 98 Me TCP IP NetBEUI IPP 1 UNIX TCP IP and Macintosh AppleTalk protocols This a...

Страница 218: ...oard can connect the printer to the network with out requiring its own power supply because the Network Interface Board is installed inside the printer 1 IPP Internet Printing Protocol is a protocol for printing via the Internet ...

Страница 219: ...e en vironment see P 1 Windows 95 98 Me Configuration There are two methods for using the printer as a network printer Windows 2000 or Windows NT Server or Workstation Print Server Windows 95 98 Me TCP IP NetBEUI IPP Windows 95 98 Me Printing Without Using a Print Server Printing With a Windows 2000 or Windows NT Print Server ...

Страница 220: ...31 Windows NT 4 0 Configuration There are two methods for using the printer as a network printer Windows 2000 TCP IP NetBEUI IPP Windows 2000 Windows 2000 or Windows NT Server or Workstation Print Server Printing Without Using a Print Server Printing With a Windows 2000 or Windows NT Print Server Windows NT 4 0 Windows NT 4 0 TCP IP NetBEUI IPP LPR Windows 2000 or Windows NT Server or Workstation ...

Страница 221: ... 98 Me P 68 Windows 95 98 Me Windows 2000 P 69 Windows 2000 Windows NT 4 0 P 70 Windows NT 4 0 Configuring the printer as a print server A dedicated NetWare print server is not required because the printer can be con figured as a print server The actual procedures for configuring the printer differ depending on the ver sion of NetWare NetWare 3 x P 54 Setting Up as a Print Server NetWare 4 x 5 P 6...

Страница 222: ...he printer differ depending on the ver sion of NetWare NetWare 3 x P 57 Setting Up as a Remote Printer NetWare 4 x 5 P 65 Setting Up as a Remote Printer Macintosh For how to set up the printer as a network printer in a Macintosh environment see P 71 Macintosh Configuration NetWare Print Server NetWare File Server Remote Printer Windows 95 98 Me Windows 2000 Windows NT 4 0 AppleTalk Macintosh ...

Страница 223: ...ix UNIX For how to setup the printer as a network printer in a UNIX environment see the UNIX Supplement included as a PDF file on the CD ROM TCP IP UNIX ...

Страница 224: ...hanging Port Settings 12 Setting up a Client Computer 13 2 Windows 2000 Configuration Configuring Windows 2000 15 Printing Without Using a Print Server 15 Printing with a Standard TCP IP Port 16 Printing with a LPR Port 16 Printing with a Windows 2000 or Windows NT Print Server 16 Configuring the Protocols 17 Configuring TCP IP and IPP for Printing 17 Configuring NetBEUI for Printing 18 Using Port...

Страница 225: ...hanging Port Settings 44 Configuring LPR Port Printing 45 Setting up a Client Computer 46 4 NetWare Configuration Installing the NIB Setup Tool 49 Installing PRINTER MANAGER FOR ADMINISTRATOR 49 Running the NIB Setup Tool 50 Quick Setup Using the NIB Setup Tool Wizard 51 NetWare 3 x Advanced Settings 54 Setting Up as a Print Server 54 Setting Up as a Remote Printer 57 NetWare 4 x 5 Advanced Settin...

Страница 226: ... Job Information 91 Print Log Information 91 Network Statistical Information 92 Configuring the Network Interface Board 93 Message List 96 System Log Information 96 Precautions 102 Connecting a Dial Up Router to a Network 102 PostScript Printing from Windows 103 NetWare Printing 103 When Using DHCP 104 Configuring a WINS 105 When Using the NIB Setup Tool 107 When Using IPP with Multidirect Print 1...

Страница 227: ... Setting up a Client Computer for how to configure Windows 95 98 Me with a Windows 2000 or Windows NT print server Consult your network administrator about which of the three protocols are appropriate 2 Configure the chosen protocol 3 Select the appropriate software 1 Decide on the protocol to use TCP IP 4 Install the software and set the printer driver port Using PortNavi Using Multidirect Print ...

Страница 228: ...ng command to confirm that it has been set correctly A Click Start point to Programs and then click MS DOS Prompt B Type the following Example IP address is 192 168 15 16 C ping 192 168 15 16 If the address has been configured correctly the following message ap pears Reply from 192 168 15 16 bytes 32 time 10ms TTL 32 If the address has been configured incorrectly the following message ap pears Req...

Страница 229: ...5 98 Me computer and set it as the default protocol A Open Control Panel and double click the Network icon Confirm that Net BEUI is listed in the The following network components are installed box on the Configuration tab Note If the NetBEUI protocol is not installed click Add on the Configuration tab and install it For more information about installing the NetBEUI protocol see Windows 95 98 Me He...

Страница 230: ...y Size and orientation of paper in each paper tray Total memory Installed fonts including the downloaded fonts Equally divide the number of copies to be printed among the selected printers in the printer group Parallel Printing Important The following must be the same for the specified printer and the print ers selected for Parallel Printing Printer models Installed options e g Paper Tray Size and...

Страница 231: ...emove Programs icon D On the Install Uninstall tab click Install E Click Next F Type the name of the CD ROM drive in the Command line for installation pro gram box followed by NETWORK PORTNAVI DISK1 SETUP EXE do not include the quotation marks and then click Finish Note An example would be D NETWORK PORTNAVI DISK1 SETUP EXE when the drive letter is D G From the Choose Setup Language list select th...

Страница 232: ...o the following port box select FILE D Click Apply The port which is currently in use is changed E Click Delete Port F Click the PortNavi port name as confirmed in step B B B B then click OK The port is deleted G Click OK to close the printer properties Uninstalling PortNavi Preparation Before uninstalling PortNavi make sure that The PortNavi settings dialog box is closed No printer is using the P...

Страница 233: ...ears The displayed items are as follows Model Name The model name of the printer Name The name of the Network Interface Board Comment Additional information about the Network Interface Board Address The IP address of the printer E Click the model name of the printer and then click OK Note If you want to select any printer which is not shown here click IP Address and input the IP address of the pri...

Страница 234: ...ce Parallel Printing Recovery Printing and Notification Reference For more information about these settings see PortNavi Help A Click Start on the taskbar point to Settings and click Printers B Click the icon of the printer you want to use On the File menu click Prop erties C Click the Details tab and click Port Settings The PortNavi settings dialog box appears ...

Страница 235: ... installer starts automatically you can use it to install Multidirect Print Follow the instructions on the screen C Open Control Panel and double click the Add Remove Programs icon D On the Install Uninstall tab click Install E Click Next F Type the name of the CD ROM drive in the Command line for installation pro gram box followed by NETWORK MDP DISK1 SETUP EXE do not include the quotation marks ...

Страница 236: ... If the printer drivers have already been installed you can proceed to the next step Reference For more information about installing the printer drivers see the Setup Guide that comes with this printer Note Any port can be selected during the installation however LPT1 is recom mended B From the Printers window click the icon of the printer On the File menu click Properties C Click the Details tab ...

Страница 237: ...er will be dis played To print to a printer not listed here click Specify Address and then type the NetBEUI address Confirm the NetBEUI address on the network configuration page For more information about the printing of configuration page see P 108 Network Configuration Page You cannot print to printers beyond routers IPP A Click IPP The IPP setting dialog box appears B In Printer URL type http p...

Страница 238: ...ttings Follow these steps to change Multidirect Print settings such as the proxy server settings or IPP URL Note There are no settings for the NetBEUI protocol A From the Printers window click the icon of the printer On the File menu click Properties B Click the Details tab and then click Port Settings The Port Settings dialog box appears For the TCP IP protocol you can configure Timeout Settings ...

Страница 239: ...ith a Windows 2000 or Windows NT print server Do not begin the fol lowing procedure until the client has been set up and configured correctly A Install the printer driver as a local printer Reference For more information about installing the printer driver see the Setup Guide that comes with this printer Note Any port can be selected during the installation however LPT1 is recom mended B Click Sta...

Страница 240: ...ck the name of the computer used as the print server The printers attached to the network are displayed G Click the name of the printer you want to use and click OK H Click OK I Confirm that the port name is displayed in the Print to the following port box and click OK ...

Страница 241: ... based print server Consult your network administrator about which of the three protocols are appropriate 2 Configure the chosen protocol 3 Select the appropriate software 1 Decide on the protocol to use TCP IP 4 Install the software and set the printer driver port Using PortNavi Using Multidirect Print PortNavi Configuring TCP IP and IPP for Printing Configuring NetBEUI for Printing Multidirect P...

Страница 242: ...ironment For more information about Standard TCP IP port settings see Windows 2000 Help Printing with a LPR Port See P 28 Configuring LPR Port Printing for how to configure a LPR port in Win dows 2000 Printing with a Windows 2000 or Windows NT Print Server See P 29 Setting up a Client Computer for how to configure Windows 2000 with a Windows 2000 or Windows NT print server ...

Страница 243: ...gn IP addresses see P 104 When Using DHCP Note After setting the IP address use the ping command to confirm that it has been set correctly A Click Start point to Programs point to Accessories and then click Com mand Prompt B Type the following Example IP address is 192 168 15 16 C ping 192 168 15 16 If the address has been configured correctly the following message ap pears Reply from 192 168 15 1...

Страница 244: ...figuring the printer Configure the printer to use the NetBEUI protocol Confirm that the NetBEUI protocol is set to be active The factory default is active Reference For more information about how to make the above settings see the Setup Guide that comes with this printer Configuring a Windows 2000 computer Follow these steps to configure a Windows 2000 computer to use the NetBEUI protocol A Click ...

Страница 245: ...y Installed fonts including the downloaded fonts Equally divide the number of copies to be printed among the selected printers in the printer group Parallel Printing Important The following must be the same for the specified printer and the print ers selected for Parallel Printing Printer models Installed options e g Paper Tray Size and orientation of paper in each paper tray Total memory Installe...

Страница 246: ... double click the Add Remove Programs icon D Click Add New Programs and then click CD or Floppy E Click Next F Type the name of the CD ROM drive in the Open box followed by NETWORK PORTNAVI DISK1 SETUP EXE do not include the quotation marks and then click Finish Note An example would be D NETWORK PORTNAVI DISK1 SETUP EXE when the drive letter is D G From the Choose Setup Language list select the l...

Страница 247: ...ter Properties The port which is currently in use is changed E Open the Printer Properties of the same printer F Click to select the Ports tab G At the Port column in the Print to the following port s dialog box click to se lect the PortNavi port name as confirmed in step B B B B H Click Delete Port I When the confirmation message appears click Yes The port is deleted J Click Close to close the Pr...

Страница 248: ...pes box and then click New Port The Select Printer dialog box appears and printers on the network are browsed The displayed items are as follows Model Name The model name of the printer Name The name of Network Interface Board Comment Additional information about Network Interface Board Address The IP address of the printer E Click the model name of the printer and then click OK Note If you want t...

Страница 249: ... Parallel Printing and Recovery Printing Reference For more information about these settings see PortNavi Help A Click Start on the taskbar point to Settings and click Printers B Click the icon of the printer you want to use On the File menu click Prop erties C Click the Ports tab and click Configure Port The PortNavi settings dialog box appears ...

Страница 250: ...ive Note If the installer starts automatically you can use it to install Multidirect Print Follow the instructions on the screen C Open Control Panel and double click the Add Remove Programs icon D Click Add New Programs and then click CD or Floppy E Click Next F Type the name of the CD ROM drive in the Open box followed by NETWORK MDP DISK1 SETUP EXE do not include the quotation marks and then cl...

Страница 251: ... printer drivers have already been installed you can proceed to the next step Reference For more information about installing the printer drivers see the Setup Guide that comes with this printer Note Any port can be selected during the installation however LPT1 is recom mended B From the Printers window click the icon of the printer you want to use On the File menu click Properties C Click the Por...

Страница 252: ...ess Confirm the NetBEUI address on the network configuration page For more information about the printing of configuration page see P 108 Network Configuration Page You cannot print to printers beyond routers IPP A Click IPP The IPP setting dialog box appears B In Printer URL type http printer s IP address printer as the IP ad dress of the printer C As necessary type the names to distinguish the p...

Страница 253: ...ow the steps to change Multidirect Print settings such as the proxy server settings or IPP URL Note There are no settings for the NetBEUI protocol A From the Printers window click the icon of the printer you want to use On the File menu click Properties B Click the Ports tab and then click Configure Port The Port Settings dialog box appears For TCP IP protocol you can configure Timeout Settings Fo...

Страница 254: ...appears B Click the icon of the printer you want to use On the File menu click Prop erties C In the Available port types box click LPR Port and then click New Port Note If LPR Port does not appear Print Services for Unix has not been in stalled D Type the IP address of the Network Interface Board into the Name or address of server providing lpd box E Type lp into the Name of printer or print queue...

Страница 255: ...t has already been configured to communi cate with a Windows 2000 or Windows NT print server Do not begin the fol lowing procedure until the client has been set up and configured correctly Use the Printers window to set up the printer A Click Start point to Settings and then click Printers B Double click the Add Printer icon This launches the Add Printer Wizard C Click Next D Click Network printer...

Страница 256: ... a driver has been installed on the client click OK and follow the in structions on the screen There is a Windows 2000 printer driver on the CD ROM that comes with this printer G Select whether to use this printer as the default printer and click Next H After installation is complete click Finish The icon of the newly installed printer appears in the Printers window ...

Страница 257: ...are based print server Consult your network administrator about which of the three protocols are appropriate 2 Configure the chosen protocol 3 Select the appropriate software 1 Decide on the protocol to use TCP IP 4 Install the software and set the printer driver port Using PortNavi Using Multidirect Print PortNavi Configuring TCP IP and IPP for Printing Configuring NetBEUI for Printing Multidirec...

Страница 258: ... P 45 Configuring LPR Port Printing for how to configure a LPR port in Win dows NT 4 0 Printing with a Windows 2000 or Windows NT Print Server See P 46 Setting up a Client Computer for how to configure Windows NT 4 0 with a Windows 2000 or Windows NT print server ...

Страница 259: ... address use the ping command to confirm that it has been set correctly A Click Start point to Programs and then click Command Prompt B Type the following Example IP address is 192 168 15 16 C ping 192 168 15 16 If the address has been configured correctly the following message ap pears Reply from 192 168 15 16 bytes 32 time 10ms TTL 32 If the address has been configured incorrectly the following ...

Страница 260: ...col Confirm that the NetBEUI protocol is set to be active The factory default is active Reference For more information about how to make the above settings see the Setup Guide that comes with this printer Configuring a Windows NT computer Install the NetBEUI protocol on the Windows NT computer and change the LAN adapter number Lana Number A Open Control Panel and double click the Network icon Conf...

Страница 261: ...r protocol s Lana Number is configured with 0 you must change the Lana Number a number other than 0 E Click OK F Click Close and close the Network dialog box G After confirming the message to restart click Yes Note After you change the Lana Number you must restart the computer ...

Страница 262: ...aper in each paper tray Total memory Installed fonts including the downloaded fonts Equally divide the number of copies to be printed among the selected printers in the printer group Parallel Printing Important The following must be the same for the specified printer and the print ers selected for Parallel Printing Printer models Installed options e g Paper Tray Size and orientation of paper in ea...

Страница 263: ...ally you can use it to install PortNavi Fol low the instructions on the screen C Open Control Panel and double click the Add Remove Programs icon D On the Install Uninstall tab click Install E Click Next F Type the name of the CD ROM drive in the Command line for installation pro gram box followed by NETWORK PORTNAVI DISK1 SETUP EXE do not include the quotation marks and then click Finish Note An ...

Страница 264: ...the following port box select FILE D Click Apply The port which is currently in use is changed E Click Delete Port F Click the PortNavi port name as confirmed in step B B B B then click OK The port is deleted G Click OK to close the printer properties Uninstalling PortNavi Preparation Before uninstalling PortNavi make sure that The port settings dialog box is closed No printer is using the PortNav...

Страница 265: ...pears The displayed items are as follows Model Name The model name of the printer Name The name of the Network Interface Board Comment Additional information about the Network Interface Board Address The IP address of the printer E Click the model name of the printer and then click OK Note If you want to select any printer which is not shown here click IP Address and input the IP address of the pr...

Страница 266: ...o tice Parallel Printing and Recovery Printing Reference For more information about these settings see PortNavi Help A Click Start on the taskbar point to Settings and click Printers B Click the icon of the printer you want to use On the File menu click Prop erties C Click the Details tab and click Port Settings The PortNavi settings dialog box appears ...

Страница 267: ...taller starts automatically you can use it to install Multidirect Print Follow the instructions on the screen C Open Control Panel and double click the Add Remove Programs icon D On the Install Uninstall tab click Install E Click Next F Type the name of the CD ROM drive in the Command line for installation pro gram box followed by NETWORK MDP DISK1 SETUP EXE do not include the quotation marks and ...

Страница 268: ...inter drivers have already been installed you can proceed to the next step Reference For more information about installing the printer drivers see the Setup Guide that comes with this printer Note Any port can be selected during the installation however LPT1 is recom mended B From the Printers window click the icon of the printer you want to use On the File menu click Properties C Click the Ports ...

Страница 269: ...s Confirm the NetBEUI address on the network configuration page For more information about the printing of configuration page see P 108 Network Configuration Page You cannot print to printers beyond routers IPP A Click IPP The IPP setting dialog box appears B In Printer URL type http printer s IP address printer as the IP ad dress of the printer C As necessary type the names to distinguish the pri...

Страница 270: ... the steps to change Multidirect Print settings such as the proxy server settings or IPP URL Note There are no settings for the NetBEUI protocol A From the Printers window click the icon of the printer you want to use On the File menu click Properties B Click the Ports tab and then click Port Configuration The Port Settings dialog box appears For TCP IP protocol you can configure Timeout Settings ...

Страница 271: ...int to Settings and then click Printers B Click the icon of the printer you want to use On the File menu click Prop erties C Click the Ports tab and then click Add Port D In the Available Printer Ports box click LPR Port and then click New Port Note If LPR Port does not appear Microsoft TCP IP Printing has not been installed E Type the IP address of the Network Interface Board into the Name or add...

Страница 272: ... been set up and configured correctly Use the Printers window to set up the printer A Click Start point to Settings and then click Printers B Double click the Add Printer icon This launches the Add Printer Wizard C Click Network printer server and click Next D In the Shared Printers box double click the name of the computer used as a print server The printers attached to the network are displayed ...

Страница 273: ... Client Computer 47 3 F Select whether to use this printer as the default printer and click Next G After installation is complete click Finish The icon of the newly installed printer appears in the Printers window ...

Страница 274: ...Windows NT 4 0 Configuration 48 3 ...

Страница 275: ...tems Microsoft Windows 95 98 Me Microsoft Windows 2000 Microsoft Windows NT 4 0 Installing PRINTER MANAGER FOR ADMINISTRATOR Follow these steps to install PRINTER MANAGER FOR ADMINISTRATOR Preparation You should install PRINTER MANAGER FOR ADMINISTRATOR on the computer If you install PRINTER MANAGER FOR ADMINISTRATOR from a file server or run it via the network PRINTER MANAGER FOR ADMINIS TRATOR m...

Страница 276: ...After the Welcome dialog box appears click Next I The Software License Agreement dialog box appears After reading through all of the contents by clicking PageDown click Yes to agree with the License Agreement J Select a folder to install PRINTER MANAGER FOR ADMINISTRATOR in and then click Next If you want to change the displayed folder click Browse to select another one The installation program st...

Страница 277: ...n assumes that NetWare is functional and that the necessary envi ronment for NetWare Print Services is available If you configure the Network Interface Board in a NetWare environment us ing the NIB Setup Tool you should install the client software released from Novell in the following cases Windows 95 98 Me in NDS mode configuration Windows 2000 in NDS mode configuration Windows 2000 in Bindery mo...

Страница 278: ...d click to clear the TCP IP check box I Click Next A dialog box for configuring the NetWare environment appears J Select Bindery when printing under Bindery mode or select NDS when printing under NDS mode When you are using NetWare version 4 x you should select NDS K If you selected Bindery type into the File Server Name box the name of the file server in which a print server is to be created Clic...

Страница 279: ... you have selected NDS mode type the volume of the print queue into the Queue Volume box Clicking Browse you can select one of those shown in the Browse dialog box P Click Next A dialog box to confirm the printing environment appears Q After confirming the environment click Next If you want to change the settings click Back and make the settings again Clicking Next the NIB Setup Tool automatically...

Страница 280: ...st time we recommend you use the Wizard method P 51 Quick Setup Using the NIB Setup Tool Wizard Note This section assumes NetWare is functional and that the necessary environ ment for the NetWare Print Service is available Setting Up as a Print Server A Log on to the file server as a Supervisor or a Supervisor equivalent B Run the NIB Setup Tool Reference P 50 Running the NIB Setup Tool C Click Pr...

Страница 281: ...he NetWare tab and make the following settings A Select Bindery B In the File Server Name box type the name of the file server in which a print server is to be created Click Browse to select a file server among those listed in the Browse dia log box C Click OK to close the property sheet D After a confirmation dialog box appears click OK J On the NIB menu click Exit to exit the NIB Setup Tool K Ty...

Страница 282: ...ote Other Unkown The IRQ Buffer size Starting form and Queue service mode are automat ically configured H Press the ESC key and click Yes in the confirmation dialog box I Press the ESC key to return to the Print Server Configuration menu N Assign print queues to the created printer as follows A From the Print Server Configuration menu select Queues Serviced By Printer B Select the printer created ...

Страница 283: ...ddress are correct and click Fin ish The NIB Setup Tool window appears G Click Configure The property sheet appears H Click the General tab and type the name of the print server into the Device Name box I Click the NetWare tab and make the following settings A In the Print Server Name box type the name of the print server B In the File Server Name box type the name of the file server in which a pr...

Страница 284: ...d print server select one of the print servers shown in the Print Server list Important Use the same name as that specified in the NIB Setup Tool Step H C From the Print Server Information menu select Print Server Configuration D From the Print Server Configuration menu select Printer Configuration E Select the printer which is indicated as Not Installed Important Use the same number as that speci...

Страница 285: ...queue at a time D Follow the instructions on the screen to make other necessary settings When you have finished the above steps confirm that the queues are as signed O Press the ESC key until Exit appears and select Yes to exit PCON SOLE P Start the print server by typing the following from the console of the Net Ware Server If it is running restart it after exiting it To exit CAREE unload pserver...

Страница 286: ...aration The following procedures use the Property Sheet method in configuring the Network Interface Board If you configure the Network Interface Board as a NetWare print server for the first time we recommend you use the Wizard method P 51 Quick Setup Using the NIB Setup Tool Wizard Note This section assumes NetWare is functional and that the necessary environ ment for the NetWare Print Service is...

Страница 287: ...server as an Admin or an Admin equivalent B Run the NIB Setup Tool Reference P 50 Running the NIB Setup Tool C Click Property Sheet and click OK The Browse dialog box of the Network Interface Board appears D Click IPX protocol E Click the IPX address of the Network Interface Board which is to be config ured and click Next Note If you do not know which Network Interface Board you are configuring se...

Страница 288: ...Admin see the documentation that comes with the NetWare L Create a print queue as follows A Select the container object the print queue is located in among those in the directory tree and click Create on the Object menu B In the Class of new object box click Print Queue and click OK C In the Print Queue name box type the name of the print queue D In the Print Queue Volume box click the Browse butt...

Страница 289: ...e using NetWare 5 click Print Server Non NDPS C In the Print Server name box type the name of the print server Important Use the same name as that specified using the NIB Setup Tool Step H D Click Define additional properties to check a box and click Create P Assign the printer to the created print server as follows A Click Assignments and click Add in the Assignments group B In the Available obje...

Страница 290: ...me of the print server B In the File Server Name box type the name of the file server in which a print server is to be created Clicking Browse you can select a file server among those listed in the Browse File Server dialog box C In the NDS Context box type the context of the print server Clicking Browse you can select a NDS tree and a NDS context among those listed in the Browse Context dialog bo...

Страница 291: ...e Board you are configuring see a network configuration page to confirm the MAC address Network Address F Confirm that the MAC address and IPX address are correct and click Fin ish The NIB Setup Tool window appears G Click Configure The property sheet appears H Click the General tab and type the name of the print server into the Device Name box I Click the NetWare tab and make the following settin...

Страница 292: ...a confirmation dialog box appears click OK J On the NIB menu click Exit to exit the NIB Setup Tool K From Windows run NW Admin Reference For more information about NWAdmin see the documentation that comes with the NetWare L Create a print queue as follows A Select the container object the print queue is located in among those in the directory tree and click Create on the Object menu B In the Class...

Страница 293: ...lick Create B In the Class of new object box click Print Server and click OK When you are using NetWare 5 click Print Sever Non NDPS C In the Print Server name box type the name of the print server Important Use the same name as that specified using the NIB Setup Tool Step H D Click Define additional properties to check a box and click Create P Assign the printer to the created print server as fol...

Страница 294: ...r driver you want to use as Local printer Reference For more information about installing the printer driver see the Setup Guide that comes with this printer Note Any port can be selected during the installation however LPT1 is recom mended B Click Start point to Settings and then click Printers C In the Printers window click the icon of the printer you want to use D On the File menu click Propert...

Страница 295: ... Windows 2000 Follow the procedure to set up a Windows 2000 client Preparation Log on to the NetWare file server before starting the following procedure A Double click the My Network Places icon on the desktop and navigate to the queue you want to use and then double click it The printers dialog box appears B Click No C Close all the applications that are currently running D Insert the CD ROM into...

Страница 296: ...double click it The Printers dialog box appears B Click No C Close all the applications that are currently running D Insert the CD ROM into the CD ROM drive If the setup menu starts automatically you can go to the next step If not see the Setup Guide that comes with this printer E The Printer Installation dialog box appears F From the Port list select the queue you selected in step A A A A and cli...

Страница 297: ...print from a Macintosh use RICOH SCRIPT2 You cannot print with IPDL C Changing to EtherTalk Follow the procedure to configure a Macintosh computer to use EtherTalk Reference For more information about installing the software required for EtherTalk see the Macintosh manuals A Open Control Panel and double click the AppleTalk icon B From the Connect via pop up menu select Ethernet C If you change zo...

Страница 298: ...g the Zone It may be necessary to change the zone configuration Use applications such as Apple Printer Utility or LaserWriter Utility to change the zone configuration in the Macintosh EtherTalk environment These utilities are distributed by Apple Computer Inc Note If the Macintosh is configured to use TCP IP you can change the zone con figuration with a Web Browser P 75 Configuring the Network Int...

Страница 299: ...guring Macintosh 73 5 E Run the Apple Printer Utility and select the printer for which the new zone name is to be used F Select Send PostScript File in the Utilities menu and send Zone Name ps to the printer ...

Страница 300: ...Macintosh Configuration 74 5 ...

Страница 301: ...more information about configuring the printer to use the TCP IP pro tocol see the Setup Guide that comes with this printer Operating system browser requirements Limitation Sometimes after clicking Back the previous page may not appear In this case click Refresh or Reload The text on the screen may disappear or be aligned incorrectly if the font size settings of the browser are too large It is rec...

Страница 302: ...an register favorite URLs with URL To view the Help section click Help Important It costs to use the browser to access a website Note Help is stored in the following folder on the CD ROM in HTML format The third folder Language may be sub stituted by an appropriate language name HELP WSMHLP Language 2 Menu Buttons Buttons to configure the Network Inter face Board and confirm the status of the prin...

Страница 303: ...n glish Help files are in the EN folder Be sure to copy the entire EN folder to the new location B Using a Web Browser navigate to the Top Page and click Network config C Type your password it is not necessary to type a user name and click OK D Type the path to the Help files in the Help URL box If you copied the Help files to C HELP EN type file C HELP For example if you copied the files to a web...

Страница 304: ...ss C Assign the IP address using the ping command ping 192 168 15 16 D Use the ping command again to confirm the address ping 192 168 15 16 If the address has been configured correctly the following message appears 192 168 15 16 is alive If the address has been configured incorrectly the following message ap pears no answer from 192 168 15 16 How to Confirm the MAC Address The MAC address Ethernet...

Страница 305: ...ress or host name of the printer start telnet telnet IP_address Note In order to use the host name instead of the IP address you must write it to the etc hosts file B Type the password Note The factory default is password C Type a command Reference For more information about telnet commands see P 80 Commands List D Exit telnet msh logout When the configuration is changed a confirmation message req...

Страница 306: ...e to display information about the syntax of that command msh help command_name TCP IP address Use the ifconfig command to configure TCP IP for the printer IP address sub net mask broadcast address default gateway address Reference msh ifconfig Configuration msh ifconfig le0 parameter address The following is an example for configuring an IP address of 192 168 15 16 msh ifconfig le0 192 168 15 16 ...

Страница 307: ... command to view and configure access control You can also configure multiple access controls with the multi command Reference msh access Configuration msh access parameter address Note The Access Control Address and the Access Control Mask are used to limit access to the computer used for printing by denying access to users based on their IP address If it is not necessary to limit access set the ...

Страница 308: ...5 when con figuring some access controls If this is not configured the first setting is selected Network Boot Use the set command to configure the boot method msh set parameter on off on means active and off means inactive Note When you use RARP TFTP BOOTP or DHCP the server also needs to be configured DHCP takes precedence over all other settings Access Control Mask IP addresses that can access t...

Страница 309: ...inter status The following commands can be used to get information about the current status of the printer msh command Note More information about any print job is displayed when the ID number is added after the prnlog command Protocol appletalk tcpip netware netbeui lpr ftp rsh diprint web npmp snmp ipp up means active and down means inactive Command Information that is displayed status Status of...

Страница 310: ...en at a time Reference For more information about the meaning of the data returned with this com mand see P 93 Configuring the Network Interface Board System log information Use the syslog command to display information stored in the printer s system log msh syslog Reference For more information about the displayed information see P 96 System Log Information SNMP Use the snmp command to display an...

Страница 311: ...otocol to inactive all access settings set to use that protocol are disabled msh snmp ip ipx on off on means active and off means inactive To change the protocol of an access settings use the following command However if you disabled a protocol with the above command making it ac tive here will have no effect msh snmp number active ip ipx on off Access configuration You can configure an address of...

Страница 312: ... settings msh ipp Example output timeout 900 sec auth basic The timeout setting specifies how many seconds the computer keeps try ing to access the network printer to send print jobs when no connection could be made The auth setting indicates the user authorization mode IPP timeout configuration Specify how many seconds to wait before canceling a print job if it has been interrupted for some reaso...

Страница 313: ...e not to forget or lose the password Note The default factory password is password A Type passwd msh passwd B Type the current password Old password C Type the new password New password Note The password must consist of 3 to 8 alphanumeric characters and symbols Upper and lower case characters are considered unique For example R is different from r The password is the same as that used in the conf...

Страница 314: ...es of the WINS server msh wins Example output wins primary server 192 168 10 1 secondary server 192 168 10 2 wins server current config primary server 192 168 10 1 secondary server 192 168 10 2 hostname 123456789abcd ScopeID Note The current configuration appears on the second line when DHCP is ac tive When DHCP is not active there is no second line If the network boot setting is changed to anothe...

Страница 315: ...e passwd msh passwd B Type the current password Old password C Type the new password New password Note The password must consist of 3 to 8 alphanumeric characters and symbols Upper and lower case characters are considered unique For example R is different from r The password is the same as that used in the configuration of the Network Interface Board using a Web Browser and that used in the NIB Se...

Страница 316: ...tion about the printer The factory default community names are public and admin You can get MIB information using these community names Reference For more information about configuring the community name see P 84 SN MP in Remote Maintenance by telnet Limitation The kinds of supported MIBs differ depending on the printer Supported MIBs MIB II PrinterMIB HostResourceMIB RicohPrivateMIB ...

Страница 317: ...Source The name of the host requesting the print job Process The type of print command Status Status of print job Active Printing or preparing for printing Waiting Waiting to be transferred to the printer Time The time when the print request was received Item name Meaning ID Print request ID Source The user name workstation name or address of the host that sent the print job Process The type of pr...

Страница 318: ...e reception number of file unit Data Size The number of bytes of received data Item name Meaning System elapsed time The time that has passed since the Network Interface Board started Total printing time The total time spent in processing the print data Total open count The total open printing process count that the application re quired Current connection count The current number of open connecti...

Страница 319: ...terface Board configuration settings information Item name Meaning Common Mode Protocol Up Down AppleTalk TCP IP NetWare NetBEUI NVRAM version Device name Comment Location Contact Soft switch Up means active Down means inactive Internal version number AppleTalk Mode Net Object Type Zone AppleTalk protocol in selection Network number Macintosh printer name The type of printer Name of the zone that ...

Страница 320: ...me server Home page URL Home page link name Help page URL SNMP protocol Up means active Down means inactive Frame type Network boot Internal parameter IP address Subnet mask Broadcast address Default gateway address Access control address Access control mask Primary WINS server address Secondary WINS server address URL of homepage URL name of homepage URL of help page Protocol used with SNMP Item ...

Страница 321: ...e Print server name Name of the connect file server Context of print server Active mode this value is fixed Time of the job timeout NetBEUI Mode Switch Mode Direct print Notification Workgroup name Computer name Comment Share name 1 this value is fixed this value is fixed this value is fixed Notification of print job completion Name of the workgroup Name of the computer Comment Share name name of ...

Страница 322: ... to file server name as the nearest server Current Interface Speed xxxMbps The speed of the network 10 Mbps or 100 Mbps Current IPX address The current IPX address Frametype frame type name The frame type name is configured to be used on NetWare NetBEUI Computer Name computer name The NetBEUI Computer Name is defined as computer name Start httpd The Web server has been started Start npmpd for IPX ...

Страница 323: ...to the network was denied Verify that the print server name and password are correct Cannot log in to the file server The print server is not registered or the password is specified Register the print server without specifying a password Cannot create service connection Cannot establish a connection with the file server Your request may exceed the maxi mum number of connections that the file serve...

Страница 324: ...ng the computer name to the suffix 0 1 Configure a new computer name that is unique Invalid gateway address The gateway address is not correct for the specified IP address filter data error Some data cannot be handled by the filter option Confirm the file code and the settings of the filter option lost connection The connection was cut by the other party Check the printer to which you requested to...

Страница 325: ... and the settings of the filter option get log busy Another machine is getting the log informa tion You should get it afterwards lost connection The connection was cut by a counterpart Check the ftp of the workstation that re quested the print job and start it again When using ftp this message remains only on the system log information no more ftp execute More than three users at a time cannot log...

Страница 326: ...d with the received packet Check if the number of the objects sent from the administration station is more than 31 and if there are wrong MIB requests snmpin error in snmpservsend code Error No Cannot send a response packet Normally this message is followed by the messages be low 1 2 snmpin pkt too large code Error num ber 1 The response packet to the request is too big to send Reduce the number o...

Страница 327: ...ion refresh error code Error number Cannot register or refresh the NetBIOS name of the printer with a WINS server Check if the WINS server IP addresses are specified correctly Confirm that WINS server is available Configure a new NetBIOS name that is unique WINS name registration Server No Re sponse WINS name refresh Server No Response There is no reply on registration or refresh request from the ...

Страница 328: ...t pass over the dial up router Note The MAC address of the printer doing the filtering is printed on the network configuration page For more information about printing the network config uration page see P 108 Network Configuration Page For more information about configuring the printer if the router cannot be configured see the instructions below Configuring the printer with NetWare A Following t...

Страница 329: ... 0 clear the Form feed check box on the Neware Settings tab in the printer properties dialog box Banner Page You should not configure a banner page on NetWare If you want to change the banner page setting always configure it on Windows With Windows 95 98 Me clear the Enable banner check box on the Printer Settings tab in the printer properties dialog box With Windows 2000 clear the Enable banner c...

Страница 330: ...CP server that it contacts Follow these steps to configure the printer with a reserved IP address A Start the DHCP manager B Select the scope that will be used and on the Scope menu click Reserva tion C Type the IP address into IP Address D Type the MAC address of the Network Interface Board into Unique Identifi er Note Do not use hyphens to separate the numbers If you do not know the MAC address ...

Страница 331: ...relay agent in a network environment that uses a dial up router to connect to the Network Interface Board an increase in commu nication fees can occur Configuring a WINS The printer can be configured to register its NetBIOS name with a WINS server when power is turned on This enables the NetBIOS name of the printer to be specified from PortNavi and Multidirect Print even under a DHCP environment T...

Страница 332: ... primary and secondary using the following com mands msh wins primary IPaddress msh wins secondary IPaddress Note To confirm the current configuration use the show command D Log out from telnet E Restart the printer Using DHCP You can use the printer under a DHCP environment You can also register the printer NetBIOS name on a WINS server when it is running Note Printers that register their NetBIOS...

Страница 333: ...from Multidirect Print at a time While the network printer is printing a job another user cannot access the network printer until it completes the job In this case Multidirect Print tries to access the network printer until the retry interval expires If Multidirect Print cannot access the network printer and times out Multidirect Print stops sending the print job In this case you should cancel the...

Страница 334: ... If you hold down the button for five seconds the system log information is printed For more information about the meaning of the data printed see P 96 System Log Information When DHCP is active Current value is displayed as the current config uration 1 MAC address 2 Printer name 3 TCP IP IP address Subnet mask Default gateway address Access control address Access control mask Network boot Command...

Страница 335: ... number Print server name Name of the connect file server Active mode 5 NetBEUI this value is fixed Workgroup name Computer name Share name Network path name 6 AppleTalk Network number Macintosh printer name The type of printer Name of the zone that printer belong to ...

Страница 336: ...P Windows 95 Windows 98 Windows Me Windows 2000 Windows NT 4 0 IPX SPX NetWare 3 12 3 2 4 1 4 11 5 IntranetWare NetBEUI Windows 95 Windows 98 Windows Me Windows 2000 Windows NT 4 0 IPP Windows 95 Windows 98 Windows Me Windows 2000 Windows NT 4 0 AppleTalk Mac OS 7 6 1 9 0 SNMP MIB II PrinterMIB HostResourceMIB RicohPrivateMIB ...

Страница 337: ...twork Statistics 92 print job 91 print log 91 system log 84 96 install Multidirect Print Windows 2000 24 Multidirect Print Windows 95 98 Me 9 Multidirect Print Windows NT 4 0 41 NIB Setup Tool 49 PortNavi Windows 2000 20 PortNavi Windows 95 98 Me 5 PortNavi Windows NT 4 0 37 IP address 78 80 IPP 86 107 L LAN adapter number Lana Number 34 LPR port Printing 45 M MAC address 78 Macintosh 71 message 9...

Страница 338: ...9 PortNavi uninstall Windows 2000 21 Windows 95 98 Me 6 Windows NT 4 0 38 precautions 102 printer name 72 Printer Reference i printer status 83 Pure IP 63 Q Quick Installation Guide i R RARP TFTP 82 remote printer setup NetWare 3 x 57 NetWare 4 x 5 65 RICOH SCRIPT2 Operating Instructions i S setup client computer Windows 2000 29 client computer Windows 95 98 Me 13 client computer Windows NT 4 0 46...

Страница 339: ...Copyright 2000 ...

Страница 340: ...Network Interface Board Operating Instructions EE GB UE USA G063 8680 ...

Страница 341: ...RICOH SCRIPT2 Operating Instructions c1 RPS 300 tif Read this manual carefully before you use this product and keep it handy for future reference For safety please follow the instructions in this manual ...

Страница 342: ...ark of Ricoh Company Microsoft Windows and Windows NT are registered trademarks of Microsoft Corporation in the United States and or other countries Adobe and PostScript are registered trademarks of Adobe Systems Incorporated Apple Macintosh TrueType LaserWriter and ColorSync are registered trademarks of Apple Compu ter Incorporated Other product names used herein are for identification purposes o...

Страница 343: ...is not followed paper might be misfed originals might be damaged or data might be lost Be sure to read this Preparation This symbol indicates the prior knowledge or preparations required before op erating Note This symbol indicates precautions for operation or actions to take after misop eration Limitation This symbol indicates numerical limits functions that cannot be used together or conditions ...

Страница 344: ...4 0 13 Printer Properties Tabs and Their Settings 13 Default Document Properties Tabs and Their Settings 15 Windows Network Environment 20 Windows Headers 21 Sending Header Data 21 2 Using RICOH SCRIPT2 with a Macintosh Using RICOH SCRIPT2 with a Macintosh 23 Option Setup Dialog 23 Setting up for Printing 24 Setting up Print Options 24 Specifying Custom Size 29 3 Appendix Printer Memory and VM Are...

Страница 345: ...s This section describes the Printer Properties tabs and the settings that are specif ic to this printer The General Details Sharing and Color Management tabs are standard Windows tabs Reference For more information about these tabs see the documentation that comes with your Windows operating system Paper tab Paper size Use this to select the size of paper you want to use Reference For more inform...

Страница 346: ...ick to display the printer driver copyright and version information More Paper Options dialog box Printing on both sides duplex printing Use this to set the duplex printing The following items are available None Flip on long edge and Flip on short edge Limitation Duplex printing is possible only when the PAPER FEED UNIT Type206 option and the AD390 duplex unit option are installed on the printer N...

Страница 347: ...closely matches the colors on the screen Halftoning Select the halftone pattern you want to use for printing The following items are available Use printer s settings and Use settings below Note You can select Use settings below but modifying Screen frequency or Screen angle has no effect on the printing result Special Use this to control the print image Selecting a check box changes the icon on th...

Страница 348: ... settings that should be made after the printer driver is in stalled These settings optimize the printer configuration Available printer memory Shows the amount of memory installed on the printer You normally do not need to change this setting Printer features Shows settings that are specific for the printer These features can be changed using the Change settings for list box The following is a li...

Страница 349: ... 1 Presentation 2 and Solid Color 3 Note When selecting OHP Transparency as the paper type the CRD automat ically adjusts to a color profile specifically for OHP transparencies Even though the color profile has been optimized for OHPs the adjustments are automatic and are not indicated on any of the dialog boxes In this case this setting is not enabled 1 Use this setting to enhance the reproductio...

Страница 350: ...t Not Installed Installed For the optional memory unit VMOption 32 MB RAM 64 MB RAM 96 MB RAM 128 MB RAM 160 MB RAM 192 MB RAM 256 MB RAM PostScript tab Use this tab to set the output format of the PostScript files and the data process ing method On the PostScript tab click Advanced to display the Advanced PostScript Op tions dialog box When the printer is connected to the network Clear both Send ...

Страница 351: ...fic to this printer Limitation Changing the printer settings requires Manage Printers permission Members of the Administrators and Power Users groups have Manage Printers permis sion by default When you set up options log on using an account that has Manage Printers permission Reference The General Sharing Ports Advanced Color Management and Security tabs are Windows 2000 standard tabs For more in...

Страница 352: ...and Send CTRL D After Each Job Job Timeout Use this to set a job timeout period in the range of 0 to 32767 seconds Setting the value to 0 turns the job timeout off Wait Timeout Use this to set a wait timeout period in the range of 0 to 32767 seconds Setting the value to 0 turns the wait timeout off Installable Options Total Printer Memory Use this to select the amount of memory actually installed ...

Страница 353: ... Duplex printing is possible only when the PAPER FEED UNIT Type206 option and the AD390 duplex unit option are installed on the printer Note You can select long edge feed or short edge feed regardless of feed and print direction Advanced Click to open the Advanced Options dialog box P 10 Advanced Options dialog box Paper Quality tab Tray Selection Paper Source Use this to select the tray from whic...

Страница 354: ...hite mode you must select Black and White in Color Mode in the Advanced Options di alog box Advanced Click to open the Advanced Options dialog box P 10 Advanced Options dialog box Advanced Options dialog box Paper Output Paper Size Shows the currently selected paper size You can use the list box to select another paper size if you want Selecting PostScript Custom Page Size opens the PostScript Cus...

Страница 355: ...setting to perform CMYK conversion The colors printed with this setting are more vivid than those printed with the Vivid setting All of the colors in the image especially the lighter ones are emphasized 4 Select this setting to perform color matching based on the printer s built in color rendering dictionaries and perform CMYK conversion It makes it pos sible to print colors that are close to the ...

Страница 356: ...on Toner Saving Use this to set Toner Saving to Off or On Note Turning on toner saving can cause the output to become blurred and re sult in very thin lines not printing at all In the case of color printing ton er saving can cause colors to be different from those expected Because of this use toner saving only for proofing and intermediate drafts and turn it off for final prints when top quality i...

Страница 357: ...sure to install the PPD file for Windows NT 4 0 Do not accidentally install the PPD file for Windows 95 98 Me or Windows 2000 Printer Properties Tabs and Their Settings This section describes the tab settings that are specific to this printer Limitation Changing the printer settings requires Full Control access permission Mem bers of the Administrators Server Operators Print Operators and Power Us...

Страница 358: ...isplayed Select the setting you want to use from Change Setting for each TrueType font Job Timeout Use this to set a job timeout period in the range of 0 to 32767 seconds Setting the value to 0 turns the job timeout off Wait Timeout Use this to set a wait timeout period in the range of 0 to 32767 seconds Setting the value to 0 turns the wait timeout off Total Printer Memory Use this to select the ...

Страница 359: ...t the paper sizes supported by this printer see P 32 Specifications With Windows NT 4 0 custom paper size cannot be defined Paper Source Use this to select the tray from which you want paper to be fed for printing The following items are available Automatically Select Tray 1 and Tray 2 option Note If you cannot select an optional tray even though it is physically installed on the printer use Optio...

Страница 360: ...of the dialog box by clicking a set ting item Select the setting you want to make for the selected item Paper Output Paper Source Use this to select the tray from which you want paper to be fed for printing The following items are available Automatically Select Tray 1 and Tray 2 option Note If you cannot select an optional tray even though it is physically in stalled on the printer use Installable...

Страница 361: ...Each Job When the printer is connected to the network select No for both Send CTRL D Before Each Job and Send CTRL D After Each Job When the printer is connected to the computer via parallel cable select Yes both for Send CTRL D Before Each Job and Send CTRL D After Each Job Halftone Color Adjustment Changing this setting will not affect printing result Printer Features Auto Tray Switch Turning on...

Страница 362: ...or Color Setting The following items are available Photograph 1 Presentation 2 and Solid Color 3 Note When selecting OHP Transparency as the paper type the CRD automat ically adjusts to a color profile specifically for OHP Even though the color profile has been optimized for OHP the adjustments are automat ic and are not indicated on any of the dialog boxes In this case this set ting is not enable...

Страница 363: ... though the color profile has been optimized for OHPs the adjust ments are automatic and are not indicated in any of the dialog boxes In this case the Color Profile setting on the Advanced tab is not enabled Statistics Code Use this to set On or Off If On is selected User Code 99999999 and User ID RPS2 will be fixed If Off is selected User Code Other and User ID will be fixed Reference For more in...

Страница 364: ...s to perform processing with the interpreter until receiving the EOF When the printer is connected to a network and since the network protocol con trols the transferred data of jobs the EOF is not required Be sure to turn off the EOF Windows 95 98 Me Open the PostScript tab on the Printer Properties Then click Advanced Click to clear Send CTRL D after job and Send CTRL D before job Windows 2000 Op...

Страница 365: ...ta to be stored in the printer memory so jobs sent after the header data has already been sent are printed more quickly Select Assume header is downloaded and retained on the PostScript tab to enable this method To use this setting you should send the header data to the print er in advance so click Send Header Now Note Header data in the printer memory is cleared whenever the printer power is turn...

Страница 366: ...Using RICOH SCRIPT2 with Windows 22 1 ...

Страница 367: ...e to configure the options correctly If not configured correctly options will not be available even though they are physically installed to the printer If you do not know the amount of memory you need to select here print a configuration page which shows how much memory is currently installed to the printer P 31 Printer Memory and VM Area Total Printer Memory Use this to select the amount of memor...

Страница 368: ... Fast or Standard Color Setting Use this to set the correction method used for the color conversion The fol lowing items are available Off 1 Vivid 2 Super Vivid 3 Fine 4 and Super Fine 5 1 No modification to the color setting 2 Select this setting to perform CMYK conversion with enhanced saturation and brightness to print vivid colors 3 Select this setting to perform CMYK conversion The colors pri...

Страница 369: ...nce the reproduction of documents that contain text and graphics This CRD is best for printing colored charts graphs presenta tion materials and etc If you use this CRD for printing photographs color or gradations might not be reproduced well 3 Use this setting to print specific colors logos and so on Toner Saving Use this to set Toner Saving On or Off Note Turning on toner saving can cause the ou...

Страница 370: ... and print direction Statistics Code Use this to set On or Off If On is selected User Code 99999999 and User ID RPS2 will be fixed If Off is selected User Code Other and User ID will be fixed Reference For more information about User Codes see the Printer Reference in cluded as a PDF file on the CD ROM LaserWriter 8 4x or later The following describes the settings specific to this printer using La...

Страница 371: ...If there is a PostScript error You can select No special report Summarize on screen or Print detailed re port If the cassette is out of paper You can use this setting to select auto tray switching which tells the printer to automatically switch to the other tray if it has the same paper size as the current tray when paper runs out while printing Selecting Printer Specific Options and Printer Speci...

Страница 372: ...g OHP Transparency as the paper type the CRD automat ically adjusts to a color profile specifically for OHP transparencies Even though the color profile has been optimized for OHPs the adjustments are automatic and are not indicated on any of the dialog boxes In this case this setting is not enabled 1 Use this setting to enhance the reproduction of photos and graphics that in clude midtones 2 Use ...

Страница 373: ...OHPs the adjust ments are automatic and are not indicated in any of the dialog boxes In this case the Color Profile setting on Printer Specific Option is not en abled Statistics Code Use this to set On or Off If On is selected User Code 99999999 and User ID RPS2 will be fixed If Off is selected User Code Other and User ID will be fixed Reference For more information about User Codes see the Printe...

Страница 374: ...Using RICOH SCRIPT2 with a Macintosh 30 2 ...

Страница 375: ...If the data sent from the computer is very com plex printing may not be possible because of insufficient printer memory This is called a VM error In some cases printing is impossible even though a VM error has not oc curred Printer Memory VM Virtual Memory Capacity 32 MB Approximately 7 7 MB 64 MB Approximately 9 6 MB 96 MB Approximately 9 6 MB 128 MB Approximately 9 6 MB 160 MB Approximately 9 6 ...

Страница 376: ...er driver supports printing on both standard and small print area However with Laser Writer 8 3x or earlier the small print area options are not displayed Paper sizes Printer driver settings A4 A4 B5 JIS B5 JIS A5 A5 Legal 81 2 14 Legal Letter 81 2 11 Letter Executive 71 4 101 2 7 25x10 5 F 8 13 8x13 Folio 81 4 13 8 25x13 Foolscap 81 2 13 8 5x13 Com10 Env Com10 Env DL Env DL Env A4 Small 1 A4 Smal...

Страница 377: ...cautions Because of the differences in image graphics and clipping rules the printing results produced by any single draw operator might be out of place by one dot The free memory space used for downloading fonts may not be sufficient A VM error might occur when downloading fonts with insufficient VM memo ry In this case the print job may be canceled However this printer will re start RICOH SCRIPT...

Страница 378: ...ions tab 4 Device Settings tab 7 13 Dithering 5 12 19 25 29 Document Options 11 17 Duplex 26 Duplex Unit 14 23 E EOF 20 F Fonts tab 4 Font Substitution Table 4 7 14 Form to Tray Assignment 7 14 G Gradation 4 17 24 27 Graphic 10 16 Graphics tab 3 H Halftone 14 Halftone Color Adjustment 17 Halftone Setup 14 Halftoning 3 header 21 I Image Color Management 10 Installable Options 8 Installable options ...

Страница 379: ...nt Quality 10 R Resolution 3 16 24 27 S Scaling 4 11 17 Send CTRL D After Each Job 8 17 Send CTRL D Before Each Job 8 17 Special 3 Specifying Custom Size 29 Statistics Code User Code User ID 6 12 19 26 29 T Toner Saving 5 12 18 25 28 Total Printer Memory 14 23 Tray Selection 9 TrueType Font 11 17 U Units 3 V VM area 31 W Wait Timeout 8 14 Width Length 3 Windows 2000 Advanced Options dialog box 10 ...

Страница 380: ...36 EE GB UE USA G063 MEMO ...

Страница 381: ...Copyright 2000 ...

Страница 382: ...RICOH SCRIPT2 Operating Instructions EE GB UE USA G063 8900 ...

Страница 383: ...UNIX Supplement c1 Network 300 tif Read this manual carefully before you use this product and keep it handy for future reference For safety please follow the instructions in this manual ...

Страница 384: ...ubject to change without prior notice In no event will the company be liable for direct indirect special incidental or consequential damages as a result of handling or operating the machine Trademarks PostScript is a registered trademark of Adobe Systems Incorporated Sun SunOS Solaris are trademarks or registered trademarks of Sun Microsystems Inc in the United States and other countries HP UX is ...

Страница 385: ...rinter Reference Describes the procedures and provides necessary information about using the printer and its options The manual is included as a PDF file on the CD ROM labeled Printer Drivers and Utilities RICOH SCRIPT2 Operating Instructions Describes the menus and features you can set using the RICOH SCRIPT2 printer driver The manual is included as a PDF file on the CD ROM labeled Printer Driver...

Страница 386: ...is not followed paper might be misfed originals might be damaged or data might be lost Be sure to read this Preparation This symbol indicates the prior knowledge or preparations required before op erating Note This symbol indicates precautions for operation or actions to take after misop eration Limitation This symbol indicates numerical limits functions that cannot be used together or conditions ...

Страница 387: ...e IP Address 1 Executing the Installation Shell Script 2 Setup 6 Printing Method 10 Printing with lpr lp 10 Printing with rsh rcp ftp 11 Printer Status 13 Viewing the Print Job Status with lpq and lpstat 13 Viewing the Printer Status with rsh and ftp 13 Copying Information to a File 14 INDEX 15 ...

Страница 388: ...iv ...

Страница 389: ...tion shell script can be used on the following three kinds of the workstations Do not use this installation shell script with other types of workstations Solaris 2 5 1 2 6 7 8 HP UX 8 x 9 x 10 x 11 0 Red Hat Linux 6 x 7 When you use NIS Network Information Service or DNS you should con figure the server before running this installation shell script For more information about the configuration util...

Страница 390: ...e and IP address to the file confirm the configuration by pinging the host name ping host_name If the host name is registered with an IP address the server can access the printer using its host name instead of its IP address Executing the Installation Shell Script After having configured the printer IP address follow the procedure below to execute the installation shell script and set up the works...

Страница 391: ...ess the RETURN key 230 User root logged in ftp E Type the following to get the installation shell script ftp get install F Close the ftp session ftp bye 221 Goodbye C Run the installation shell script sh install Note Insert a period and slash before the current directory D Enter a number to select the workstation OS that you are using Network printer install shell Copyright RICOH CO LTD 1994 2000 ...

Страница 392: ... E nothing is added to the etc hosts file G Configure the printer name Enter logical printer name default nphost_prn If you want to use the default name press the RETURN key If you want to change this name enter a new name Note The host name entered in step F followed by _prn appears in default H Set the print option Enter remote printer name default lp Press the RETURN key Setup with the installa...

Страница 393: ...the printer BSD UNIX workstation Linux Delete the printer entry from etc printcap Solaris HP UX Delete the printer entry A Stop the scheduler usr sbin lpshut B Delete the printer usr sbin lpadmin x printer_name C Restart the scheduler usr lib lpsched ...

Страница 394: ...IS or DNS you must manually enter the IP address and host name of each workstation using the network printer in the etc hosts file Adding an entry to the etc printcap file The following entry is added to the etc printcap file This is the configuration for printing with the lpr command In order to use the lpr command to print you need to edit the etc hosts file add an entry for the network printer ...

Страница 395: ... the network printer need to have a spool directory for the network printer A spool directory should be made for every network printer entry listed in the etc printcap file The spool directory should normally be made under var spool lpd and the name should match that listed under the sd capability in etc print cap Change the owner and group of the directory to root and lp The fol lowing examples s...

Страница 396: ...92 168 15 16 is the IP address nphost is the host name from to the end of the line is a comment Note The etc hosts file contains a list of the IP addresses and their host names of all of the hosts communicating on the network Each entry is delimited with a space or a tab and each line is separated with a return If you do not use NIS or DNS you must manually enter the IP address and host name of ea...

Страница 397: ...ch line is separated with a return If you do not use NIS or DNS you must manually enter the IP address and host name of each workstation using the network printer in the etc hosts file Registering the printer The installation shell script registers the printer as a remote printer following the procedure below A Stop the scheduler usr lib lpshut B Register the printer usr lib lpadmin Pnp v dev null...

Страница 398: ...file_name For example printer name is np file names are file1 and file2 lp d np file1 file2 Note printer_name is the name that was entered when executing the installation shell script You can use wild cards or for the file name The message print session full appears when the maximum number of print requests has been reached max 5 sessions You should try to print again when the number of requests b...

Страница 399: ...led Printer Drivers and Utilities rsh rsh host_name print file_name file_name For example host name is nphost file names are file1 and file2 rsh nphost print file1 file2 Note host_name is the name entered when executing the installation shell script If you use a HP UX use the remsh command instead of rsh rcp To specify the file and print it rcp file_name file_name host_name For example host name i...

Страница 400: ...le using ftp A Start ftp using the IP address or host name of the printer ftp IP_address Note host_name is the name entered when executing the installation shell script B Enter the user name Ignore the password and then press the RETURN key Name Password C Set the file transfer mode to binary ftp bin Note If the file transfer mode is not set to binary the image might not be printed correctly D Pri...

Страница 401: ...np lpq Pnp System V UNIX Soralis HP UX lpstat o printer_name For example Printer name is np lpstat o np Note In case of HP UX do not put a space between o and printer_name Viewing the Printer Status with rsh and ftp Use the rsh or ftp command to display the status of printer or information about print jobs using specified parameters You can use these commands for BSD and System V UNIX Note If your...

Страница 402: ...en press the RETURN key Parameter Information returned Reference status Status of the printer Information about print jobs Network Interface Board Operating Instructions provided as a PDF file on the CD ROM labeled Printer Drivers and Utili ties info Information about the paper tray output tray and printer language of the printer Printer Reference provid ed as a PDF file on the CD ROM labeled Prin...

Страница 403: ...shell script 1 2 N Network Interface Board Operating Instructions i P Printer Reference i Printer Status 13 Printing Method 10 Printing with rsh rcp ftp 11 Q Quick Installation Guide i R rcp Printing 11 RICOH SCRIPT2 Operating Instructions i rsh Printing 11 S Setup Guide i Solaris HP UX Deleting the printer 5 Printing Method 10 System V UNIX Soralis HP UX Printer Status 13 U UNIX 1 UNIX Supplement...

Страница 404: ...16 UE USA G063 MEMO ...

Страница 405: ...Copyright 2000 ...

Страница 406: ...UNIX Supplement UE USA G063 8697 ...

Отзывы: