TM081 Rheem 834 Series Hydroelectric CFGWH Service Instructions
REV: AA Issued: 22/02/17
This document is stored and maintained electronically by Rheem Technical Support. All printed copies are deemed uncontrolled.
48
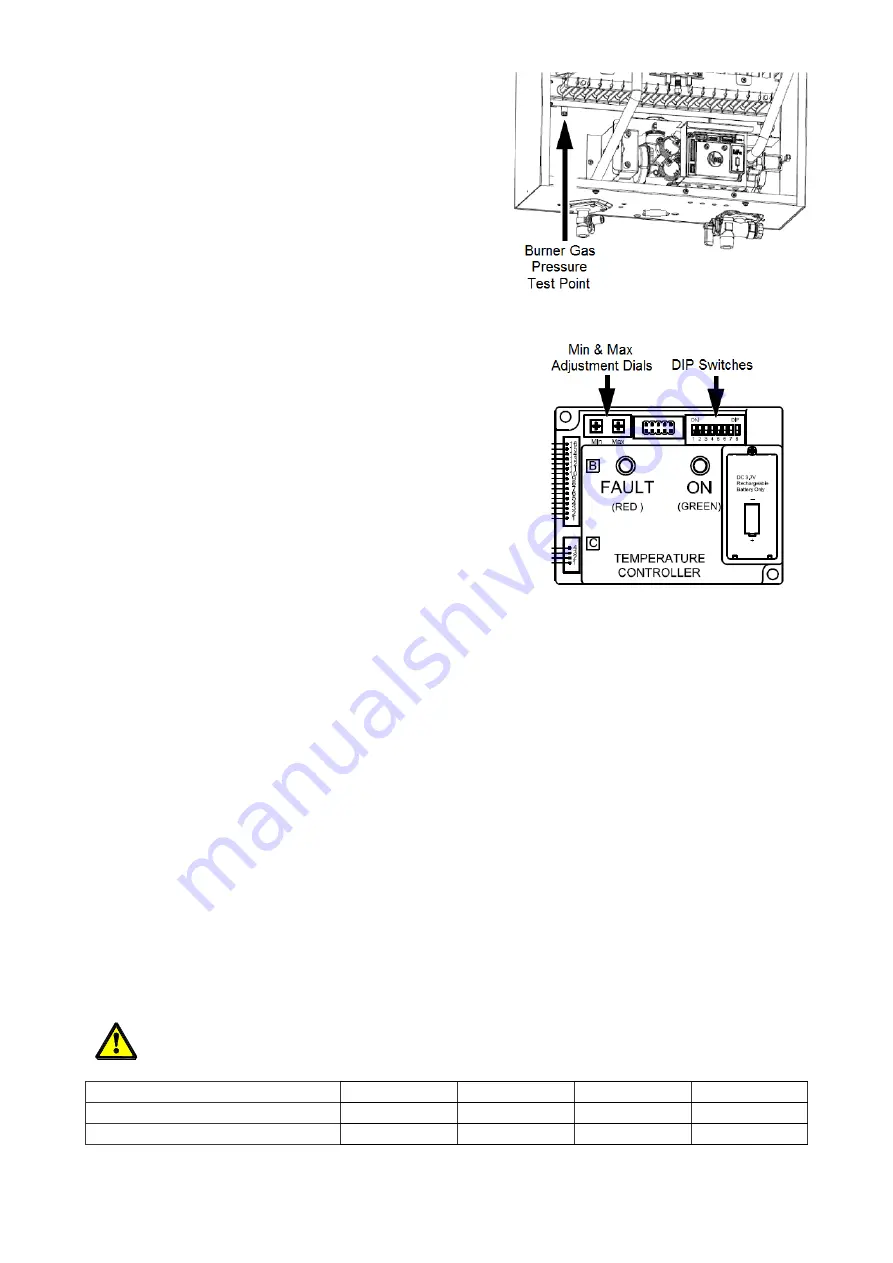
5. Locate the burner gas pressure test point on
the main burner manifold.
Remove the test point screw and washer
from the test point orifice.
Connect the manometer.
6. Open the gas isolation valve fully at the gas
inlet to the water heater.
7. Set dip switches 1, 2 and 3 to the 'ON' (up)
position.
8. Open a hot tap fully until the burner ignites.
The burner will now operate on the minimum gas pressure setting.
9. Observe the gas pressure reading on the
manometer and compare to the minimum test point
gas pressure stated on the rating label.
10. If adjustment is required, using a Phillips head
screw driver turn the “MIN” dial anti-clockwise to
increase the minimum burner gas pressure or
clockwise to reduce the minimum burner gas
pressure, whilst reading the gas pressure on the
manometer.
11. When the minimum burner gas pressure is correctly
adjusted, set dip switch
2 to the “OFF” (down)
position.
The burner will now operate on the maximum gas pressure setting
.
12. Observe the gas pressure reading on the manometer and compare to the maximum
test point gas pressure stated on the rating label.
13. If adjustment is required, using a P
hillips head screw driver turn the “MAX” dial anti-
clockwise to increase the maximum burner gas pressure or clockwise to reduce the
maximum burner gas pressure, whilst reading the gas pressure on the manometer.
14. When the maximum burner gas pressure is correctly adjusted, set the dip switch 1 to
the “OFF” (down) position.
15. Wait for 1 second, then set dip switch
3 to the “OFF” (down) position.
16. Turn off the hot water tap.
17.
Close the gas isolation valve fully at the gas inlet to the water heater.
18. Remove the manometer and refit and tighten the test point screw and washer.
19. Turn on the gas isolation valve fully, open a hot water tap and check the burners
ignite.
20. Check for gas leaks.
21. Turn off the hot water tap and refit the front panel to the water heater.
The temperature control function is deactivated whilst performing this
procedure. DIP switches 1, 2 and 3 MUST be set to OFF (down position) for
the water heater to function correctly during normal operation.
Burner Gas Pressure Settings
834012N0
834012P0
834016N0
834016P0
Min Setting (kPa)
0.080
0.21
0.088
0.21
Max Setting (kPa)
0.72
1.85
0.74
1.85


