12
Page
Step 7
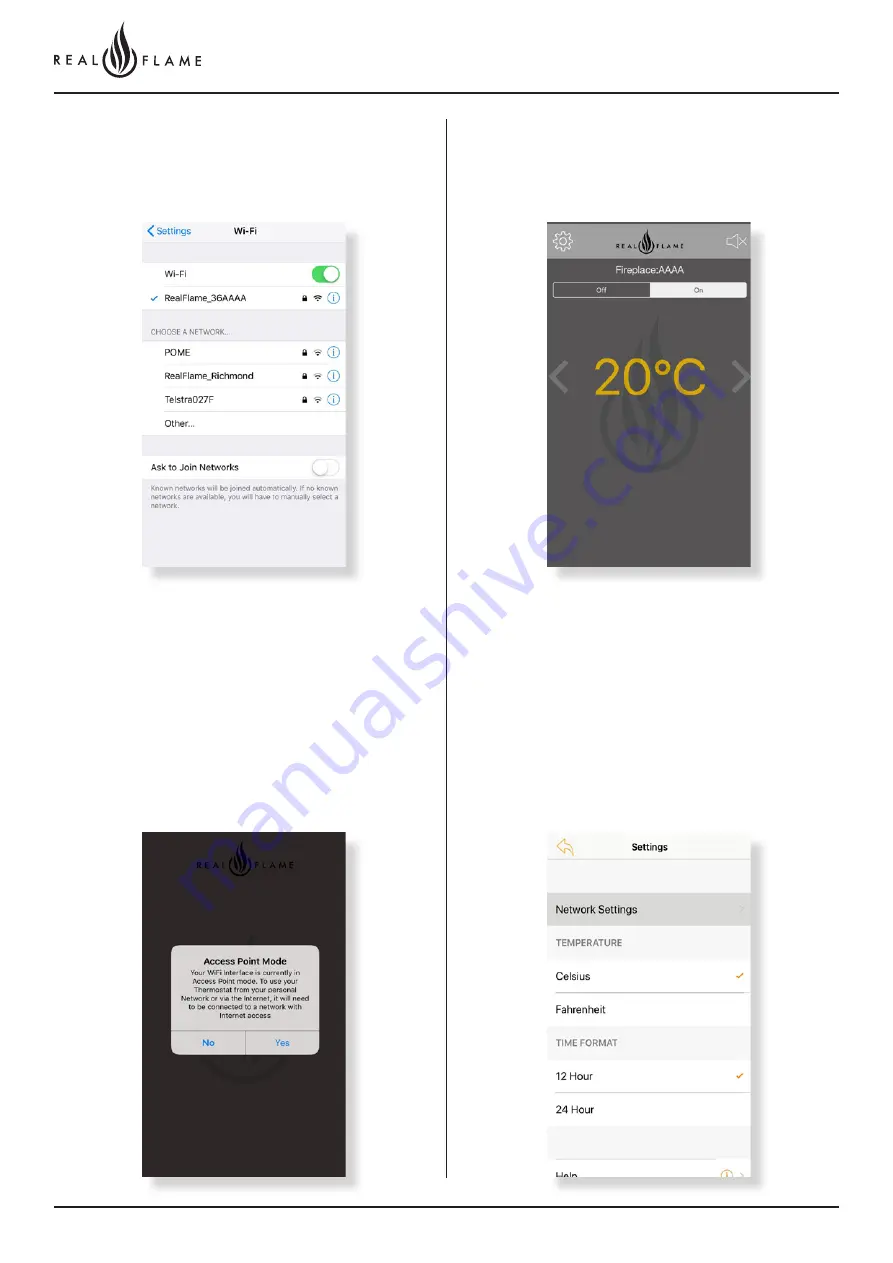
Once the fireplace is connected click on the information button and
select auto join for ease of connection in the future.
Step 8
Open the App and click on NO when this pops up. Clicking NO
would prompt the device to access the fireplace in the access point
mode, which means you have connected to the device using the
fireplace WiFi.
*Check Step 11 under “Setting up remote access to the fireplace” to connect to your
fireplace from any location.
Step 9
Congrats you have connected to the fireplace. Sit back, relax and
increase or decrease the temperature as you please.
Step 10
In case you want to change the name of your fireplace connection,
click on the settings button on the left corner and it will transport you
to the settings tab. Click on Network settings.
Содержание Element 1200 MARK 2
Страница 6: ...6 Page OPERATION INSTRUCTIONS ...
Страница 20: ...20 Page IN STALL ATION INSTRUCTIONS ...
Страница 26: ...26 Page 0 5M FLUE CONFIGURATION ...
Страница 30: ...30 Page Flue runs 0m to 5m length rooftop termination with external motor ...
Страница 34: ...34 Page 0M 5M FLUE INTERNAL FAN AND WALL TERMINATION INSTALL ATION ...
Страница 42: ...42 Page INTERNAL FAN ROOF TERMINATION ...
Страница 46: ...46 Page ROOFTOP TERMINATION WITH EXTERNAL MOTOR ...
Страница 49: ...49 Page 5 10M INSUL ATED FLUE CONFIGURATION ...
Страница 77: ...77 Page 10 13 5M POLYPROPYLENE FLUE CONFIGURATION ...
Страница 81: ...81 Page ...
Страница 89: ...89 Page Connect power cable connector Fit cable clamp to cable Fit front cover ...
Страница 98: ...98 Page 10 13 5M ROOFTOP POLYPROPYLENE FLUE CONFIGURATION ...
Страница 102: ...102 Page ...
Страница 103: ...103 Page SET UP WITH IN LINE OR APPLIANCE MOUNTED FAN ...
Страница 123: ...123 Page APP EN DIX 1 FL UE TERMINATION ...


