background image

OWNER’S MANUAL

2

SIXTY-TWO

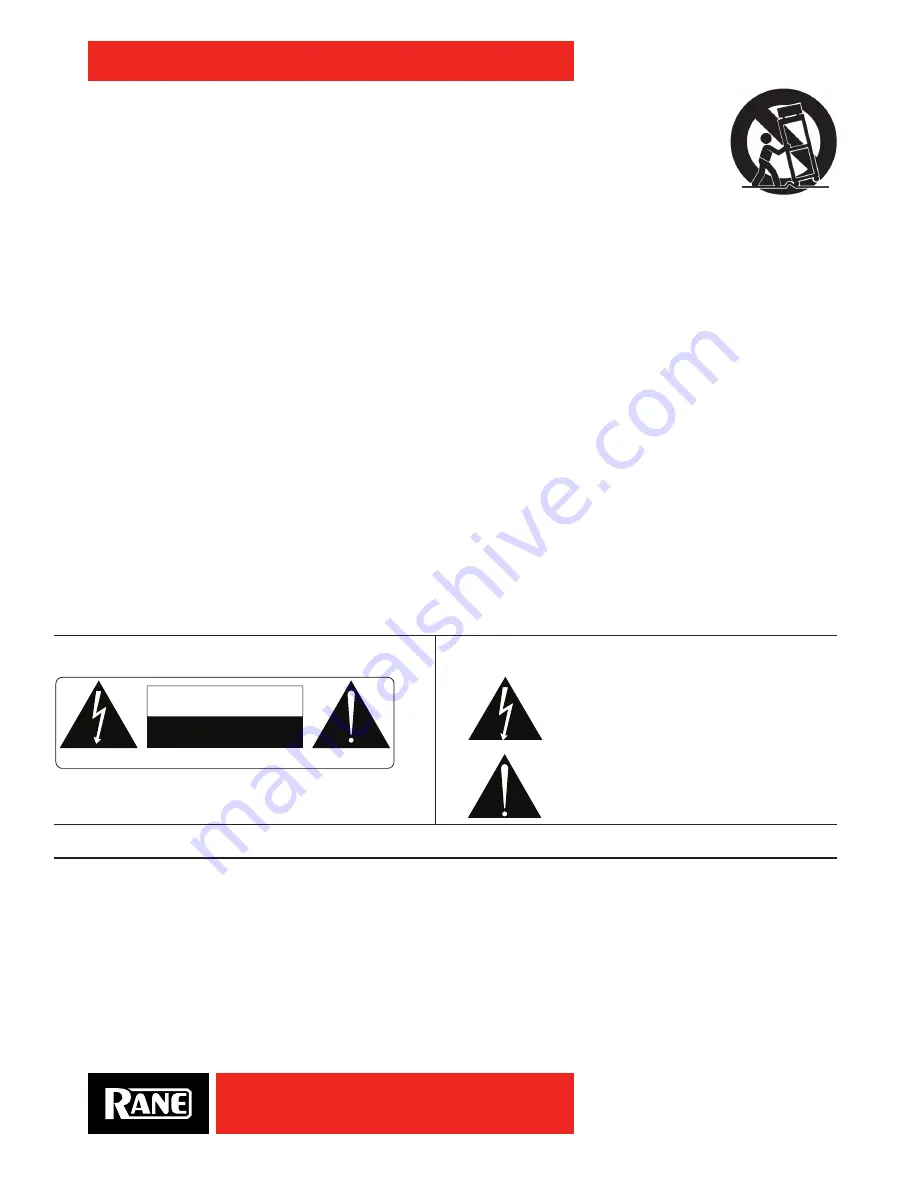
ATTENTION: RISQUE DE CHOCS ELECTRIQUE - NE PAS OUVRIR

RISK OF ELECTRIC SHOCK

DO NOT OPEN

CAUTION

To reduce the risk of electrical shock, do not open the unit. No 
user serviceable parts inside. Refer servicing to qualified service 
personnel.

The symbols shown below are internationally accepted symbols 
that warn of potential hazards with electrical products.

This symbol indicates that a dangerous voltage 
constituting a risk of electric shock is present 
within this unit.

This symbol indicates that there are important 
operating and maintenance instructions in the 
literature accompanying this unit.

WARNING

Important Safety Instructions

1. Read these instructions.
2. Keep these instructions.
3. Heed all warnings.
4. Follow all instructions.
5. Do not use this apparatus near water.
6. Clean only with a dry cloth.
7. Do not block any ventilation openings. Install in accordance with manufacturer’s instructions. 
8. Do not install near any heat sources such as radiators, registers, stoves, or other apparatus (including amplifiers) that produce heat.
9. Do not defeat the safety purpose of the polarized or grounding-type plug. A polarized plug has two blades with one wider than the other. A 

grounding-type plug has two blades and a third grounding prong. The wide blade or third prong is provided for your safety. If the provided plug 
does not fit into your outlet, consult an electrician for replacement of the obsolete outlet.

10. Protect the power cord and plug from being walked on or pinched particularly at plugs, convenience receptacles, and the point where it exits 

from the apparatus. 

11. Only use attachments and accessories specified by Rane.
12. Use only with the cart, stand, tripod, bracket, or table specified by the manufacturer, or sold with the apparatus. When a cart is used, use 

caution when moving the cart/apparatus combination to avoid injury from tip-over. 

13. Unplug this apparatus during lightning storms or when unused for long periods of time.
14. Refer all servicing to qualified service personnel. Servicing is required when the apparatus has been damaged in any way, such as power supply 

cord or plug is damaged, liquid has been spilled or objects have fallen into the apparatus, the apparatus has been exposed to rain or moisture, 
does not operate normally, or has been dropped.

15. The plug on the power cord is the AC mains disconnect device and must remain readily operable. To completely disconnect this apparatus from 

the AC mains, disconnect the power supply cord plug from the AC receptacle.

16. This apparatus shall be connected to a mains socket outlet with a protective earthing connection.
17. When permanently connected, an all-pole mains switch with a contact separation of at least 3 mm in each pole shall be incorporated in the 

electrical installation of the building. 

18. If rackmounting, provide adequate ventilation. Equipment may be located above or below this apparatus, but some equipment (like large power 

amplifiers) may cause an unacceptable amount of hum or may generate too much heat and degrade the performance of this apparatus.

19. This apparatus may be installed in an industry standard equipment rack. Use screws through all mounting holes to provide the best support.

WARNING

: To reduce the risk of fire or electric shock, do not expose this apparatus to rain or moisture. Apparatus shall not be exposed to dripping 

or splashing and no objects filled with liquids, such as vases, shall be placed on the apparatus.

NOTE

: This equipment has been tested and found to comply with the limits for a Class B digital device, pursuant to part 15 of the FCC Rules. 

These limits are designed to provide reasonable protection against harmful interference in a residential installation. This equipment generates, uses 
and can radiate radio frequency energy and, if not installed and used in accordance with the instructions, may cause harmful interference to radio 
communications. However, there is no guarantee that interference will not occur in a particular installation. If this equipment does cause harmful 
interference to radio or television reception, which can be determined by turning the equipment off and on, the user is encouraged to try to correct 
the interference by one or more of the following measures:
• Reorient or relocate the receiving antenna.
• Increase the separation between the equipment and receiver.
• Connect the equipment into an outlet on a circuit different from that to which the receiver is connected.
• Consult the dealer or an experienced radio/TV technician for help.

CAUTION

: Changes or modifications not expressly approved by Rane Corporation could void the user's authority to operate the equipment.

This Class B digital apparatus complies with Canadian ICES-003.

WARNING

: This product may contain chemicals known to the State of California to cause cancer, or birth defects or other reproductive harm.

Содержание SIXTY-TWO

Страница 1: ...OWNER S MANUAL SIXTY TWO RANE SIXTY TWO MIXER MANUAL...

Страница 2: ...r cord is the AC mains disconnect device and must remain readily operable To completely disconnect this apparatus from the AC mains disconnect the power supply cord plug from the AC receptacle 16 This...

Страница 3: ...lument rester accessible Pour d connecter totalement l appareil du secteur d branchez le c ble d alimentation de la prise secteur 16 Cet appareil doit tre branch une prise terre avec protection 17 Qua...

Страница 4: ...or commercial benefit is strictly prohibited For avoidance of doubt the duplication or creation of Control vinyl for any use is strictly prohibited Please respect our copyright Windows is a registered...

Страница 5: ...t 15 Main and Booth 16 Software Controls 16 Library Browse 16 Loops Manual Auto 16 Manual Loop Controls 16 Auto Loop Controls 17 Cues Samples control 17 Cue Points 17 Sample Player SP 6 Triggers 18 Fl...

Страница 6: ...om serato com if it is newer than the version on the CD ROM that comes with your mixer 1 Insert the Serato DJ Installer CD ROM that came with your unit or browse using Windows Explorer to the location...

Страница 7: ...ne computer Leave the power off until your decks and amplifiers are connected Analog Inputs 1 Connect your Left deck s RCA cables to ANALOG INPUT 1 If it s a CD player select CD with the switch above...

Страница 8: ...Virtual Deck To select the control sources in Scratch Live click the SETUP button at the top of the Scratch Live screen In the Hardware General tab verify that Control Source PGM 1 is set to 1 This wi...

Страница 9: ...situations you will not be able to improve the signal quality and you will have to play on regardless In this situation stick to rel mode The Scopes The scopes on the setup screen in Serato DJ displa...

Страница 10: ...used Mic controls easily map to MIDI Advanced post fader FlexFX Internal Effects engine with Filter Flanger Phaser Echo Robot and Reverb MIDI beat clock tracking and generation Sync BPM with Serato DJ...

Страница 11: ...input is on unbalanced TS tip sleeve jacks These inputs automatically switch to mono when only one cable is connected to the left or right Return input The FlexFX Return input is normally used along w...

Страница 12: ...e how to share the Sixty Two in DJ Changeover on page 25 USB Playback Stereo Pair Serato DJ Description Mixer Use 1 1 2 Left Virtual Deck Output Select as Deck 1 Source from USB A or USB B 2 3 4 Right...

Страница 13: ...t 3 PH CD 4 THRU Set to PH or CD with the rear panel switch When selected in software this input is available on USB record 7 8 for use as the DVS control signal or for audio recording To select this...

Страница 14: ...ols operate as solo or radio button controls This means engaging a Headphone Cue turns all the other Headphone Cue controls off You can select more than one at a time by simultaneously pressing more t...

Страница 15: ...RT TIME 3 1 2 1 B A FILTER BEAT SHIFT LEVEL FILTER FLEXFX ROLL OUT SAVE LOOP CUE DECK 1 CUE USB AUX CUE DECK 2 10 0 2 4 8 6 10 0 2 4 8 6 10 0 2 4 8 6 HIGH LOW 10 0 2 4 8 6 MAIN CUE 10 0 2 4 8 6 10 0 2...

Страница 16: ...rato DJ when the encoder is pressed IN Sets a loop in point OUT Sets a loop out point LOOP Turns a loop on or off Auto Loop Controls When Auto loop mode is selected loop control buttons are illuminate...

Страница 17: ...ected in Serato DJ Sample playback can be assigned to the Left Virtual Deck Right Virtual Deck or USB AUX The Sixty Two has a dedicated USB AUX input for the sample player typically used for SP 6 play...

Страница 18: ...ith internal effects and the INSERT or independently NOTE If no external connection is made to the FLEXFX LOOP RETURN jack the signal will be interrupted when the EXT INSERT button is turned on 4 The...

Страница 19: ...edback filter and adjustable recirculation of 0 to 100 The feedback filter types help reduce the muddy sound that can result when using a lot of recirculation The type of Echo is selected in the menu...

Страница 20: ...r of 8 the resulting time is 8000 milliseconds If the multiplier is set to 16 the resulting time would be 16000 milliseconds which is out of range In this case the time remains at 8000 milliseconds an...

Страница 21: ...the echo effect decays The amount of recirculation varies with the echo options selected see last column Setting the control to minimum or 0 results in a Dry signal with the minimum recirculation sett...

Страница 22: ...Low sync Filters sync to BPM at the low point of the sweep and the High sync Filters sync to BPM at the high point of the sweep Press any effect button or the SHIFT button to exit the menu Low pass F...

Страница 23: ...sections you can independently bypass the controls so they do not affect audio and only output their MIDI changes This allows you to map the Mic controls to functions in software such as effects and n...

Страница 24: ...essage sent 24 times per quarter note BPM Adjust Hold the SHIFT button and turn the TIME encoder to adjust the BPM to a specific value Sync Hold the SHIFT button and press SYNC to turn Sync on for a D...

Страница 25: ...ng do the following 1 Connect the second computer to the unused USB port on the Sixty Two 2 Switch the DECK SOURCE on the non playing mixer channel to the USB source of the second computer 3 Play a tr...

Страница 26: ...ved settings override your previous Control Panel settings The control Panel consists of four pages Preferences Program Inputs 1 2 Effects and MIDI The current page title is in the top center To move...

Страница 27: ...utoff frequency The Low setting provides the smoothest Filter without adding gain The High setting adds accent to frequencies near the Filter cutoff point by adding about 12 dB of gain Adding gain in...

Страница 28: ...n Receive MIDI Beat Clock is checked the mixer receives MIDI Real Time System Messages When Send MIDI Beat Clock is checked the mixer sends MIDI Real Time System Messages When User Button Lighting is...

Страница 29: ...d Sample buttons when in CUE and SAMPLES modes MIDI Layers The mixer is capable of changing MIDI Layers in order to MIDI map one control to multiple functions under different contexts Changing the MID...

Страница 30: ...SERT TIME TAP CUES 1 2 3 4 5 C D 5 4 3 SAMPLES 4 5 6 3 2 1 2 1 B A ON CUE EXT INSERT FILTER BEAT FLANGER PHASER ECHO ROBOT REVERB FLEXFX BACK LOAD SCROLL LOOPS BEATS SELECT SELECT SHIFT SHIFT LEVEL FI...

Страница 31: ...OWNER S MANUAL 31 SIXTY TWO 21 112 24 113 27 25 23 22 26 114 30 115 38 49 33 48 46 41 39 40 42 55 43...

Страница 32: ...Encoder Push Not Applicable Mixer Control 4 0x04 FlexFX Cue Not Permitted Mixer Control 5 0x05 FX Tap Not Permitted Mixer Control 7 0x07 Beat Joystick Push Not Applicable Mixer Control 8 0x08 Reverb...

Страница 33: ...Yellow DAW MIDI Control 75 0x4B RH Cue 4 PRI Green SEC Yellow DAW MIDI Control 76 0x4C RH Cue 5 PRI Green SEC Yellow DAW MIDI Control 77 0x4D USB Aux Cue Not Permitted Mixer Control 78 0x4E RH Cue 1 P...

Страница 34: ...ime Encoder 2 s Complement from 64 Relative Binary Offset 21 0x15 Analog 1 Phono Sensitivity Value Hex Sensitivity mV dB 0 0x00 2 5 16 04 1 0x01 3 14 46 2 0x02 3 5 12 12 3 0x03 4 11 96 4 0x04 4 5 10 9...

Страница 35: ...eck 1 Mid 0 127 0x00 0x7F 78 0x4E Deck 2 Mid 0 127 0x00 0x7F 82 0x52 Mic Low 0 127 0x00 0x7F 83 0x53 Deck 1 Fader 0 127 0x00 0x7F 84 0x54 Deck 2 Fader 0 127 0x00 0x7F 87 0x57 Session Out Level 0 127 0...

Страница 36: ...where it can t get damaged 4 Remove the two screws at each end of a fader holding the bottom of the fader in place with your other hand 5 Take out the fader assembly completely 6 Note the left connect...

Страница 37: ...oth DECK 1 CUE and DECK 2 CUE buttons at the same time 4 While holding these buttons down power on the Sixty Two 5 Immediately after powering up the CUE lights will flash one time indicating a success...

Страница 38: ...Stereo unbalanced TS tip sleeve phone jacks Mic Input Balanced TRS XLR combination jack Tone Controls 2 band High and Low Mic Line level switch Choose Line to connect wireless receiver Line Outputs F...

Страница 39: ...ntative contacts are at dj rane com CUE DECK 1 CUE USB AUX CUE DECK 2 10 0 2 4 8 6 10 0 2 4 8 6 10 0 2 4 8 6 HIGH LOW 10 0 2 4 8 6 MAIN CUE 10 0 2 4 8 6 10 0 2 4 8 6 10 0 2 4 8 6 10 0 2 4 8 6 10 0 2 4...

Страница 40: ...HIS LIMITED WARRANTY SHALL BE THAT WHICH IS DESCRIBED TO THE ORIGINAL RETAIL PURCHASER BY THE AUTHORIZED RANE DEALER OR DISTRIBUTOR AT THE TIME OF PURCHASE Rane Corporation does not however warrant it...

Страница 41: ...hased in the U S AT THE RANE FACTORY IN THE U S If the product is being sent to Rane for repair please call the factory for a Return Authorization number We recommend advance notice be given to the re...

Страница 42: ...n consent of the manufacturer This declaration of conformity is issued under the sole responsibility of Rane Corporation Type of Equipment Professional Audio Signal Processing Brand Rane Model Sixty T...

Страница 43: ...OWNER S MANUAL 43 SIXTY TWO...

Страница 44: ...OWNER S MANUAL 44 SIXTY TWO PART 22489...

Отзывы: