24
for further information consult our website
www.raleigh.co.uk •
for video support & download
DisC bRAkEs
It is better if the bike is upside down
when fitting a disc brake wheel.
Disc brakes use 2 pads and these are
usually kept in place with packing pieces
during transit. Remove the packaging
from between the disc pads making sure
that the pads are not displaced.
High performance models are fitted
with disc brakes to ensure powerful and
consistent braking under all conditions.
Brakes which work on the wheel rim
only work properly when the rim is clean
and dry. In rain or mud, the brake pad
tends to slide over the braking surface
rather than gripping it. So not only does
braking performance fall off badly, you
can never be sure just how much it is
affected.
Disc brakes, on the other hand, have
larger pads that can easily wipe any
water or mud off the disc. This gives you
consistent levels of braking, whatever
the weather or the surface conditions.
In addition, the mechanism presses the
pad much more firmly against the disc.
Remember that the gap between the
pad and the disc is very small. So-when
correctly adjusted, the brake pads rub
very lightly against the disc. In fact you
should be able to hear a light scraping
noise when you spin the wheel. This
means that you get the full braking
effect with only a short pull on the brake
lever. But the small gap also means that
when fitting wheels with disc brakes
to a bike, you must slide the disc into
position between the pads, before you
fit the wheel to the frame. If you don’t,
there’s a slight possibility of either
jamming the pad against the disc or
preventing the caliper moving.
The small gap between the pad and the
disc also makes it vital to keep the disc
absolutely straight and true. So don’t
ever kick it, let it bind on a rock or get
damaged in any other way. If the disc
does go out of true, it’ll rub much more
heavily on the pad and must be replaced
without delay.
As for maintenance, disc brake pads
should be replaced every 2 to 3,000
km or when they have worn down to
6.3 mm in thickness, whichever comes
first. If you don’t, the steel backing will
eventually score the disc. But when you
do fit new pads, and whenever you find
that you need to pull the brake lever
a lot further to stop quickly, you must
adjust the gap between the pad and the
disc. The only other maintenance job is
to apply a little copper-based anti-seize
compound to the caliper mounting pins
every so often.
Refer immediately to your retailer if
the disc gets scored or distorted or you
hear any unusual noises, especially
screeching or grinding sounds.
Please note disc brake type may vary
from model to model, but in principal
their operation is the same.
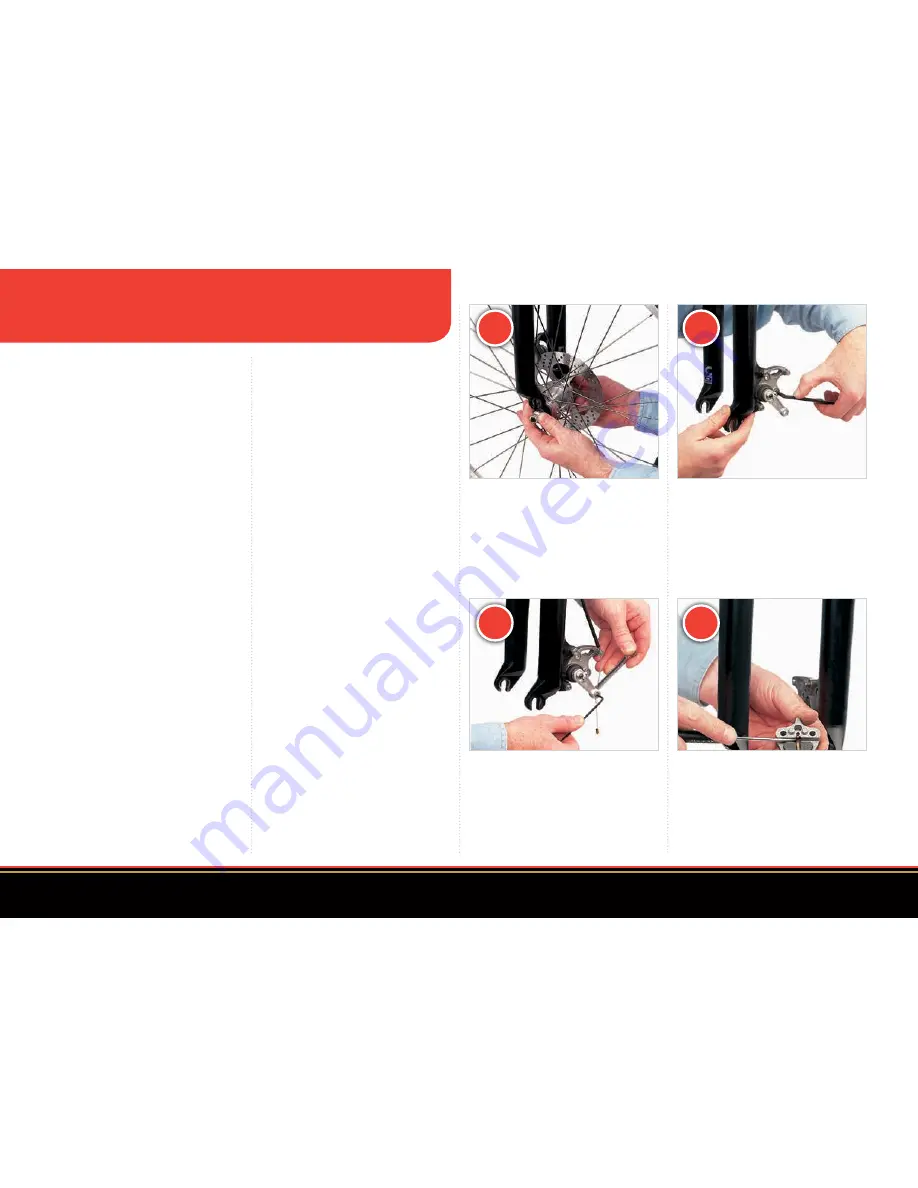
To fit new brake pads, you next have
to free the inner pad holder from the
caliper body. So locate all three fixing
bolts and go round undoing each one
half a turn at a time. This method of
working will prevent any distortion of
the parts.
When you have removed all three bolts,
gently prise the pad holder away from
the caliper body. The pad is held in place
with a tiny spring, so prise this away as
well. Be very careful, as the spring can fly
in any direction.
To remove a front wheel with a disc
brake, turn the quick release lever to
the open position and let it drop out.
If it seems stuck, undo the adjuster nut
a bit. When refitting the wheel, lift it
carefully into place and re-adjust the
quick release.
To fit a new cable, hold the back of the
cable clamp with a spanner while you
loosen the cable clamp with an Allen
key. This is also the first step when you
have to strip down the caliper to free it
off or when you want to fit new brake
pads.
1
2
3
4


