20
for further information consult our website
www.raleigh.co.uk •
for video support & download
ChECking bRAkEs
The first thing to check on either cantilever or caliper brakes is the amount of effort
needed for an emergency stop. If you have to pull the lever more than halfway to
the handlebars, the cable should be tightened .Next, check that the brake pads are
aligned with the wheel rim and are not worn. If they’re not aligned correctly or need
changing, see page 21.
If one of the wheels starts to rub against the brake pads after making any of these
adjustments, check that it’s correctly centred in the frame and that the brake pads
are centred on the wheel rim. If the wheels and brakes are correctly centred, the
wheels may be slightly buckled and you should ask your retailer to check this point.
Most models are fitted with powerful long arm cantilever brakes, called V-brakes.
If they don’t seem to be stopping the bike as quickly as they should, check the
alignment and condition of the brake pads and the position of the brake arms -
see page 22. It’s more difficult to set up standard cantilever correctly. If you have
problems, consult your retailer.
Finally, see page 26 for caliper brakes, often fitted to sports and children’s bikes.
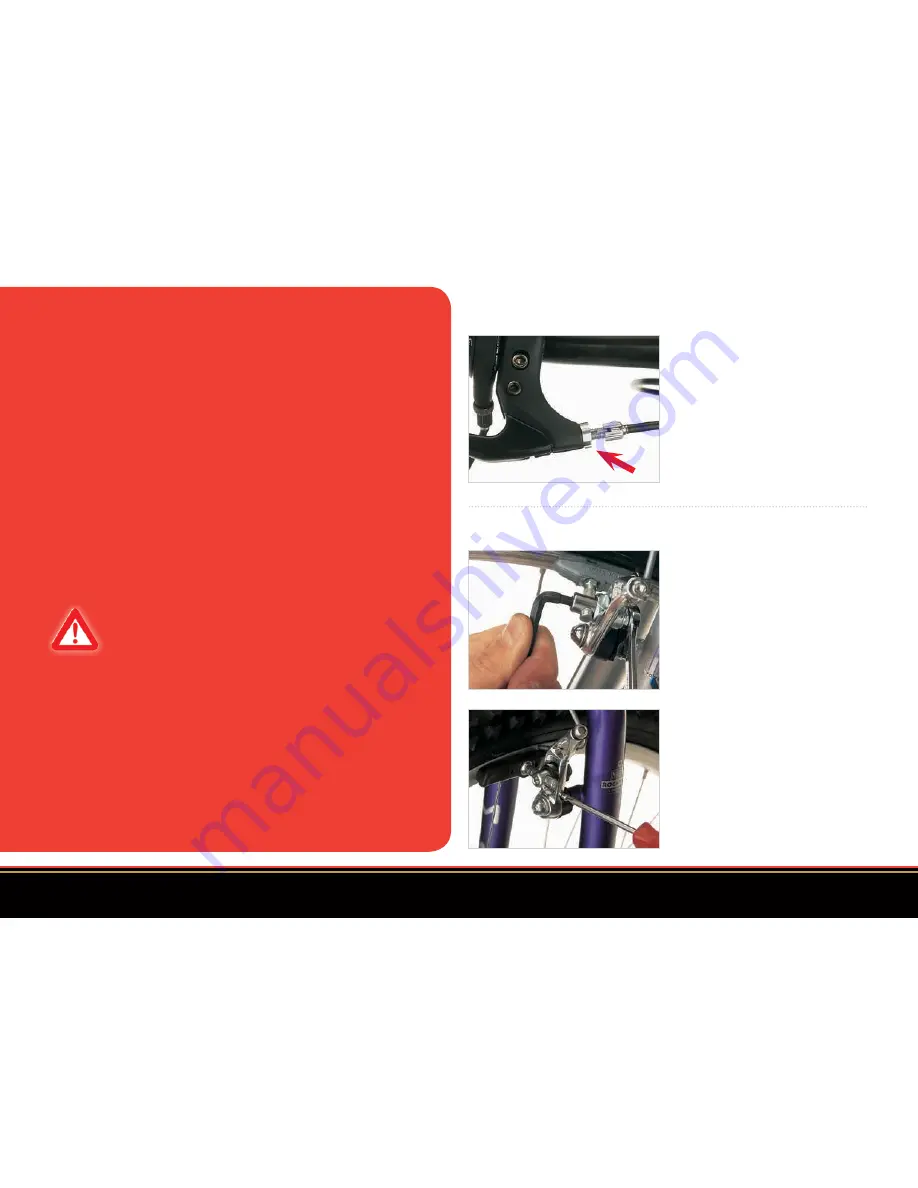
To tighten the cable, undo the lock
nut arrowed in the picture. Then
undo the knurled adjuster two turns
anti-clockwise and test. If the brakes
are OK, retighten the lock nut but for
the sake of safety, always leave three
full threads in the brake. Ensure slots
are not all in line in order to keep
cable secure. This should be checked
regularly.
Check pad alignment and pad wear as
explained above. If you have to realign
the pads, hold the mounting with an
Allen key at the front while you loosen
the nut at the back slightly. Adjust the
pad position, then retighten the nut.
You can adjust the reach to the brake
lever on some standard cantilevers
in the same way as on V-style brakes.
If the pads are more than 4 mm from
the rim, tighten the cable adjuster.
Finally, equalise pad to rim distance
with the Philips screw.
Tightening the cable adjuster
Cantilevers
Bike braking systems are so powerful that it’s easy to lock the wheels and take a flyer
over the handlebars. So before your first ride, stand next to your bike and push it
backwards and forwards, gently applying the brakes so that you get an idea of the
braking forces involved. Always apply the rear brake a fraction of a second ahead of the
front brake, especially in the wet.
Then ride round an empty car park for a while, constantly using the brakes so that you
get used to the amount of force needed to pull up smartly, without skidding or locking
the wheels. Again, this is particularly important in the wet.
On a wet road, it takes about 60% longer for bikes and most other vehicles to stop. So
when it’s wet, give everything else on the road a wider berth and be very careful when
threading through traffic. Above all, don’t snatch at the brakes - apply them well before
you have to stop and give the pads a chance to wipe the rims dry.


