background image

QUEST SPECTRUM

®

 3 


p. 33/50 


Instructions for Use 


8.8  Pin code 


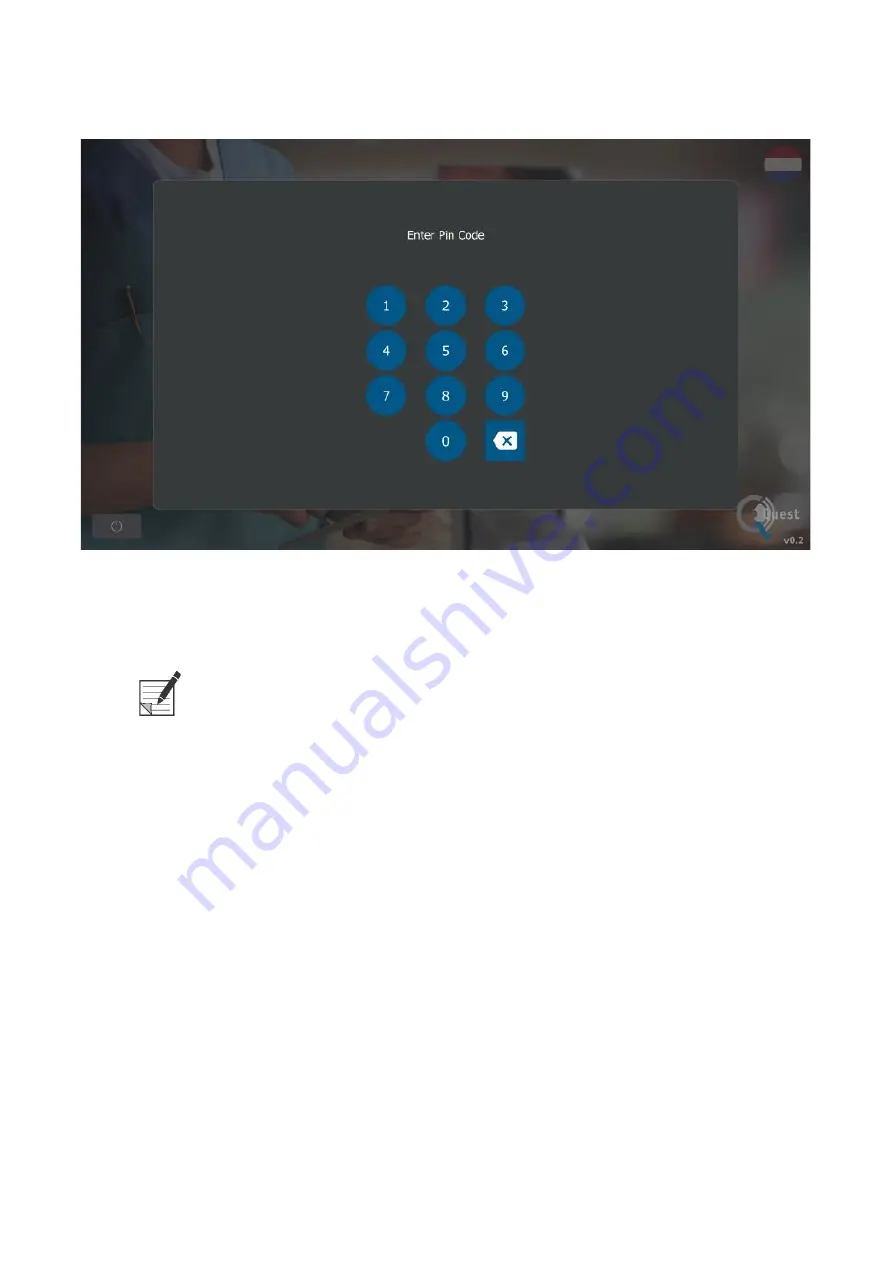
Each  surgeon  is  given  a  personal four-digit  pin  code.  This  pin code  is requested  when  wanting to 
access  the  “case  manager”  and  the  “settings”.  First,  the  correct  surgeon  needs  to  be  selected. 
Thereafter, the surgeon’s correct pin code needs to be entered (see figure


16).  


 Note:  

Please note that a surgeon can never be logged in. Every time a 
user wants to  access  the  “case manager”  or “settings”, the  pin 
code is requested. Sharing the pin code with third parties is not 
advised.  


8.9  Case manager 

 
All the taken recordings are stored in the “case manager”.  The Case manager can be found on the 
home  page  (see  figure  6

).  After  selecting  the  “case  manager”  icon,  a  surgeon  must  be  selected. 

Accessing the recordings can only be done by entering the surgeo

n’s personal pin code. After having 

entered  the  code,  an  interface  as  shown  in  figure  17  will  appear.  Now,  all  the  recordings  and 
snapshots taken by the surgeon can be accessed. All the snapshots and recordings can be filtered 
on date by selecting the calendar icon. The search bar can be used as well to search a specific patient 
for example.  

Figure 16: Pin code 

Содержание SPECTRUM 3

Страница 1: ...Instructions for Use QUEST SPECTRUM 3 ...

Страница 2: ...duct information updated as part of ECO 2042 IFU released per DCO 2325 2 3 2358 8 11 22 05 2021 NdK Updated document in accordance with Translations and additional feedback Added warnings related to heat related to CAPA 2243 and CAPA 2244 Released per DCO 2358 3 2547 12 21 23 12 2021 IMO See SCM History IFU released per DCO 2547 4 2646 22 23 22 02 2022 IMO Update article number on Capture suite Up...

Страница 3: ...QUEST SPECTRUM 3 Instructions for Use Intra operative Fluorescence Imaging Open and Minimal Invasive Surgery QUEST SPECTRUM 3 ...

Страница 4: ...echnical Support Email info quest mi com Phone 1 33 07 52 65 96 Fax 1 33 07 52 65 97 Document Identification Document QMI0023_IFU_EN Revision 4 Date of revision 22 02 2022 Copyright statement 2022 Quest Medical Imaging B V All rights reserved No part of this document may be photocopied reproduced or translated in any way without the prior written consent of Quest Medical Imaging B V Every effort h...

Страница 5: ...acology 11 4 2 Contraindications 11 4 2 1 General 11 4 2 2 Drug Interactions 11 4 2 3 Drug Laboratory Test Interactions 11 4 2 4 Carcinogenesis Mutagenesis Impairment of Fertility 11 4 2 5 Pediatric Use 11 4 2 6 Geriatric Use 11 4 3 Adverse reactions 12 4 4 Over dosage 12 5 Symbols and indicator Lights 13 6 Disposal 14 7 Unpacking and Setting Up 15 7 1 Unpacking the System 15 7 2 Setting Up QUEST ...

Страница 6: ...erilization 38 9 1 Cleaning Instructions 38 9 2 Sterilization 38 9 3 Maintenance 38 10 Appendix A Trouble Shooting 39 10 1 Trouble shooting 39 10 2 Fuse Replace Procedure 40 11 Appendix B Technical Specifications 41 12 Appendix C EMC and Environmental Safety 42 12 1 Electromagnetic interference 42 12 2 Electrostatic discharge 42 12 3 General notes and benefits of potential equalization 42 13 Appen...

Страница 7: ...nformation 1 2 Indication for Use The Quest Spectrum is a fluorescent imaging system used in capturing and viewing fluorescent images for the visual assessment of blood flow for the evaluation of tissue perfusion and related tissue transfer circulation in tissue and free flaps used during plastic reconstructive and organ transplant surgeries The Quest Spectrum is intended for intraoperative and mi...

Страница 8: ...g it back Clean disinfect and sterilize the light guide cable and laparoscope thoroughly prior to returning for repair Clean and disinfect the QUEST SPECTRUM 3 and its camera and ring light Return the part in its original packaging If this is not possible package the part to secure it for transport Quest Medical Imaging is not liable for damage resulting from improper shipping Note The QUEST SPECT...

Страница 9: ...nents that have not been clearly identified for use with the system WARNING Do not exchange components of the QUEST SPECTRUM 3 between devices Note The QUEST SPECTRUM 3 can be used for minimal invasive surgeries by connecting the QUEST SPECTRUM Laparoscope to the QUEST SPECTRUM Camera 2 2 Imaging Agent The Indocyanine Green ICG imaging agent is a sterile water soluble lyophilized green powder ICG ...

Страница 10: ...isplay ART CS 0104 QUEST SPECTRUM Capture Suite ART TR C01 0006 QUEST SPECTRUM Mechanical Camera Arm Optional components ART RL 0012 QUEST SPECTRUM Ring Light Lens ART LAP 0008 QUEST SPECTRUM Laparoscope 30 1 ART LAP 0008S QUEST SPECTRUM Laparoscope 30 Short 1 ART LAP 0009 QUEST SPECTRUM Laparoscope 0 1 ART LAP 0009S QUEST SPECTRUM Laparoscope 0 Short1 ART OP 0007 QUEST SPECTRUM Light Cable 1 Drap...

Страница 11: ...uids around the QUEST SPECTRUM 3 If liquid enters components of the QUEST SPECTRUM 3 immediately turn system off and unplug it from the power outlet CAUTION Do not insert objects into the ventilation holes of QUEST SPECTRUM 3 enclosure CAUTION Do not connect or disconnect the camera cable while QUEST SPECTRUM 3 is powered on 3 2 Electrical Safety Power WARNING Do not connect any devices to the pow...

Страница 12: ...ng and Disinfecting WARNING Follow the instructions in Chapter 9 to clean disinfect and or sterilize the QUEST SPECTRUM 3 components and accessories WARNING Do not sterilize the Ring Light with Lens 3 6 Heat WARNING The light source can generate significant amount of heat exceeding 41 C 106 F at the scope tip the scope light post the light cable tip and or near the light cable adapter Higher level...

Страница 13: ... standby mode whenever the scope is removed from the light cable or the device is unattended The scope tip scope light post light cable adapter and light cable tip will take several minutes to cool off after being placed in standby mode and therefore may still result in fire mode and therefore may still result in fire or burns to the patient user or inanimate objects WARNING Never use the QUEST SP...

Страница 14: ...ained in discontinuous sampling techniques may be read hours later Sterile techniques should be used in handling the dye solution as well as in the performance of the dilution curves ICG powder may cling to the vial or lump together because it is freeze dried in the vials This is not due to the presence of water the moisture content is carefully controlled The ICG is suitable for use 4 2 2 Drug In...

Страница 15: ... be administered 4 4 Over dosage There are no data available describing the signs symptoms or laboratory findings accompanying over dosage The LD 50 after I V administration ranges between 60 and 80 mg kg in mice 50 and 70 mg kg in rats and 50 and 80 mg kg in rabbits Under sterile conditions the ICG for Injection USP powder should be dissolved with Sterile Water for Injection USP Exactly 5 mL of S...

Страница 16: ...ols and Signs IPC On off button with blue light indicator Table 4 Symbols and Signs Trolley Aperture Warning Do not view the beam with magnifying optical instruments e g a loupe Laser warning indications Do not step Mind your fingers Do not use the mechanical camera arm with the laparoscope LASER RADIATION AVOID DIRECT EYE EXPOSURE CLASS 3R LASER PRODUCT Max output 41 mW Emitted wavelengths 680nm ...

Страница 17: ...isposed of in compliance with local regional and national regulations Single use or consumable components and accessories such as the QUEST SPECTRUM Drapes should be disposed in compliance with the regulatory regulations Other QUEST SPECTRUM 3 components should be returned to Quest Medical Imaging B V for disposal ...

Страница 18: ...re proceeding installing the QUEST SPECTRUM 3 Contact Quest Medical Imaging B V or representative if components are missing or damaged Note The QUEST SPECTRUM Drapes are purchased separately Table 5 Component summary Description Component QUEST SPECTRUM Camera QUEST SPECTRUM Ring Light Optional QUEST SPECTRUM Camera QUEST SPECTRUM Laparoscope Optional QUEST SPECTRUM Mechanical Camera Arm ...

Страница 19: ...QUEST SPECTRUM 3 p 16 50 Instructions for Use QUEST SPECTRUM IPC Trolley Barco Branded 4K UHD surgical display ...

Страница 20: ...QUEST SPECTRUM 3 p 17 50 Instructions for Use Instructions for Use Draping Instructions Quick Start ...

Страница 21: ...by unqualified personnel 7 2 2 Main power supply In Figure 2 the main power supply of the QUEST SPECTRUM 3 is shown Make sure both cables are connected to ensure power supply and protective earth Note The yellow green cable is omitted in the USA version The protective earth is incorporated in the black cable Note Make sure to use the metal frame above the power supply in order to prevent accidenta...

Страница 22: ...m Make sure the adapter is in the locked position push click 7 2 4 Connecting Ring Light or Laparoscope to the Camera Depending on the procedure a laparoscope or ring light needs to be attached to the camera The fully assembled camera consists of two parts the camera the ring light laparoscope When assembling make sure that the three pins on the ring light laparoscope fit into the camera Figure 3 ...

Страница 23: ...mera by turning the lens adapter clockwise from the user s perspective 2 Insert the ring light laparoscope into the camera 3 Make sure the lens adapter is back in the locked position a Check if you hear a click b Check if rotation of the laparoscope ring light is possible ...

Страница 24: ...ition before moving the trolley 12 Before use select a stable location with sufficient space 13 Use the Trolley only with the wheels in their fixed position brakes applied 14 The Trolley is usually placed on the other side from where the surgeon is positioned but can be placed in a different position if preferred 15 The equipment on the Trolley needs a power supply to function The Trolley is equip...

Страница 25: ...ing up This light will stay on until the system has been shut down The shutting down process also includes pressing the On Off button once As a result the blue light indicator will start blinking as an indicator that the system is shutting down The system has been shut down when the button stopped blinking 8 4 Starting surgery The QUEST SPECTRUM 3 will load into the start surgery screen immediatel...

Страница 26: ...QUEST SPECTRUM 3 p 23 50 Instructions for Use Figure 6 home screen Figure 7 insert patient data ...

Страница 27: ...QUEST SPECTRUM 3 p 24 50 Instructions for Use Figure 8 Start Surgery Figure 9 Select surgery ...

Страница 28: ...orescent overlay can be seen There are two modes Green icon the 800 nm channel supports the use of ICG Blue icon the 700 nm channel It is important to know what kind of fluorescence is used before starting surgery in order for the correct mode to be selected Note Only the ICG mode is activated for USA purposes Sensitivity The sensitivity can be increased by use of this function When unable to clea...

Страница 29: ...Modes By using the arrows on the side of the icon the monitor can be adjusted to the user s preferred settings The different viewing possibilities of the monitor are shown on the left 3x1 screen 2x2 screen 1x full screen Rotating screens There are 4 different screens see table below By using the arrows on the side of the icons the user can rotate through these various screens Table 6 overview diff...

Страница 30: ...go to the case manager see chapter 8 4 Recording By pressing the left camera icon a live recording will be made By pressing the square icon the recording will be stopped The recording can be retrieved during surgery by selecting the timeline icon see 8 4 4 timeline After surgery the recording can be accessed by going to the case manager see chapter 8 4 When recording a red coloured circle will tur...

Страница 31: ...ght can be adjusted by use of these icons Increasing the amount of laser light results in a greater fluorescent response By default the laser setting is at its highest level As shown on the left there are 4 different settings Scrolling through the settings is possible by using the arrows on the side Each next setting increases or decreases the laser output by 33 3 When wanting to turn the light ou...

Страница 32: ...w screen will turn up see figure 11 In this screen an overview is given of all taken snapshots and recordings They are all organised in chronological order with timestamps beneath them It is also possible to re watch the snapshots and recording just by selecting them By selecting the top right icon the patient data can be accessed When done select the top left arrow and you will return to the home...

Страница 33: ... is open Each table has also been divided into two parts No focus and MF manual focus No focus symbolises all the functions and options when the manual focus has not been selected and MF represents the opposite situation Table 7 overview camera functions Menu Closed No focus MF Long press start video end video start video end video Short press snapshot snapshot Turn Manual Focus on Turn manual foc...

Страница 34: ...Arm The mechanical camera arm can be used for holding the camera during an open surgery Figure 13 It is not meant for its use in minimally invasive surgery procedures The mechanical arm can be adjusted to move the camera to the region of interest Before usage this component is sterilized by putting sterile drapes over the camera gripper and joints of the mechanical arm Figure 13 Mechanical Camera ...

Страница 35: ...e arm Figure 15 Cables should not be tight between joints to avoid any damage due to pulling Figure 14 Camera positioned in arm gripper Figure 15 Cables secured in camera arm WARNING Do not use the QUEST SPECTRUM Mechanical Camera Arm with the QUEST SPECTRUM Laparoscope ...

Страница 36: ...ing the pin code with third parties is not advised 8 9 Case manager All the taken recordings are stored in the case manager The Case manager can be found on the home page see figure 6 After selecting the case manager icon a surgeon must be selected Accessing the recordings can only be done by entering the surgeon s personal pin code After having entered the code an interface as shown in figure 17 ...

Страница 37: ...d all content can be exported to this device Devices can be connected by using the USB ports on the IPC 8 10 Settings After selecting the settings icon on the home page see figure 6 an interface similar to figure 18 will appear The user has two access options Access the surgeon s settings by selecting the surgeon and entering the correct pin code see 8 8 Access the technical staff s settings see f...

Страница 38: ... Settings Technical service settings When having entered the correct pin code after selecting the option Technical service an interface as shown in figure 19 will appear See an explanation about the setting options below Figure 19 Technical service settings ...

Страница 39: ...istered surgeons this icon should be selected After pressing this icon a log of all activities is given The log includes time stamps of the activities and names of the active users Surgeon s settings After having selected the surgeon and correct pin code an interface as shown in figure 20 will appear Figure 20 surgeon s settings By selecting this icon settings can be set to the surgeon s preferenc...

Страница 40: ...and solve the problem by using the appendix trouble shooting see appendix A trouble Shooting When still experiencing trouble the help icon should be selected After selecting this icon an interface like figure 9 will appear containing all contact details for help Depending on what country the user is in different contact details are needed This information can be retrieved by selecting the correct ...

Страница 41: ...nt free cloth moisturized with 70 IPA solution External housing materials of the device are powder coated or anodized aluminum 9 2 Sterilization Laparoscopes and their Lighting Cables are compatible with conventional sterilization methods The operating facility is responsible for the sterility of the Laparoscopes and Optical Fiber Cables For cleaning and sterilization of your Laparoscope and Optic...

Страница 42: ...turned on Check that the system illuminates light Check that the injected product is fluorescent Check that the injected dose is appropriate Check that the right fluorescent tracer is selected Unexpected bright areas Check that all surgical lights are turned off Check if the fluorescent tracer can accumulate or leak to those areas Check if the tissue could fluoresce by itself Check if the light is...

Страница 43: ...s are replaced at the same time To replace the fuses unscrew the fuse holder as shown in Figure 22 The fuses can be found just above the main power supply Figure 22 Replacement of the fuses Pull out the fuse from the fuse holder see Figure 23 and replace it with a new fuse Figure 23 Pull out the fuse Screw the fuse holder back in place ...

Страница 44: ... 4A Fuse rating 2 x 5A In series p n ART ETC 0011 2 x 8A In series p n ART ETC 0008 Ceramic or sand filled Device classification Class 1 BF type Maximum installation height 1000 m Temperature range 10 30 C Operating 20 50 C Storage Humidity range 85 R H Non condensing IP class 20 Laser class Class 3R See chapter 3 4 for details Dimensions 60 x 80 x 140 cm Weight 174 kg Table 10 Cable specification...

Страница 45: ...ce level to 0 0014 V meter Always use and plug in the Potential Equalizer Conductor for safe use according to 60601 1 standard 12 2Electrostatic discharge Electrostatic discharge ESD or static shock is a naturally occurring phenomenon ESD is common in conditions of low humidity which can be caused by heating or air conditioning Static shock is a discharge of the electrical energy from a charged bo...

Страница 46: ...he customer or the user of QUEST SPECTRUM 3 should assure that it is used in the following environment Emissions Test Compliance Electromagnetic Environment guidance RF emissions CISPR11 Group 1 The QUEST SPECTRUM 3 uses RF energy only for its internal function Therefore its RF emissions are very low and are not likely to cause any interference in nearby electronic equipment RF emissions CISPR11 C...

Страница 47: ...tage dips short interruptions and voltage variations on power supply input lines IEC 61000 4 11 5 Un 95 drop in Un for 0 5 cycle 40 Un 60 drop in Un for 5 cycles 70 Un 30 drop in Un for 25 cycles 5 Un 95 drop in Un for 5 seconds 5 Un 95 drop in Un for 0 5 cycle 40 Un 60 drop in Un for 5 cycles 70 Un 30 drop in Un for 25 cycles 5 Un 95 drop in Un for 5 seconds Mains power quality should be that of ...

Страница 48: ...nt marked with the following symbol Proximity fields form RF wireless communic ations equipment 385 MHz 380 390 MHz 430 470 MHz 28 V m 704 787 MHz 9 V m 800 960 MHz 28 V m 1700 1990 MHz 28 V m 2400 2570 MHz 28 V m 5100 5800 MHz 9 V m 385 MHz 380 390 MHz 430 470 MHz 28 V m 704 787 MHz 9 V m 800 960 MHz 28 V m 1700 1990 MHz 28 V m 2400 2570 MHz 28 V m 5100 5800 MHz 9 V m NOTE These guidelines may no...

Страница 49: ... distance according to frequency of transmitter m 150 kHz to 80 MHz d 1 2 P 80 MHz to 800 MHz d 1 2 P 800 MHz to 2 5 GHz d 2 4 P 0 01 0 12 0 12 0 24 0 1 0 38 0 38 0 76 1 1 2 1 2 2 4 10 3 8 3 8 7 6 100 12 12 24 For transmitters rated at a maximum output power not listed above the recommended separation distance d in meters m can be estimated using the equation applicable to the frequency of the tra...

Страница 50: ...our QUEST SPECTRUM 3 bear the CE mark Quest Medical Imaging B V herewith declares that a We have verified the mutual compatibility of the devices of the QUEST SPECTRUM 3 in accordance with the manufacturers instructions and have carried out his operations in accordance with these instructions b We have packaged the QUEST SPECTRUM 3 and supplied relevant information to users incorporating relevant ...

Отзывы: