3. X-axis & Extruder assembly
Original Prusa MINI+ kit assembly
71
STEP 47
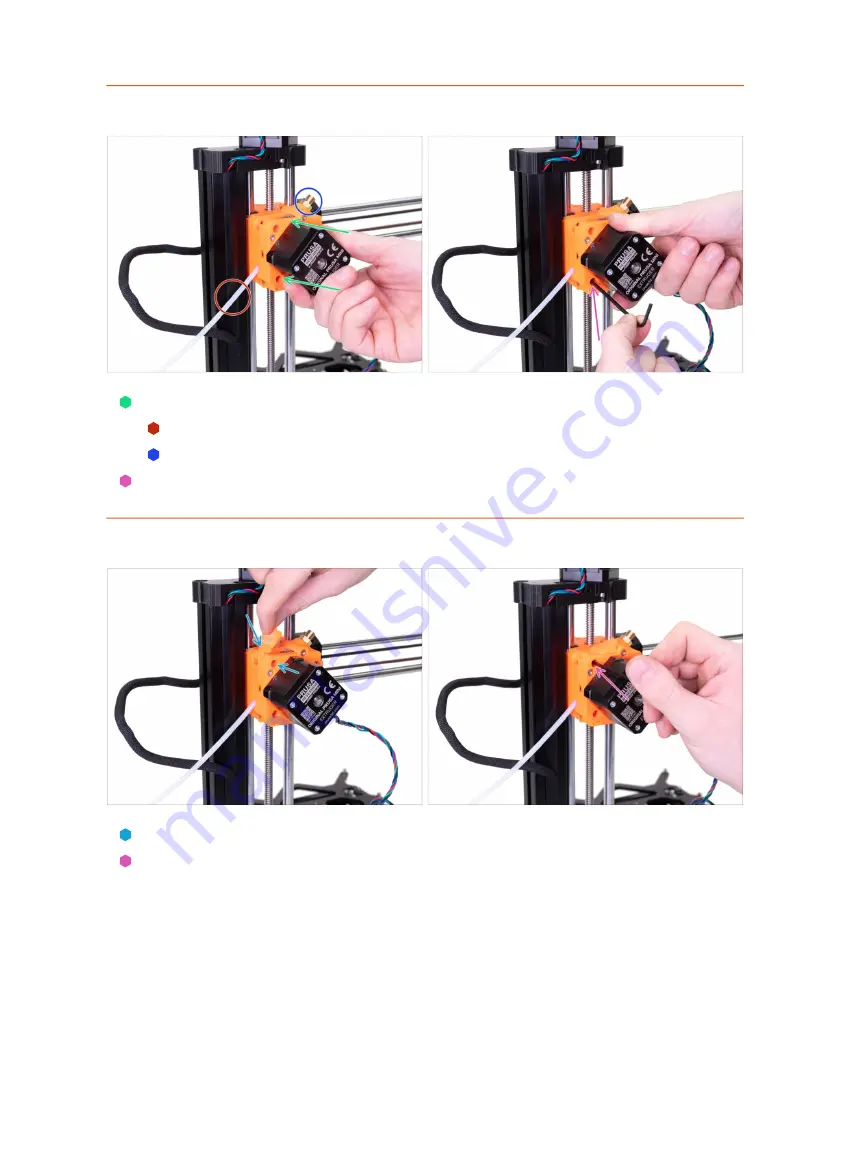
Mounting the Extruder
Place the extruder on the Z-carriage. Make sure the orientation is correct:
The PTFE tube is facing to the left.
The brass fitting is on the top right.
Secure it with the M3x25 screw in the lower hole.
STEP 48
Mounting the Extruder
Place the MINI-Inspection-door to the extruder and align the holes.
Secure it with the M3x25 screw. Do not overtighten. Make sure the MINI-
Inspection-door can move freely.
Содержание Original Prusa MINI
Страница 5: ...Original Prusa MINI kit assembly 5 1 Introduction ...
Страница 14: ...14 Original Prusa MINI kit assembly 2 YZ axis assembly ...
Страница 47: ...Original Prusa MINI kit assembly 47 3 X axis Extruder assembly ...
Страница 73: ...Original Prusa MINI kit assembly 73 4 Print head Heatbed assembly ...
Страница 87: ...Original Prusa MINI kit assembly 87 5 LCD assembly Electronics ...
Страница 100: ...100 Original Prusa MINI kit assembly 6 Spool holder assembly ...
Страница 105: ...Original Prusa MINI kit assembly 105 7 Preflight check ...
Страница 109: ...109 Notes ...
Страница 110: ...110 ...
Страница 111: ...111 Notes ...
Страница 112: ...112 ...
Страница 113: ...113 Notes ...
Страница 114: ...114 ...
Страница 115: ...115 Notes ...
Страница 116: ...116 ...


