


3. X-axis & Extruder assembly
54
Original Prusa MINI+ kit assembly
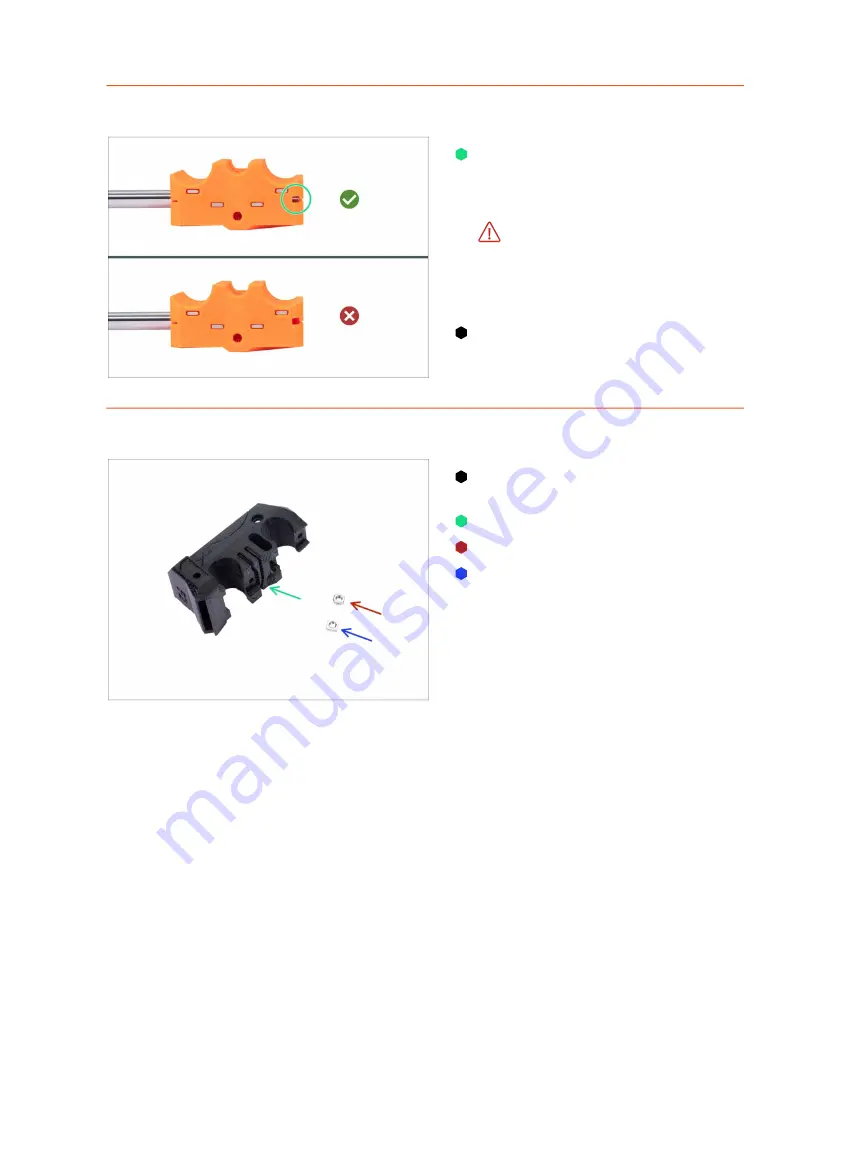
STEP 13
Checking the smooth rods: X-end
Look sideways on the MINI-X-end
into the inspection hole and
ensure
that the smooth rod is inserted all
the way in the plastic part.
If the rod is not fully visible in
the groove, try using more force
to push MINI-X-end on the rod.
Do not use a hammer or similar
tools to push the plastic part!
Turn the X-axis and use the same
procedure for the second smooth
rod.
STEP 14
X-carriage: parts preparation
For the following steps, please
prepare:
MINI-x-carriage (1x)
M3n nut (1x)
M3nS nut(1x)
Содержание Original Prusa MINI
Страница 5: ...Original Prusa MINI kit assembly 5 1 Introduction ...
Страница 14: ...14 Original Prusa MINI kit assembly 2 YZ axis assembly ...
Страница 47: ...Original Prusa MINI kit assembly 47 3 X axis Extruder assembly ...
Страница 73: ...Original Prusa MINI kit assembly 73 4 Print head Heatbed assembly ...
Страница 87: ...Original Prusa MINI kit assembly 87 5 LCD assembly Electronics ...
Страница 100: ...100 Original Prusa MINI kit assembly 6 Spool holder assembly ...
Страница 105: ...Original Prusa MINI kit assembly 105 7 Preflight check ...
Страница 109: ...109 Notes ...
Страница 110: ...110 ...
Страница 111: ...111 Notes ...
Страница 112: ...112 ...
Страница 113: ...113 Notes ...
Страница 114: ...114 ...
Страница 115: ...115 Notes ...
Страница 116: ...116 ...