13
4
The Fat Channel
4.2
Input Controls
StudioLive™ 16.0.2 USB
Owner’s Manual
4.2
Input Controls
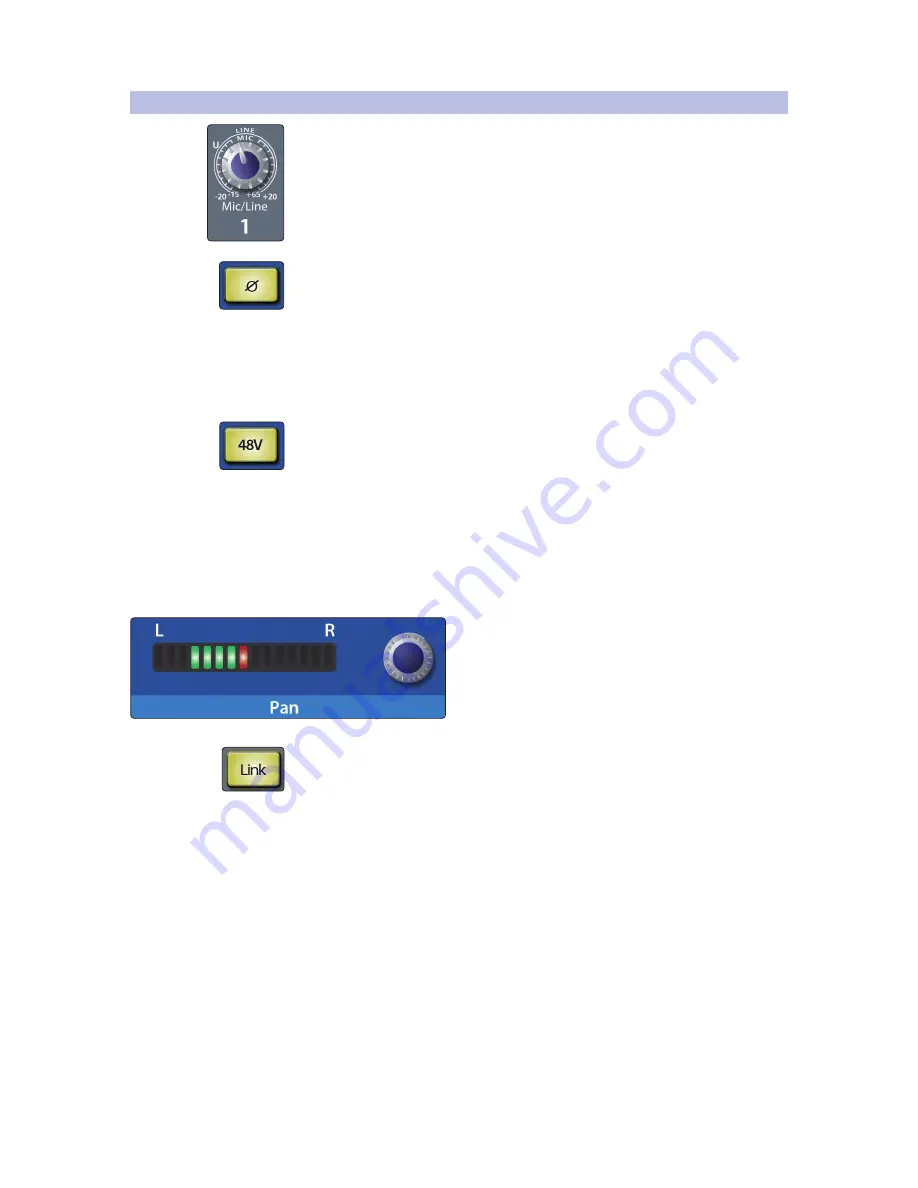
Trim Control. Adjusts the Input Gain Level.
The analog Trim controls above the Fat Channel adjust the gain of
the channel’s analog input. It is very important to properly adjust
this control to minimize noise and avoid overload distortion.
For gain staging advice and level setting steps,
please review Section 2.1
.
Polarity Invert Button. Inverts the Polarity of the Selected Channel.
Push this button to invert the polarity of the selected channel’s signal (that
is, to alter the polarity by 180°). The button will illuminate, indicating that
Polarity Invert is active. The Polarity Invert button can be used to correct audio
signals that are out of phase and are cancelling/reinforcing each other.
Power User Tip:
When recording with more than one open microphone, use the polarity
invert to combat phase cancellation between microphones.
Polarity Invert is only available on the 16 input channels.
48V Button. Engages Phantom Power in the Microphone Preamp of the Selected
Channel.
Push this button to engage phantom power on the selected channel’s microphone
preamp. The button will illuminate, indicating that phantom power is active.
Phantom power transmits 48V of DC electric power through a microphone cable.
The 48 volts supplied by way of the XLR input provides power for condenser
microphones and other devices requiring continuous phantom power. This
power is supplied at a constant level to prevent any signal degradation.
Phantom power is only available on the 12 input channels
equipped with a microphone preamp.
Pan. Sets the relative position of the channel in the main
stereo mix.
The LED display shows the Pan setting, and the
encoder to the right of the display controls panning
for the selected input or output bus. When two
channels are linked as stereo pair, the LED display
will automatically change to a stereo pan.
Stereo Link. Links a pair of adjacent channels to function as a stereo channel.
Input channels and aux buses can be linked to create a stereo pair. The
stereo pairs are predefined and cannot be changed. They are as follows:
4
Channels 1/2
4
Channels 3/4
4
Channels 5/6
4
Channels 7/8
4
Channels 9/10
4
Channels 11/12
4
Channels 13/14
4
Channels 15/16
For mono channels (Channels 1-8), a stereo link can be enabled when either channel
in the pair is selected. When the Stereo Link button is illuminated, all dynamics
and EQ settings are nondestructively pasted to the other channel in the pair.
Power User Tip:
It is important to note that this is a nondestructive paste; when the Link
button is disengaged, the slaved channel‘s previous settings will be restored. For instance,
if Channel 8 is selected when the Stereo Link button is engaged, all of Channel 8’s settings
will be copied onto Channel 7. If Channel 7 is selected when the Stereo Link button is


