


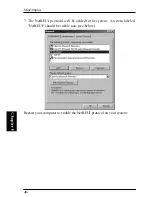


Mini300plus
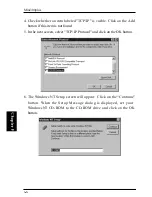
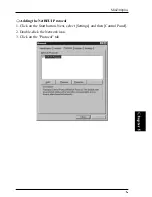
4. Check whether an item labeled "TCP/IP" is visible. Click on the Add
button if this item is not found.
5. In the next screen, select "TCP/IP Protocol" and click on the OK button.
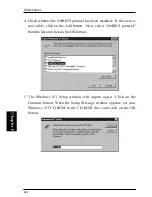
6. The Windows NT Setup screen will appear. Click on the “Continue”
but ton. When the S etup Message dial og i s di spl ayed, set your
WindowsNT CD-ROM to the CD-ROM drive and click on the OK
button.
Содержание Mini300Plus
Страница 1: ......
Страница 2: ......
Страница 13: ......
Страница 42: ......
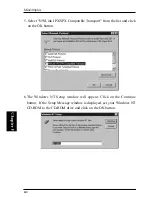
Страница 67: ...Mini300plus 7 An item labeled NWLink IPX SPX compatible transport will be added to the Protocol tab ...
Страница 87: ...Mini300plus 5 Select the Protocol item and click on the Add button ...
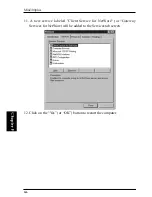
Страница 103: ...Mini300plus 3 Now select Local Printer and click on the Next button ...
Страница 121: ...Mini300plus 3 In the next window select Network Printer and click on the Next button ...
Страница 130: ......
Страница 134: ......