Configuring VLANs
Installation and Configuration Guide, (CQW-AP108AG)
109
Use the buttons on the Summary tab to add a new VLAN, configure an existing VLAN, delete an
interface from a VLAN, delete IP addresses from a VLAN, or set an interface as part of the
management VLAN. The default VLAN cannot be modified.
To add a new VLAN, click
Add
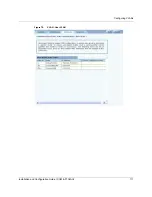
to open the Add VLAN Entry panel (Figure 77).
Figure 77:
VLAN Configuration - Add VLAN Entry Panel
Enter the following information to define the new VLAN:
Click
Apply
to create the new VLAN and return to the VLAN table.
Interface VLAN
When the AP receives a frame, it must determine the VLAN to which the frame belongs. If the
received frame is tagged, then VLAN is already known, and the AP can route the packet
Tagged
Indication of whether the identity of the VLAN is explicitly encoded in
transmitted packets. Each frame contains a four-byte tag that encodes the
VLAN to which the packet belongs when it is sent on a tagged interface. If the
received packet is untagged, the packet is classified as belonging to the
interface VLAN. If the VLAN interface is not tagged, then the AP drops any
VLAN-tagged packet. When the packet is transmitted from the interface, it is
be untagged.
Field
Description
VLAN Name
Enter an alphanumeric name for the VLAN. The maximum length of VLAN
name is 80 characters. (optional)
VLAN ID
Enter a numeric identifier for the VLAN. This number is used for table
references and as part of the bridging ID. The range is 2 - 4093. (required)
IP Address/Maskbits
Enter the IP address and maskbits used to access the VLAN for management
purposes.
If the address is to be assigned by a DHCP server, select
DHCP Assigned
.
If the VLAN is to be used for guest access, you must assign an IP address. See
“Configuring Guest Access” on page 158
Select Interface
Select interfaces for the VLAN. If an interface is assigned to the VLAN, then
packets transmitted over that interface are included in that VLAN.
Tagged
Select
Tagged
for an interface to mark packets sent out over the interface as
belonging to the VLAN.
Field
Description
Содержание CQW-AP108AG
Страница 2: ......
Страница 13: ...Preface xiii Installation and Configuration Guide CQW AP108AG ...
Страница 51: ...3 Using the Configuration Interfaces 38 Installation and Configuration Guide CQW AP108AG Figure 25 Home Panel ...
Страница 67: ...3 Using the Configuration Interfaces 54 Installation and Configuration Guide CQW AP108AG ...
Страница 113: ...4 Configuring Radio Settings 100 Installation and Configuration Guide CQW AP108AG ...
Страница 124: ...Configuring VLANs Installation and Configuration Guide CQW AP108AG 111 Figure 79 VLAN User VLAN ...
Страница 141: ...5 Configuring Networking Settings 128 Installation and Configuration Guide CQW AP108AG ...
Страница 149: ...6 Configuring a Wireless Backhaul 136 Installation and Configuration Guide CQW AP108AG ...
Страница 167: ...7 Managing Security 154 Installation and Configuration Guide CQW AP108AG ...
Страница 177: ...8 Configuring Guest Access 164 Installation and Configuration Guide CQW AP108AG ...
Страница 223: ...9 Managing the Network 210 Installation and Configuration Guide CQW AP108AG ...
Страница 241: ...10 Maintaining the Access Point 228 Installation and Configuration Guide CQW AP108AG ...
Страница 245: ...A Using the Command Line Interface 232 Installation and Configuration Guide CQW AP108AG ...
Страница 247: ...B Regulatory and License Information 234 Installation and Configuration Guide CQW AP108AG ...
Страница 289: ...C Alarms 276 Installation and Configuration Guide CQW AP108AG ...


