


Content Security Gateway User’s Manual
Default Gateway:
This will be the Gateway IP address.
Domain Name Server (DNS):
This is the IP Address of the DNS server.
For PPTP (European User Only):
This is mainly used in Europe. You need to know the PPTP Server
address as well as your name and password.
User Name:
The user name is provided by ISP.
Password:
The password is provided by ISP.
IP Address:
Enter the static IP address assigned to you by your ISP, or obtain an IP address
automatically from ISP.
PPTP Gateway:
Enter the PPTP server IP address assigned to you by your ISP.
Connect ID:
This is the ID given by ISP. This is optional.
BEZEQ-ISRAEL:
Select this item if you are using the service provided by BEZEQ in Israel.
Service-On-Demand:
The PPPoE connection will automatically disconnect after a length of idle time
(no activities). Enter in the amount of idle minutes before disconnection. Enter ‘0’ if you do not want the
PPPoE connection to disconnect at all.
Ping:
Select this to allow the WAN network to ping the IP Address of the Content Security Gateway. This will
allow people from the Internet to be able to ping the Content Security Gateway. If set to enable, the device will
respond to echo request packets from the WAN network.
WebUI:
Select this to allow the device WEBUI to be accessed from the WAN network. This will allow the
WebUI to be configured from a user on the Internet. Keep in mind that the device always requires a username
and password to enter the WebUI.
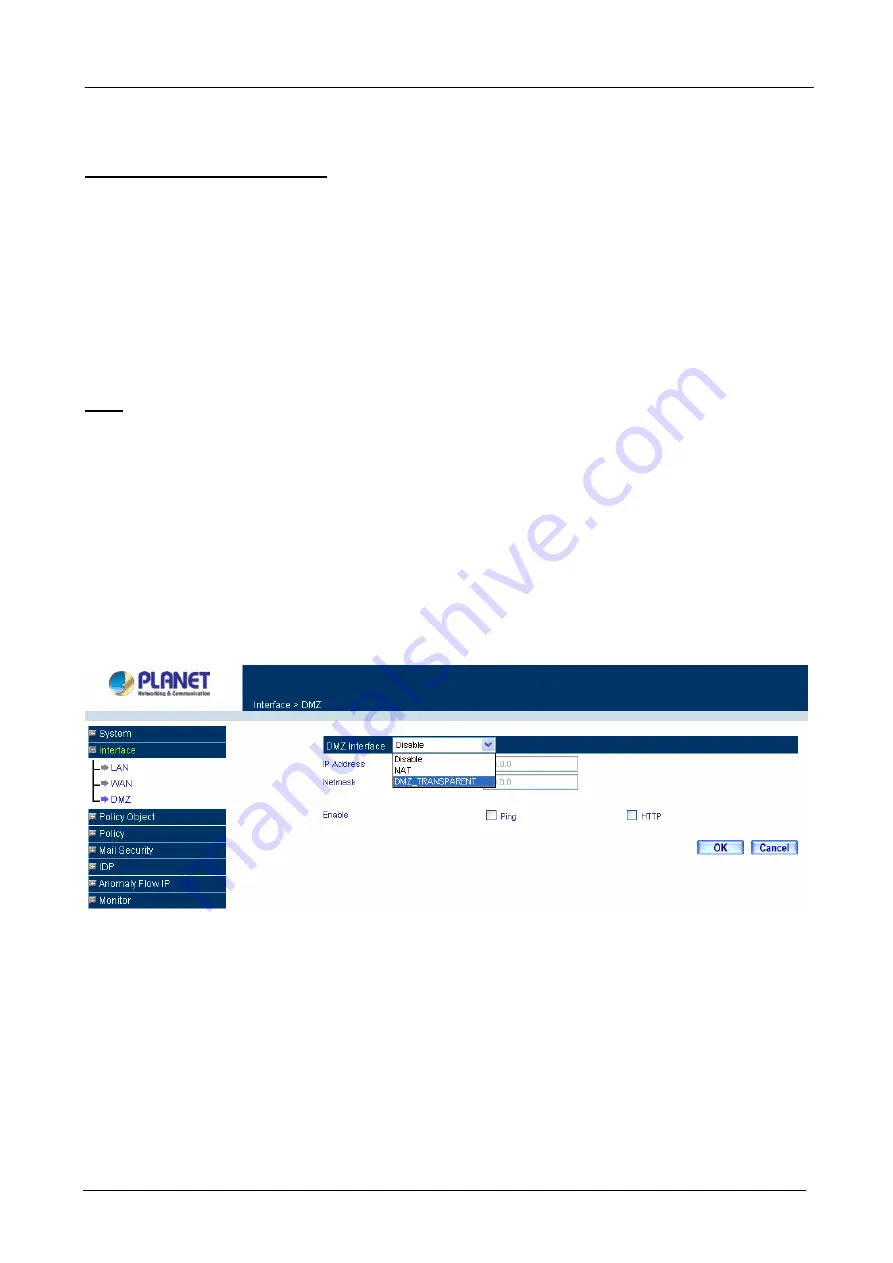
3.3 Configure DMZ interface
Depends on your network requirement, you can disable the DMZ port, make DMZ port transparent to WAN or
enable NAT function on it.
To configure the DMZ port, select the
Interface
tab on the left menu, then click on DMZ, the following page is
shown.
3.4 Configure Policy
STEP 1:
Click on the
Policy
tab from the main function menu, and then click on
Outgoing
(LAN to WAN) from the
sub-function list.
STEP 2:
Click on
New Entry
button.
STEP 3:
When the
New Entry
option appears, enter the following configuration:
Source Address
– select
“Inside_Any”
- 9 -
Содержание Content Security Gateway CS-500
Страница 1: ...Content Security Gateway User s Manual Content Security Gateway CS 500 User s Manual ...
Страница 125: ...Content Security Gateway User s Manual Step 13 Click next Step 14 Enter the WAN IP of Remote user 210 66 155 91 120 ...
Страница 127: ...Content Security Gateway User s Manual Step 17 Click Add Step 18 Enter the name of IP filter and click Add 122 ...
Страница 131: ...Content Security Gateway User s Manual Step 25 Click OK Step 26 Select Traffic in and click next 126 ...
Страница 132: ...Content Security Gateway User s Manual Step 27 Enable User Add Wizard and click add Step 28 Click next 127 ...
Страница 134: ...Content Security Gateway User s Manual Step 31 Click next Step 32 Select Custom and click settings 129 ...
Страница 136: ...Content Security Gateway User s Manual Step 35 Select security and click next Step 36 Click finish 131 ...
Страница 137: ...Content Security Gateway User s Manual Step 37 Click Add Step 38 Click next 132 ...
Страница 140: ...Content Security Gateway User s Manual Step 43 Enter the name of IP filter and click Add Step 44 Click next 135 ...
Страница 142: ...Content Security Gateway User s Manual Step 47 Click next Step 48 Please enable Edit properties and click finish 137 ...
Страница 143: ...Content Security Gateway User s Manual Step 49 Please don t enable Mirrored and click ok Step 50 Click ok 138 ...
Страница 156: ...Content Security Gateway User s Manual Incoming Policy 151 ...
Страница 157: ...Content Security Gateway User s Manual Step 2 Configure VRT 311 VPN policy as the following 152 ...


