


The PhotoViewer
12
102
En
Zooming an image
During a slideshow you can zoom in to
enlarge a portion of the picture by a factor of
two or four. You can also move the area of
the picture displayed.
1
Press during the slideshow to
zoom the picture.
Repeated presses cycle between zoom off,
2x zoom and 4x zoom. The zoom factor is
displayed on-screen.
2
Use to move the zoomed
area.
Rotating an image
You can rotate the displayed picture during a
slideshow so you can always view pictures
the right way up, whichever way they were
taken.
•
Press during the slideshow
to rotate the displayed picture clockwise
by 90º.
Press repeatedly to continue rotating the
picture in increments of 90º.
Reloading files from a disc
If you have a disc with more than 1000 files
and/or 100 folders, you can still view all the
images using the reload function.
1
Navigate to the last entry in
the folder list (‘Read next: ...’).
2
Load the next batch of up to 999
files/99 folders from the disc.
It will take a moment (at most a few minutes)
to load in the images.
1
Importing files to the HDD
You can import files and save them to the
HDD
2
from a CD or DVD. Once on the HDD
you can edit and organize your pictures.
1
Select the location of folders/
files you want to import.
To import a whole folder, select the desired
folder, press
, and skip to step
3
below.
• To import multiple folders, use the Multi-
Mode; see
on page 103.
2
Select a file to import, then
press
....
• To import multiple files, use the Multi-
Mode; see
on page 103.
3
Select ‘Copy to HDD’ from the
menu.
4
Select ‘Yes’ to confirm and
copy the folder(s)/file(s), or ‘No’ to
cancel.
• The files will be copied to the HDD with
the same folder structure as the original.
Note
1 You can press
HOME MENU
to exit the PhotoViewer screen while the recorder is reloading images. (If you enter
the PhotoViewer again, it will resume reloading.)
2 For files you want to keep permanently, we recommend backing up to DVD-R/-RW.
HDD
File
001 PIOR0000
002 PIOR0001
003 PIOR0002
004 PIOR0003
005 PIOR0004
006 PIOR0005
007 PIOR0006
008 PIOR0007
009 PIOR0008
010 PIOR0009
011 PIOR0010
012 PIOR0011
100.0 G
Remain
1/84
PhotoViewer CD/DVD
Folder2 Folder Size 999 MB
12 Files
FILE
MENU
Start Slideshow
Copy all to HDD
Copy to HDD
Detailed Information
Multi-Mode
DVR550H_WV_EN.book 102 ページ 2006年12月28日 木曜日 午後4時21分
Downloaded From Disc-Player.com Pioneer Manuals
104
En
1
Load a blank (or unfinalized Video
mode) DVD-R or DVD-RW disc.
2
Select ‘View/Edit Photos on
the HDD’ from the menu.
3
Select the file(s) or folder(s)
you want to copy.
• Copying a folder will copy all the files
contained in it.
• To copy multiple folders, use the Multi-
Mode; see
on page 103.
4
Select ‘Copy to DVD’ from the
menu.
5
Select ‘Yes’ to confirm or ‘No’
to cancel.
• Folder names on the disc will be
PIONR
. File names will be
PHOT
• Note that during copying, any timer
programmes set to start will not begin,
and no other operation is possible.
• While
‘Cancel’
is displayed, you can
press
ENTER
to cancel.
Editing files on the HDD
There are a number of commands you can
use to edit and organize your pictures stored
on the HDD.
Creating a new folder
1
From the folder list, display
the menu.
2
Select ‘New Folder’.
The folder appears at the bottom of the folder
list with the name
F_
.
• There can be up to 999 folders on the
HDD.
Erasing a file or folder
1
Select the file(s) or folder(s)
you want to erase.
• To erase multiple files or folders, use the
Multi-Mode; see
on page 103.
• Erasing a folder will erase all the files
contained in it. Please be careful!
• You can’t erase files that have been
locked.
• Folders containing locked files can’t be
erased. Unlocked files in the folder,
however, will be erased.
HDD
Folder
002 Folder2
Files 999
Folder 999
MB
100.0 G
Remain
1/3
PhotoViewer HDD
002
Folder2
003
Folder3
004
Folder4
005
Folder5
006
Folder6
007
Folder7
008
Folder8
001
Folder1
Select Folder
FOLDER
MENU
Start Slideshow
Start Audio Slideshow
New Folder
Folder Options
Copy to DVD
Multi-Mode
DVR550H_WV_EN.book 104 ページ 2006年12月28日 木曜日 午後4時21分
Downloaded From Disc-Player.com Pioneer Manuals
106
En
4
Enter a new name for the file/folder.
File names or Folder names can be up to 64
characters long.
See
on page 82 for how to enter a name.
Locking/Unlocking files
Locking files will protect them from
accidental erasure and prevent them from
being renamed.
Use the same process to both lock and
unlock files. Locked files are displayed in the
PhotoViewer with a padlock icon.
1
Select the file(s) you want to
lock (or unlock).
• To lock/unlock multiple files or folders,
use the Multi-Mode; see
on page 103.
2
Display the command menu.
3
Select ‘File Options’ or ‘Folder
Options’.
4
Select ‘Lock’ or ‘Lock Folder
Contents’.
Locked files are shown with a padlock icon
next to them. To remove all locks within a
given folder, choose
‘Folder Option’ >
‘Unlock Folder Contents’
.
To view detailed information
This feature allows you to check the settings
of the camera from which you imported the
photos.
1
Choose the file for which you would
like to see detailed information.
2
Choose ‘Detailed Information’.
When no detailed information is available,
nothing is displayed.
HDD
File
001 PIOR0000
002 PIOR0001
003 PIOR0002
004 PIOR0003
005 PIOR0004
006 PIOR0005
007 PIOR0006
008 PIOR0007
009 PIOR0008
010 PIOR0009
011 PIOR0010
012 PIOR0011
100.0 G
Remain
1/84
PhotoViewer HDD
Folder2 Folder Size 999 MB
12 Files
FILE
MENU
Start Slideshow
Start Audio Slideshow
File Options
Copy to DVD
Detailed Information
Multi-Mode
Erase
Copy
Rename File
Lock
Cancel
DVR550H_WV_EN.book 106 ページ 2006年12月28日 木曜日 午後4時21分
Downloaded From Disc-Player.com Pioneer Manuals
The Disc Setup menu
13
108
En
Initialize settings
You can initialize a recordable DVD-R/-RW
disc for either VR mode or Video mode
recording.
The first time you load a new DVD-RW disc,
it will be automatically initialized for
recording according to the DVD-RW Auto
Init. setting in the Disc Setup menu (see
page 62).
New DVD-R discs are ready for Video mode
recording when you load them, but it is also
possible to initialize them for VR mode
recording.
1
DVD+RW and DVD-RAM discs can also be
initialized as a way of erasing the entire disc.
When initializing a DVD-RAM disc, select VR
mode.
See
on
page 61 for detailed instructions.
Finalize settings
Finalize
Finalizing ‘fixes’ the recordings in place so
that the disc can be played on a regular DVD
player or computer equipped with a suitable
DVD-ROM drive.
It is also possible to finalize DVD+RW discs.
This is only necessary if you want to a player
to display a title menu for the disc.
See
on page 60 for detailed instructions.
Undo Finalize
You can undo the finalization on DVD-RW
discs recorded on this recorder in Video
mode. You need to do this if you want to
record more material or edit material already
on the disc.
You can also undo the finalization of VR
mode discs which have been finalized on
other DVD recorders. If when you load a disc
the message
This disc cannot be recorded.
Undo the finalization.
is displayed, use
this command to be able to record on the
disc using this recorder.
1
Select ‘Disc Setup’ from the
Home Menu.
2
Select ‘Finalize’ > ‘Undo
Finalize’ then ‘Start’.
Optimize HDD
As you record, erase and edit recordings, the
HDD file system gradually becomes
fragmented. Periodically, the HDD will need
optimizing to ‘clean up’ all the fragmented
files.
When the HDD needs optimizing the
recorder will automatically display a
message recommending optimization.
Important
• Optimizing the HDD can take as long as
eight hours. During optimization,
playback and recording are not possible.
• Canceling optimization mid-way does
not undo the optimization already done,
so the HDD will be partly optimized.
Note
1 Once initialized for VR mode recording it is not possible to re-initialize the disc for Video mode recording. Also,
once recorded in Video mode, the disc cannot be re-initialized for VR mode recording.
DVR550H_WV_EN.book 108 ページ 2006年12月28日 木曜日 午後4時21分
Downloaded From Disc-Player.com Pioneer Manuals
The Video Adjust menu
14
110
En
Chapter 14
The Video Adjust menu
Using the Video Adjust menu you can set up
the picture quality for the built-in tuner and
external inputs, for disc playback, and for
recording.
Setting the picture quality
for TV and external inputs
Picture Creation lets you choose a set of
picture quality settings for the built-in TV
tuner and for each external input. There are
several preset settings that suit various
sources, or you can create up to three of your
own sets.
Choosing a preset
1
With the recorder stopped,
press to display the Home Menu.
2
Select ‘Video Adjust’.
3
Select a preset.
• Use the
INPUT SELECT
button to switch
between the built-in TV tuner and the
external inputs.
• Use the
PREV
NEXT
buttons to
change the channel of the built-in TV
tuner.
There are six presets available:
•
Tuner
– suitable for general TV
broadcasts
•
VCR
– suitable for video cassettes
•
DTV/LDP
– suitable for digital
broadcasts and Laserdiscs
•
Memory1
– user preset 1
•
Memory2
– user preset 2
•
Memory3
– user preset 3
You can press
DISPLAY
to see the individual
settings for the current preset (
Tuner
,
VCR
or
DTV/LDP
).
Creating your own set
There are three user presets in which you
can save your own set of picture quality
settings.
1
Follow
above and
select one of the user presets (Memory 1,
2 or 3).
2
Select ‘Detailed Settings’.
3
Select the setting you want to
adjust.
You can adjust the following settings:
• Prog. Motion
– Adjusts the motion and
still picture quality when video output is
set to progressive.
• PureCinema
– This setting optimizes the
picture for film material when the video
output is set to progressive. Usually set
to
Auto
, but try switching to
Off
if the
picture appears unnatural.
Detailed Settings
Pr 1
Tuner
Detailed Settings
Pr 1
Memory1
Memory1
3-D Y/C
Motion
Still
PureCinma
Prog. Motion
Auto1
Motion
Still
Pr 1
Detail
CNR
YNR
White AGC
Off
Max
Off
Off
Max
Max
Off
DVR550H_WV_EN.book 110 ページ 2006年12月28日 木曜日 午後4時21分
Downloaded From Disc-Player.com Pioneer Manuals
The Video Adjust menu
14
112
En
2
Move the cursor down and select
‘Detailed Settings’.
3
Select the picture quality setting you
want to adjust.
You can adjust the following settings:
• Prog. Motion
– Adjusts the motion and
still picture quality when video output is
set to progressive. (Prog. Motion is
ineffective when PureCinema is On.)
• PureCinema
– This setting optimizes the
picture for film material when the video
output is set to progressive. Usually set
to
Auto 1
but try switching to
Auto 2
,
On
or
Off
if the picture appears
unnatural.
•
YNR
– Adjusts the amount of noise
reduction (NR) applied to the Y
(brightness) component.
• BNR
– Adjusts the amount of noise
reduction (NR) applied to the block noise
(artefacts visible in areas of flat colour,
caused by MPEG compression).
•
MNR
– Adjusts the amount of noise
reduction (NR) applied to the mosquito
noise (artefacts visible around the edges
of an image, caused by MPEG
compression).
•
Sharpness
– Adjusts the sharpness of
the high-frequency (detailed) elements
in the picture. Sharpness is ineffective
for HDMI output.
•
Detail
– Adjusts how sharp edges
appear.
•
White Level
– Adjusts the intensity of
white. White Level is ineffective for HDMI
output.
•
Black Level
– Adjusts the intensity of
black. Black Level is ineffective for HDMI
output.
•
Black Setup
– Corrects the standard
reference black level. Black Setup is
ineffective for HDMI output.
•
Gamma Correction
– Adjusts the
brightness of darker images. Gamma
Correction is ineffective for HDMI
output.
•
Hue
– Adjusts overall balance between
red and green. Hue is ineffective for
HDMI output.
•
Chroma Level
– Adjusts how rich the
colours appear. Chroma Level is
ineffective for HDMI output.
4
Use the
/
buttons to adjust the
currently selected picture quality setting.
5
When you have all the settings as you
want them, press HOME MENU to exit.
Tip
• To see more of the picture as you adjust
different settings, press
ENTER
after
selecting the setting you want to adjust.
Detailed Settings
Memory1
Memory1
YNR
Motion
Still
PureCinma
Prog. Motion
Auto1
Off
Max
BNR
MNR
Max
Max
Off
Off
Sharpness
Detail
Fine
Soft
Fine
Soft
DVR550H_WV_EN.book 112 ページ 2006年12月28日 木曜日 午後4時21分
Downloaded From Disc-Player.com Pioneer Manuals
The Initial Setup menu
15
114
En
Tuner
Auto Channel
Setting
Auto Scan
Select your country and then wait for the recorder to
auto tune into channels in your area. After auto scan
has finished, the channel mapping screen appears
showing which channels have been assigned to
which programme numbers. You can skip unwanted
channels using the Manual CH Setting option below.
Press
HOME MENU
to exit the channel mapping
screen.
Download from
TV
If your TV supports this feature you can download all
the channels that your TV is tuned to via the SCART
input. Select your country and then wait for the
download to complete. After the download is
complete, the channel mapping screen appears, as
above.
See also the operating instructions that came with
your TV for more information.
Manual CH Setting
Next Screen
Proceed to the next screen if you need to adjust any
of the settings made by auto tuning. Select your
country, then proceed to the manual channel setting
screen:
• Change channel presets using the
PREV
NEXT
buttons.
• To skip the displayed channel (because there is no
station assigned to that channel), change the
Skip
setting to
On
.
• Set the
CH SYSTEM
setting to match the channel
system of your country or region.
• Set the
CHANNEL
setting to the channel you want
to assign to the current channel preset.
• To manually fine tune the channel, change the
AFT
setting to
Off
then adjust the
Level
setting.
• Set the
Sound System
setting to match the sound
system of your region.
• The
Name
field allows you to input a name of up to
five characters for the current channel preset.
• If the currently selected channel is scrambled
requiring a decoder connected to the
AV2 (INPUT 1/
DECODER)
, set the
Decoder
setting to
On
.
Channel Swapping
Next Screen
Proceed to the next screen to swap channel
assignments of different presets so that you can
group together presets that naturally go together.
Select two presets to swap then press
ENTER
.
Setting
Options
Explanation
DVR550H_WV_EN.book 114 ページ 2006年12月28日 木曜日 午後4時21分
Downloaded From Disc-Player.com Pioneer Manuals
The Initial Setup menu
15
116
En
AV2/L1 In
Video •
Sets the
AV2 (INPUT 1/DECODER)
SCART input to
standard composite video.
S-Video
Sets the
AV2 (INPUT 1/DECODER)
SCART input to
S-video.
RGB
Sets the
AV2 (INPUT 1/DECODER)
SCART input to
RGB.
Decoder
Use this setting if you connected a decoder to the
AV2 (INPUT 1/DECODER)
SCART connector. For
scrambled channels, make sure that the channel
Decoder
setting is set to
On
. (See
on page 114.)
NTSC on PAL TV
On •
NTSC discs will play correctly on PAL-only TVs.
Off
Use if your TV is already NTSC-compatible.
Audio In
NICAM Select
NICAM •
Record the NICAM audio in a NICAM broadcast.
Regular Audio
Record the non-NICAM audio in a NICAM broadcast.
(You can still switch the audio to record using the
AUDIO
button before recording.)
Tuner Level
Normal •
Standard setting.
Compression
Use if the audio level from the built-in tuner is
excessive, causing distortion.
External Audio
Stereo •
Select if the audio from the currently selected
external input is standard stereo.
Bilingual
Select if each channel carries a separate soundtrack.
Bilingual Recording A/L •
Record the left (A) channel of a bilingual source
when recording to HDD with HDD Recording Format
set to Video Mode On, to DVD-R/-RW (Video mode) or
DVD+R/+RW or in
LPCM
mode, from an external
source.
B/R
As above, but for right (B) channel recording.
LPCM
LPCM
Setting
Options
Explanation
DVR550H_WV_EN.book 116 ページ 2006年12月28日 木曜日 午後4時21分
Downloaded From Disc-Player.com Pioneer Manuals
The Initial Setup menu
15
118
En
Audio Language
English •
Sets the default audio language for DVD-Video
playback to English.
Choose from the languages displayed to set the
default audio language for DVD-Video playback.
Other
Select to set the default audio language to
something other than the ones listed. See
on page 125.
Subtitle Language
English •
Sets the default subtitle language for DVD-Video
playback to English.
Choose from the languages displayed to set the
default subtitle language for DVD-Video playback.
Other
Select to set the default subtitle language to
something other than the ones listed. See
on page 125.
Auto Language
On •
On this setting:
• DVD-Video discs whose main audio track is in your
default language will play using that language,
without subtitles.
• Discs whose main audio track is not in your default
language but that have a subtitle track in your default
language will play the original audio track with
subtitles.
Off
Select to play DVD-Video discs according to your
audio and subtitle language preferences.
DVD Menu
Language
w/Subtitle
Language
•
Sets the language of DVD-Video menus to the same
as that set for the subtitle language.
English
Sets the language of DVD-Video menus to English.
Choose from the displayed languages to set the
default language for DVD-Video menus.
Other
Select to set the DVD menu language to something
other than the ones listed. See
on page 125.
Setting
Options
Explanation
DVR550H_WV_EN.book 118 ページ 2006年12月28日 木曜日 午後4時21分
Downloaded From Disc-Player.com Pioneer Manuals
The Initial Setup menu
15
120
En
Auto Chapter
(Video)
No Separation
Automatic chapter marking is switched off.
10 minutes •
When recording in Video mode, chapter markers are
inserted every 10 minutes.
15 minutes
Chapter markers are inserted every 15 minutes.
Auto Chapter
(DVD+R/+RW)
No Separation
Automatic chapter marking is switched off.
10 minutes •
When recording in DVD+R/+RW or in real-time
copying, chapter markers are inserted every 10 minutes.
15 minutes
Chapter markers are inserted every 15 minutes.
HDD Recording
Format
Video Mode Off
Recordings made to the HDD are made in VR mode.
Use this setting if you don’t need to transfer the
recording later to a DVD-R/-RW (Video mode) or
DVD+R/+RW.
Video Mode On •
Recordings made to the HDD are compatible with
Video mode recordings. This setting is convenient if
you want to transfer the recording to a DVD-R/-RW
(Video mode) or DVD+R/+RW as high-speed copy
can be used.
XP+
Playback
TV Screen Size
4:3 (Letter Box)
Select if you have a standard 4:3 TV and prefer the
letter box format presentation for widescreen
material.
4:3 (Pan & Scan)
Select if you have a standard 4:3 TV and prefer the
pan and scan presentation for widescreen material.
16:9 •
Select if you have a widescreen 16:9 TV. Your TV
settings determine how 4:3 material will look.
4:3 (Letter Box)
4:3 (Pan & Scan)
Still Picture
Field
Produces a stable, generally shake-free image.
Frame
Produces sharp image, but may be prone to shake.
Auto •
Generates a generally less sharp but more stable still
image.
Setting
Options
Explanation
DVR550H_WV_EN.book 120 ページ 2006年12月28日 木曜日 午後4時21分
Downloaded From Disc-Player.com Pioneer Manuals
The Initial Setup menu
15
122
En
4:3 Video Output
Full
Select if your HDMI TV allows you to change the
aspect ratio.
Normal
Select if your HDMI TV does not allow you to change
the aspect ratio. 4:3 video will be shown with bars on
each side.
Colour
RGB (0–255)
Use if colours are weak and black appears to ‘float’
on the
RGB (16–235)
setting.
RGB (16–235)
Use this setting if colours appear overly rich and the
black too deep on the
RGB (0–255)
setting.
YCbCr 4:2:2
The video signal is output as a 10-bit YCbCr 4:2:2
component signal. This is the standard setting for
HDMI-compatible devices.
YCbCr 4:4:4
The video signal is output as a 8-bit YCbCr 4:4:4
component signal.
YCbCr 4:2:2
YCbCr 4:4:4
YCbCr 4:2:2
Screen Resolution
720x576i (720x480i)
Audio Output
Auto •
Dolby Digital, MPEG and DTS sources are output as
a bitstream signal. However, depending on the
Audio Out
setting, number of audio channels, and
the HDMI-connected device, Linear PCM audio may
be output.
PCM
All audio signals are converted to Linear PCM
(except DTS).
Bitstream Priority
Select if the connected device is compatible with
bitstream audio.
Options
On Screen Display
On •
The recorder displays operation displays (
Stop
,
Play
,
etc.) on-screen.
Off
Switches off the on-screen operation displays.
Front Panel Display On •
The time is shown in the front panel display when the
recorder is in standby.
Off
The front panel display is switched off in standby .
Remote Control
Mode
Recorder 1–3
If you are using more than one recorder in the same
room, set them to different IDs. This setting sets the
recorder ID; to change the remote controller ID, press
and hold
RETURN
then press
1
,
2
or
3
to set. The
remote will only control a recorder with the same ID.
Setting
Options
Explanation
DVR550H_WV_EN.book 122 ページ 2006年12月28日 木曜日 午後4時21分
Downloaded From Disc-Player.com Pioneer Manuals
The Initial Setup menu
15
124
En
Additional information about the
TV system settings
About the input line system
This recorder is compatible with PAL,
SECAM, 3.58 NTSC and PAL-60 TV systems.
The Input Line System and Input Colour
System settings determine how the recorder
treats incoming video signals from an
external input or the built-in TV tuner.
Please note the following points when
changing the input line system:
• When the current input is a built-in tuner
channel preset, changing the input line
system will usually also affect the input
line system of the
AV2 (INPUT 1/
DECODER)
input. However if the
AV2/L1
In
setting is set to
Decoder
, then the L2
input is affected instead.
• If, when the Input Line System setting is
changed, the screen goes blank (due to
incompatibility with your TV), you can
switch back by pressing and holding the
front panel
STOP
button then pressing
INPUT SELECT
(also front panel) while
the recorder is stopped.
• When you switch the Input Line System
setting the Copy List is erased. If you
switch the setting using the
STOP
button and
INPUT SELECT
buttons as
described above, there is no
confirmation, so please use with care.
• You can’t mix recordings of different TV
line systems on the same disc.
• When you change this setting, the
Input
Colour System
setting also changes
(see below).
About NTSC on PAL TV
Depending on the Input Line System setting
and the NTSC on PAL TV setting, the signal
format output when the recorder is stopped
varies as shown in the table below.
About the input colour system
The available options of the Input Colour
System setting depend on the Input Line
System setting. The table below shows the
different options available.
Additional information about
component video output
If you switch the Component Video Out
setting to
Progressive
when using a TV that
is not compatible with progressive-scan
video, you will not be able to see anything
displayed on your TV. If this happens, press
and hold the
STOP
button on the front
panel, then press
OPEN/CLOSE
. This will
set the recorder’s video output back to
Interlace.
Input Line
System
NTSC on PAL
TV
Output
when
stopped
625 System
Off
PAL
On
PAL
525 System
Off
NTSC
On
PAL–60
Input Line
System
Built-in tuner
External
input
625 System
Auto
Auto
PAL
PAL
SECAM
SECAM
525 System
Auto
3.58 NTSC
PAL–60
DVR550H_WV_EN.book 124 ページ 2006年12月28日 木曜日 午後4時21分
Downloaded From Disc-Player.com Pioneer Manuals
Additional information
16
126
En
Chapter 16
Additional information
Minimum copying times
The table below shows the minimum HDD to DVD copying time for one hour of video.
Please note that not all discs are compatible with high-speed copying.
1
Check with the disc
manufacturer for compatibility.
Note that all times in the above table are approximate. Also that actual copy speed varies with the part of the disc
being recorded.
SEP
SLP
EP
Note
1 Depending on the disc, the copy speed may be reduced (for example, although a 6x disc is used, the copy may
be made at 2x speed).
Rec mode
SEP
SLP
EP
LP
SP
XP
DVD disc type
10 h
8 h
6 h
4 h
2 h
1 h
DVD-R / 1x
DVD-RW / 1x
1x
6 mins.
7.5 mins.
10 mins.
15 mins.
30 mins.
60 mins.
DVD-RW / 2x
DVD-R DL
DVD-RAM / 2x
2x
3 mins.
4 mins.
5 mins.
7.5 mins.
15 mins.
30 mins.
DVD+R / 2.4x
DVD+RW / 2.4x
DVD+R DL
2.4x
6.3 mins.
12.5 mins.
25 mins.
DVD-RAM / 3x
DVD-RAM / 5x
3x
2 mins.
2.5 mins.
3.5 mins.
5 mins.
10 mins.
20 mins.
DVD-R / 4x
DVD-RW / 4x
DVD+R / 4x
DVD+RW / 4x
4x
1.5 mins.
2 mins.
2.5 mins.
4 mins.
7.5 mins.
15 mins.
DVD-RW / 6x
DVD+RW / 8x
6x
1.25 mins.
1.6 mins.
2.2 mins.
3 mins.
5.5 mins.
11 mins.
DVD-R / 8x / 16x
DVD+R / 8x / 16x
8x
1 mins.
1.25 mins.
1.5 mins.
2.25 mins.
4 mins.
7.75 mins.
DVR550H_WV_EN.book 126 ページ 2006年12月28日 木曜日 午後4時21分
Downloaded From Disc-Player.com Pioneer Manuals
Additional information
16
128
En
LPCM
Troubleshooting
Incorrect operation is often mistaken for trouble and malfunction. If you think there is
something wrong with this component, please check the points below. Sometimes the
trouble may lie in another component. Investigate the other components and electrical
appliances being used. If the trouble cannot be rectified even after checking the points below,
ask your nearest Pioneer authorized service center or your dealer to carry out repair work.
General
Problem
Remedy
The disc is
automatically ejected
after closing the disc
tray
• Check that the disc is not an incompatible format disc (page 7).
• Check that the disc is loaded properly (aligned in disc tray and label-
side up).
• Take out the disc and clean it (page 138).
• Check that the disc has a region code compatible with the recorder.
Can’t eject a disc
•Turn off the power to this device and press and hold
OPEN/CLOSE
on the front of the unit for more than three seconds.
Can’t play a disc
• Check that the disc is a compatible format disc (page 7).
• Take out the disc and clean it (page 138).
• Check that the disc is loaded properly (aligned in disc tray and label-
side up).
• Press
HDD/DVD
to select the DVD.
• There may be condensation in the recorder. Leave the recorder for
an hour or so for the condensation to evaporate.
• During HDD recording, you can’t play discs that are recorded with a
Line System different to the current recorder setting.
• DVD+R/+RW discs recorded using another recorder with copy-
once protected recordings will not play in this recorder.
Can’t record a disc
• Check that the disc is not an incompatible format disc (page 7).
• Some DVD-RAM discs are not recordable until they have been
initialized (page 61). This can take up to an hour.
No picture
• Check that everything is connected properly (page 14).
• Check that the connected TV and/or the AV amp/receiver is set to
the correct input.
• The recorder may be set to progressive scan with an incompatible
TV. Reset to interlace by pressing and holding the front panel
STOP
button then pressing
OPEN/CLOSE
.
• When you are connected via HDMI, no video is output from the
COMPONENT VIDEO OUT
.
DVR550H_WV_EN.book 128 ページ 2006年12月28日 木曜日 午後4時21分
Downloaded From Disc-Player.com Pioneer Manuals
Additional information
16
130
En
Can’t play a disc
recorded using this
recorder on another
player
• If the disc was recorded in DVD-R/-RW (Video mode) or DVD+R,
make sure that it’s finalized (page 60).
•Some players will not play recordable DVD discs, even when
recorded in DVD-R/-RW (Video mode) or DVD+R and finalized.
• If the disc was recorded in VR mode, the other player must be
specifically RW compatible in order to play it (page 7).
• Discs recorded with copy-once material cannot be played on non-
CPRM compatible players (page 50).
• DVD+RW discs containing only a small amount of recorded
material may not play on other players. Finalize the disc and try again.
During playback the
picture is dark or
distorted
• When a copy-protected disc is played via a VCR, the picture will not
display correctly. Connect the recorder directly to your TV.
Recorded contents are
not clear or artefacts
appear in areas of flat
colour (due to MPEG
compression; also
known as
)
• Change the recording mode to
XP
/
SP
.
Can’t record or does
not record successfully
• Check that there is some remaining blank space on the DVD/HDD.
• For a DVD-R/-RW (Video mode) or DVD+R, check that the disc isn’t
already finalized.
• Check the limits on the number of titles and chapters on a disc:
– HDD: 999 titles
– VR mode: 99 titles, 999 chapters per disc
– Video mode disc: 99 titles per disc, 99 chapters per title
– DVD+R/+RW: 49 titles per disc, 99 chapters per title (max 254
chapters per disc)
• Check that the source you are trying to record is not copy protected.
• For a VR formatted disc, check that the disc isn’t locked (page 107).
• Check that you are recording with the same TV system (PAL, NTSC,
etc.) as the disc has already been recorded in. All recordings on a disc
must be in the same TV system. When recording to the HDD, it is also
necessary to set the Input Line System setting to match what you want
to record (page 124).
• The power may have failed during recording.
Timer programme
doesn’t record
successfully
• When setting the recording channel, make sure you set the
recorder’s built-in TV tuner, not the TV’s built-in tuner.
• When recording to a DVD-R/-RW (Video mode) or DVD+R/+RW,
programmes that are copy-once protected cannot be recorded. Use a
VR mode formatted disc for copy-once material (page 50).
• Two timer programmes may have overlapped, in which case only the
earlier one will record completely.
• The power may have failed during recording.
Problem
Remedy
DVR550H_WV_EN.book 130 ページ 2006年12月28日 木曜日 午後4時21分
Downloaded From Disc-Player.com Pioneer Manuals
Additional information
16
134
En
• Repairing disc.
• Repairing the HDD.
During recording, the power was cut. This display
appears when the power is restored.
• Could not repair the disc.
The recorder was unable to repair the disc after a
power cut. The contents of the recording will be
lost.
• Overheating has stopped operation.
Press DISPLAY to clear message.
The internal temperature of the recorder has
exceeded the operating limit. If this message
reappears, please ask your nearest Pioneer-
authorized service center or your dealer to carry
out repairs.
• HDD optimization is recommended.
This can be done using Disc Setup.
The HDD should be optimized (basically, HDD
housekeeping) to maintain playback and recording
performance.
• Please perform HDD optimization.
This can be done using Disc Setup.
The HDD is in more urgent need of optimization in
order to maintain performance.
• The HDD has not been sufficiently
optimized. Please optimize again.
If this message appears repeatedly after
optimizing the HDD it is likely that there is not
enough free space on the HDD for optimization to
complete properly. Please erase some titles from
the HDD and optimize again.
• An error occurred. Please consult the
service center. Note that contents on
the HDD may be erased when servicing
this unit
....
This message is displayed when information from
the HDD cannot be read. The HDD may be
damaged or broken. Please ask your nearest
Pioneer-authorized service center or your dealer to
carry out repairs.
• The Hard Disk Drive info is incorrect.
Use the Disc Setup menu to reinitialize.
As the HDD info cannot be properly read, no new
recordings can be made. Reinitializing the HDD
(page 109) may result in your being able to make
recording again. Note that reinitializing the HDD
will erase all recorded contents, including
protected files.
• This signal’s TV system is different
from the recorder’s setting.
The TV system (PAL, NTSC, etc.) of the current
channel is different from the TV system settings of
this recorder.
• Recording failed due to a TV system
mismatch. Press DISPLAY to clear
message.
The timer recording failed because the TV system
of the channel set for recording was different from
the setting of the recorder.
• Playback has stopped because the TV
system is different than the recording.
During recording or timer recording standby, the
TV System (PAL, NTSC, etc.) of the playback video
changed, causing playback to stop automatically.
Message
Explanation/Action
DVR550H_WV_EN.book 134 ページ 2006年12月28日 木曜日 午後4時21分
Downloaded From Disc-Player.com Pioneer Manuals
Additional information
16
136
En
Language code list
Language (Language code letter),
Language code
Country/Area code list
Country/Area,
Country/Area code
,
Code letter
Japanese (ja),
1001
English (en),
0514
French (fr),
0618
German (de),
0405
Italian (it),
0920
Spanish (es),
0519
Chinese (zh),
2608
Dutch (nl),
1412
Portuguese (pt),
1620
Swedish (sv),
1922
Russian (ru),
1821
Greek (el),
0512
Polish (pl),
1612
Czech (cs),
0319
Norwegian (no),
1415
Afar (aa),
0101
Abkhazian (ab),
0102
Afrikaans (af),
0106
Amharic (am),
0113
Arabic (ar),
0118
Assamese (as),
0119
Aymara (ay),
0125
Azerbaijani (az),
0126
Bashkir (ba),
0201
Byelorussian (be),
0205
Bulgarian (bg),
0207
Bihari (bh),
0208
Bislama (bi),
0209
Bengali (bn),
0214
Tibetan (bo),
0215
Breton (br),
0218
Catalan (ca),
0301
Corsican (co),
0315
Welsh (cy),
0325
Danish (da),
0401
Bhutani (dz),
0426
Esperanto (eo),
0515
Estonian (et),
0520
Basque (eu),
0521
Persian (fa),
0601
Finnish (fi),
0609
Fiji (fj),
0610
Faroese (fo),
0615
Frisian (fy),
0625
Irish (ga),
0701
Scots-Gaelic (gd),
0704
Galician (gl),
0712
Guarani (gn),
0714
Gujarati (gu),
0721
Hausa (ha),
0801
Hindi (hi),
0809
Croatian (hr),
0818
Hungarian (hu),
0821
Armenian (hy),
0825
Interlingua (ia),
0901
Interlingue (ie),
0905
Inupiak (ik),
0911
Indonesian (in),
0914
Icelandic (is),
0919
Hebrew (iw),
0923
Yiddish (ji),
1009
Javanese (jw),
1023
Georgian (ka),
1101
Kazakh (kk),
1111
Greenlandic (kl),
1112
Cambodian (km),
1113
Kannada (kn),
1114
Korean (ko),
1115
Kashmiri (ks),
1119
Kurdish (ku),
1121
Kirghiz (ky),
1125
Latin (la),
1201
Lingala (ln),
1214
Laotian (lo),
1215
Lithuanian (lt),
1220
Latvian (lv),
1222
Malagasy (mg),
1307
Maori (mi),
1309
Macedonian (mk),
1311
Malayalam (ml),
1312
Mongolian (mn),
1314
Moldavian (mo),
1315
Marathi (mr),
1318
Malay (ms),
1319
Maltese (mt),
1320
Burmese (my),
1325
Nauru (na),
1401
Nepali (ne),
1405
Occitan (oc),
1503
Oromo (om),
1513
Oriya (or),
1518
Panjabi (pa),
1601
Pashto, Pushto (ps),
1619
Quechua (qu),
1721
Rhaeto-Romance (rm),
1813
Kirundi (rn),
1814
Romanian (ro),
1815
Kinyarwanda (rw),
1823
Sanskrit (sa),
1901
Sindhi (sd),
1904
Sangho (sg),
1907
Serbo-Croatian (sh),
1908
Sinhalese (si),
1909
Slovak (sk),
1911
Slovenian (sl),
1912
Samoan (sm),
1913
Shona (sn),
1914
Somali (so),
1915
Albanian (sq),
1917
Serbian (sr),
1918
Siswati (ss),
1919
Sesotho (st),
1920
Sundanese (su),
1921
Swahili (sw),
1923
Tamil (ta),
2001
Telugu (te),
2005
Tajik (tg),
2007
Thai (th),
2008
Tigrinya (ti),
2009
Turkmen (tk),
2011
Tagalog (tl),
2012
Setswana (tn),
2014
Tonga (to),
2015
Turkish (tr),
2018
Tsonga (ts),
2019
Tatar (tt),
2020
Twi (tw),
2023
Ukrainian (uk),
2111
Urdu (ur),
2118
Uzbek (uz),
2126
Vietnamese (vi),
2209
Volapük (vo),
2215
Wolof (wo),
2315
Xhosa (xh),
2408
Yoruba (yo),
2515
Zulu (zu),
2621
Argentina,
0118
,
ar
Australia,
0121
,
au
Austria,
0120
,
at
Belgium,
0205
,
be
Brazil,
0218
,
br
Canada,
0301
,
ca
Chile,
0312
,
cl
China,
0314
,
cn
Denmark,
0411
,
dk
Finland,
0609
,
fi
France,
0618
,
fr
Germany,
0405
,
de
Hong Kong,
0811
,
hk
India,
0914
,
in
Indonesia,
0904
,
id
Italy,
0920
,
it
Japan,
1016
,
jp
Korea, Republic of,
1118
,
kr
Malaysia,
1325
,
my
Mexico,
1324
,
mx
Netherlands,
1412
,
nl
New Zealand,
1426
,
nz
Norway,
1415
,
no
Pakistan,
1611
,
pk
Philippines,
1608
,
ph
Portugal,
1620
,
pt
Russian Federation,
1821
,
ru
Singapore,
1907
,
sg
Spain,
0519
,
es
Sweden,
1905
,
se
Switzerland,
0308
,
ch
Taiwan,
2023
,
tw
Thailand,
2008
,
th
United Kingdom,
0702
,
gb
USA,
2119
,
us
DVR550H_WV_EN.book 136 ページ 2006年12月28日 木曜日 午後4時21分
Downloaded From Disc-Player.com Pioneer Manuals
Additional information
16
138
En
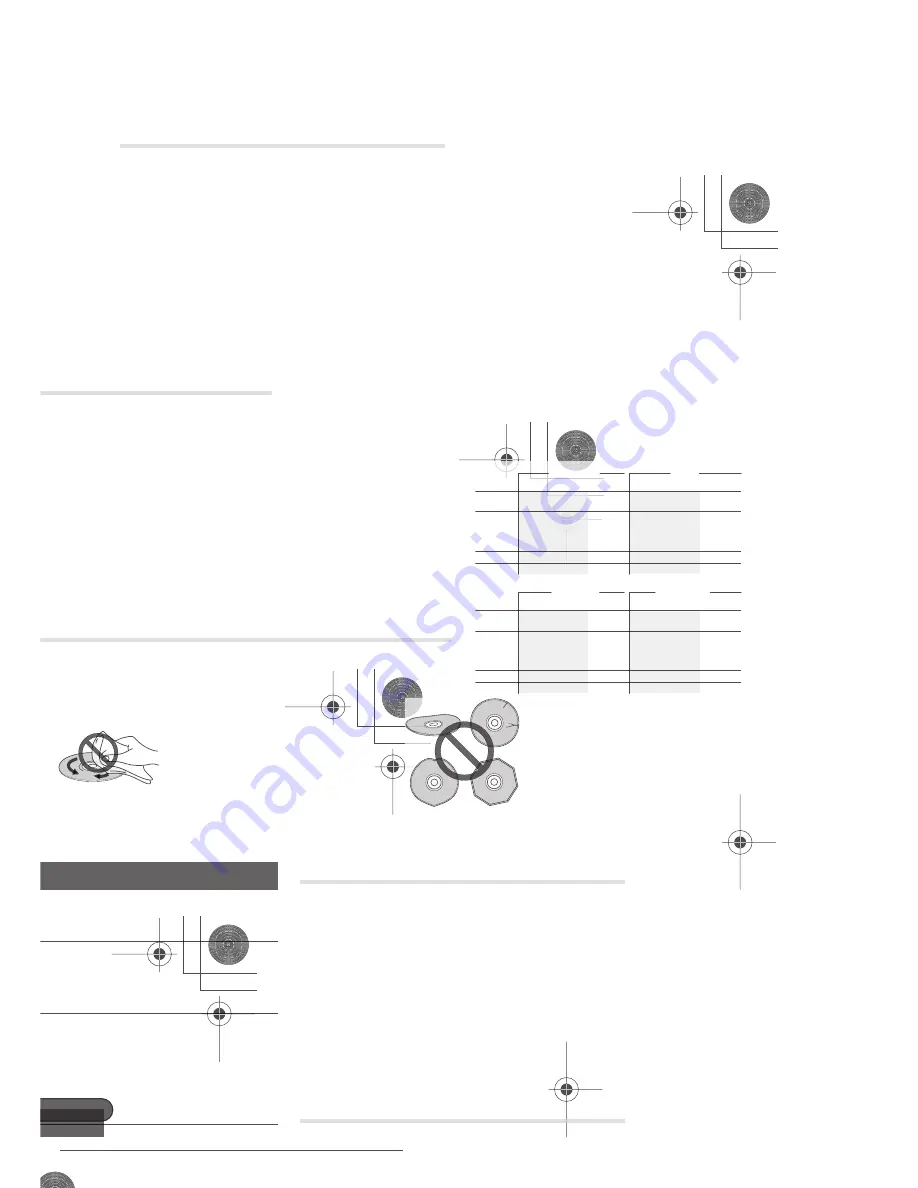
Handling discs
When holding discs of any type, take care
not to leave fingerprints, dirt or scratches on
the disc surface. Hold the disc by its edge or
by the center hole and edge.
Damaged or dirty discs can affect playback
and recording performance. Take care also
not to scratch the label side of the disc.
Although not as fragile as the recorded side,
scratches can still result in a disc becoming
unusable.
Should a disc become marked with
fingerprints, dust, etc., clean using a soft,
dry cloth, wiping the disc lightly from the
center to the outside edge. Do not wipe with
a circular motion.
If necessary, use a cloth soaked in alcohol,
or a commercially available CD/DVD
cleaning kit to clean a disc more thoroughly.
Never use benzine, thinner or other cleaning
agents, including products designed for
cleaning vinyl records.
Storing discs
Although CDs and DVD discs are more
durable than vinyl records, you should still
take care to handle and store discs correctly.
When you’re not using a disc, return it to its
case and store upright. Avoid leaving discs
in excessively cold, humid, or hot
environments (including under direct
sunlight).
Don’t glue paper or put stickers onto the
disc, or use a pencil, ball-point pen or other
sharp-tipped writing instrument. These
could all damage the disc.
For more detailed care information see the
instructions that come with discs.
Do not load more than one disc into the
recorder.
Damaged discs
Discs spin at high speed inside the recorder.
If you can see that a disc is cracked,
chipped, warped, or otherwise damaged,
don’t risk using it; you could end up
damaging the recorder.
This recorder is designed for use with
conventional, fully circular discs only. Use of
shaped discs is not recommended for this
product. Pioneer disclaims all liability
arising in connection with the use of shaped
discs.
Cleaning the pickup lens
The HDD/DVD recorder’s lens should not
become dirty in normal use, but if for some
reason it should malfunction due to dust or
dirt, consult your nearest Pioneer-authorized
service center. Although lens cleaners are
commercially available, we do not
recommend using them since some may
damage the lens.
Condensation
Condensation may form inside the recorder
if it is brought into a warm room from
outside, or if the temperature of the room
rises quickly. Although the condensation
won’t damage the recorder, it may
temporarily impair its performance. For this
reason you should leave it to adjust to the
warmer temperature for about an hour
before switching on and using.
DVR550H_WV_EN.book 138 ページ 2006年12月28日 木曜日 午後4時21分
Downloaded From Disc-Player.com Pioneer Manuals
Additional information
16
140
En
Specifications
General
Power requirements . . . . . 220 V to 240 V, 50 Hz/60 Hz
Power consumption . . . . . . . . . . . . . . . . . . . . . . . .42 W
Power consumption in standby mode . . . . . . . 0.67 W
(Front panel display: off)
Weight . . . . . . . . . . . . . . . . . . . . . . . . . . . . . . . . . . 4.1 kg
Dimensions
. . . . . . . . . . . .420 mm (W) x 75 mm (H) x 288 mm (D)
Operating temperature . . . . . . . . . . . +5 °C to +35 °C
Operating humidity . . 5 % to 85 % (no condensation)
TV system . . . . . . . . . . . . . . .NTSC (external input only)
/PAL/SECAM
Readable discs
DVD-Video, DVD-RW, DVD-R, DVD+R, DVD+RW,
DVD-RAM, Video CD, Super VCD, CD, CD-R/-RW
(WMA, MP3, JPEG, CD-DA, DivX)
Recording discs and formats
DVD-R/-RW: VR mode and Video mode
DVD+R/+RW: +VR mode
DVD-RAM: VR mode
DVD-R DL: VR mode and Video mode
DVD+R DL: +VR mode
Video recording format
Sampling frequency . . . . . . . . . . . . . . . . . . . . 13.5 MHz
Compression format . . . . . . . . . . . . . . . . . . . . . . .MPEG
Audio recording format
Sampling frequency . . . . . . . . . . . . . . . . . . . . . . 48 kHz
Compression format . . . . Dolby Digital or Linear PCM
(uncompressed)
Recording time
HDD (160 GB)
XP+ . . . . . . . . . . . . . . . . . . . . . . . . . . . . . . Approx. 23 h
Fine (XP). . . . . . . . . . . . . . . . . . . . . . . . . . . Approx. 34 h
Standard Play (SP) . . . . . . . . . . . . . . . . . . Approx. 68 h
Long Play (LP) . . . . . . . . . . . . . . . . . . . . . Approx. 136 h
Extended Play (EP) . . . . . . . . . . . . . . . . . Approx. 204 h
Super Long Play (SLP) . . . . . . . . . . . . . . Approx. 272 h
Super Extended Play (SEP) . . . . . . . . . . Approx. 340 h
Manual Mode (MN). . . . . . . . . . . Approx. 23 h to 455 h
DVD-R/-RW, DVD+R/+RW, DVD-RAM
Fine (XP). . . . . . . . . . . . . . . . . . . . . . . . . . . . Approx. 1 h
Standard Play (SP) . . . . . . . . . . . . . . . . . . . Approx. 2 h
Long Play (LP) . . . . . . . . . . . . . . . . . . . . . . . Approx. 4 h
Extended Play (EP) . . . . . . . . . . . . . . . . . . . Approx. 6 h
Super Long Play (SLP) . . . . . . . . . . . . . . . . Approx. 8 h
Super Extended Play (SEP) . . . . . . . . . . . Approx. 10 h
Manual Mode (MN)
DVD-R/-RW/-RAM . . . . . . . . . . . . Approx. 1 h to 13 h
DVD+R/+RW. . . . . . . . . . . . . . . . . Approx. 1 h to 8 h
DVD-R DL/DVD+R DL
Fine (XP) . . . . . . . . . . . . . . . . . . . . . . . Approx. 1 h 51 m
Standard Play (SP). . . . . . . . . . . . . . . Approx. 3 h 35 m
Long Play (LP) . . . . . . . . . . . . . . . . . . Approx. 7 h 11 m
Extended Play (EP) . . . . . . . . . . . . . Approx. 10 h 46 m
Super Long Play (SLP). . . . . . . . . . . Approx. 14 h 21 m
Super Extended Play (SEP) . . . . . . . Approx. 17 h 57 m
Manual Mode (MN)
DVD-R DL . . . . . . . . . . . . . . Approx. 1 h 51 m to 24 h
DVD+R DL . . . . . . . . Approx. 1 h 51 m to 14 h 21 m
Timer
Programmes . . . . . . . . . . . . 1 month/32 programmes
Clock . . . . . . . . . . Quartz lock (24-hour digital display)
Tuner
Receivable channels
VHF (low)
VHF (high)
Hyper
UHF
VHF (low)
VHF (high)
Hyper
UHF
Channel
E2 to E4
X to Z
E5 to E12
S1 to S20
M1 to M10
U1 to U10
S21 to S41
E21 to E69
Frequency
47 MHz to 89 MHz
104 MHz to 300 MHz
302 MHz to 470 MHz
470 MHz to 862 MHz
Channel
A to C
X to Z
D to J
11, 13
S1 to S20
S21 to S41
E21 to E69
Frequency
44 MHz to 89 MHz
104 MHz to 300 MHz
302 MHz to 470 MHz
470 MHz to 862 MHz
SECAM B/G
PAL B/G
PAL I
Channel
FB, FC1, FC
F1 to F6
B to Q
S21 to S41
21 to 69
Frequency
49 MHz to 65 MHz
104 MHz to 300 MHz
300 MHz to 470 MHz
470 MHz to 862 MHz
Channel
R1 to R5
R6 to R12
S1 to S20
S21 to S41
E21 to E69
Frequency
49 MHz to 94 MHz
104 MHz to 300 MHz
302 MHz to 470 MHz
470 MHz to 862 MHz
SECAM L
SECAM D/K
PAL D/K
STEREO
B/G - A2
I - NICAM
L - NICAM
B/G - NICAM
D/K - NICAM
DVR550H_WV_EN.book 140 ページ 2006年12月28日 木曜日 午後4時21分
Downloaded From Disc-Player.com Pioneer Manuals