


14
p
Depending on the search results, some steps may be
skipped.
1 Press the
MAP
button and touch
.
2 Touch [
New Route
].
3 Touch [
Address
].
4 Input the destination information.
State or UT (Union Territories) name
City/town/village/locality name or PIN code
Locality or street name
House number or intersection
After you touch the selected address to finish the address
search, the searched location appears on the Map screen.
If you touch [
Go to City/Town/Village/Locality
],
the geographic centre of the city appears on the
Map screen.
If you touch [
Go to Locality/Street
], the geo-
graphic centre of the street appears on the Map
screen.
5 Touch [
Select as Destination
], and then touch
[
Start Navigation
].
Your navigation system starts the route guidance.
Searching for Points of Interest
(POI)
Information about various facilities (Points Of Interest – POI),
such as petrol stations, car parks or restaurants, is available. You
can search for a POI by selecting the category (or entering the
POI Name).
Searching for POIs using preset
categories
The preset search allows you to quickly find the most frequently
selected types of POIs.
1 Press the
MAP
button and touch
.
2 Touch [
New Route
].
3 Touch [
Places
].
The preset search categories are as follows.
Gas Station
Accommodation
Restaurant
Parking
p
If the data for these items is not contained in the map data,
the information is not available even if there are signs on the
actual road.
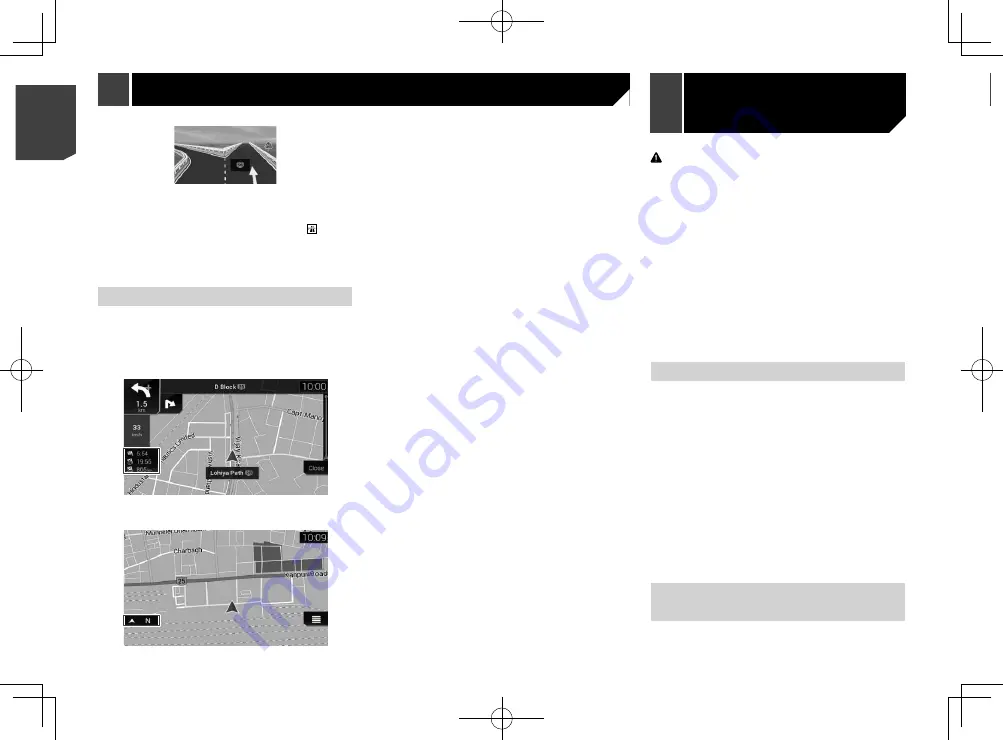
When you set “
Offer Freeway Services
” to “
on
”, the icon
appears while you are driving on motorways. Touch the icon
to open the details of the next few exits or service stations. In
addition, touch an item to show its location on the map. You can
set it as a waypoint easily.
Browsing the data field
The data fields are different when you are navigating a route and
when you have no specified destination. For example, the data
field provides the following information.
When the route is set:
Distance to final destination, time needed to reach the final
destination and estimated arrival time are shown.
When the route is not set:
Direction or altitude is shown.
p
Touching and holding the field allows you to display the
setting screen for the field.
Refer to
Data Fields
on page 26
p
The estimated time of arrival is an ideal value calculated
based on the speed limit value set in “
Max. Speed
” of vehi-
cle type setting and the actual driving speed. The estimated
time of arrival is only a reference value, and does not guaran-
tee arrival at that time.
Refer to
“
Route Preferences
” settings
on page 24
CAUTION
For safety reasons, these route-setting functions are not
available while your vehicle is in motion. To enable these
functions, you must stop in a safe place and put on the
handbrake.
p
Some information regarding traffic regulations depends on
the time when the route calculation is performed. Thus, the
information may not correspond with a certain traffic regula-
tion when your vehicle actually passes through the location
in question. Also, the information on the traffic regulations
provided applies for a passenger vehicle, and not for a truck
or other delivery vehicles. Always follow the actual traffic
regulations when driving.
p
[
Destination from Phone
] and [
Online Search
] on the
“
New Route to...
” screen can be used when the
AVICSYNC
App
connection is established.
Be sure read
Expanding the use of the navigation functions
(page 28) before using the
AVICSYNC
function.
How to plan your route
The following is a summary of the route setting procedure.
1 Search for a destination using various methods
on the [
New Route
] menu.
The location you searched for appears on the “
Map Location
”
screen.
2 Touch [
Select as Destination
].
Refer to
Using the “
Map Location
” screen
on page 17
The “
Route Summary
” screen appears and countdown begins.
When the countdown ends, the guidance automatically starts.
If you touch the screen anywhere during the countdown, the
countdown stops and the screen will stay as it is.
Refer to
Checking route information and preferences
on page
3 Touch [
Start Navigation
].
Your navigation system starts the route guidance.
Refer to
Understanding the route guidance
on page 13
Searching for a location by
address
The most frequently used function is the address search in
which the address is specified and the location is searched.
Searching for a destination
14
< CRB4783-A >
< CRB4783-A >
How to use the map
Searching for a
destination
Searching for a destination


