


23
Chapter 1
Using schedule files
23
Transferring the schedules to the
MTU-TXC
Use the WinHost On-line MTU Interface program to
transfer your schedules to the MTU-TXC. First connect
a PC to the unit, then transfer the files.
To connect to the MTU-TXC:
1. Ground the MTU-TXC as described earlier.
2. Connect the GPS antenna as described earlier.
3. Connect the MTU-TXC to the current source or
receiver as described earlier.
4. Connect a battery as described earlier.
5. Power up the MTU-TXC by pressing the
POWER
switch
ON
and releasing it.
6. Watch the LED on top of the MTU-TXC, and wait
approximately 30s for GPS synchronization to
begin, indicating that the unit has finished booting
up. (See “Understanding LED indications” on
page 18.)
7. Connect a PC to the
PARALLEL
I
/
O
port of the
MTU-TXC, as described on page 11.
To transfer the schedule file(s):
1. On the PC, launch the WinHost On-line MTU
Interface.
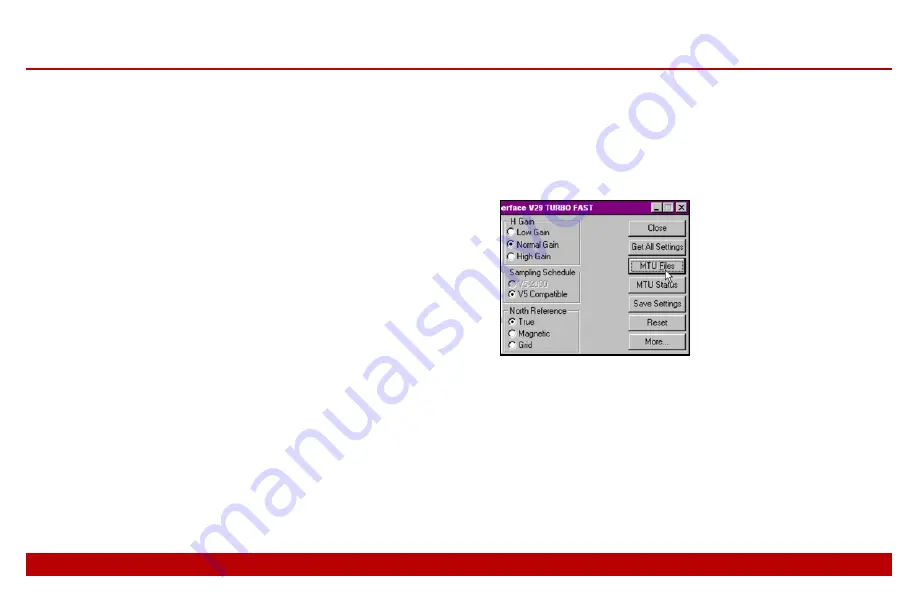
2. On the right side of the main window, click the MTU
Files button.
Содержание MTU-TXC
Страница 1: ...MTU TXC Current Source Controller User Guide Version 1 February 2004 PHOENIX GEOPHYSICS...
Страница 2: ......
Страница 3: ...MTU TXC Current Source Controller User GuideVersionj Feb...
Страница 6: ...ii ii...
Страница 26: ......


