Remove a satellite
You can remove one or more satellites from your current
satellite installation. You remove the satellite and its channels.
However, some satellite operators do not allow removing a
satellite.
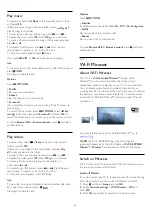
To remove satellites . . .
1
- Press
and select
Setup
and press
OK
.
2
- Select
Search for satellite
and press
OK
.
3
- Select
Remove satellite
and press
OK
. The current satellites
are shown.
4
- Use the arrows keys to select the satellite you want to
remove.
5
- Press
OK
to mark a satellite to remove. Press
OK
again to
unmark.
6
- Select
Remove
, press
OK
and confirm. The satellites are
removed.
7
- Select
Exit
and press
OK
to close Remove satellite.
Update satellite channels
Once a day, at 6 AM, the TV automatically updates the satellite
channels. A channel update looks for new channels and adds
them to the channel list. No longer available channels are
removed and if a provider reorders its channel package, the
channel list of the TV will be updated. The TV must be on
standby to automatically update the satellite channels.
Alternatively, you can do a channel update yourself at any
moment.
New channels, found with the channel update, are marked with
the letter N and collected in the channel list New. New
channels are also added in the All channel list. New channels
stay in the channel list New as long as you do not tune to them
or mark them as a favourite.
Switch off the automatic channel update
You can completely switch off the TV at night to avoid a channel
update. Alternatively, you can switch off the automatic update in
the setup menu.
1 -
Press
and select
Setup
and press
OK
.
2 -
Select
Satellite settings
>
Channel installation
>
Automatic
channel update
and select
Off
.
Switch off the update for a specific satellite
1 -
Press
and select
Setup
and press
OK
.
2 -
Select
Satellite settings
>
Channel installation
>
Automatic
update option
.
3 -
With the arrow keys, select the satellite you do not wish to
update. Press
OK
to unmark the satellite.
4 -
Select
Done
and press
OK
to close the menu.
The TV will not update the channels from the satellite you
unmarked.
Start an update yourself
1 -
Press
and select
Setup
and press
OK
.
2 -
Select
Search for satellite
and press
OK
.
3 -
Select
Update channels
and press
OK
.
4 -
If you want to check which satellites are set for updating,
select
Settings
and press
OK
.
5 -
With the arrow keys, mark or unmark the satellites for
updating. Select
Done
and press
OK
.
6 -
Select
Update
and press
OK
. The update may take a few
minutes.
7 -
Select
Finish
and press
OK
.
Languages and audio
Preferred languages and subtitles
Satellite channels can hold different audio languages, subtitle
languages or Text languages. You can set the TV to
automatically switch to the language, subtitle language or Text
language you prefer, if this language is available on the channel or
Text pages.
To set the your preferred language . . .
1 -
Press
and select
Setup
and press
OK
.
2 -
Select
Satellite settings
and press
OK
.
3 -
Select
Languages
and press
OK
. Select the setting you want.
4 -
Press
, repeatedly if necessary, to close the menu.
Hearing impaired audio
Some digital TV channels broadcast special audio and subtitles
adapted for hearing impaired people.
With Hearing impaired switched on, the TV automatically
switches to the adapted audio and subtitles, if available. Before
you can switch on Hearing impaired, you have to switch on
Universal access
.
Switch on
To switch on Hearing impaired, press
OPTIONS
, select
Universal access
and press
OK
.Select
Hearing impaired
, select
On
and press
OK
.
To check whether a hearing impaired audio language is available,
press
OPTIONS
, select
Audio language
and look for an
audio language marked with a
.
If Universal access does not appear in the Options menu, switch
on
Universal access
in Setup.
For more information, press
Keywords
and look up
Universal access
.
Audio description
Switch on
Digital TV channels can broadcast special audio commentary
describing what is happening on screen. To be able to set the
Audio description audio and effects, you have to switch on
Audio description first. Also, before you can switch on Audio
39
Содержание 40PFH4509/88
Страница 1: ...Register your product and get support at www philips com welcome User Manual ...
Страница 6: ...In Help press Keywords and look up EasyLink for more information 6 ...
Страница 22: ...22 ...
Страница 68: ...TV name To change the TV name Press Setup Network settings TV network name 68 ...

