background image

Page 40 · 

Robotics with the Boe-Bot  


P3.


The last three 

DEBUG

 lines can be deleted.  An additional 

CR

 is needed after the 

"Hello" message. 


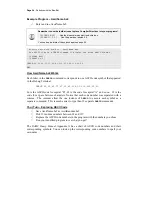
' Robotics with the Boe-Bot – HelloBoeBotCh01Project03.bs2 
' Send message to Debug Terminal and do some math. 
 
' {$STAMP BS2} 
' {$PBASIC 2.5} 
 
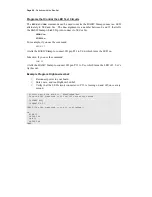
DEBUG "Hello, this is a message from your Boe-Bot.", CR 
 
DEBUG "What's 7 X 11?", CR, "The answer is: ", DEC 7 * 11 
 
END 


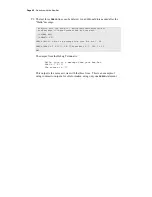
The output from the Debug Terminal is: 
 

Hello, this is a message from your Boe-Bot. 
What's 7 X 11? 
The answer is: 77 


This output is the same as it was with the three lines.  This is an example of 
using commas to output a lot of information, using only one 

DEBUG

 statement. 


Содержание Boe-Bot

Страница 1: ...Robotics with the Boe Bot Student Guide VERSION 2 2...

Страница 2: ...ederal copyright or intellectual property laws Any duplication of this documentation for commercial uses is expressly prohibited by Parallax Inc Duplication for educational use is permitted subject to...

Страница 3: ...ucators to ask questions and get answers Parallax Educators Exclusively for educators and those who contribute to the development of Stamps in Class Parallax created this group to obtain feedback on o...

Страница 4: ......

Страница 5: ...41 Introducing the Continuous Rotation Servo 41 Activity 1 How to Track Time and Repeat Actions 42 Activity 2 Tracking Time and Repeating Actions with a Circuit 45 Activity 3 Connecting the Servo Mot...

Страница 6: ...Activity 5 Flashlight Beam Following Boe Bot 210 Activity 6 Roaming Toward the Light 219 Summary 227 Chapter 7 Navigating with Infrared Headlights 235 Using Infrared Headlights to See the Road 235 Ac...

Страница 7: ...Table of Contents Page iii Appendix E Boe Bot Parts Lists 317 Appendix F Balancing Photoresistors 321 Appendix G Tuning IR Distance Detection 329 Appendix H Boe Bot Navigation Contests 335 Index 339...

Страница 8: ......

Страница 9: ...t to learn while doing the activities and projects in this text will be relevant to real world applications that use robotic control the only difference being the size and sophistication The mechanica...

Страница 10: ...s on experience Those who intend to delve further into industrial technology electronics or robotics are likely to benefit significantly from initial experiences with these topics SUPPORT AND DISCUSSI...

Страница 11: ...ll of these publications are available for free download from www parallax com The versions cited below were current at the time of this printing We continually strive to improve our educational progr...

Страница 12: ...LATIONS Parallax educational texts may be translated to other languages with our permission e mail stampsinclass parallax com If you plan on doing any translations please contact us so we can provide...

Страница 13: ...participants for their input Richard Breen Robert Ang Dwayne Tunnell Marc Pierloz and Nagi Babu These participants submitted one or more of the following error corrections useful editorial suggestions...

Страница 14: ...ng Robotics with the Boe Bot versions or More Robotics with the Boe Bot texts contact us at stampsinclass parallax com Subscribe and stay tuned to the StampsInClass Yahoo Group for the latest in free...

Страница 15: ...essential robotic tasks 1 Monitor sensors to detect the world around it 2 Make decisions based on what it senses 3 Control its motion by operating the motors that make its wheels turn 4 Exchange infor...

Страница 16: ...AND SOFTWARE Getting started with BASIC Stamp programming is similar to getting started with a brand new PC or laptop The first things that most people do when they get a new PC or laptop is take it o...

Страница 17: ...ct a power supply and serial cable to the BASIC Stamp module In later activities you will also see how the Board of Education makes it easy to build circuits and connect them to the BASIC Stamp Figure...

Страница 18: ...to build your own servo connections and to control power by disconnecting it from the board or by building your own power control circuits The BASIC Stamp 2 microcontroller is build right into the bo...

Страница 19: ...re on your PC or laptop Computer System Requirements You will need either a PC or laptop computer to run the BASIC Stamp Editor software Getting started with the BASIC Stamp is easiest if your PC or l...

Страница 20: ...nload with a version number of 2 0 or higher Click the Download icon In Figure 1 5 the Download icon looks like a file folder to the right of the description BASIC Stamp Windows Editor Version 2 0 Bet...

Страница 21: ...wse your computer s hard drives to find a convenient place to save the file After choosing where to save the file you are downloading click the Save button Figure 1 7 Save As Window Selecting a place...

Страница 22: ...Hundreds of applications and experiments you can try Finding the Software on the Parallax CD You can also install the BASIC Stamp Editor from the Parallax CD but the CD has to be newer than April 200...

Страница 23: ...drive and then double click Welcome Click the Software link shown in Figure 1 10 Figure 1 10 The Parallax CD Browser Click the next to the BASIC Stamps folder shown in Figure 1 11 Click the next to t...

Страница 24: ...probably have the most up to date material If it s an older CD consider requesting a new one from Parallax or downloading the files you need from the Parallax web site ACTIVITY 2 INSTALLING THE SOFTW...

Страница 25: ...k the Open button now If you located the software on the Parallax CD click the Install button shown in Figure 1 13 Figure 1 13 The Parallax CD Browser Install button located near bottom of window When...

Страница 26: ...the InstallShield Wizard tells you it is Ready to Install the Program click the Install button shown in Figure 1 16 Figure 1 16 Ready to Install Click the Install button When the InstallShield Wizard...

Страница 27: ...ns you can use the BASIC Stamp Editor to test the system This activity will show you how Computer Serial Cable Setup The Board of Education or BASIC Stamp HomeWork Board should be connected to your PC...

Страница 28: ...ows US232B LC Driver Software Downloads The software drivers and other information about this product can be downloaded from http www ftdichip com FT232 htm Figure 1 19 FTDI s US232B LC USB to Serial...

Страница 29: ...f Education 4 New AA alkaline batteries not included Figure 1 20 Getting Started Hardware for the BASIC Stamp and Board of Education Connecting the Hardware The rubber feet are shown in Figure 1 21 an...

Страница 30: ...f Education to position 0 0 1 2 Figure 1 22 3 position Switch Set to position 0 to turn off the power Only the Board of Education Rev C has a 3 position switch If you have a Board of Education Rev A o...

Страница 31: ...lug in power Make sure the pins are lined up properly with the holes in the socket then press down firmly to seat it The module should sink in about 1 8 inch 3 mm 2 1 www stampsinclass com Reset STAMP...

Страница 32: ...light labeled Pwr on the Board of Education should now be on Figure 1 26 BASIC Stamp and Board of Education Connected and Ready to Program Skip to the Testing for Communication section on page 21 BAS...

Страница 33: ...k Board Remove each rubber foot from its adhesive strip and affix it to the underside of the HomeWork Board next to each plated hole at each corner of the board as shown in Figure 1 28 making sure not...

Страница 34: ...Powercell Figure 1 29 HomeWork Board and Serial Cable Plug the serial cable and 9 V battery into the HomeWork Board Figure 1 30 shows the BASIC Stamp HomeWork Board connected to its battery power supp...

Страница 35: ...C Stamp Editor Click your Windows Start Button then select Programs Parallax Inc Stamp Editor 2 then click the BASIC Stamp Editor Icon Your BASIC Stamp Editor window should look similar to the one sho...

Страница 36: ...COM ports If the BASIC Stamp 2 has been detected then you are ready for Activity 4 Your First Program If the Identification window does not detect a BASIC Stamp 2 on any of the COM ports go to page 3...

Страница 37: ...er Your First Program The example programs that you will type into the BASIC Stamp Editor and download to the BASIC Stamp will always be shown with a gray background Here is an example Example Program...

Страница 38: ...at the beginning of your program Figure 1 36 PBASIC 2 5 Icon Clicking on this button will automatically place PBASIC 2 5 at the beginning of your program ALWAYS use these toolbar buttons to add these...

Страница 39: ...he BASIC Stamp Editor Save your work by clicking File and selecting Save shown in Figure 1 38 Figure 1 38 Saving the Program HelloBoeBot bs2 Enter the name HelloBoeBot bs2 into the File name field nea...

Страница 40: ...Figure 1 40 Figure 1 40 Running Your First Program HelloBoeBot bs2 A Download Progress window will appear briefly as the program is transmitted from the PC or laptop to your BASIC Stamp Figure 1 41 sh...

Страница 41: ...ton with your mouse You can get similar hints to find out what the other buttons do by pointing at them Figure 1 42 BASIC Stamp Editor Shortcut Buttons How HelloBoeBot bs2 Works The first two lines in...

Страница 42: ...is command is handy because it puts the BASIC Stamp into low power mode when it s done running the program In low power mode the BASIC Stamp waits for either the Reset button to be pressed and release...

Страница 43: ...hese three lines between the first DEBUG command and the END command DEBUG CR What s 7 X 11 DEBUG CR The answer is DEBUG DEC 7 11 Save the changes you made by clicking File and selecting Save Your pro...

Страница 44: ...f Figure 1 45 the Debug Terminal 1 shortcut button shown at the right of the figure or the F12 key on your keyboard Figure 1 45 Debug Terminal 1 to Foreground Using the menu left and using the shortcu...

Страница 45: ...he field labeled Type in the keyword to find shown in Figure 1 47 When the word DEBUG appears in the list below the field you are typing in double click it then click the Display button Figure 1 47 Lo...

Страница 46: ...link and click to select it When you get to the BASIC Stamp Documentation page find the BASIC Stamp Manual Click the Download icon that looks like a file folder to the right of the description BASIC...

Страница 47: ...t happens if you don t use the DEC formatter with a number If you use the DEBUG command followed by a number with no formatter the BASIC Stamp will read that number as an ASCII code Programming with A...

Страница 48: ...appeared in the Debug Terminal DEBUG 66 65 83 73 67 32 83 116 97 109 112 32 50 66 is the ASCII code for capital B 65 is the code for capital A and so on 32 is the code for a space between characters...

Страница 49: ...typing area Circuit prototypes should never be left unattended with a battery or power supply connected You never know what kind of accident might occur when you are not there Always disconnect the po...

Страница 50: ...oard of Education mistakes may occur that can damage it Although the BASIC Stamp is sometimes moved from one socket to another during a larger project it will not be necessary during any of the activi...

Страница 51: ...w to use the BASIC Stamp Editor s Help and the BASIC Stamp Manual How to disconnect the power to your Board of Education or HomeWork Board when you re done Questions 1 What device will be the brain of...

Страница 52: ...ee if you removed the DEC formatter from this command Use a PBASIC program to test your prediction DEBUG DEC 7 11 3 Which lines can you delete in HelloBoeBotYourTurn bs2 if you place the command shown...

Страница 53: ...wo operands 7 and 11 resulting in a product of 77 The asterisk is the multiply operator E3 To fix the problem add a carriage return the CR control character DEBUG DEC 7 11 DEBUG CR DEC 7 11 P1 Here is...

Страница 54: ...rminal and do some math STAMP BS2 PBASIC 2 5 DEBUG Hello this is a message from your Boe Bot CR DEBUG What s 7 X 11 CR The answer is DEC 7 11 END The output from the Debug Terminal is Hello this is a...

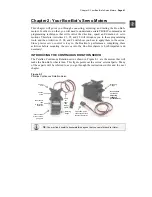
Страница 55: ...g the servos into the Boe Bot chassis is both important and necessary INTRODUCING THE CONTINUOUS ROTATION SERVO The Parallax Continuous Rotation servos shown in Figure 2 1 are the motors that will mak...

Страница 56: ...activity has a few PBASIC example programs that demonstrate how to repeat the same message over and over again and control the timing of the message Displaying Messages at Human Speeds You can use th...

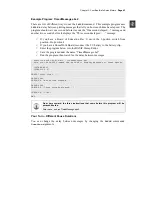
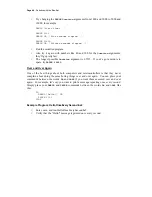
Страница 57: ...d reconnect the 9 V battery to the battery clip Enter the program below into the BASIC Stamp Editor Save the program under the name TimedMessages bs2 Run the program then watch for the delay between m...

Страница 58: ...e try PAUSE 60000 Over and Over Again One of the best things about both computers and microcontrollers is that they never complain about doing the same boring things over and over again You can place...

Страница 59: ...ill build circuits that emit light that will allow you to see the kind of signals that are used to control the Boe Bot s servo motors What s a Microcontroller Excerpts This activity contains selected...

Страница 60: ...r information on how to determine a resistor s value from the colored stripes on its ceramic case A diode is a one way current valve and a light emitting diode LED emits light when current passes thro...

Страница 61: ...nd the cathode will be shown with a sign Always check the LED s plastic case Usually the longer lead is connected to the LED s anode and the shorter lead is connected to its cathode But sometimes the...

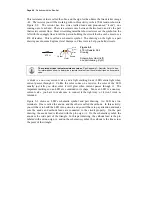
Страница 62: ...P12 P13 Vss Vss LED LED 470 470 P15 P14 P11 P10 P9 P8 P7 P6 P5 P4 P3 P2 P1 P0 P13 P12 X2 X3 Vdd Vss Vin Figure 2 4 Two LEDs Connected to BASIC Stamp I O Pins P13 and P12 Schematic left and wiring dia...

Страница 63: ...ed 5 V When you apply voltage to a circuit it s like applying electrical pressure Current refers to the rate at which electrons pass through a circuit You will often see measurements of current expres...

Страница 64: ...p to connect I O pin P13 to Vdd which turns the LED on Likewise if you use the command LOW 13 it tells the BASIC Stamp to connect I O pin P13 to Vss which turns the LED off Let s try this out Example...

Страница 65: ...23 22 21 20 19 18 17 16 15 14 13 1 2 3 4 5 6 7 8 9 10 11 12 BS2 IC BS2 Vdd Vss Figure 2 6 BASIC Stamp Switching The BASIC Stamp can be programmed to internally connect the LED circuit s input to Vdd...

Страница 66: ...would not otherwise need a DEBUG instruction So you should be able to run all of the remaining programs in this book even if your computer failed the diagnostic test Introducing the Timing Diagram A...

Страница 67: ...s look like this DO HIGH 12 HIGH 13 PAUSE 500 LOW 12 LOW 13 PAUSE 500 LOOP Run the modified program and verify that it makes both LEDs blink on and off at roughly the same time You can modify the prog...

Страница 68: ...lionth of a second It s abbreviated s Be careful when you write this value it s not the letter u from our alphabet it s the Greek letter mu For example 8 microseconds is abbreviated 8 s You can send a...

Страница 69: ...Figure 2 8 Timing Diagram for PulseP13Led bs2 Enter save and run PulseP13Led bs2 Verify that the LED circuit connected to P13 pulses for about thirteen hundredths of a second once every two seconds Ro...

Страница 70: ...ugh many of these kinds of documents looking for information needed to help make decisions while designing the product Sometimes the times are also left out or just shown with a label like thigh and t...

Страница 71: ...it makes the LEDs blink ten times as fast Now let s try 100 times as fast one hundredth of the duration Instead of appearing to flicker the LED will just appear to be not as bright as it would when y...

Страница 72: ...not be obvious but the brightness level is between those given by Duration arguments of 650 and 850 ACTIVITY 3 CONNECTING THE SERVO MOTORS In this activity you will build a circuit that connects the...

Страница 73: ...connecting the servo to your board Page 60 Board of Education Rev C Page 63 BASIC Stamp HomeWork Board Board of Education Rev B If you have a Board of Education Rev B follow the instructions for the B...

Страница 74: ...est on If you are using the 6 V battery pack make sure the jumper between the servo ports on the Board of Education is set to Vin as shown on the left of Figure 2 12 Use only alkaline AA 1 5 V batteri...

Страница 75: ...v C The jumper is set to Vin Connect your servos to your Board of Education Rev C as shown in Figure 2 13 Vin Vss P13 White Red Black Vin Vss P12 White Red Black Figure 2 13 Servo Connection Schematic...

Страница 76: ...ts P12 P13 Vss Vss LED LED 470 470 P15 P14 P11 P10 P9 P8 P7 P6 P5 P4 P3 P2 P1 P0 P13 P12 X2 X3 Vdd Vss Vin Figure 2 15 LED Servo Signal Monitor Circuit Disconnecting Power Special Instructions for the...

Страница 77: ...2 3 pin male male headers 4 Jumper wires 4 AA batteries 1 5 V alkaline 2 Built and tested LED circuits from the previous activity Figure 2 16 Servo Centering Parts for the HomeWork Board Figure 2 17...

Страница 78: ...should be connected to Vss Double check to make sure that all the connections for P13 Vbp Vss Vbp and P12 all exactly match the wiring diagram Connect the servo plugs to the male headers as shown on...

Страница 79: ...stampsinclass com Rev B Figure 2 18 Servo Connection Wiring Diagram for the BASIC Stamp HomeWork Board Left build the servo ports Right connect the servos Port connections Servo connections by wire c...

Страница 80: ...ructions for the HomeWork Board Never leave the power connected to your system when you are not working with it From here onward disconnecting power takes two steps Unplug the 9 V battery from the bat...

Страница 81: ...he center signal and after the servo has been properly adjusted this signal instructs it to stay still The instruction consists of a series of 1 5 ms pulses with 20 ms pauses between each pulse P12 1...

Страница 82: ...connected to P13 If you have a Board of Education Rev C make sure to set the 3 position power switch to position 2 as shown in Figure 2 23 0 1 2 Figure 2 23 Set the 3 Position Switch to Position 2 If...

Страница 83: ...with the screwdriver The potentiometer inside the servo is pretty delicate so be careful not to apply any more pressure than necessary when adjusting the servo Figure 2 24 Center Adjusting a Servo Ver...

Страница 84: ...p You can learn more about potentiometers in What s a Microcontroller and Basic Analog and Digital student guides Your Turn Centering the Servo Connected to P13 Repeat the process for the servo connec...

Страница 85: ...ted to power If you have a BASIC Stamp HomeWork Board remove one battery from the battery pack but leave the 9 V battery connected to the battery clip This disconnects power from the servo ports but p...

Страница 86: ...variables Before running the program predict what each DEBUG command will display Enter save and run VariablesAndSimpleMath bs2 Compare the results to your predictions and explain any differences Rob...

Страница 87: ...Terminal display its name the decimal value it s storing and a carriage return It s very handy for looking at the contents of a variable The riddle in the next three lines is what will be displayed T...

Страница 88: ...The StartValue and EndValue arguments can be either numbers or variables When you see something between curly braces in a syntax description it means it s an optional argument In other words the FOR...

Страница 89: ...ue argument You can use it to make myCounter count in steps Instead of 9 10 11 you can make it count by twos 9 11 13 or by fives 10 15 20 or whatever StepValue you give it forwards or backwards Here s...

Страница 90: ...llions of dollars In those kinds of projects subsystem testing is rigorous and thorough Pulse Width Controls Speed and Direction Recall from centering the servos that a signal with a pulse width of 1...

Страница 91: ...bedded BASIC Stamp Vdd Vin and Vss Enter save and run ServoP13Clockwise bs2 Verify that the servo s horn is rotating between 50 and 60 RPM clockwise Robotics with the Boe Bot ServoP13Clockwise bs2 Run...

Страница 92: ...te counterclockwise A Duration of 850 will send 1 7 ms pulses as shown in Figure 2 26 This will make the servo turn full speed counterclockwise Figure 2 26 A 1 7 ms Pulse Train Makes the Servo Turn Fu...

Страница 93: ...ning full speed counterclockwise while the one connected to P12 is turning full speed clockwise Robotics with the Boe Bot ServosP13CcwP12Cw bs2 Run the servo connected to P13 at full speed countercloc...

Страница 94: ...Cw bs2 sends one of these combinations 850 to P13 and 650 to P12 By testing several possible combinations and filling in the Description column of Table 2 1 you will become familiar with them and buil...

Страница 95: ...tions Durations P13 P12 Description Behavior 850 650 Full speed P13 servo counterclockwise P12 servo clockwise 650 850 850 850 650 650 750 850 650 750 750 750 Both servos should stay still because of...

Страница 96: ...e loop the PULSOUT command lasts for 1 7 ms the PAUSE command lasts for 20 ms and it takes around 1 3 ms for the loop to execute One time through the loop 1 7 ms 20 ms 1 3 ms 23 0 ms Since the loop ex...

Страница 97: ...ach time through the loop it will take 1 7ms Servo connected to P13 1 3 ms Servo connected to P12 20 ms Pause duration 1 6 ms Code overhead 24 6 ms Total If you want to run the servos for a certain am...

Страница 98: ...850 PULSOUT 12 650 PAUSE 20 NEXT FOR counter 1 TO 122 PULSOUT 13 650 PULSOUT 12 850 PAUSE 20 NEXT END Verify that each servo turned one direction for three seconds and then reversed direction and turn...

Страница 99: ...switch to position 0 if you have a Board of Education Rev C If you have a HomeWork Board disconnect the 9 V battery from the battery clip and remove one battery from the battery pack TIP To measure th...

Страница 100: ...iving the 1 5 ms pulses until it stayed still This process is called centering the servo After the servos were centered variables were introduced as a way to store values Variables can be used in math...

Страница 101: ...R counter 9 TO 21 DEBUG counter PAUSE 500 NEXT Projects 1 Write a program that causes the LED connected to P14 to light dimly on off with every pulse while the P12 servo is turning 2 Write a program t...

Страница 102: ...ervo speed and direction As seen on a timing diagram the pulse width is the high time In PBASIC the pulse can be generated with the PULSOUT command The PULSOUT command s Duration argument adjusts the...

Страница 103: ...long it will take for one loop 1 one loop 1 7 1 7 20 ms 1 6 25 0 ms 0 025 s 2 one loop 1 3 1 3 20 ms 1 6 24 2 ms 0 0242 s 3 one loop 1 7 1 3 20 ms 1 6 24 6 ms 0 0246 s 4 one loop 1 3 1 7 20 ms 1 6 24...

Страница 104: ...0 NEXT FOR counter 1 TO 124 Loop for three seconds PULSOUT 13 650 P13 servo clockwise PULSOUT 12 650 P12 servo clockwise PAUSE 20 NEXT FOR counter 1 TO 122 Loop for three seconds PULSOUT 13 650 P13 se...

Страница 105: ...d 3 Connect and test a speaker that can let you know when the Boe Bot s batteries are low 4 Use the Debug Terminal to control and test servo speed ACTIVITY 1 ASSEMBLING THE BOE BOT This activity will...

Страница 106: ...t See Figure 3 2 1 Boe Bot chassis 4 1 Standoffs 4 Pan head screws 1 4 4 40 1 Rubber grommet 13 32 Instructions Insert the 13 32 rubber grommet into the hole in the center of the Boe Bot chassis Make...

Страница 107: ...ts Lists for more information Removing the Servo Horns Disconnect the power from your BASIC Stamp and servos Remove all of the AA batteries from the battery pack Disconnect the servos from your board...

Страница 108: ...os on the Chassis Parts List See Figure 3 4 1 Boe Bot chassis partially assembled 2 Parallax Continuous Rotation servos 8 Pan Head Screws 3 8 4 40 8 Nuts 4 40 Instructions Attach the servos to the cha...

Страница 109: ...nd the parts on the right if you have a HomeWork Board Parts List for Boe Bot with a Board of Education Rev C See Figure 3 5 left side 1 Boe Bot chassis partially assembled 2 Flat head Phillips screws...

Страница 110: ...derside of the Boe Bot chassis as shown on the left side of Figure 3 6 Make sure to insert the screws through the battery pack then tighten down the nuts on the topside of the chassis As shown on the...

Страница 111: ...the Boe Bot s tail wheel mounted on the chassis The tail wheel is merely a plastic ball with a hole through the center A cotter pin holds it to the chassis and functions as an axle for the wheel Line...

Страница 112: ...ach the wheels to the servo output shafts Figure 3 8 Mounting the Wheels Tail wheels left drive wheels right Attaching Board to Chassis Parts List for a Boe Bot with a Board of Education See left side...

Страница 113: ...Education Rev C With the HomeWork Board Figure 3 10 shows the servo ports reconnected for both the Board of Education Rev C left side and the HomeWork Board right side Reconnect the servos to the serv...

Страница 114: ...th their respective boards attached Set the board on the four standoffs so that they line up with the four holes on the outer corner of the board Make sure the white breadboard is closer to the drive...

Страница 115: ...2 Assembled Boe Bots With Board of Education Rev C With HomeWork Board ACTIVITY 2 RE TEST THE SERVOS In this activity you will test to make sure that the electrical connections between your board and...

Страница 116: ...3 14 Testing the Right Wheel Example Program RightServoTest bs2 Set the Boe Bot on its nose so that the drive wheels are suspended above ground Reload the batteries into the battery pack If you have a...

Страница 117: ...n where you will test the left wheel Robotics with the Boe Bot RightServoTest bs2 Right servo turns clockwise three seconds stops 1 second then counterclockwise three seconds STAMP BS2 PBASIC 2 5 DEBU...

Страница 118: ...t the other servo that was connected to P13 to P12 Reconnect power Re run RightServoTest bs2 The wheel does not fully stop it turns slowly This means that the servo may not be exactly centered You can...

Страница 119: ...3 seconds If the left wheel servo does not behave as predicted see the Servo Trouble Shooting section on page 104 If the left wheel servo does behave properly then your Boe Bot is functioning properl...

Страница 120: ...extremely useful diagnostic device as well as a useful robot tool One way to indicate resets is to include an unmistakable signal at the beginning of all the Boe Bot s programs The signal occurs every...

Страница 121: ...te Piezoelectric elements have many uses For example when force is applied to a piezoelectric element it can create voltage Some piezoelectric elements have a frequency at which they naturally vibrate...

Страница 122: ...33 www parallax com www stampsinclass com To Servos HomeWork Board Figure 3 18 Wiring Diagrams for the Program Start Reset Indicator Circuit Board of Education left and HomeWork Board right The piezos...

Страница 123: ...One kilohertz is one thousand times per second and it s abbreviated 1 kHz FREQOUT digitally synthesizes tones The FREQOUT command applies high low pulses of varying durations that make a piezospeaker...

Страница 124: ...l hardware reset How StartResetIndicator bs2 Works StartResetIndicator bs2 starts by displaying the message Beep Then immediately after printing the message the FREQOUT command plays a 3 kHz tone on t...

Страница 125: ...upply ACTIVITY 4 TESTING SPEED CONTROL WITH THE DEBUG TERMINAL In this activity you will graph servo speed vs pulse width One thing that can make this process go much more quickly is the Debug Termina...

Страница 126: ...riable named pulseWidth will be used to store the values the DEBUGIN command receives pulseWidth VAR Word Now the DEBUGIN command can be used to capture a decimal value that you enter into the Debug T...

Страница 127: ...660 670 680 690 700 700 710 720 730 740 750 760 770 780 790 800 810 820 830 840 850 For each pulse width multiply the number of turns by 10 to get the RPM For example if the wheel makes 3 65 full turn...

Страница 128: ...ommand stores this value in the pulseWidth variable DEBUG Enter pulse width DEBUGIN DEC pulseWidth To make the measurement more accurate two PULSOUT commands have to be sent By making one PULSOUT comm...

Страница 129: ...d Topic Graphing Pulse Width vs Rotational Velocity Figure 3 20 shows an example of a transfer curve for a continuous rotation servo The horizontal axis shows the pulse width in ms and the vertical ax...

Страница 130: ...0 1 530 1 630 1 340 1 440 1 540 1 640 1 350 1 450 1 550 1 650 1 360 1 460 1 560 1 660 1 370 1 470 1 570 1 670 1 380 1 480 1 580 1 680 1 390 1 490 1 590 1 690 1 700 Remember that the PULSOUT command s...

Страница 131: ...made Multiply this value by 10 and enter the result into Table 3 1 next to the 1 31 ms entry Keep increasing your durations by 5 0 01 ms until you are up to 850 1 7 ms Use a spreadsheet calculator or...

Страница 132: ...routine that will be used at the beginning of all Boe Bot programs Until this chapter the Debug Terminal has been used to display messages sent to the computer by the BASIC Stamp These messages were d...

Страница 133: ...fies an intermediate step in a program has been completed Try a value with a 100 ms duration at a 4 kHz frequency Projects 1 Modify RightServoTest bs2 so that it makes a tone signifying the test is co...

Страница 134: ...wapped 2 One or both servos is plugged in backwards so that the white red black color coding is incorrect 3 The power switch is not on position 2 4 The 9V or AA batteries are not installed 5 The servo...

Страница 135: ...servo PULSOUT commands must be added to actually move the servo motors Furthermore all variables must be declared in the beginning of the program An example solution is shown below Robotics with the B...

Страница 136: ...122 Robotics with the Boe Bot PULSOUT 13 ltPulseWidth Left servo motion PULSOUT 12 rtPulseWidth Right servo motion PAUSE 20 NEXT LOOP Note This project is best tested with the Boe Bot s wheels proppe...

Страница 137: ...une the maneuvers from Activity 1 so that they are more precise 3 Use math to calculate the number of pulses to deliver to make the Boe Bot travel a predetermined distance 4 Instead of programming the...

Страница 138: ...om the left the wheel has to turn counterclockwise for the Boe Bot to move forward Viewed from the right the other wheel has to turn clockwise for the Boe Bot to move forward Figure 4 2 Wheel Rotation...

Страница 139: ...Word FREQOUT 4 2000 3000 Signal program start reset FOR counter 1 TO 122 Run servos for 3 seconds PULSOUT 13 850 PULSOUT 12 650 PAUSE 20 NEXT END How BoeBotForwardThreeSeconds bs2 Works From chapter 2...

Страница 140: ...ance and Speed By changing the FOR NEXT loop s EndValue argument from 122 to 61 you can make the Boe Bot move forward for half the time This in turn will make the Boe Bot move forward half the distanc...

Страница 141: ...looking at it from above PULSOUT 13 850 PULSOUT 12 850 You can combine all these commands into a single program that makes the Boe Bot move forward turn left turn right then move backward Example Pro...

Страница 142: ...ounter 1 TO 64 Backward PULSOUT 13 650 PULSOUT 12 850 PAUSE 20 NEXT END Your Turn Pivoting You can make the Boe Bot turn by pivoting around one wheel The trick is to keep one wheel still while the oth...

Страница 143: ...ull speed forward for fifteen seconds What if the Boe Bot curves slightly to the left or right during its travel when it s supposed to be traveling straight ahead There s no need to take the Boe Bot b...

Страница 144: ...ight try this example anyway If you follow the instructions it should adjust your Boe Bot so that it curves slightly to the right Let s say that the Boe Bot turns slightly to the left There are two wa...

Страница 145: ...label each servo with the best PULSOUT values If your Boe Bot already travels straight forward try the modifications just discussed to see the effect It should cause the Boe Bot to travel in a curve i...

Страница 146: ...rd bs2 so that it makes precise 90 turns Update ForwardLeftRightBackward bs2 with the PULSOUT values you determined for straight forward and backward travel Update the label on each servo with a notat...

Страница 147: ...our 70 miles 140 time Example Time for Metric Distance If you re 200 kilometers away from your destination and you re traveling 100 kilometers per hour it s going to take 2 hours to get there hours 2...

Страница 148: ...U1 TM 0 1 2 2000 2003 Vdd P15 P14 P13 P12 P11 P10 P9 P8 P7 P6 P5 P4 P3 P2 P1 P0 X2 X3 Vdd Vss Vin Rev C 1 2 3 4 5 6 1 2 3 4 5 6 7 8 9 10 11 12 13 14 15 inch cm 7 8 9 10 16 17 18 19 20 21 22 23 24 25 M...

Страница 149: ...2 54 You can convert centimeters to inches by dividing the number of centimeters by 2 54 Example Time for 20 in At 9 in s your Boe Bot has to travel for 2 22 s to travel 20 in s 22 2 in 9 s 1 in 20 in...

Страница 150: ...Bot Boe ce tan dis Bot Boe ulses p Example Time for 20 in At 9 in s your Boe Bot has to travel for 2 22 s to travel 20 in pulses 90 pulses 333 90 pulses 65 40 9 20 s 1 pulses 65 40 in 9 s 1 in 20 s p...

Страница 151: ...rallax com ACTIVITY 4 MANEUVERS RAMPING Ramping is a way to gradually increase or decrease the speed of the servos instead of abruptly starting or stopping This technique can increase the life expecta...

Страница 152: ...Program StartAndStopWithRamping bs2 Enter save and run StartAndStopWithRamping bs2 Verify that the Boe Bot gradually accelerates to full speed maintains full speed for a while and then gradually dece...

Страница 153: ...speed going backward instead of forward The only difference between this routine and the forward ramping routine is that the value of pulseCount is subtracted from 750 in the PULSOUT 13 command where...

Страница 154: ...hapter your Boe Bot will have to perform maneuvers to avoid obstacles One of the key ingredients to avoiding obstacles is executing pre programmed maneuvers One way of executing pre programmed maneuve...

Страница 155: ...nd in subroutine in your Debug Terminal PAUSE 1000 causes a one second pause Then when the program gets to the RETURN command arrow 2 shows how it jumps back to the command immediately after the GOSUB...

Страница 156: ...in turn Try this program and note the effect Example Program TwoSubroutines bs2 Enter save and run TwoSubroutines bs2 Robotics with the Boe Bot TwoSubroutines bs2 This program demonstrates that a sub...

Страница 157: ...utines bs2 Make forward left right and backward movements in reusable subroutines STAMP BS2 PBASIC 2 5 DEBUG Program Running counter VAR Word FREQOUT 4 2000 3000 Signal program start reset GOSUB Forwa...

Страница 158: ...r has been accomplished with similar code blocks Compare these two snippets Forward full speed FOR counter 1 TO 64 PULSOUT 13 850 PULSOUT 12 650 PAUSE 20 NEXT Ramp down from full speed backwards FOR p...

Страница 159: ...ft turn pulseLeft 650 pulseRight 650 pulseCount 24 GOSUB Navigate Right turn pulseLeft 850 pulseRight 850 pulseCount 24 GOSUB Navigate Backward pulseLeft 650 pulseRight 850 pulseCount 64 GOSUB Navigat...

Страница 160: ...the BASIC Stamp uses as instructions for executing the program They are stored in one of the two smaller black chips on top of your BASIC Stamp the one labeled 24LC16B This chip is a special type of c...

Страница 161: ...atted differently Figure 4 6 BASIC Stamp Memory Map While we are here note also that the counter variable we declared as a word is visible in Register 0 of the RAM Map This program might have seemed l...

Страница 162: ...the movements are over The list is saved in EEPROM during program download with the DATA directive which looks like this DATA FLFFRBLBBQ Each letter is stored in a byte of EEPROM beginning at address...

Страница 163: ...B GOSUB Backward CASE R GOSUB Right_Turn CASE L GOSUB Left_Turn ENDSELECT Here are these concepts all together in a single program Example Program EepromNavigation bs2 Carefully read the code instruc...

Страница 164: ...broutine FOR pulseCount 1 TO 64 Send 64 forward pulses PULSOUT 13 850 1 7 ms pulse to left servo PULSOUT 12 650 1 3 ms pulse to right servo PAUSE 20 Pause for 20 ms NEXT RETURN Return to Main Routine...

Страница 165: ...adjust the FOR NEXT loop s EndValue arguments in the turning subroutines to make precise 90 degree turns Your Turn With EepromNavigation bs2 active in the BASIC Stamp Editor click Run and select Memo...

Страница 166: ...in mind that if your program gets larger the number of available EEPROM addresses for holding data gets smaller You can modify the existing data string to a new set of directions You can also add add...

Страница 167: ...his code snippet addressOffset 0 2 4 6 8 Pulses_Count DATA Word 64 Word 24 Word 24 Word 64 Word 0 Pulses_Left DATA Word 850 Word 650 Word 850 Word 650 Pulses_Right DATA Word 650 Word 650 Word 850 Word...

Страница 168: ...lseLeft PULSOUT 12 pulseRight PAUSE 20 NEXT becomes FOR counter 1 TO 64 PULSOUT 13 850 PULSOUT 12 650 PAUSE 20 NEXT Do you recognize the basic maneuver generated by this code block Look at the other c...

Страница 169: ...R counter 1 TO pulseCount PULSOUT 13 pulseLeft PULSOUT 12 pulseRight PAUSE 20 NEXT LOOP UNTIL pulseCount 0 END Stop executing until reset Did your Boe Bot perform the familiar forward left right backw...

Страница 170: ...a column for each Boe Bot maneuver you want to make plus one for the Word 0 item in the Pulses_Count row Use the table to plan out your Boe Bot choreography filling in the FOR NEXT loop s EndValue and...

Страница 171: ...e accomplished by measuring the distance it travels in one second with the help of a ruler Using this distance and the number of pulses in one second of run time you can calculate the number of pulses...

Страница 172: ...s 1 What direction does the left wheel have to turn to make the Boe Bot go forward What direction does the right wheel have to turn 2 When the Boe Bot pivots to the left what are the right and left wh...

Страница 173: ...lumn 3 of Table 2 1 PULSOUT Duration Combinations on page 81 To do this modify the PULSOUT Duration arguments in the program BoeBotForwardThreeSeconds bs2 using each pair of values from column 1 Recor...

Страница 174: ...63 Q4 Given Boe Bot speed 11 in s Boe Bot distance 36 in s pulses Boe Bot distance Boe Bot speed 40 65 pulses s 36 11 40 65 133 04 133 It should take 133 pulses to travel 36 inches Q5 The FOR NEXT loo...

Страница 175: ...tate right 60 degrees PULSOUT 13 850 PULSOUT 12 850 PAUSE 20 NEXT E3 FOR counter 1 to 100 Forward PULSOUT 13 850 PULSOUT 12 650 PAUSE 20 NEXT FOR counter 0 TO 30 Ramping pivot turn PULSOUT 13 750 coun...

Страница 176: ...P12 CW Medium Veer right 800 650 P13 CCW Medium P12 CW Full Speed Veer left P2 The circle can be implemented by veering right continuously Trial and error a yard or meter stick will help you arrive a...

Страница 177: ...4 Triangle bs2 Boe Bot navigates triangle shape with 1 yard sides Go forward then turn 120 degrees Repeat three times STAMP BS2 PBASIC 2 5 DEBUG Program running counter VAR Nib Triangle has 3 sides pu...

Страница 178: ......

Страница 179: ...alculator display updates or the factory production line reacts with motors or servos to guide products In this chapter you will build tactile switches called whiskers onto your Boe Bot and test them...

Страница 180: ...ving on to programs that make the Boe Bot navigate based on what it can touch it s essential to build and test the whiskers first This activity will guide you through building and testing the whiskers...

Страница 181: ...ont standoffs Refer to Figure 5 3 while following the remaining instructions Thread a nylon washer and then a round spacer on each of the 7 8 screws Attach the screws through the holes in your board a...

Страница 182: ...the wiring diagram in Figure 5 5 on page 169 as a reference If you have a HomeWork Board build the whiskers circuit shown in Figure 5 4 using the wiring diagram in Figure 5 6 on page 170 as a referen...

Страница 183: ...P6 P3 P2 P1 P0 P7 P5 P4 X2 X3 Vdd Vss Vin Board of Education 2000 2003 Rev C Vdd Black Red X4 X5 15 14 13 12 To Servos Left Whisker Right Whisker Use the 220 resistors red red brown color codes to co...

Страница 184: ...3 P2 P1 P0 X2 X3 Vdd Vss Vin Rev B 916 624 8333 www parallax com www stampsinclass com To Servos Left Whisker Right Whisker HomeWork Board Use the 220 resistors red red brown color codes to connect P5...

Страница 185: ...Figure 5 7 Whiskers Schematic A Second Look The BASIC Stamp can be programmed to detect when a whisker is pressed I O pins connected to each switch circuit monitor the voltage at the 10 k pull up res...

Страница 186: ...ts Example Program TestWhiskers bs2 This next example program is designed to test the whiskers to make sure they are functioning properly By displaying the binary digits stored in the P7 and P5 input...

Страница 187: ...r into its three pin header and note the value displayed in the Debug Terminal again This time it should read P5 0 P7 1 Press both whiskers against both three pin headers Now it should read P5 0 P7 0...

Страница 188: ...er Testing Circuits Disconnect power from your board and servos If you have a Board of Education add the circuit shown in Figure 5 9 with the help of the wiring diagram in Figure 5 10 page 175 If you...

Страница 189: ...m for the Board of Education P15 P14 P13 P12 P11 P10 P7 P5 P4 P1 P9 P8 P6 P3 P2 P0 X2 X3 Vdd Vss Vin Board of Education 2000 2003 Rev C Vdd Black Red X4 X5 15 14 13 12 To Servos Left Whisker Right Whi...

Страница 190: ...15 P14 P11 P13 P12 P10 P7 P5 P4 P1 P9 P8 P6 P3 P2 P0 X2 X3 Vdd Vss Vin Rev B 916 624 8333 www parallax com www stampsinclass com To Servos Left Whisker Right Whisker HomeWork Board Flat spot on plasti...

Страница 191: ...which turns the LED off when the whisker is not pressed The second IF THEN statement does the same thing for the whisker connected to P5 and the LED connected to P10 RunTestWhiskersWithLeds bs2 Test...

Страница 192: ...means you can place a code block one or more commands between the keywords The next example program makes decisions based on the whisker inputs and then calls subroutines to make the Boe Bot take acti...

Страница 193: ...2000 3000 Signal program start reset Main Routine DO IF IN5 0 AND IN7 0 THEN Both whiskers detect obstacle GOSUB Back_Up Back up U turn left twice GOSUB Turn_Left GOSUB Turn_Left ELSEIF IN5 0 THEN Le...

Страница 194: ...he Back_Up subroutine followed by calling the Turn_Left subroutine twice in a row If just the left whisker is pressed IN5 0 then the program calls the Back_Up subroutine followed by the Turn_Right sub...

Страница 195: ...side a DO LOOP each time the program returns from a Forward_Pulse it gets to LOOP which sends the program back up to DO What happens then The IF THEN statement checks the whiskers all over again Your...

Страница 196: ...Programming to Escape Corners RoamingWithWhiskers bs2 can be modified to detect this problem and act upon it The trick is to count the number of times that alternate whiskers are contacted One importa...

Страница 197: ...rners bs2 Test this program by pressing alternate whiskers as the Boe Bot roams Depending on which Whisker you started with the Boe Bot should execute its U Turn maneuver after either the fourth or fi...

Страница 198: ...r old5 IN5 counter 1 not alternate reset counter ENDIF ENDIF old7 IN7 and old5 IN5 ENDIF ENDIF IN7 IN5 Same navigation routine from RoamingWithWhiskers bs2 IF IN5 0 AND IN7 0 THEN Both whiskers detect...

Страница 199: ...le Remember that a bit variable can store a single bit either a 1 or a 0 The next two variables old7 and old5 are both bit variables These are also the right size for the job since they are used to st...

Страница 200: ...tracks alternate whisker contacts It s also time to remember the current whisker pattern by setting old7 equal to the current IN7 and old5 equal to the current IN5 IF old7 IN7 AND old5 IN5 THEN count...

Страница 201: ...old7 IN7 AND old5 IN5 THEN statement ENDIF ENDIF The remainder of the program is the same as before Your Turn One of the IF THEN statements in EscapingCorners bs2 checks to see if counter has reached...

Страница 202: ...intelligence an additional routine was developed that enabled the Boe Bot to detect when it got stuck in a corner This routine involved storing old whisker states comparing them against the current wh...

Страница 203: ...you will have to make to the Main Routine section of RoamingWithWhiskers bs2 Projects 1 Modify RoamingWithWhiskers bs2 so that the Boe Bot makes a 4 kHz beep that lasts 100 ms before executing the ev...

Страница 204: ...e or false Q5 The program can check for one condition and if that condition is true it can check for another condition within the first condition E1 The key to solving this problem is to use a second...

Страница 205: ...HEN Left whisker contacts FREQOUT 4 100 4000 4 kHz beep for 100 ms GOSUB Back_Up Back up turn right GOSUB Turn_Right ELSEIF IN7 0 THEN Right whisker contacts FREQOUT 4 100 4000 4 kHz beep for 100 ms G...

Страница 206: ...in Ch4 to make 1y circle toneFreq 4000 Beginning tone is 4 kHz Main Routine DO PULSOUT 13 850 Pulse servos in circular path PULSOUT 12 pulseWidth 12 slower than 13 so it arcs PAUSE 20 IF IN5 0 THEN L...

Страница 207: ...ight level With this ability your Boe Bot can be programmed to recognize areas with light or dark perimeters report the overall brightness and darkness level it sees and seek out light sources such as...

Страница 208: ...using the photoresistors we won t be concerned about lux levels just whether illuminance is higher or lower in certain directions The Boe Bot can be programmed to use the relative light intensity info...

Страница 209: ...7 P5 P2 P1 P0 P6 P4 P3 X2 X3 Vdd Vss Vin Board of Education 2000 2003 Rev C Vdd Black Red X4 X5 15 14 13 12 To Servos P15 P14 P11 P13 P12 P6 P4 P3 P10 P9 P8 P7 P5 P2 P1 P0 X2 X3 Vdd Vss Vin Rev B 916...

Страница 210: ...tore a 0 Any voltage below 1 4 V will make an input register for an I O pin store a 0 BASIC Stamp I O pins are input by default When a BASIC Stamp program starts all I O pins start as inputs When you...

Страница 211: ...these two equations R 000 2 000 2 V 5 Vo 2000 Vo 2000 V 5 R 1 4 V is called the BASIC Stamp I O pin s threshold voltage also known as the I O pin s logic threshold When voltage sensed by an I O pin is...

Страница 212: ...e both IN6 and IN3 store the value 1 Verify that you can use your hand to cast a shadow over each of the photoresistors and cause its input register to change from 1 to 0 If you are having difficulty...

Страница 213: ...or not you cast a shadow over them If the room is very brightly lit and you find yourself having to cup your hand over the photoresistor s light collecting surface to make the 1 go to 0 you may need...

Страница 214: ...sistor Dividers From RoamingWithWhiskers bs2 IF IN5 0 AND IN7 0 THEN GOSUB Back_Up GOSUB Turn_Left GOSUB Turn_Left ELSEIF IN5 0 THEN GOSUB Back_Up GOSUB Turn_Right ELSEIF IN7 0 THEN GOSUB Back_Up GOSU...

Страница 215: ...uit connected to P3 a shadow over the left photoresistor divider circuit connected to P7 and a shadow over both photoresistor dividers Update the comments such as the title and descriptions of reactio...

Страница 216: ...0 NEXT RETURN Back_Up Back up FOR pulseCount 0 TO 40 PULSOUT 12 850 PULSOUT 13 650 PAUSE 20 NEXT RETURN Your Turn Improving performance You can improve your Boe Bot s performance by commenting some of...

Страница 217: ...VITY 3 A MORE RESPONSIVE SHADOW CONTROLLED BOE BOT By eliminating the FOR NEXT loops in the navigation subroutines you can make the Boe Bot significantly more responsive This wasn t really possible wi...

Страница 218: ...0 THEN Both detect shadows forward PULSOUT 13 850 PULSOUT 12 650 ELSEIF IN6 0 THEN Left detects shadow PULSOUT 13 750 pivot left PULSOUT 12 650 ELSEIF IN3 0 THEN Right detects shadow PULSOUT 13 850 pi...

Страница 219: ...the BASIC Stamp can monitor and actually gather enough information from it to determine relative light levels The value the BASIC Stamp gets from the circuit will range from small numbers indicating...

Страница 220: ...toresistors CDS 2 Capacitors 0 01 F 103 2 Resistors 220 red red brown 2 Jumper wires 0 01 F 103 Figure 6 7 Capacitor Schematic Symbol and Part Drawing There may also be 0 1 F capacitors marked 104 in...

Страница 221: ...P15 P14 P13 P12 P11 P10 P9 P8 P7 P5 P2 P1 P0 P6 P4 P3 X2 X3 Vdd Vss Vin Board of Education 2000 2003 Rev C Vdd Black Red X4 X5 15 14 13 12 To Servos P15 P14 P11 P13 P12 P6 P4 P3 P10 P9 P8 P7 P5 P2 P1...

Страница 222: ...charge If the photoresistor has a small resistance value because the light incident on its surface is very bright it will not resist current very strongly and the capacitor will lose its charge very r...

Страница 223: ...e measurement which is in 2 s units In this next example program we ll measure the RC decay time on the photoresistor circuit connected to P6 which is the photoresistor on the Boe Bot s left To measur...

Страница 224: ...tive PBASIC 2 5 PBASIC directive timeLeft VAR Word DO HIGH 6 PAUSE 2 RCTIME 6 1 timeLeft DEBUG HOME timeLeft DEC5 timeLeft PAUSE 100 LOOP Your Turn Save TestP6Photoresistor bs2 as TestP3Photoresistor...

Страница 225: ...aces are pointing ahead at separate points on the ground about 2 in 5 1 cm in front of the Boe Bot Point the light collecting surfaces of your photoresistors at the surface in front of the Boe Bot as...

Страница 226: ...st row of Table 6 1 Turn on your flashlight and focus your beam in front of the Boe Bot Your time measurements should now be significantly lower than the first set Record these new values of both time...

Страница 227: ...location in the BASIC Stamp s RAM After you have declared the variable every time you use counter in a PBASIC program it uses the value stored at that particular location in the BASIC Stamp s RAM You...

Страница 228: ...value is the 5 8 of the average of LeftBright and LeftAmbient Math expressions in PBASIC are executed from left to right First LeftBright is added to LeftAmbient This value is divided by 2 The result...

Страница 229: ...ight to get the forward left turn and right turn maneuvers to execute Use the flashlight to guide your Boe Bot through various obstacle courses and maneuvers Title Robotics with the Boe Bot Flashlight...

Страница 230: ...TURN Subroutine Navigate Navigate IF timeLeft LeftThreshold AND timeRight RightThreshold THEN PULSOUT 13 850 Both detect flashlight beam PULSOUT 12 650 full speed forward ELSEIF timeLeft LeftThreshold...

Страница 231: ...ine whether the photoresistors are sensing ambient light or a focused beam Average Scale LeftThreshold CON LeftBright LeftAmbient 2 5 8 RightThreshold CON RightBright RightAmbient 2 5 8 These variable...

Страница 232: ...CTIME measurement is small it means bright light is detected and when it s large it means the light is not as bright So when one of the variables that stores an RCTIME measurement is smaller than the...

Страница 233: ...esponded to the flashlight beam By modifying the IF THEN statement in the example program you can change the Boe Bot s behavior so that it tries to get the light out of its eyes Modify the IF THEN sta...

Страница 234: ...urement when there is a large difference between the two measurements In effect this means the Boe Bot will turn toward bright light Initially this seems like a simple enough programming task IF THEN...

Страница 235: ...above is that it works under medium dark conditions only If you take it into a much darker area the Boe Bot starts turning back and forth again and it never applies any forward pulses If you take it i...

Страница 236: ...ing on the lighting conditions Instead it takes into account the lighting conditions and the sensitivity adjustment is made in software using the average and difference variables For this program to w...

Страница 237: ...5 PBASIC directive DEBUG Program Running Variables Declare variables for storing measured RC times of the left right photoresistors timeLeft VAR Word timeRight VAR Word average VAR Word difference VAR...

Страница 238: ...nstead of PAUSE 20 Because the Test_Photoresistors subroutine has two PAUSE commands adding up to 6 ms plus some extra time to execute the RCTIME commands Both these factors add to the amount of time...

Страница 239: ...Denominator constant like this Average_And_Difference average timeRight timeLeft 2 difference average Denominator RETURN Make the changes just discussed and verify that the program still works correc...

Страница 240: ...rd of RAM Unchanged code average VAR Word difference VAR Word Changed to save Word of RAM average VAR Word difference VAR average We don t really need the average variable but the program will make mo...

Страница 241: ...tands for resistor capacitor and the capacitor was introduced in this chapter along with a circuit that makes it possible for the BASIC Stamp to measure RC decay time This is easily done with the BASI...

Страница 242: ...If Vo in Figure 6 4 on page 197 is 1 4 V what s the value of R Repeat for Vo 1 V and Vo 3 V 3 Assume you have three variable values firstValue secondValue and thirdValue Write a command that takes the...

Страница 243: ...techniques Also make sure this obstacle course is in a uniformly lit area Bright sunlight from windows and shadows cast by onlookers can make the demonstration fail 2 If you succeeded with project 1 e...

Страница 244: ...ulses This makes the Boe Bot much more responsive Q6 A constant declaration tells the compiler the value of your constant For example MaxTemp CON 212 is a constant declaration A constant gives a usefu...

Страница 245: ...ndValue thirdValue 3 myScaledAverage myAverage 7 8 Declarations as separate variables myAverage VAR Word myScaledAverage VAR Word Declarations using aliasing myAverage VAR Word myScaledAverage VAR myA...

Страница 246: ...ding timeRight VAR Word Right photoresistor reading Main Routine DO GOSUB Test_Photoresistors IF timeLeft LeftAvg THEN DEBUG CRSRXY 0 0 Left Black ELSE DEBUG CRSRXY 0 0 Left White ENDIF IF timeRight R...

Страница 247: ...s LeftWhite CON 16 RightWhite CON 33 LeftBlack CON 26 RightBlack CON 45 LeftAvg CON LeftWhite LeftBlack 2 RightAvg CON RightWhite RightBlack 2 Variables timeLeft VAR Word Left photoresistor reading ti...

Страница 248: ...URN Hints Make sure to test and understand what the Boe Bot sees when it is focused on a black sheet of paper and what it sees when it is focused on a white background Use example programs from the la...

Страница 249: ...ystem is to use infrared light to illuminate the robot s path and determine when the light reflects off an object Thanks to the proliferation of infrared IR remote controls IR illuminators and detecto...

Страница 250: ...of the Boe Bot the BASIC Stamp makes decisions and operates the servo motors based on this sensor input Figure 7 1 Object Detection with IR Headlights The IR detectors have built in optical filters t...

Страница 251: ...ld and test the infrared transmitter detector pairs Parts List 2 Infrared detectors 2 IR LEDs clear case 2 IR LED shield assemblies 2 Resistors 220 red red brown 2 Resistors 1 k brown black red 1 2 3...

Страница 252: ...ce for parts placement Figure 7 4 Left and Right IR Pairs Left IR Pair Right IR Pair Watch your IR LED anodes and cathodes Remember that the anode lead is the longer lead on an IR LED by convention bu...

Страница 253: ...z One interesting phenomenon of digitally synthesized tones is that they contain signals called harmonics A harmonic is a higher frequency tone that s mixed in with the tone you want to hear These ton...

Страница 254: ...to making each IR LED detector pair work is to send 1 ms of 38 5 kHz FREQOUT harmonic and then immediately store the IR detector s output in a variable Here is an example that sends the 38 5 kHz signa...

Страница 255: ...move on to the Your Turn section following the example program If the Debug Terminal does not display the expected values try the steps in the Trouble Shooting box Trouble Shooting If the Debug Termin...

Страница 256: ...is handy if you are not near a PC or laptop and you need to trouble shoot your IR detector circuits You will also write a program to sniff for infrared interference from fluorescent lights Some fluore...

Страница 257: ...t program that shows you what the infrared detectors are sensing You can use this program to verify that all the circuits are working before unplugging the Boe Bot from its serial cable and testing ot...

Страница 258: ...n object If one or both of the LEDs appear not to work check your wiring and your program Robotics with the Boe Bot TestIrPairsAndIndicators bs2 Test IR object detection circuits STAMP BS2 Stamp direc...

Страница 259: ...arby light is generating some IR light at a frequency close to 38 5 kHz If you try to have a Boe Bot contest or demonstration under one of these lights your infrared systems might end up performing ve...

Страница 260: ...fer bs2 Test fluorescent lights infrared remotes and other sources of 38 5 kHz IR interference STAMP BS2 Stamp directive PBASIC 2 5 PBASIC directive counter VAR Nib DEBUG IR interference not detected...

Страница 261: ...e red and infrared LEDs Parts List You will need some extra parts for this activity 2 Resistors 470 yellow violet brown 2 Resistors 220 red red brown 2 Resistors 2 k red black red 2 Resistors 4 7 k ye...

Страница 262: ...resistor before moving on to the next portion of this activity Explain in your own words the relationship between LED brightness and series resistance Series Resistance and IR Detection Range We now...

Страница 263: ...LED detector pairs are working properly ACTIVITY 4 OBJECT DETECTION AND AVOIDANCE An interesting thing about the IR detectors is that their outputs are just like the whiskers When no object is detecte...

Страница 264: ...B Turn_Left ELSE GOSUB Forward_Pulse ENDIF Example Program RoamingWithIr bs2 Open RoamingWithWhiskers bs2 Modify it so that it matches the program below Reconnect power to your board and servos Save a...

Страница 265: ...THEN Left IR pair detects GOSUB Back_Up Back up turn right GOSUB Turn_Right ELSEIF irDetectRight 0 THEN Right IR pair detects GOSUB Back_Up Back up turn left GOSUB Turn_Left ELSE Both IR pairs 1 no de...

Страница 266: ...it can neatly find its way around obstacles and successfully navigate more complex courses Sampling Between Every Pulse to Avoid Collisions The great thing about detecting an obstacle before bumping i...

Страница 267: ...pulseRight 650 ENDIF PULSOUT 13 pulseLeft Apply the pulse PULSOUT 12 pulseRight PAUSE 15 LOOP Repeat main routine How FastIrRoaming bs2 Works This program takes a slightly different approach to apply...

Страница 268: ...ulseRight 850 ELSEIF irDetectLeft 0 THEN pulseLeft 850 pulseRight 850 ELSEIF irDetectRight 0 THEN pulseLeft 650 pulseRight 650 ELSE pulseLeft 850 pulseRight 650 ENDIF Before the DO LOOP repeats the la...

Страница 269: ...can continue forward so long as the table top it s navigating on is detected Disconnect power from your board and servos Point your IR pairs downward and outward as shown in Figure 7 8 Figure 7 8 IR...

Страница 270: ...the poster board but does not detect the electrical tape If the Boe Bot still sees the electrical tape too clearly here are a few remedies Try adjusting the IR detectors and LEDs downward at various a...

Страница 271: ...r Boe Bot may detect you if you are standing in its line of sight Its current program has no way to differentiate you from the table below it so it might try to continue forward and off the edge of th...

Страница 272: ...xample Program AvoidTableEdge bs2 Open FastIrNavigation bs2 and save it as AvoidTableEdge bs2 Modify the program so that it matches the example program This will involve adding variables modifying the...

Страница 273: ...t detected pulseCount 10 10 pulses right pulseLeft 850 pulseRight 850 ELSE Neither detected pulseCount 15 back up and try again pulseLeft 650 pulseRight 850 ENDIF FOR loopCount 1 TO pulseCount Send pu...

Страница 274: ...0 pulseRight 650 Else if the left IR detector does not see the tabletop rotate right 10 pulses ELSEIF irDetectLeft 1 THEN pulseCount 10 pulseLeft 850 pulseRight 850 Else if neither detector can see th...

Страница 275: ...track the edge of the electrical tape delimited course Pivoting backward instead of rotating in place may also lead to some interesting behaviors Modify AvoidTableEdge bs2 so that it follows the edge...

Страница 276: ...skers RoamingWithWhiskers bs2 was adapted to the infrared detectors A program that checks the IR detectors between each servo pulse was introduced to demonstrate a higher performance way of roaming wi...

Страница 277: ...s 1 Design a Boe Bot application that sits still until you wave your and in front of it then it starts roaming 2 Design a Boe Bot application that slowly rotates in place until it detects an object As...

Страница 278: ...in dimmer LEDs In terms of results brighter IR LEDs make it possible to detect objects that are farther away E1 Change the IF THEN to read IF IN0 0 THEN This will only monitor the right detector E2 Th...

Страница 279: ...UT 13 pulseLeft Apply the pulse PULSOUT 12 pulseRight PAUSE 15 GOSUB Check_IRs Check IRs again LOOP Subroutines Check_IRs FREQOUT 8 1 38500 Check IR Detectors irDetectLeft IN9 FREQOUT 2 1 38500 IrDete...

Страница 280: ...ect is spotted DO PULSOUT 13 790 Rotate slowly PULSOUT 12 790 PAUSE 15 5 ms for detectors GOSUB Check_IRs While looking for object LOOP UNTIL irDetectLeft 0 OR irDetectRight 0 Now figure out exactly w...

Страница 281: ...solving this problem is to combine FastIrRoaming bs2 and IrInterferenceSniffer bs2 in a single program Title Robotics with the Boe Bot RoamAndSniffBoeBot bs2 Boe Bot roams around and sounds alarm when...

Страница 282: ...om FastIrRoaming bs2 FREQOUT 8 1 38500 Check IR Detectors irDetectLeft IN9 FREQOUT 2 1 38500 irDetectRight IN0 Decide how to navigate IF irDetectLeft 0 AND irDetectRight 0 THEN pulseLeft 650 pulseRigh...

Страница 283: ...MINING DISTANCE WITH THE SAME IR LED DETECTOR CIRCUIT You will use the same circuit from the previous chapter to detect distance If the circuit is still built on your Boe Bot make sure your IR LED s h...

Страница 284: ...detects it Depending on which frequency makes the reflected infrared no longer visible to the IR detector you can infer the distance Frequency Sweep is the technique of testing a circuit s output usin...

Страница 285: ...ed in Appendix G Tuning IR Distance Detection In order to test the IR detector at each frequency you will need to use FREQOUT to send five different frequencies and test at each frequency to find out...

Страница 286: ...completely different purpose to make IR communication between a handheld remote and a television possible Example Program TestLeftFrequencySweep bs2 TestLeftFrequencySweep bs2 does two things First it...

Страница 287: ...Zone in the Debug Terminal should either be 0 or 1 Gradually move the sheet of paper away from the IR LED and make a note of each distance that causes the zone value to get larger Zones 1 4 typically...

Страница 288: ...1500 irFrequency FREQOUT 8 1 irFrequency irDetect IN9 distance distance irDetect DEBUG CRSRXY 4 freqSelect 3 DEC5 irFrequency DEBUG CRSRXY 11 freqSelect 3 IF irDetect 0 THEN DEBUG Yes ELSE DEBUG No PA...

Страница 289: ...can be handy for copying and pasting into other programs that require distance detection Example Program DisplayBothDistances bs2 Enter save and run DisplayBothDistances bs2 Repeat the distance measur...

Страница 290: ...equency irDetectLeft IN9 distanceLeft distanceLeft irDetectLeft FREQOUT 2 1 irFrequency irDetectRight IN0 distanceRight distanceRight irDetectRight PAUSE 100 NEXT RETURN Subroutine Display_Distances D...

Страница 291: ...that takes the sensor measurements and converts them to mechanical action The processor has to be programmed to make decisions based on the sensor inputs and then control the mechanical outputs accor...

Страница 292: ...The block s output shows the result of 2 35 70 which is called the output adjust This output adjust goes into another summing junction and this time it is added to the servo s center pulse width of 75...

Страница 293: ...hm shown in Figure 8 5 The difference is that Kp is 35 instead of 35 Assuming the same measured value at the right IR pair the output adjust results is a pulse width of 820 Here is the equation and ca...

Страница 294: ...s a variable named distanceRight that will store the IR distance measurement Kp is 35 and the center pulse width is 750 pulseRight 2 distanceRight 35 750 Remember that in PBASIC math expressions are e...

Страница 295: ...the program will be reflected everywhere these constants are used For example by changing the Kpl CON directive from 35 to 40 every instance of Kpl in the entire program changes from 35 to 40 This is...

Страница 296: ...gram Running Constants Kpl CON 35 Kpr CON 35 SetPoint CON 2 CenterPulse CON 750 Variables freqSelect VAR Nib irFrequency VAR Word irDetectLeft VAR Bit irDetectRight VAR Bit distanceLeft VAR Nib distan...

Страница 297: ...FollowingBoeBot bs2 Works FollowingBoeBot bs2 declares four constants Kpr Kpl SetPoint and CenterPulse using the CON directive Everywhere you see SetPoint it s actually the number 2 a constant Likewis...

Страница 298: ...The LOOP portion of the DO LOOP sends the program back to the command immediately following the DO at the beginning of the main loop LOOP Your Turn Figure 8 6 shows a lead Boe Bot followed by a shadow...

Страница 299: ...220 resistors Program the lead Boe Bot for object avoidance using a modified version of FastIrRoaming bs2 Open FastIrRoaming bs2 and rename it SlowerIrRoamingForLeadBoeBot bs2 Make these modifications...

Страница 300: ...P 11 P 9 P 8 V i n P 10 P 15 P 14 P 13 P 12 V dd R st V ss B l ack R ed X 4 X 5 15 1 4 13 1 2 1 X 1 V ss P 1 P 3 P 5 P 7 P 9 P 11 P 13 P 15 V in V ss P 0 P 2 P 4 P 6 P 8 P 10 P 12 P 14 V dd U1 TM 0 1...

Страница 301: ...irected Downwards to Scan for the Stripe Top View Side View Make sure your electrical tape course is free of fluorescent light interference See Sniffing for IR Interference page 245 Replace the 1 k re...

Страница 302: ...8 10 and Figure 8 11 Then adjust your Boe Bot s position toward and away from the tape until both zone values reach the 4 or 5 level indicating that either a far away object is detected or no object...

Страница 303: ...rs further downward and toward the front of the Boe Bot but be careful not to cause reflection off the chassis You can also try a lower value resistor like 1 k brown black red If you are using the old...

Страница 304: ...P 5 P 4 P 3 P 2 P 1 P 0 X 2 X 3 V dd V ss V in P 15 P 14 P 13 P 12 P 11 P 10 P 9 P 8 P 4 P 2 P 1 P 0 P 7 P 6 P 5 P 3 X 2 X 3 V dd V ss V in R ev C Figure 8 12 Stripe Scan Test IR pairs close up Top v...

Страница 305: ...P 12 P 14 V dd U1 TM 0 1 2 2 000 2 003 V dd P 15 P 14 P 13 P 12 P 11 P 10 P 9 P 8 P 7 P 6 P 5 P 4 P 3 P 2 P 1 P 0 X 2 X 3 V dd V ss V in P 15 P 14 P 13 P 12 P 11 P 10 P 9 P 8 P 4 P 2 P 1 P 0 P 7 P 6...

Страница 306: ...000 Main Routine DO GOSUB Get_Ir_Distances Calculate proportional output pulseLeft SetPoint distanceLeft Kpl CenterPulse pulseRight SetPoint distanceRight Kpr CenterPulse GOSUB Send_Pulse LOOP Subrout...

Страница 307: ...UT 12 pulseRight PAUSE 5 RETURN Your Turn Stripe Following Contest You can turn this into a contest with the lowest course time winning provided the Boe Bot faithfully waits at the Start and Finish st...

Страница 308: ...re in terms of distance The BASIC stamp was programmed in PBASIC to operate control loops for the both the left and right servos and distance detectors By re sampling distance and adjusting the servo...

Страница 309: ...e Bot realize it s not doing anything and break from its proportional control loop Hints You can do this by creating two counters one that increments by 1 each time through the DO LOOP and the other t...

Страница 310: ...commands not shown NEXT E3 Sniff for IR interference with IrInterferenceSniffer bs2 Run Display BothDistances bs2 White readings should be 0 1 in both sensors Black readings should be 4 5 in both sens...

Страница 311: ...2 5 PBASIC directive DEBUG Program Running Constants Kpl CON 35 Left proportional constant Kpr CON 35 Right proportional constant SetPoint CON 3 0 1 is White 4 5 is Black CenterPulse CON 750 Turn90Deg...

Страница 312: ...NTIL distanceLeft 2 AND distanceRight 2 GOSUB Stop_Quickly Don t coast forward Now back up until one detector sees the black L R turn will see black on one detector 3 or 4 way will see both black turn...

Страница 313: ...ses ENDIF forward is any pulse 750 CASE 60 If we have sent 60 pulses IF fwdPulses 30 THEN how many were forward isStuck 1 If 30 robot is stuck ENDIF CASE 60 numPulses 0 Reset counters back to zero fwd...

Страница 314: ...nceLeft irDetectLeft FREQOUT 2 1 irFrequency irDetectRight IN0 distanceRight distanceRight irDetectRight NEXT RETURN Send_Pulse Send a single pulse to the servos in between IR readings PULSOUT 13 puls...

Страница 315: ...E Most null modem cables are labeled NULL or Null Modem visually inspect the cable for any such labeling Disable any palmtop communication software If you are using a BASIC Stamp and Board of Educatio...

Страница 316: ...the Run Identify test again If you are unsure of which COM port your BASIC Stamp is connected to or if you are using a USB to serial port adaptor you may need to look in your computer s Device Manage...

Страница 317: ...d to a different COM port and see if Run Identify works then If you have a second computer try it on the different computer If you get the error message No BASIC Stamp Found but the Run Identify test...

Страница 318: ...vanced Uncheck the box labeled Use FIFO Buffers then click OK Click OK to close each window as needed and return to the BASIC Stamp Editor Try downloading a program once more Windows XP Pro Click on y...

Страница 319: ...nd Carrier Board Components and Features The BASIC STAMP 2 Microcontroller Module Figure B 1 shows a close up of the BASIC Stamp 2 microcontroller module Its major components and their functions are i...

Страница 320: ...tion Rev C Carrier Board The Board of Education Rev C carrier board for BASIC Stamp 24 pin microcontroller modules is shown in Figure B 2 Its major components and their functions are indicated by labe...

Страница 321: ...Features Page 307 The BASIC Stamp HomeWork Board Project Platform The BASIC Stamp HomeWork Board project platform is shown in Figure B 3 Its major components and their functions are indicated by label...

Страница 322: ...ucation Rev B Carrier Board Figure B 4 shows the Board of Education Rev B carrier board for BASIC Stamp 24 pin microcontroller modules Its major components and their functions are indicated by labels...

Страница 323: ...For the activities in this book a resistor s tolerance does not matter but its value does Each color bar that tells you the resistor s value corresponds to a digit and these colors digits are listed...

Страница 324: ...Page 310 Robotics with the Boe Bot Third stripe is brown Since brown is 1 it means add one zero to the right of the first two digits Yellow Violet Brown 4 7 0...

Страница 325: ...t your circuit to the BASIC Stamp s input output pins P15 P14 P13 P12 P11 P10 P9 P8 P7 P6 P5 P4 P3 P2 P1 P0 X2 X3 Vdd Vss Vin Figure D 1 Prototyping Area Power terminals black sockets along top I O pi...

Страница 326: ...0 resistor right Figure D 3 shows an example of a circuit schematic on the left and a drawing of a circuit that can be built using this schematic on the right Notice how the schematic shows that one e...

Страница 327: ...end connected to the terminal of an LED and the terminal of the LED is connected to Vss The schematic only differs by one connection The resistor lead that used to be connected to Vdd is now connected...

Страница 328: ...hematic symbols and part drawings for these components are shown in Figure D 5 0 01 F Figure D 5 Part Drawings and Schematic Symbols Photoresistor top and non polar capacitor bottom Since this schemat...

Страница 329: ...and photoresistor plugged into it In the schematic the other terminals of the photoresistor and capacitor are connected to Vss Here is a trick to keep in mind when building circuits on a breadboard Yo...

Страница 330: ...ed here as solutions to the schematics are not the ONLY solutions to those schematics For example Figure D 8 shows another solution to the schematic just discussed Follow the connections and convince...

Страница 331: ...known as the Boe Bot Full Kit Aside from a PC with a serial port and a few common household items the Boe Bot Robot Kit contains all the parts and documentation you ll need to complete the experiments...

Страница 332: ...10 k resistor 2 150 02020 2 k resistor 2 150 02210 220 resistor 8 150 04710 470 resistor 4 150 04720 4 7 k resistor 2 200 01031 0 01 F capacitor 2 200 01040 0 1 F capacitor 2 350 00003 Infrared LED 2...

Страница 333: ...unit separately from the Boe Bot Robot Full Kit or the Boe Bot Parts Kit Table E 3 Boe Bot Hardware Pack 28133 Parts and quantities subject to change without notice Parallax Stock Code Description Qua...

Страница 334: ...s a core The Board of Education can be purchased separately or in its own kit as listed in Table E 4 below Table E 4 Board of Education Full Kit 28102 Parts and quantities subject to change without no...

Страница 335: ...citor could be up to 80 larger or 20 smaller than 0 01 F This means that your measured decay time could also be between 80 larger and 20 smaller The photoresistors themselves can also behave different...

Страница 336: ...iption Photoresistors in uniform ambient light Photoresistors in uniform low light Robotics with the Boe Bot TestPhotoresistors bs2 Test Boe Bot photoresistor circuits STAMP BS2 Stamp directive PBASIC...

Страница 337: ...ents than the other for ambient and low light you can use a linear approximation for making the sensors return approximately the same values for the same light levels For every reading from one sensor...

Страница 338: ...t b 2 2 2 2 mx y b b mx y So the two equations for solving for m and b turn out to be x x y y m 1 2 1 2 and 2 2 mx y b Let s plug our sample values from Table F 2 into the equations and see what the s...

Страница 339: ...adjusted value of timeLeft after this line of code is executed is 1 37 times the old timeLeft plus 7 Why did 1 37 become 351 The way the operator works is that you have multiply your fractional value...

Страница 340: ...n for similarity When you have determined your values for m and b you can modify RoamingTowardTheLight bs2 by uncommenting the equation between GOSUB Test_Photoresistors and GOSUB Average_And_Differen...

Страница 341: ...Appendix F Balancing Photoresistors Page 327 DEC5 timeRight Before timeLeft timeLeft 351 7 DEBUG CRSRXY 0 5 Display measurements DEC5 timeLeft DEC5 timeRight After PAUSE 200 LOOP...

Страница 342: ......

Страница 343: ...he Boe Bot in front of a wall with a white sheet of paper as the IR target Place the Boe Bot so that its IR LEDs are 2 5 cm away from the paper target Make sure the front of the Boe Bot is facing the...

Страница 344: ...dummy crsrPosRow 6 FOR irFrequency 30500 TO 46500 STEP 1000 crsrPosRow crsrPosRow 1 FREQOUT 8 1 irFrequency irDetect IN9 DEBUG CRSRXY 4 crsrPosRow DEC5 irFrequency DEBUG CRSRXY 11 crsrPosRow IF irDet...

Страница 345: ...bug of Frequency Data The BASIC Stamp has been programmed to make the Debug Terminal display a Yes if an object was detected and a No if an object was not detected Figure G 1 shows that the left senso...

Страница 346: ...ent When the Boe Bot has been backed up by 20 cm the frequency sweep will display mostly if not all No regions When the frequency sweep is all No it means no object is detected at any frequency within...

Страница 347: ...s readings If you look back to the 17 5 cm mark two of these frequencies were stable but the other was not Take the frequency that was not stable at 17 5 cm but was stable at 15 cm as your most reliab...

Страница 348: ......

Страница 349: ...s and features of the robot As always any robot that could damage the area or pose a danger to the public will not be allowed Robots need not be autonomous but it is encouraged Judging will be determi...

Страница 350: ...urves have a radius of at least one foot and at most three feet The walls are 3 1 2 inches high and surround the course The floor is white and made of either paper or Dupont Tyvek Tyvek is a strong pl...

Страница 351: ...e either brutally fast or which can learn the maze after one pass The object is for a robot which is set down at the entrance of the maze to find its way through the maze and reach the exit in the lea...

Страница 352: ...form of power is allowed as long as local laws do not require hearing protection in its presence or place any other limitations on it Scoring Each robot is to be run through the maze three times The...

Страница 353: ...36 BASIC Stamp Editor Identification window 22 Identify 302 303 304 installation 10 Software 4 Trouble Shooting 301 BASIC Stamp Editor s Help 30 BASIC Stamp HomeWork Board 3 BASIC Stamp HomeWork Boar...

Страница 354: ...40 color code 309 COM port 301 COM Port 13 command 28 comment 27 Compiler directives 24 components BASIC Stamp 305 BASIC Stamp HomeWork Board 307 Board of Education 306 Board of Education Rev B 308 co...

Страница 355: ...t 242 fluorescent light interference 287 fluorescent lights 237 foot candle 194 FOR NEXT 74 counting backward 75 decrement 75 EndValue 74 StartValue 74 STEP StepValue 75 forward motion 124 Freq1 argum...

Страница 356: ...g diode 46 anode 46 cathode 46 schematic symbol 46 terminals 46 linear approximation 323 logic threshold 197 LOOKUP 271 Index argument 271 ValueN argument 271 Variable argument 271 LOW 50 PIN argument...

Страница 357: ...T CASE ENDSELECT 149 STOP 248 PBASIC directive 28 PBASIC directives CON 213 DATA 148 PBASIC 28 Stamp 28 PBASIC operators 325 186 photoresistor 193 194 calibration 323 part drawing 193 schematic symbol...

Страница 358: ...stor 45 color code 309 leads 46 light dependent resistor 193 series resistors 197 tolerance 309 voltage divider 197 RETURN 140 rotational velocity 115 RPM 115 rubber band tire 97 rubber grommet 92 96...

Страница 359: ...nes 106 tools required 91 transfer curve 115 Transmit windowpane 111 troubleshooting BASIC Stamp to PC communication 301 electrical tape course 289 IR detectors 241 photoresistor voltage divider 199 s...

Страница 360: ...ntities in the various Boe Bot Robot kits are subject to change without notice Parts may differ from what is shown in this picture Please contact stampsinclsss parallax com if you have any questions a...

Отзывы: