94
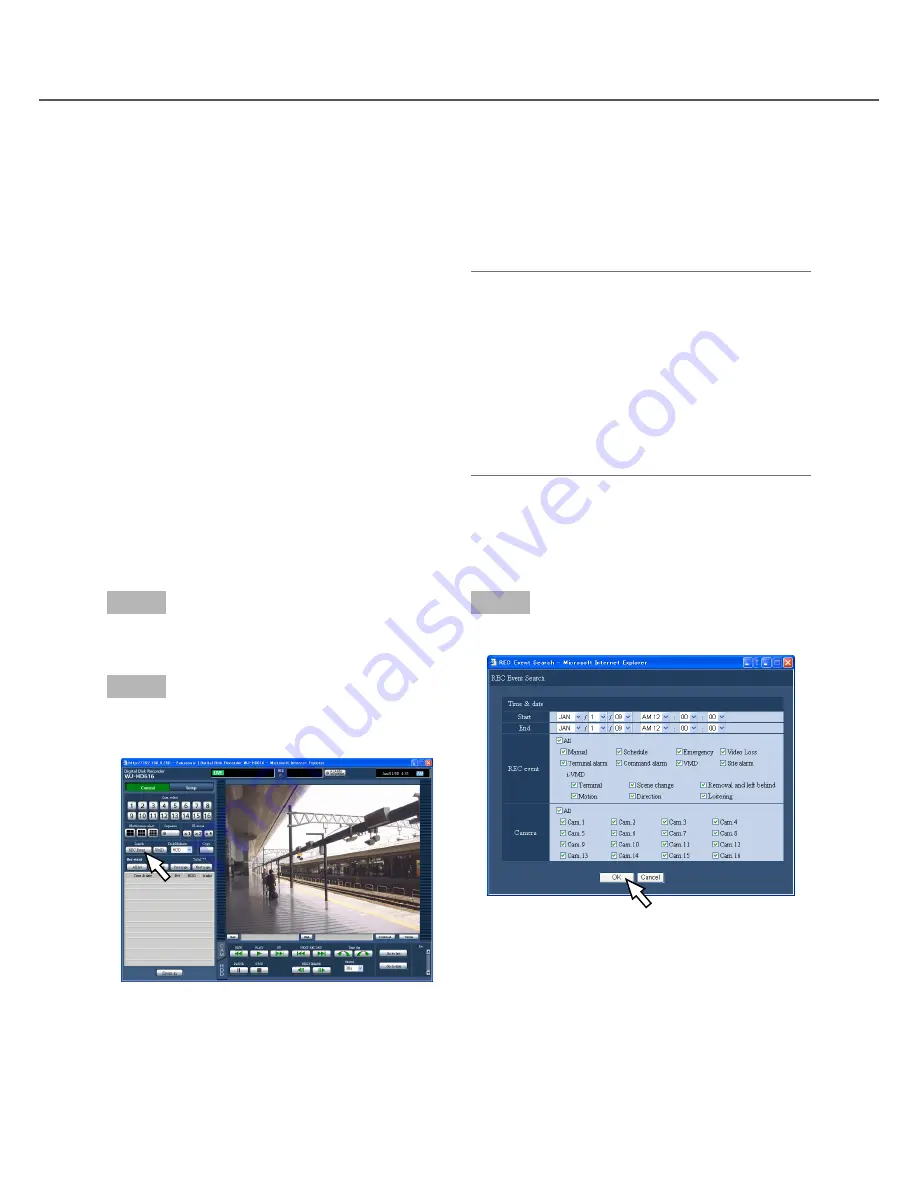
Step 1
Display the top page of the operation window.
(
☞
Page 77)
Step 2
Select "HDD" for "Disk/Media" in the [Search] box,
and then click the [REC Event] button.
→
The "REC event search" window will be displayed.
Step 3
Specify the search conditions (filters).
Time & date:
Designate the recording start time and
date and the end time and date of recorded imag-
es to be searched for.
Select a start time and an end time by clicking the
[
C
] button.
[Refresh] button
The displayed contents will be updated to the latest.
[Prev page] button
Displays the previous page.
[Next page] button
Displays the next page.
Time & date
Displays the start time and date of the recording.
Ch
Displays the camera channel used for recording.
Playback of images recorded using the displayed
camera channel will start on a 1-screen.
Evt
Displays the event type. Refer to page 8 for further
information about the event type.
HDD
Displays the hard disk drive number on which images
were recorded.
Audio
Displays the icon to indicate whether audio is
attached to the data or not.
Note:
• Recording event list will be displayed when the
[Refresh] button is clicked or when the VMD
search (
☞
page 96) or selection of the disk/medi-
um (
☞
page 99) is performed.
• The [All list] button will become unavailable during
playback. To use the [All list] button, stop play-
back and click it.
• When many cameras are connected, the record
-
ing start time of each camera channel may some-
times not be the same.
How to operate


