47
Hard Disk Drive
To change your hard disk drive, contact Panasonic Technical Support
To change your hard disk drive, contact Panasonic Technical Support.
Be sure to back up all important data before the change.
You can erase the data before changing the hard disk drive.
(
“
Hard Disk Data Erase Utility
”
)
If [Hard Disk Lock] is set to [Enable] in the Setup Utility, change this to [Disable]
before the change.
Be careful when replacing the hard disk drive. The hard disk drive is extremely sensi-
tive to shock. In addition, static electricity could later affect some internal components.
CAUTION
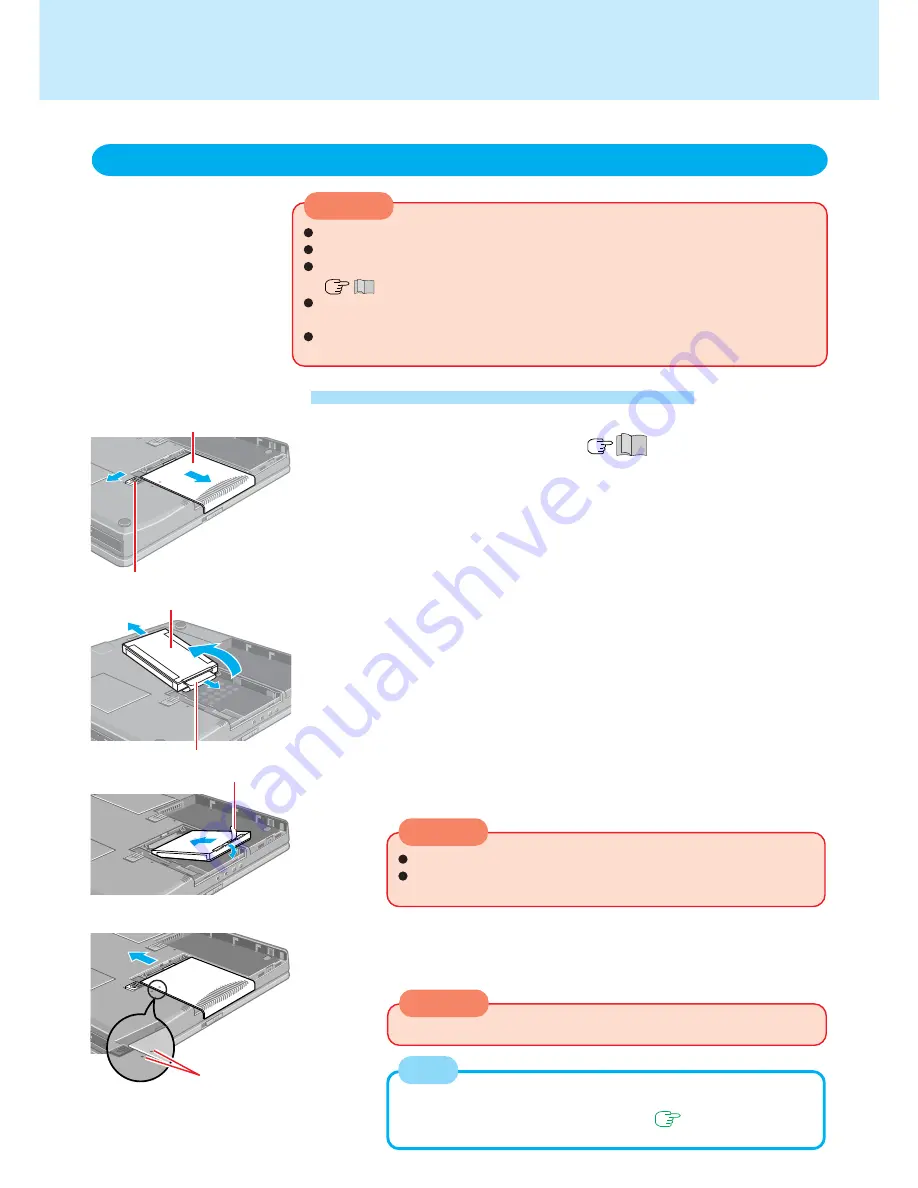
Installing/Removing the hard disk drive
CAUTION
3
Removing the hard disk
Carefully lift the hard disk and remove it from the connector by pulling
the tab.
1
Power off your computer
(
“Starting Up/Shutting Down”)
Do not shut down using the standby or hibernation function.
Disconnect the AC adaptor and remove the battery pack.
2
Turn your computer over and remove the cover
Slide the latch, and then without releasing it, slide and remove the cover.
Cover
Hard Disk
Latch
4
Inserting the hard disk
Connect the hard disk to the connector and carefully insert the hard disk.
The hard disk may be damaged if its top and bottom are confused.
In this computer, connect the strand on the opposite edge of the
flat cable to the red strand to the No.1 pin of the connector.
CAUTION
5
Close the cover
Match the mark on the cover to the body of the computer, then slide the
cover back into place and put the battery pack in place.
Mark
Tab
Be sure the tab does not get caught when closing the cover.
Tab
NOTE
Whether the hard disk is properly recognized or not can be confirmed
in [Information] menu of the Setup Utility (
page 49
). If the hard
disk is not recognized, power off the computer and insert it again.


