manualshive.com logo in svg
background image


Thank you for purchasing our product. 


This manual provides important information about safe and proper 

operations of this Switching Hub. 


Please read the "Important Safety Instruction" on pages 3 to 5. 


Any problems or damage resulting from disassembly of this Switching 

Hub by customers are not covered by the warranty.
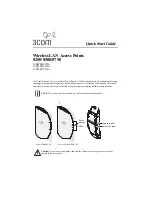


Switch-M48eG 


Model Number: PN28480K 


Operation Manual 


Menu Screens


Содержание Switch-M48eG

Страница 1: ...afe and proper operations of this Switching Hub Please read the Important Safety Instruction on pages 3 to 5 Any problems or damage resulting from disassembly of this Switching Hub by customers are not covered by the warranty Switch M48eG Model Number PN28480K Operation Manual Menu Screens ...

Страница 2: ...2 This operation manual is applicable to the following Switching Hubs Product name Model No Firmware version Switch M48eG PN28480K ID PN28480K TH PN28480K MY 2 0 0 01 or higher ...

Страница 3: ...ing a thunderstorm Deviation could lead to electric shock Do not disassemble and or modify this Switching Hub Deviation could lead to fire electric shock and or equipment failure Do not damage the power cord Do not bend too tightly stretch twist bundle with other cord pinch put under a heavy object and or heat it Damaged power cord could lead to fire short and or electric shock Do not put foreign ...

Страница 4: ...b at the location with continuous vibration or strong shock or at the unstable location Deviation could lead to injury and or equipment failure Do not install any module other than the separately sold SFP module PN54021K PN54023K to SFP extension slot Deviation could lead to fire electric shock and or equipment failure Do not put this Switching Hub into fire Deviation could lead to explosion and o...

Страница 5: ...d Deviation could lead to electric shock malfunction and or equipment failure Connect the power cord firmly to the power port Deviation could lead to electric fire shock and or malfunction Unplug the power cord if the STATUS ECO LED Status ECO mode blinks in orange system fault Deviation such as keeping connected for a long time could lead to fire Handle the Switching Hub carefully so that fingers...

Страница 6: ...not touch the metal terminal of the RJ45 connector the modular plug of connected twisted pair cable or the metal terminal of the SFP extension slot Do not place charged objects in the proximity of them Static electricity could lead to equipment failure Do not put the modular plug of the connected twisted pair cable on objects that can carry static charge such as carpet Do not place it in the proxi...

Страница 7: ...ure and or malfunction When stacking Switching Hubs leave a minimum of 20 mm space between them Operation is not guaranteed if a module other than the optional SFP extension modules PN54021K PN54023K is inserted into the SFP extension slot For the latest information about compatible SFP extension modules check our website 1 Panasonic will not be liable for any damage resulting from the operation n...

Страница 8: ...g to 19 inch Rack 21 3 Connection 22 3 1 Connection Using a Twisted Pair Port 22 3 2 Connection Using an SFP Extension Slot 23 3 3 Connection to Power 24 4 Configuration 25 4 1 Connecting via Console Port 25 4 2 Login 26 4 3 Basic Operations on the Screen 29 4 4 Main Menu 31 4 5 General Information Menu 33 4 6 Basic Switch Configuration 37 4 6 1 System Administration Configuration 39 4 6 2 System ...

Страница 9: ...ng Menu 175 4 7 11 Static Multicast Address 178 4 8 Statistics 180 4 9 Switch Tools Configuration 185 4 9 1 TFTP Software Upgrade 186 4 9 2 Configuration File Upload Download 189 4 9 3 System Reboot 191 4 9 4 Exception Handler 193 4 9 5 Ping Execution 195 4 9 5 a IPv4 Ping Execution 196 4 9 5 b IPv6 Ping Execution 198 4 9 6 System Log 200 4 9 7 Watch Dog Timer Menu 207 4 10 Save Configuration to F...

Страница 10: ...10 ...

Страница 11: ...raight cables whether it is a terminal or a network device This function does not work if the port communication configuration is set at Fixed or Link Aggregation Ports 1 to 44 are set at MDI X default Has a loop detection function which notifies when a loop occurs with the corresponding port LED and automatically shuts down the looped port Has a loop detection history function which notifies when...

Страница 12: ...pendix C Link aggregation function is supported Aggregation can be manually configured up to 8 ports Reboot timer function is supported enabling auto reboot after a scheduled time 24 hours or less Equipped with energy efficient Ethernet EEE conforming to IEEE802 3az LPI When there is no data transmission at link up the energy saving state automati cally starts so that power consumption can be redu...

Страница 13: ...nt Quantity Installation Guide this document 1 CD ROM PDF version of Operating Instructions 1 Mounting bracket for 19 inch rack 2 Screws for 19 inch rack 4 Screws for fixing the main unit and the mounting bracket 8 Rubber foot 4 Power cord 1 Optional accessories PN54021K 1000BASE SX SFP Module PN54023K 1000BASE LX SFP Module ...

Страница 14: ...14 1 3 Part Names Fig 1 3 Part Names Back panel Magnified Front panel ...

Страница 15: ...ower Green Light Power is ON Off Power is OFF ANY COL LED Collision Orange Light During half duplex operation packet collision is occurring in either port Off No packet collision STATUS ECO LED Status Eco mode Green Light Operating in status mode Green Blink Operating in ECO mode All LEDs turn off except POWER and STATUS ECO LEDs during ECO mode Off Power is OFF GIGA LED GIGA mode Green Light Oper...

Страница 16: ... According to switchover in the port LED display mode described previously display of port LED in each port changes as follows Port LED Display mode Behavior Description Left STATUS ECO Green Light Link is established Green Blink Transmitting and receiving data Off No device connected GIGA Green Light Link is established at 1000 Mbps Off Link is established at 100 Mbps or 10 Mbps or no device is c...

Страница 17: ...17 Off No loop detection history Right Orange Light Shutting down by loop detection Off Not shutting down by loop detection Fig 1 4 Port LED ...

Страница 18: ...ed the port will shut down again Remove the loop while the port is shut off The loop detection shut off function can be switched on off by keeping pressing the LED display switch button for more than 10 seconds or by setting in the configuration menu For details on the configuration menu refer to 4 7 8 If switching properly takes place LOOP HISTORY LED turns on to complete switchover The loop hist...

Страница 19: ...status of each port In status mode STATUS ECO LED lights in green ECO mode Regardless of whether a device is connected or not all LEDs other than POWER and STATUS ECO LEDs turn off to save power In ECO mode STATUS ECO LED flashes in green The base mode can be set from the configuration menu of this Switching Hub For details refer to 4 6 7 h 1 5 2 LED Display Switchover By pressing the LED display ...

Страница 20: ...20 If the port LED display mode is switched to other than STATUS ECO and then no operation is executed for more than 1 minute the mode automatically shifts to the base mode ...

Страница 21: ...8 screws for fixing the main unit and the mounting bracket and fix the brackets to the main unit by tightening screws into 4 holes located at the sides Then mount this Switching Hub firmly to the rack using the supplied 4 screws for 19 inch rack or screws furnished at the rack The main unit can be placed 20 mm back on the rack by changing the bracket fixing position Fig 2 1 Mounting to 19 inch Rac...

Страница 22: ...performance mode When a terminal or a LAN device without auto negotiation function is connected to this Switching Hub this Switching Hub automatically determines and sets the communication speed however the full duplex half duplex configuration is set at half duplex because the full duplex half duplex capability cannot be determined When connecting a terminal or a LAN device without auto negotiati...

Страница 23: ...nnection Connect this Switching Hub s TX port to the RX port of the connected device and this Switching Hub s RX port to the TX port of the connected device If a twisted pair cable and an SFP module are simultaneously connected to combo ports that are used exclusively SFP link has a priority 1000BASE SX 550 m or shorter 1000BASE LX 10 km or shorter 100 m or shorter 100 m or shorter ...

Страница 24: ... and connect the other end into an electric outlet This Switching Hub operates at 100 240 V 50 60 Hz This Switching Hub does not have a power ON OFF switch Plugging the power cord turns on this Switching Hub s power and the operation starts To power off unplug the power code from the electric outlet ...

Страница 25: ...IP address first via the console port before accessing via Telnet or SSH 4 1 Connecting via Console Port Console connection requires a DEC VT100 compatible asynchronous terminal or a terminal capable of running a VT100 compatible terminal emulator such as HyperTerminal on Windows XP or older Connect a terminal of this kind to the console port of this Switching Hub Configure the communication mode ...

Страница 26: ...onfirm that there is no error in configuration of communication mode and others Fig 4 2 1 Login Screen Console If accessing the Switching Hub via Telnet a similar login screen appears displaying Remote Management System Version at the upper part of the screen as shown in Fig 4 2 2 PN28480K Local Management System Version x x x xx MAC Address xx xx xx xx xx xx Login Menu Login ...

Страница 27: ...27 Fig 4 2 2 Login Screen Telnet PN28480K Remote Management System Version x x x xx MAC Address xx x xx xx xx xx Login Menu Login ...

Страница 28: ...nager Enter the password correctly and press the Enter key Fig 4 2 3 Entering Password Both the login name and password can be changed For the detailed change procedure refer to 4 6 7 Note A password is displayed with asterisks as a user enters it Note Up to four users can access the Switching Hub concurrently via Telnet and two users via SSH Note Follow the operating procedures for SSH client to ...

Страница 29: ...Menu MAC Address xx xx xx xx xx xx IP Address 192 168 1 10 Subnet Mask 255 255 255 0 Default Gateway 0 0 0 0 COMMAND Set I P Address Set Subnet M ask Set Default G ateway Set IP P a rameter Set I P v6 Address Q uit to previous menu Command Enter the character in square brackets to select option 2 Previous menu name 1 Title 3 Current menu name 4 Configuration 6 Prompt 7 Command entry line 5 Command...

Страница 30: ...hows the commands available on this screen Available commands differ on each screen Select a command from the list 6 Prompt Changes as you enter a command indicating what you need to enter next Follow the instruction in this field 7 Command entry line Enter a command or settings 8 Explanation Shows the explanation of this screen or errors All operations on this screen are done by entering letters ...

Страница 31: ...er a command letter To return to the previous menu enter the Q command The second line from the top shows the current menu name Fig 4 4 1 Main Menu PN28480K Local Management System Main Menu G eneral Information B asic Switch Configuration A dvanced Switch Configuration S tatistics Switch T ools Configuration Save Configuration to F lash Run C LI Q uit Command Enter the character in square bracket...

Страница 32: ...s this Switching Hub s advanced functions such as VLAN link aggregation and QoS Statistics Shows this Switching Hub s statistical information Switch Tools Configuration Configures this Switching Hub s additional tools such as firmware update saving reading settings Ping and system log Save Configuration to Flash Writes this Switching Hub s settings into its internal memory Run CLI Switches to a co...

Страница 33: ...Information Menu PN28480K Local Management System Main Menu General Information System up for 0day s 0hr s 0min s 0sec s Boot Runtime Code Version x x x x x x x x Hardware Information Version A1 DRAM Size 128MB Flash Size 28MB Administration Information Switch Name Switch Location Switch Contact System Address Information MAC Address xx xx xx xx xx xx IP Address 0 0 0 0 Subnet Mask 0 0 0 0 Default...

Страница 34: ...ion Menu IPv6 PN28480K Local Management System Main Menu General Information System Address Information MAC Address xx xx xx xx xx xx IPv6 Address PrefixLen 128 IPv6 Link Local Address IPv6 Default Gateway Press any key to continue ...

Страница 35: ...ocation of the Switching Hub No information is set on shipment Switch Contact Shows contact information of the Switching Hub No information is set on shipment System Address Information Items shown here are configured in accordance with 4 6 2 System IP Configuration MAC Address Shows the MAC address of this Switching Hub This value is uniquely assigned to each device and cannot be changed IP Addre...

Страница 36: ...r to 4 6 2a IPv6 Link Local Address Shows the Switching Hub s current IPv6 link local address is displayed because no address is set on shipment For configuration details refer to 4 6 2a IPv6 Default Gateway Shows the IP address of the router for the default gateway is displayed because no address is set on shipment For configuration details refer to 4 6 2a ...

Страница 37: ...itch Configuration PN28480K Local Management System Main Menu Basic Switch Configuration Menu System A dministration Configuration System I P Configuration S N MP Configuration P ort Configuration Basic Port Configuration E xtend Port Configuration P o wer Saving S ystem Security Configuration F orwarding Database T ime Configuration A R P Table N D P Table Q uit to previous menu Command Enter the...

Страница 38: ... Port Configuration Extend Configures extended port settings such as port name Port Configuration Power Saving Configures power saving mode for MNO series System Security Configuration Configures the security settings such as access control for this Switching Hub Forwarding Database Shows the MAC address table Time Configuration Configures the time settings such as the SNTP based time synchronizat...

Страница 39: ...rresponding ID in the MIB This item is not editable Name Shows the system name No information is set on shipment Location Shows the installation location No information is set on shipment Contact Shows the contact information No information is set on shipment PN28240K Local Management System Basic Switch Configuration System Admin Configuration Menu Description Switch M48eG Object ID 1 3 6 1 4 1 3...

Страница 40: ...cters or less L Set edit the installation location information Press L The command prompt changes to Enter system location Enter a Switching Hub location in 50 one byte characters or less C Set edit the contact information Press C The command prompt changes to Enter system contact Enter contact information in 50 one byte characters or less Q Return to the previous menu ...

Страница 41: ...displayed because no address is set on shipment Subnet Mask Shows the current subnet mask 0 0 0 0 is displayed because no address is set on shipment Default Gateway Shows the IP address of the router set as a current default gateway 0 0 0 0 is displayed because no address is set on shipment PN28480K Local Management System Basic Switch Configuration System IP Configuration Menu MAC Address xx xx x...

Страница 42: ...fault gateway A Set the IP address subnet mask and default gateway in succession Press A The command prompt changes to Enter IP address Enter the IP address of the Switching Hub Then the command prompt changes to Enter subnet mask Enter the subnet mask Then the command prompt changes to Enter new gateway IP address Enter the IP address of a router used as a default gateway Q Return to the previous...

Страница 43: ...status is disabled IPv6 Address PrefixLen Shows the current IPv6 address and prefix length 128 is displayed because no address is set on shipment IPv6 Link Local Address Shows the current IPv6 link local address displayed because no address is set on shipment PN28480K Local Management System System IP Configuration Menu IPv6 Configuration Menu MAC Address xx xx xx xx xx xx IPv6 Status Disabled IPv...

Страница 44: ...44 IPv6 Default Gateway Shows the IPv6 address of the router set as a current default gateway is displayed because no address is set on shipment ...

Страница 45: ...s the SNMP manager settings SNMP Extend Configuration Configures the SNMP extend settings SNMP Trap Receiver Configuration Configures the SNMP trap receiver settings Quit to previous menu Returns to the previous menu PN28480K Local Management System Basic Switch Configuration SNMP Configuration Menu SNMP M anagement Configuration SNMP E xtend Configuration SNMP T rap Receiver Configuration Q uit t...

Страница 46: ... SNMP Management Configuration Menu opens E Configure the SNMP extend settings Press E The SNMP Extend Configuration Menu opens T Configure the trap receiver settings Press T The SNMP Trap Receiver Configuration Menu opens Q Quit the SNMP Configuration Menu and return to the previous menu ...

Страница 47: ... write operations are allowed Read Only Only the read operation is allowed IP Address Shows the IP address of the SNMP manager PN28480K Local Management System SNMP Configuration SNMP Management Configuration Menu SNMP Manager List No Status Privilege IP Address Community 1 Enabled Read Only 0 0 0 0 public 2 Enabled Read Write 0 0 0 0 private 3 Disabled Read Only 0 0 0 0 4 Disabled Read Only 0 0 0...

Страница 48: ...anges to Enter IP address for manager Enter an IP address R Set an access privilege for an SNMP manager Press R The command prompt changes to Enter manager entry number Enter an SNMP manager entry number you wish to configure Then the command prompt changes to Enter the selection Press 1 for read only permission Press 2 for read and write P Configure the IPv6 SNMP manager settings Press P The IPv6...

Страница 49: ...ress of the SNMP manager Available commands are listed below I Set an IP address for an SNMP manager Press I The command prompt changes to Enter manager entry number Enter an SNMP Management entry number you wish to configure Then the command prompt changes to Enter new manager IPv6 address Enter an IPv6 address Q Return to the previous menu PN28480K Local Management System SNMP Management Configu...

Страница 50: ... previous menu Returns to the previous menu Available commands are listed below U Configure the SNMP user settings Press U The SNMP User Configuration Menu opens V Configure the SNMP view settings Press V The SNMP View Configuration Menu opens G Configure the SNMP Group settings Press G The SNMP Group Configuration Menu opens Q Quit the SNMP Configuration Menu and return to the previous menu PN284...

Страница 51: ... current SNMP user settings No Shows the entry number on the SNMP User List User Name Shows the SNMP user name Group Shows the group of the SNMP user PN28480K Local Management System SNMP Extend Configuration Menu SNMP User Configuration Menu SNMP User List No User Name Group 1 initial initial 2 3 4 5 6 7 8 9 10 COMMAND C reate SNMP User M o dify SNMP User M ore User Info D elete SNMP User Q uit t...

Страница 52: ... for changing SNMP user Press O The command prompt changes to Enter User ID Enter an SNMP user entry number you wish to configure Then the Modify SNMP User Configuration Menu opens M Show additional information on a SNMP user Press M to display information on authentication type priviledge D Delete a SNMP user Press D The command prompt changes to Enter User ID Enter User ID you wish to delete wit...

Страница 53: ...Y_VIEW Shows the name of view to notify Authentication Shows the authentication method Auth key Shows the authentication key Privilege Shows the encryption scheme Privilege Key Shows the encryption key PN28480K Local Management System SNMP User Configuration Menu Create SNMP User Configuration Menu Index 3 User Name Group Name READ_VIEW None WRITE_VIEW None NOTIFY_VIEW None Authentication None Aut...

Страница 54: ...d the command prompt changes to Enter Key Enter a key A Set the authentication method Press A The command prompt changes to Enter Authentication Type Press M to select MD5 Press S to select SHA P Set the encryption key Press P The command prompt changes to Use Password or Key Press P to enter a password Press K to enter a key If P is selected the command prompt changes to Enter Password Enter a pa...

Страница 55: ... the name of view to notify Authentication Shows the authentication method Auth key Shows the authentication key Privilege Shows the encryption scheme Privilege Key Shows the encryption key PN28480K Local Management System SNMP User Configuration Menu Modify SNMP User Configuration Menu Index 2 User Name test Group Name test READ_VIEW test WRITE_VIEW test NOTIFY_VIEW test Authentication MD5 Auth K...

Страница 56: ...d the command prompt changes to Enter Key Enter a key A Set the authentication method Press A The command prompt changes to Enter Authentication Type Press M to select MD5 Press S to select SHA P Set the encryption key Press P The command prompt changes to Use Password or Key Press P to enter a password Press K to enter a key If P is selected the command prompt changes to Enter Password Enter a pa...

Страница 57: ... type PN28480K Local Management System SNMP Extend Configuration Menu SNMP View Configuration Menu Total Entry 8 View Name Subtree View Type restricted 1 3 6 1 2 1 1 Included restricted 1 3 6 1 2 1 11 Included restricted 1 3 6 1 6 3 10 2 1 Included restricted 1 3 6 1 6 3 11 2 1 Included restricted 1 3 6 1 6 3 15 1 1 Included CommunityView 1 Included CommunityView 1 3 6 1 6 3 Excluded CommunityView...

Страница 58: ...r an SNMP view in 32 one byte characters or less Then the Create SNMP View Configuration Menu opens O Go to the screen for changing SNMP view Press O The command prompt changes to Please enber view name Enter an SNMP view in 32 one byte characters or less Then the Modify SNMP View Configuration Menu opens D Delete a SNMP user Press D The command prompt changes to Please enter view name Enter an SN...

Страница 59: ... 4 6 13 Create SNMP View Screen Description View Name Shows the SNMP View name Subtree Shows the SNMP View subtree View Type Shows the SNMP View type PN28480K Local Management System SNMP View Configuration Menu Create SNMP View Configuration Menu View Name test Subtree Type COMMAND N ext Page A dd OID Q uit to previous menu Pre v ious Page D elete OID Command Enter the character in square bracket...

Страница 60: ...he previous page A Register an additional OID in subtree Press A The command prompt changes to Enter OID Enter an OID Then the command prompt changes to Enter Type Press I to include OID Press E to exclude OID D Delete an OID that has been registered in subtree Press D The command prompt changes to Enter OID Enter an OID Q Return to the previous menu ...

Страница 61: ...14 Modify SNMP View Screen Description View Name Shows the SNMP View name Subtree Shows the SNMP View subtree View Type Shows the SNMP View type PN28480K Local Management System SNMP View Configuration Menu Modify SNMP View Configuration Menu View Name test Subtree Type 1 Included COMMAND N ext Page A dd OID Q uit to previous menu Pre v ious Page D elete OID Command Enter the character in square b...

Страница 62: ...he previous page A Register an additional OID in subtree Press A The command prompt changes to Enter OID Enter an OID Then the command prompt changes to Enter Type Press I to include OID Press E to exclude OID D Delete an OID that has been registered in subtree Press D The command prompt changes to Enter OID Enter an OID Q Return to the previous menu ...

Страница 63: ...MP Group name Ver Shows the SNMP version Level Shows the SNMP security level PN28480K Local Management System SNMP Extend Configuration Menu SNMP Group Configuration Menu Total Entry 5 Group Name Ver Level public v1 NoAuth NoPriv public v2c NoAuth NoPriv initial v3 NoAuth NoPriv private v1 NoAuth NoPriv private v2c NoAuth NoPriv COMMAND N ext Page C reate SNMP Group M o dify SNMP Group Pre v ious ...

Страница 64: ...NMP group Press O The command prompt changes to Please input the SNMP Group Name Enter an SNMP view in 32 one byte characters or less Then the command prompt changes to Please input the SNMP Group Version Press 1 for SNMP v1 Press 2 for SNMP v2c Press 3 for SNMP v3 Then the Modify SNMP Group Configuration Menu opens D Delete a SNMP group Press D The command prompt changes to Please input the SNMP ...

Страница 65: ...s the SNMP version READ_VIEW Shows the SNMP read view WRITE_VIEW Shows the SNMP write view NOTIFY_VIEW Shows the SNMP notify view Level Shows the SNMP security level PN28480K Local Management System SNMP Group Configuration Menu Create SNMP Group Configuration Menu Group Name test SNMP Version v3 READ_VIEW None WRITE_VIEW None NOTIFY_VIEW None Security Level NoAuth NoPriv COMMAND Set S NMP Version...

Страница 66: ...f view to read Press R The command prompt changes to Enter Read View Enter an SNMP view name in 32 one byte characters or less E Set a security level Press E The command prompt changes to Please input the Select security level N A P Press N for no authentication and no privilege Press A for authentication and no priviledge Press P for authentication and priviledge W Set a name of view to write Pre...

Страница 67: ...s the SNMP version READ_VIEW Shows the SNMP read view WRITE_VIEW Shows the SNMP write view NOTIFY_VIEW Shows the SNMP notify view Level Shows the SNMP security level PN28480K Local Management System SNMP Group Configuration Menu Modify SNMP Group Configuration Menu Group Name test SNMP Version v3 READ_VIEW None WRITE_VIEW None NOTIFY_VIEW None Security Level NoAuth NoPriv COMMAND Set S NMP Version...

Страница 68: ...f view to read Press R The command prompt changes to Enter Read View Enter an SNMP view name in 32 one byte characters or less E Set a security level Press E The command prompt changes to Please input the Select security level N A P Press N for no authentication and no privilege Press A for authentication and no priviledge Press P for authentication and priviledge W Set a name of view to write Pre...

Страница 69: ...aps Type Shows the trap type v1 Sends SNMP v1 traps v2c Sends SNMP v2c traps IP Address Shows the IP address of a trap receiver PN28480K Local Management System SNMP Configuration SNMP Trap Receiver Configuration Menu Trap Receiver List No Status Type IP Address Community 1 Disabled v1 0 0 0 0 2 Disabled v1 0 0 0 0 3 Disabled v1 0 0 0 0 4 Disabled v1 0 0 0 0 5 Disabled v1 0 0 0 0 6 Disabled v1 0 0...

Страница 70: ... Configure the trap sending settings when the link status changes Press D to open the Enable Disable Individual Trap Menu For configuration details refer to 4 6 3 C T Set a trap type Press T The command prompt changes to Enter manager entry number Enter an entry number for the trap receiver you wish to configure Then the command prompt changes to Enter the selection Press 1 to select SNMPv1 traps ...

Страница 71: ...s disabled Factory default setting Login Failure Shows the trap sending settings for a login failure Enabled The trap sending is enabled Disabled The trap sending is disabled Factory default setting Enabled Link Up Down Port Shows the port number to which a trap is sent when its link status changes All ports are assigned at factory shipment PN28480K Local Management System SNMP Trap Receiver Confi...

Страница 72: ...a login failure Press L The command prompt changes to Enable or Disable Login failure trap E D Press E to enable the trap sending Press D to disable it P Add a port to which the trap is sent when its link status changes Press P The command prompt changes to Enter port number Enter a port number The trap is sent for this port D Delete a port to which the trap is sent when its link status changes Pr...

Страница 73: ...of the SNMP trap receiver Available commands are listed below I Set an IPv6 address for an SNMP trap receiver Press I The command prompt changes to Enter manager entry number Enter an SNMP trap receiver entry number you wish to configure Then the command prompt changes to Enter new receiver IPv6 address Enter an IPv6 address Q Return to the previous menu PN28480K Local Management System SNMP Trap ...

Страница 74: ... Down Auto Disabled Disabled 3 1000T Enabled Down Auto Disabled Disabled 4 1000T Enabled Down Auto Disabled Disabled 5 1000T Enabled Down Auto Disabled Disabled 6 1000T Enabled Down Auto Disabled Disabled 7 1000T Enabled Down Auto Disabled Disabled 8 1000T Enabled Down Auto Disabled Disabled 9 1000T Enabled Down Auto Disabled Disabled 10 1000T Enabled Down Auto Disabled Disabled 11 1000T Enabled D...

Страница 75: ... Mode Shows the communication speed and full duplex half duplex settings The factory default setting is Auto for all ports Auto Auto negotiation mode 100 FDx 100F 100 Mbps full duplex 100 HDx 100H 100 Mbps half duplex 10 FDx 10F 10 Mbps full duplex 10 HDx 10H 10 Mbps half duplex Flow Ctrl Shows the flow control settings The factory default setting is Disabled for all ports Enabled The flow control...

Страница 76: ...to enable the auto negotiation mode Press N to disable it If N is selected the command prompt changes to Enter speed for port 10 100 Select a desired communication speed Upon setting the command prompt changes to Enter duplex for port F H Select F for full duplex Select H for half duplex When you complete the setting change the display on the screen is automatically updated Mode A Enable the auto ...

Страница 77: ...e Then the command prompt changes to Enable or Disable Auto MDl for port E D Press E to enable the function Press D to disable it As the change is applied the display on the screen is updated automatically Q Return to the previous menu Note The screen shows the port status however the status is not automatically updated To display the latest status press any key ...

Страница 78: ...ion Extend Menu Jumbo Status Disabled Port Trunk Type Link Port Name EAP Pkt FW 1 1000T Down Disabled 2 1000T Down Disabled 3 1000T Down Disabled 4 1000T Down Disabled 5 1000T Down Disabled 6 1000T Down Disabled 7 1000T Down Disabled 8 1000T Down Disabled 9 1000T Down Disabled 10 1000T Down Disabled 11 1000T Down Disabled 12 1000T Down Disabled COMMAND N ext Page Set Port N a me P revious Page Set...

Страница 79: ...Shows the port type 100TX The port type is 10 100BASE TX 1000T The port type is 10 100 1000BASE T 1000X The port type is SFP extension port Link Shows the current link status Up Link is established successfully Down Link is not established Port Name Shows the port name EAP Pkt FW Shows the current EAP Packet Forwarding settings The factory default setting is Disabled Enabled EAP Packet Forwarding ...

Страница 80: ...on the screen is updated automatically A A name can be assigned to each port Press A The command prompt changes to Select port number to be changed Enter a port number you wish to change Press 0 to change the settings of all ports at a time Then the command prompt changes to Enter port name string Enter a name you wish to assign When you complete the setting change the display on the screen is aut...

Страница 81: ...wer saving mode Fig 4 6 23 Port Configuration Power Saving PN28480K Local Management System Basic Switch Configuration Port Configuration Power Saving Menu Port Link Trunk Type Mode Power saving EEE 802 3az 1 Down 1000T Auto Half Enabled 2 Down 1000T Auto Half Enabled 3 Down 1000T Auto Half Enabled 4 Down 1000T Auto Half Enabled 5 Down 1000T Auto Half Enabled 6 Down 1000T Auto Half Enabled 7 Down ...

Страница 82: ...x settings The factory default setting is Auto for all ports Auto Auto negotiation mode 100 FDx 100F 100 Mbps full duplex 100 HDx 100H 100 Mbps half duplex 10 FDx 10F 10 Mbps full duplex 10 HDx 10H 10 Mbps half duplex Power saving Shows status of the MNO series power saving mode The factory default setting is Half for all ports Half Power saving mode is enabled Half Full Power saving mode is enabl...

Страница 83: ...le the mode Press D to disable it Press H to enable the power saving mode of giving priority to connectivity with another device As the change is applied the display on the screen is updated automatically E An EEE can be assigned to each port Press E The command prompt changes to Select port number to be changed Enter a port number you wish to change Press 0 to change the settings of all ports at ...

Страница 84: ...tus Disabled SNMP Agent Disabled IP Setup Interface Enabled Local User Name manager Syslog Transmission Disabled Login Method 1 2 Local None Method 1 Fail Action Method 2 COMMAND Set C onsole UI Time Out Change Local User N ame Set T elnet UI Time Out Change Local P assword Enable Disable Te l net Server R ADIUS Configuration Enable Disable S NMP Agent L o gin Method I P Setup Interface Login M et...

Страница 85: ...etwork cameras The factory default setting is Enabled For instructions refer to Appendix C Enabled Access is enabled Disabled Access is disabled Local User Name Shows the current login user name The factory default setting is manager Syslog Transmission Shows the settings for sending system logs to the Syslog server The factory default setting is Disabled Enabled Sends system log to the Syslog ser...

Страница 86: ...r Disable telnet server E D Press E to enable the access Press D to disable the access S Configure the SNMP access settings Press S The command prompt changes to Enable or Disable SNMP Agent E D Press E to enable the access Press D to disable the access Y Configure the Syslog transmission settings Press Y The command prompt changes to Enable or Disable Syslog Transmission E D Press E to enable the...

Страница 87: ...he SSH Server Configuration Menu opens For configuration details refer to the next section 4 6 7 g B Configure the LED base mode settings Press B The LED Basic Mode Configuration Menu opens For configuration details refer to the next section 4 6 7 h F Configure the Fan Control settings Press F The Fan Control Configuration Menu opens For configuration details refer to the next section 4 6 7 i W Co...

Страница 88: ...n Configuration PN28480K Local Management System System Security Configuration Telnet Access Limitation Menu Telnet Access Limitation Disabled No IP Address Subnet Mask 1 empty empty 2 empty empty 3 empty empty 4 empty empty 5 empty empty COMMAND E nable Disable Telnet Access Limitation A dd IP Address and Subnet Mask D elete IP Address and Subnet Mask M odify IP Address and Subnet Mask S et IPv6 ...

Страница 89: ...255 255 254 192 168 1 20 192 168 1 21 Two units can be accessed 3 192 168 2 1 255 255 255 128 192 168 2 1 192 168 2 127 127 units can be accessed 4 192 168 3 1 255 255 255 0 192 168 3 1 192 168 3 254 254 units can be accessed D Delete a range of IP address that has been set up Press D The command prompt changes to Enter IP address entry number Enter an IP address entry number you wish to delete M ...

Страница 90: ...tion Configuration PN28480K Local Management System Telnet Access Limitation Menu IPv6 Telnet Access Limitation Menu Telnet Access Limitation Enabled No IPv6 Address Prefixlen 1 empty empty 2 empty empty 3 empty empty 4 empty empty 5 empty empty COMMAND E nable Disable Telnet Access Limitation A dd IPv6 Address and Prefix Length D elete IPv6 Address and Prefix Length M odify IPv6 Address and Prefi...

Страница 91: ...Prefixlen Access permitted IP address 1 2001 1 1 128 2001 1 1 Only one unit can be accessed 2 2001 2 1 1 127 2001 2 1 0 2001 1 2 1 1 Two units can be accessed 3 2001 3 1 1 126 2001 3 1 0 2001 3 1 3 Four units can be accessed 4 2001 4 1 1 125 2001 4 1 0 2001 4 1 7 Eight units can be accessed D Delete a range of IPv6 address that has been set up Press D The command prompt changes to Enter IPv6 addre...

Страница 92: ...ets this common key No common key is set at shipment Response Time Shows the maximum response time for authentication request to RADIUS server The factory default setting is 10 seconds Max Retransmission Shows the number of retransmission times for authentication request to RADIUS server The factory default setting is 3 times PN28480K Local Management System System Security Configuration RADIUS Co...

Страница 93: ... RADIUS server index Enter a RADIUS server entry number between 1 and 5 The command prompt changes to Enter secret string for server with encryption Enter a common key within 20 one byte characters R Set a response time until the RADIUS server responds to authentication request Press R The command prompt changes to Enter RADIUS server index Enter a RADIUS server entry number between 1 and 5 The co...

Страница 94: ...s are listed below N Set a NAS ID NAS Identifier Press N The command prompt changes to Enter NAS ID Enter NAS ID within 16 one byte characters I Set an IPv6 address of RADIUS server Press I The command prompt changes to Enter RADIUS server index Enter a RADIUS server entry number between 1 and 5 The command prompt changes to Enter new server IPv6 address Enter an IPv6 address Q Return to the previ...

Страница 95: ...acillity Shows the value of Facillity Include SysName IP Shows information to be added SysName Adds the SysName of this switch to the system log to be transmitted IP address Adds the IP address of this switch to the system log to be transmitted PN28480K Local Management System System Security Configuration Syslog Transmission Configuration Menu Syslog Server List No Status IP Address Facility Incl...

Страница 96: ...mmand prompt changes to Enter IP address for manager Enter the IP address of Syslog server Y Sent information that is added to the system log to be transmitted Press Y The command prompt changes to Enter manager entry number Enter a Syslog server entry number between 1 and 2 The command prompt changes to Enter Include Information Press S to add the SysName Press I to add the IP address Press N not...

Страница 97: ...ress is set on shipment Available commands are listed below I Set an IPv6 address of Syslog server Press I The command prompt changes to Enter manager entry number Enter a Syslog server entry number between 1 and 2 The command prompt changes to Enter new server IPv6 address Enter the IPv6 address of the Syslog server Q Return to the previous menu PN28480K Local Management System System Security Co...

Страница 98: ... Retries Time Shows the number of retries for SSH authentication The factory default setting is 5 times SSH Server Shows the SSH access settings The factory default setting is Disabled Enabled SSH Access is enabled Disabled Access is disabled SSH Server key Shows the status of SSH server key Key exists The server key exists Key does not exist The server key does not exist PN28480K Local Management...

Страница 99: ...utomatically terminating an SSH connected session if no input is made Press O The command prompt changes to Enter SSH UI idle timeout Enter a value from 1 to 60 minutes A Set the response time to SSH authentication Press A The command prompt changes to Enter SSH authentication idle timeout Enter a value from 1 to 120 seconds R Set the number of retries for SSH authentication Press R The command pr...

Страница 100: ...listed below B Change the LED base mode Press B The command prompt changes to Select LED Base Mode S E Press S to change the LED base mode to the status mode Press E to change it to the ECO mode Q Return to the previous menu Note If the LED base mode is changed the configuration information is saved and all settings are stored in a built in memory PN28480K Local Management System System Security C...

Страница 101: ... Low Sets the fan speed to Low For 40 degrees C support High Sets the fan speed to High For 50 degrees C support Available commands are listed below F Change the Fan Control setting Press F The command prompt changes to Select Fan Speed Press 1 to change the Fan Control status to High Press 2 to change it to Low Q Return to the previous menu PN28480K Local Management System System Security Configu...

Страница 102: ... the MAC address of forwarding database MAC Learning Sets to Auto Off for the MAC address learning function of each port If this is set to OFF only MAC address registered in the Static Address Table is allowed for communications Display MAC Address by Port Shows all MAC addresses that have been registered Quit to previous menu Returns to the previous menu PN28480K Local Management System Basic Swi...

Страница 103: ...ss N The screen shows the next page P Show the previous page Press P The screen shows the previous page A Register an additional MAC address Press A The command prompt changes to Enter MAC Address xx xx xx xx xx xx Enter a MAC address to be added D Delete a MAC address that has been registered Press D The command prompt changes to Enter MAC Address xx xx xx xx xx xx Enter a MAC address to be delet...

Страница 104: ...g is disabled MAC Learning Limit Shows the limit number of MAC address auto learning for each port Disabled The number of MAC address auto learning is not limited Factory default setting 1 256 Indicates the limit number of MAC address auto learning PN28480K Local Management System Forwarding Database Menu MAC Learning Menu Port MAC Learning MAC Learning Limit 1 Auto Disabled 2 Auto Disabled 3 Auto...

Страница 105: ...atus of auto learning Press S The command prompt changes to Select Port Number to be changed Enter a port number you wish to change the setting Then the command prompt changes to Change MAC Learning Mode for port specified port number Press A to enable auto learning Press D to disable the mode L Set the limit number of MAC address auto learning Press L The command prompt changes to Select Port Num...

Страница 106: ...AC address table Port Shows the port to which the MAC address has belonged Available commands are listed below N Show the next page Press N The screen shows the next port P Show the previous page Press P The screen shows the previous port A Set a time to store MAC address Press A The command prompt changes to Enter Age Out time Enter Age Out time with a value of 10 to 1000000 seconds Q Return to t...

Страница 107: ...ronization setting by SNTP Fig 4 6 38 Configuring of Time Synchronization Function before configuration PN28480K Local Management System Basic Switch Configuration Time Configuration Menu Time HH MM SS 12 13 13 Date YYYY MM DD 2001 01 01 Monday SNTP Server IP 0 0 0 0 SNTP Server IPv6 SNTP Polling Interval 1440 Min Time Zone GMT 09 00 Osaka Sapporo Tokyo Daylight Saving N A COMMAND Set C lock Time ...

Страница 108: ...on with SNTP server Time Zone Shows the time zone Daylight Saving Shows the application status of Daylight Saving Summer time PN28480K Local Management System Basic Switch Configuration Time Configuration Menu Time HH MM SS 10 20 33 Date YYYY MM DD 2009 04 01 Wednesday SNTP Server IP 192 168 0 2 SNTP Server IPv6 SNTP Polling Interval 1440 Min Time Zone GMT 09 00 Osaka Sapporo Tokyo Daylight Saving...

Страница 109: ...ng is 1440 minutes 1 day E Set the application status of Daylight Saving Summer time Press E The command prompt changes to Enable or Disable Daylight Saving E D Enter E to use daylight saving time Press D not to use it When the time zone is set to where daylight saving time is not applied this setting is not available When this Switching Hub is used domestically this setting is not required Z Set ...

Страница 110: ...out Shows the age out time of ARP table IP Address Shows the IP address on ARP table Hardware Address Shows the hardware address on ARP table Type Shows the type on ARP table Static The address is manually set Dynamic The address is auto learned PN28480K Local Management System Basic Switch Configuration ARP Table Sorting Method By IP ARP Age Timeout 7200 seconds IP Address Hardware Address Type C...

Страница 111: ...t method for sorting entry to display I T Press I to display in the order of IP address Press T to display in the order of type If T is selected the command prompt changes to Select type for sorting entry to display S D Press S to display manually set addresses Press D to display auto leaned addresses A Add modify an entry of ARP table Press A The command prompt changes to Enter IP address Enter a...

Страница 112: ...P Reachable Time Shows the NDP Reachable time NDP State Time Shows the NDP Stale time IPv6 Address Shows the IPv6 Address on NDP table Hardware Address Shows the hardware address on NDP table Status Shows the IPv6 neighbor cache Type Shows the type on NDP table Static The address is manually set Dynamic The address is auto learned PN28480K Local Management System Basic Switch Configuration NDP Tab...

Страница 113: ...f NDP table with a value of 0 to 86400 seconds A Add modify an entry of NDP table Press A The command prompt changes to Enter IPv6 address Enter an IPv6 address Then the command prompt changes to Enter Hardware address Enter a MAC address as D Delete an entry of NDP table Press D The command prompt changes to Enter IPv6 address Enter an IPv6 address S Select the order of displaying NDP table Press...

Страница 114: ...m Control Configuration Configures Storm Control function setting 802 1X Port Based Access Control Configuration Configures IEEE802 1X Port Based Access Control setting Loop Detection Configuration Configures Loop Detection Shut off setting Port Group Configuration Configures Port Grouping setting Digital Diagnostic Monitoring Configures Digital Diagnostic Monitoring setting SFP module monitored m...

Страница 115: ...115 Static Multicast Address Configuration Configures Static Multicast Address setting Quit to previous menu Quits the Advanced Switch Configuration Menu and returns to the Main menu ...

Страница 116: ...AN ID VLAN ID is a VLAN identifier placed on each frame in processing tagged frames As for an untagged frame ports are divided into groups by this ID and the forwarding destination of the frame is determined by referring to this ID Multiple VLANs can be assigned to each port PVID Port VLAN ID Only one PVID can be set to each port When an untagged frame is received this ID determines to which VLAN ...

Страница 117: ...ID of VLAN VLAN Name Shows the VLAN name being configured VLAN Type Shows the type of VLAN Permanent Indicates that the VLAN is the one of initial setting This VLAN cannot be deleted Static Indicates that the VLAN is the newly configured one Mgmt Shows whether the VLAN is a management VLAN or not PN28480K Local Management System Advanced Switch Configuration VLAN Management Menu Total VLANs 1 Inte...

Страница 118: ...le Internet Mansion Function E D Press E to enable the function Press D to disable it If E is selected the command prompt changes to Uplink port Enter a port number you wish to configure as an uplink port This function enables to configure all settings needed for the Internet mansion environment Ports other than that designated as an uplink port are set as downlink ports Communications between dow...

Страница 119: ...figuration screen in Fig 4 7 4 and Fig 4 7 5 On deletion you cannot delete a VLAN whose ID is remained as a PVID Delete the VLAN after changing the PVID to another ID Note When Internet Mansion mode is enabled there are constrained conditions as the followings Please use the Switching Hub after confirming these constrained conditions 1 Combined usage with Link Aggregation is not possible 2 Static ...

Страница 120: ...Menu Screen Description VLAN ID Shows the VLAN ID VLAN Name Shows the VLAN name Port Member Shows the port number of the VLAN member PN28480K Local Management System VLAN Management VLAN Creation Menu VLAN ID VLAN Name Port Members COMMAND Set V LAN ID Set VLAN N ame Select P ort Member A pply Q uit to previous menu Command Enter the character in square brackets to select option ...

Страница 121: ...s P Set a member of VLAN Press P The command prompt changes to Enter egress port number Enter a port number you wish to set When entering multiple port numbers delimit with comma with no space or hyphenate the continuous numbers A Create VLAN Press A to apply the setting Q Return to the previous menu Note After setting a VLAN make sure to press A to apply the setting If you press Q without pressin...

Страница 122: ...enu Screen Description VLAN ID Shows the VLAN ID VLAN Name Shows the VLAN name Port Member Shows the port number of the VLAN member Untagged Port Shows the port without adding VLAN tags PN28480K Local Management System VLAN Management VLAN Modification Menu VLAN ID 1 VLAN Name Port Members 1 48 Untagged Ports 1 48 COMMAND Set VLAN N ame Select P ort Member A pply Q uit to previous menu Command Ent...

Страница 123: ...e byte characters P Set a member of VLAN Press P The command prompt changes to Enter egress port number Enter a port number you wish to set When entering multiple port numbers delimit with comma with no space or hyphenate the continuous numbers A Apply modification of VLAN configuration Press A to apply the setting Q Return to the previous menu ...

Страница 124: ...eceived The factory default setting is 1 When a tagged packet is received destination port will be determined according to the tag regardless of PVID Acceptable Type Shows the type of received frame Admit All Receives all frames Tagged Only Receives only VLAN tagged frames PN28480K Local Management System VLAN Management VLAN Port Configuration Menu Port PVID Acceptable Frame Type 1 1 Admit All 2 ...

Страница 125: ... PVID with a value of 1 to 4094 F Set the type of received frame Press F The command prompt changes to Enter port number Enter a port number you wish to configure Then the command prompt changes to Select port acceptable frame type A T Enter A to receive all frames Enter T to receive only tagged frames Q Return to the previous menu Note In this Switching Hub multiple VLANs can be assigned to one p...

Страница 126: ...can be created When using both Link Aggregation and Access Control functions assign a practical physical port number to a port list of access control not a logical port created in Link Aggregation For details refer to 4 7 4 Note If port communication modes are mixed Link Aggregation cannot be configured In addition Link Aggregation and Internet Mansion mode cannot be used simultaneously Note Depen...

Страница 127: ...Enter trunk group number Enter a target group number with a value of 1 to 8 Then the command prompt changes to Enter port members for group x Enter a port number to be added When entering multiple port numbers delimit with comma with no space or hyphenate the continuous numbers R Delete a group Press R The command prompt changes to Enter trunk group number Enter a target group number with a value ...

Страница 128: ...e normally filtered and cannot be monitored On this screen you can configure port monitoring settings Fig 4 7 7 Port Monitoring Configuration PN28480K Local Management System Advanced Switch Configuration Port Monitor Configuration Menu Monitoring Port Be Monitored Port s 1 2 Direction Status Both Disabled COMMAND S et Monitoring Port Set Ports to be M onitored Set Traffic D irection C hange Mirro...

Страница 129: ...red port to which analyzer etc is connected Press S The command prompt changes to Enter port number Enter a target port number M Set a port to be monitored Press M The command prompt changes to Enter port number Enter a target port number When entering multiple port numbers delimit with comma with no space or hyphenate the continuous numbers D Set a communication direction of target packet to be m...

Страница 130: ... Maximum configurable number 81 Out Profile action Sets the action against input packet exceeding a committed rate Maximum configurable number 128 Port list Sets the list of applicable ports Maximum configurable number 128 Policy Sets the policy Maximum configurable number 128 Quit to previous menu Returns to the previous menu PN28480K Local Management System Advanced Switch Configuration Access C...

Страница 131: ...address DSCP Shows the priority information DSCP value Pro Shows the protocol Src L4 Port Shows the source port number of TCP UDP Dst L4 Port Shows the destination port number of TCP UDP PN28480K Local Management System Access Control Configuration Classifier Configuration Menu Multifield Classifier Total Entries 1 Index Src IP Addr Mask Dst IP Addr Mask DSCP Pro Src L4 Port Dst L4 Port 1 Ignore I...

Страница 132: ...Press O The Modify Classifier Menu opens Set modify the configuration in the same as the Create Classifier Configuration Menu M Show additional information on a classifier Press M to display information on source MAC address destination MAC address 802 1p VLAN ID TCP SYN Flag and ICMP type S Show detailed information on a classifier Press S to display information on source MAC address destination ...

Страница 133: ...s Source MAC Mask Length Destination MAC Address Destination MAC Mask Length Source IP Address Source IP Mask Length Destination IP Address Destination IP Mask Length Source IPv6 Address PLen Destination IPv6 Address PLen Source Layer 4 Port Destination Layer 4 Port COMMAND C lassifier Index S o urce IP Address S ource MAC Address D e stination IP Address D estination MAC Address Source IPv 6 Addr...

Страница 134: ...s of source MAC address Destination MAC Mask Length Shows the length bits of destination MAC address Source IP Address Shows the source IP address Source IP Mask length Shows the length bits of source address mask Destination IP Address Shows the destination IP address Destination IP Mask length Shows the length bits of destination address mask Source IPv6 Address Shows the source IPv6 address PLe...

Страница 135: ...IP address Then the command prompt changes to Enter source IP address mask length Enter a length bits of address mask E Set a destination IP address to be filtered Press E The command prompt changes to Enter destination IP address Enter a destination IP address Then the command prompt changes to Enter destination IP address mask length Enter a length bits of address mask U Set a TCP UDP source por...

Страница 136: ...to Enter source IPv6 address Enter a source IPv6 address Then the command prompt changes to Enter source IPv6 address mask length Enter a length bits of address mask N Set a destination IPv6 address to be filtered Press N The command prompt changes to Enter destination IPv6 address Enter a destination IPv6 address Then the command prompt changes to Enter destination IPv6 address mask length Enter ...

Страница 137: ... Fig 4 7 12 On this screen you can refer to classifier information Fig 4 7 11 Classifier Configuration Menu 1 PN28480K Local Management System Access Control Configuration Classifier Configuration Menu Multifield Classifier Total Entries 1 Index Source MAC Addr Mask Destination MAC Addr Mask 1 00 00 00 00 00 01 48 00 00 00 00 00 02 48 Press any key to continue ...

Страница 138: ...ion MAC Address Shows the destination MAC address 802 1p Priority Shows the priority of IEEE802 1p VLAN ID Shows the VLAN ID TCP SYN Flag Shows whether a TCP SYN flag is set for filtering ICMP Type Shows the ICMP type PN28480K Local Management System Access Control Configuration Classifier Configuration Menu Multifield Classifier Total Entries 1 Index 802 1p VLAN ID TCP SYN ICMPTP 1 Ignore Ignore ...

Страница 139: ...sifier Information Classifier Index 1 Source MAC Address Ignore Source MAC Address Mask Length Ignore Destination MAC Address Ignore Destination MAC Address Mask Length Ignore 802 1p Priority Ignore VLAN ID Ignore Source IP Address Ignore Source IP Address Mask Length Ignore Destination IP Address Ignore Destination IP Address Mask Length Ignore DSCP Ignore IPv6 DSCP Ignore Protocol Ignore Source ...

Страница 140: ...Source IP Mask length Shows the length bits of source address mask Destination IP Address Shows the destination IP address Destination IP Mask length Shows the length bits of destination address mask Source L4 Port Shows the source port number of TCP UDP Destination L4 Port Shows the destination port number of TCP UDP 802 1p Priority Shows the priority of IEEE802 1p TCP SYN Flag Shows whether a TC...

Страница 141: ...y Permit Shows whether a packet is denied or permitted Action Shows the execution mode in in profile Policed DSCP Marks the DSCP value Policed Precedence Marks the precedence value Policed CoS Marks the CoS value PN28480K Local Management System Access Control Configuration In Profile Action Configuration Menu In Profile Action Total Entries 0 Index Deny Permit Policed DSCP Policed Precedence Poli...

Страница 142: ...edence value Policed CoS Mark the CoS value D Delete in profile Press D The command prompt changes to Enter in profile action index Enter an index number of the in profile to be deleted M Modify in profile Enter M The command prompt changes to Enter in profile action index Enter an index number of the in profile to be modified and modify it using the same operation as that for creating in profile ...

Страница 143: ...packet is denied or permitted Action Policed DSCP Marks the DSCP value Policed Precedence Marks the precedence value Policed CoS Marks the CoS value PN28480K Local Management System In Profile Action Configuration Create In Profile Action Menu Index 1 Deny Permit Permit Policed DSCP Ignore Policed Precedence Ignore Policed CoS Ignore COMMAND In Profile Action I ndex Set Policed C oS Set D eny Perm...

Страница 144: ...ets Press 2 to permit them S Set a DSCP value to be marked Press S The command prompt changes to Enter DSCP value Enter a DSCP value of 0 to 63 P Set a precedence value to be marked Press P The command prompt changes to Enter ToS precedence value Enter a precedence value of 0 to 7 C Set a CoS value to be marked Press C The command prompt changes to Enter CoS value Enter a CoS value of 0 to 7 A App...

Страница 145: ...ic burst size that can be transmitted exceeding the committed rate For burst size 4K 8K 16K 32K and 64K are used Deny Permit Shows whether a packet is denied or permitted Policed DSCP Shows a DSCP value to be marked PN28480K Local Management System Access Control Configuration Out Profile Action Configuration Menu Out Profile Action Total Entries 0 Index Committed Rate Burst Size KB Deny Permit Po...

Страница 146: ...ete out profile Press D The command prompt changes to Enter out profile action Index Enter an Index number of the out profile to be deleted M Modify out profile Enter M The command prompt changes to Enter out profile action Index Enter an index number of the out profile to be modified and modify it using the same operation as that for creating out profile Q Return to the previous menu Note 1 Burst...

Страница 147: ...packet is denied or permitted Committed Rate Shows the packet buffer rate Burst Size KB Shows the traffic burst size that can be transmitted exceeding the committed rate Burst size is fixed to 64K PN28480K Local Management System Out Profile Action Configuration Create Out Profile Action Menu Index Deny Permit Deny Committed Rate 1 Burst Size 64KB Note Deny Permit deny only Burst Size 64KB only CO...

Страница 148: ...Enter Out Profile action index Enter an index number with a value of 1 to 65535 C Set the committed rate Press C The command prompt changes to Enter committed rate Enter the committed rate with a value of 1 to 1000 A Apply the setting If not applied here the setting will be discarded Q Return to the previous menu ...

Страница 149: ...d in Link Aggregation Fig 4 7 18 Port List Configuration Menu Screen Description Total Entries Shows the number of port lists number of indexes created Index Shows the port list index number Port List Shows the port number in the port list PN28480K Local Management System Access Control Configuration Port List Configuration Menu Port List Total Entries 0 Index Port List COMMAND N ext Page D elete ...

Страница 150: ...created Then the command prompt changes to Enter port number Enter a port number to be included in the list D Delete a port list Press D The command prompt changes to Enter port list index Enter an index number of the port list to be deleted M Modify a port list Enter M The command prompt changes to Enter port list index Enter an index number of the port list to be modified and modify it using the...

Страница 151: ...der of policies Policies are applied in ascending order of this sequence number In Profile Shows the in profile index number Out Profile Shows the out profile index number Port List Shows the port list index number Status Shows the application status of policy PN28480K Local Management System Access Control Configuration Policy Configuration Menu Policy Total Entries 0 Index Classifier Seq In Prof...

Страница 152: ...mpt changes to Enable or Disable Policy Entry Press E to enable the policy Press D to disable it Enabled Enable a policy Disabled Disable a policy S Show the policy information Press S to display detailed information on each policy U Modify a policy Press U The command prompt changes to Enter policy index Enter an index number to be modified Then carry out the same operation as that for creating a...

Страница 153: ... the In Profile Action Configuration Menu Out Profile Index Shows the out profile index number created in the Out Profile Action Configuration Menu Port List Index Shows the port list index number created in the Port List Configuration Menu PN28480K Local Management System Policy Configuration Create Policy Configuration Menu Policy Index Classifier Index Policy Sequence In Profile Action Index Ou...

Страница 154: ...umber I Set an index number of applicable in profile Press I The command prompt changes to Enter in profile index Enter an index number of applicable in profile O Set an index number of applicable out profile Press O The command prompt changes to Enter out profile index Enter an index number of applicable out profile Out profile can be omitted L Set an index number of applicable port list Press L ...

Страница 155: ...guration screen for traffic class Press T The Traffic Class Configuration Menu opens For configuration details refer to 4 7 5 a E Go to the configuration screen for bandwidth Press E The Egress Rate Limiting Configuration Menu opens For configuration details refer to 4 7 5 b Q Return to the previous menu PN28480K Local Management System Main Menu Quality of Service Configuration Menu T raffic Clas...

Страница 156: ...ompt changes to Enable or Disable QoS E D Press E to enable the function Press D to disable it M Assign a priority level traffic class to a priority value of IEEE802 1p Press M The command prompt changes to Enter Priority E D Enter a priority value 0 to 7 to be assigned Then the command prompt changes to Enter traffic class for priority Enter a priority level traffic class to be controlled by this...

Страница 157: ...he next page P Show the previous page Press P The screen shows the previous page B Set a bandwidth Press B The command prompt changes to Enter port number e g 1 3 5 48 Enter a port number to designate Then the command prompt changes to Enter bandwidth Enter a value between 1 and 1000 S Set the bandwidth control PN28480K Local Management System Quality of Service Configuration Egress Rate Limiting ...

Страница 158: ... changes to Enter port number e g 1 3 5 48 Enter a port number to designate Then the command prompt changes to Enable or Disable Status E D Press E to enable the bandwidth control Press D to disable it Q Return to the previous menu ...

Страница 159: ...cast traffic Enabled Storm control for multicast is enabled Disabled Storm control for multicast is disabled Factory default setting Threshold Shows the threshold number of packets Packet Per Second PN28480K Local Management System Advanced Switch Configuration Storm Control Configuration Menu Port Storm Control Setting No DLF Broadcast Multicast Threshold pps 1 Disabled Disabled Disabled 0 2 Disa...

Страница 160: ... Enable or Disable broadcast storm control status E D Press E to enable the broadcast control Press D to disable it M Enable disable the storm control for multicast traffic Press M The command prompt changes to Enter port number Enter a port number to designate Then the command prompt changes to Enable or Disable multicast storm control status E D Press E to enable the multicast control Press D to...

Страница 161: ...ce Unauthorized The access control function is disabled All communica tions are blocked Force Authorized The access control function is disabled All communica tions are authorized Factory default setting Transmission Period The number of seconds to wait before requesting the client to reattempt authentication The factory default setting is 30 seconds PN28480K Local Management System Advanced Switc...

Страница 162: ...request The factory default setting is 2 Quiet Period Shows the number of seconds to wait before reattempting a failed authenti cation The factory default setting is 60 seconds Re authenticati on Period Shows the re authentication time interval The factory default setting is 3600 seconds Re authenticati on Status Shows whether the re authentication is enabled or disabled Enabled The re authenticat...

Страница 163: ...1 and 10 O Set the timeout for the authentication server Press O The command prompt changes to Enter Server Timeout Enter an integer between 1 and 65535 seconds L Set the timeout for the supplicant Press L The command prompt changes to Enter Supplicant Timeout value Enter an integer between 1 and 65535 seconds E Set the re authentication time interval Press E The command prompt changes to Enter re...

Страница 164: ...Enabled Port Trunk Link State Loop Detect Recovery Recovery Time 1 Down Forwarding Enabled Enabled 60 2 Down Forwarding Enabled Enabled 60 3 Down Forwarding Enabled Enabled 60 4 Down Forwarding Enabled Enabled 60 5 Down Forwarding Enabled Enabled 60 6 Down Forwarding Enabled Enabled 60 7 Down Forwarding Enabled Enabled 60 8 Down Forwarding Enabled Enabled 60 9 Down Forwarding Enabled Enabled 60 10...

Страница 165: ...detected and the port is shut off Loop Detect Shows the status of loop detection shut off function of each port Enabled The loop detection shut off function is enabled Factory default setting Port 1 to 44 Disabled The loop detection shut off function is disabled Factory default setting Port 45 to 48 Recovery Shows the recovery mode for auto recovery of the shutoff port Enabled Automatically recove...

Страница 166: ... status of recovery mode for auto recovery of the shutoff port Press S The command prompt changes to Select port number to be changed Enter a target port number Then the command prompt changes to Enable or Disable Recovery for port x E D Press E to enable auto recovery of the port Press D to disable it When entering multiple port numbers delimit with comma with no space or hyphenate the continuous...

Страница 167: ...the event occurred If the time is not set the accumulated running time since boot is shown Event Shows the description of the event occurred to the Switching Hub The loop detected on portX Indicates that a loop was detected in a Switching Hub under port X and the connection has been shut down The loop detected between portX and portY Indicates that a loop was detected between port X and port Y and...

Страница 168: ...n example of configuration using port grouping is given in Fig 4 7 28 Fig 4 7 28 Example of Configuration Using Port Grouping This configuration allows communications between PC1 and Internet and among PC2 PC3 and Internet Note The loop detection shut off function detects a loop of a frame and shuts down the connection even if the loop occurs between different port groups If some member ports of a...

Страница 169: ...mber ports belonging to the port group PN28480K Local Management System Advanced Switch Configuration Port Group Configuration Menu Total Groups 0 Group ID Group Name Group Member Status COMMAND N ext Page C reate Group D elete Group P revious Page M odify Group E nable or Disable Group Q uit to previous menu Command Enter the character in square brackets to select option ...

Страница 170: ...o the next section 4 7 9 a D Delete a port group Press D The command prompt changes to Enter Port Group ID Enter a port group ID you wish to delete with a value of 1 to 256 M Go to the screen for changing a port grouping setting Press M The command prompt changes to Enter Port Group ID Enter a port group ID you wish to configure with a value of 1 to 256 Then the Port Group Modification Menu opens ...

Страница 171: ... Group ID Shows the port group ID Group Name Shows the port group name being configured Port Members Shows member ports belonging to the port group PN28480K Local Management System Port Group Configuration Port Group Configuration Menu Group ID Group Name Port Members COMMAND Select Port G roup ID Set Port Group N ame Select P ort Group Member A pply Q uit to previous menu Command Enter the charac...

Страница 172: ... Set a port group member Press P The command prompt changes to Enter egress port number Enter a port number you wish to set When entering multiple port numbers delimit with comma with no space or hyphenate the continuous numbers A Create a port group Press A to apply the setting Q Return to the previous menu Note After setting a port group make sure to press A to apply the setting If you press Q w...

Страница 173: ...Modification Menu Screen Description Group ID Shows the port group ID Group Name Shows the port group name being configured Port Members Shows member ports belonging to the port group PN28480K Local Management System Port Group Configuration Port Group Modification Menu Group ID 1 Group Name Port Members 1 48 COMMAND Set Port Group N ame Select P ort Group Member A pply Q uit to previous menu Comm...

Страница 174: ...e byte characters or less P Set a port group member Press P The command prompt changes to Enter egress port number Enter a port number you wish to set When entering multiple port numbers delimit with comma with no space or hyphenate the continuous numbers A Apply modified setting of the port group Press A to apply the setting Q Return to the previous menu ...

Страница 175: ...ws the Tx power Temp deg C Shows the Temparature Voltage V Shows the Voltage Bias Current mA Shows the bias current Status Shows the current value PN28480K Local Management System Advanced Switch Configuration Digital Diagnostic Monitoring Menu Limit Trap Status Disabled SFP Port Number 45 Transceiver Type Vender Name Vender Product Number Vender Serial Number RX Power TX Power Temp Voltage Bias C...

Страница 176: ...176 High Alarm Shows the high alarm value High Warning Shows the high warning value Low Alarm Shows the low alarm value Low Warning Shows the low warning value ...

Страница 177: ...V Configure the Voltage threshold settings Press V The command prompt changes to Auto or Manual A M Press A to set the SFP default value Press M to set the value manually If M is selected the command prompt changes to High or Low H L Press H to set the high alarm or warning value Press L to set the low alarm or warning value Upon setting the command prompt changes to Alarm or Warning A W Select A ...

Страница 178: ...Description VLAN ID Shows the VLAN ID of multicast group Group MAC Address Shows the MAC address of multicast group Group Members Shows the ports of multicast group PN28480K Local Management System Advanced Switch Configuration Static Multicast Address Table Menu VLAN ID Group MAC Address Group Members 1 01 00 5E 00 00 00 1 COMMAND N ext Page P revious Page Q uit to previous menu A dd Static Membe...

Страница 179: ...nges to Enter MAC address for multicast entry Enter a multicast group MAC address to be added Then the command prompt changes to Select group member Enter a port D Delete a Multicast group MAC address that has been registered Press D The command prompt changes to Enter VLAN ID Enter a VLAN ID between 1 and 4094 Then The command prompt changes to Enter MAC address for multicast entry Enter a multic...

Страница 180: ...r Name Shows each counter name Total Shows each counter value Avg s Shows the average per second of each counter PN28480K Local Management System Main Menu Statistics Menu Port 1 Refresh 300 Sec Elapsed Time Since System Reset 000 00 00 00 Counter Name Total Avg s Total RX Bytes 0 0 Total RX Pkts 0 0 Good Broadcast 0 0 Good Multicast 0 0 CRC Align Errors 0 0 Undersize Pkts 0 0 Oversize Pkts 0 0 Fr...

Страница 181: ...S The command prompt changes to Select Port number Enter the port number you wish to display F Set the screen refresh mode Press F The command prompt changes to 1 for start to refresh 2 for set refresh rate Press 1 to stop auto refresh Press 2 to change the refresh interval If you press 2 the command prompt changes to Input refresh time Enter an integer between 5 and 600 seconds R Reset counter va...

Страница 182: ...System Main Menu Statistics Menu Port 1 Refresh 300 Sec Elapsed Time Since System Reset 000 00 00 00 Counter Name Total Avg s Total RX Bytes 0 0 Total RX Pkts 0 0 Good Broadcast 0 0 Good Multicast 0 0 CRC Align Errors 0 0 Undersize Pkts 0 0 Oversize Pkts 0 0 Fragments 0 0 Jabbers 0 0 Collisions 0 0 64 Byte Pkts 0 0 65 127 Pkts 0 0 128 255 Pkts 0 0 256 511 Pkts 0 0 512 1023 Pkts 0 0 1024 1518 Pkts ...

Страница 183: ...The screen shows the counter values of the previous port Disabled in Port 1 S Switch a target port Press S The command prompt changes to Select Port number Enter the port number you wish to display F Set the counter refresh mode Press F The command prompt changes to 1 for start to refresh 2 for set refresh rate Press 1 to stop auto refresh Press 2 to change the refresh interval If you press 2 the ...

Страница 184: ...tes When the Jumbo status is enabled Shows the number of packets having a packet length greater than 9216 bytes Fragments Shows the number of error packets that have a packet length less than 64 bytes and have a CRC or alignment error Jabbers Shows the number of error packets that have a packet length greater than 1518 bytes and have a CRC or alignment error Collisions Shows the number of packet c...

Страница 185: ...e configuration of this Switching Hub System Reboot Configures and executes the reboot of this Switching Hub Exception Handler Configures the operation when exception occurs in this Switching Hub Ping Execution Executes ping from this Switching Hub System Log Shows the system log of this Switching Hub Watch Dog Timer Configures the Watch Dog function Quit to previous menu Quits the Switch Tools Co...

Страница 186: ... used for update Image File Name Shows the file name of the firmware to be upgraded Reboot Timer Shows the time before rebooting after downloading the firmware You can set the time in the System Reboot Menu PN28480K Local Management System Switch Tools Configuration TFTP Software Upgrade Image Version 1 0 0 xx TFTP Server IP 0 0 0 0 TFTP Server IPv6 Image File Name Reboot Timer 0 seconds COMMAND S...

Страница 187: ...ame of the firmware to be upgraded Press F The command prompt changes to Enter file name Specify the file name of the downloaded program within 30 one byte characters U Start upgrading Press D The command prompt changes to Download file Y N Confirm whether or not you wish to start the process Confirm that all settings are correct Press Y to start upgrading If you find any incorrect setting press N...

Страница 188: ...After waiting for the time set by the Reboot Timer rebooting is automatically executed Fig 4 9 3 Download in Process Note Be sure not to turn off the power of the Switching Hub while upgrading the firmware version PN28480K Local Management System Software Upgrade Menu Download Status TFTP Server IP 192 168 1 10 TFTP Server IPv6 Image File Name M48eG rom Protocol TFTP Press CTRL C to quit downloadi...

Страница 189: ...iption TFTP Server IP Shows the IP address of the TFTP server to upload download the configuration Config File Name Shows the configuration file name PN28480K Local Management System Switch Tools Configuration Configuration File Upload Download TFTP Server IP 0 0 0 0 TFTP Server IPv6 Config File Name COMMAND Set TFTP S erver IP Address Set TFTP Server I Pv6 Address Set Configuration F ile Name U p...

Страница 190: ... 30 one byte characters U Start uploading the configuration information Press U The command prompt changes to Upload file Y N Confirm whether or not you wish to start the process Confirm that all settings are correct Press Y to start uploading If you find any incorrect setting press N to reset the settings D Start downloading the configuration information Press D The command prompt changes to Down...

Страница 191: ...ult Factory Default Except IP All settings except the IP address are reset to factory default Reboot Timer Shows the time between execution of the reboot command and actual reboot The factory default setting is 0 seconds Time Left Shows the time left before the system actually reboots after execution of the reboot command A key entry refreshes the screen display allowing you to check the elapsed t...

Страница 192: ...tory default Press I to save only the IP address setting and return the other settings to factory default R Execute the reboot Press R The command prompt changes to Are you sure to reboot the system Y N Press Y to execute it Press N to cancel it T Set the time before the system reboots Press T The command prompt changes to Enter Reboot Timer Enter a value between 0 or 5 and 86400 seconds 24 hours ...

Страница 193: ...n handler is disabled Exception Handler Mode Shows the method of exception handler Debug Message When the Switching Hub detects exception handler a debug message is displayed on the console screen System Reboot When the Switching Hub detects exception handler the system automatically starts rebooting PN28480K Local Management System Switch Tools Configuration Exception Handler Exception Handler Di...

Страница 194: ...mpt changes to Enable or Disable Exception Handler E D Press E to enable the function Press D to disable it M Set the method of exception handler Press M The command prompt changes to Select Exception Handler Mode M R Press M to display a debug message Press R to reboot Q Return to the previous menu ...

Страница 195: ... as shown in Fig 4 9 7 On this screen you can select IPv4 or IPv6 ping command Fig 4 9 7 Ping Execution PN28480K Local Management System Switch Tools Configuration Ping Execution IPv 4 Ping Execution IPv 6 Ping Execution Q uit to previous menu Command Enter the character in square brackets to select option ...

Страница 196: ...ping The factory default setting is 0 0 0 0 Number of Request Shows the number of times of ping The factory default setting is 10 times Timeout Value Shows the time before timeout occurs The factory default setting is 3 seconds Result Shows the ping result PN28480K Local Management System Ping Execution IPv4 Ping Execution Target IP Address 0 0 0 0 Number of Requests 10 Timeout Value 3 Sec Result ...

Страница 197: ...tween 1 to 5 seconds E Execute the ping command Or clear the display Press E The command prompt changes to Execute Ping or Clean before Ping Data E C Press E to execute ping Press C to only clear the display S Cancel the ping command Press S or Ctrl C during the ping execution to cancel it Q Return to the previous menu Fig 4 9 9 Display during IPv4 Ping Execution PN28480K Local Management System P...

Страница 198: ...f the ping The factory default setting is Number of Request Shows the number of times of ping The factory default setting is 10 times Timeout Value Shows the time before timeout occurs The factory default setting is 3 seconds Result Shows the ping result PN28480K Local Management System Ping Execution IPv6 Ping Execution Target IP Address Number of Requests 10 Timeout Value 3 Sec Result COMMAND Se...

Страница 199: ...1 to 5 seconds E Execute the ping command Or clear the display Press E The command prompt changes to Execute Ping or Clean before Ping Data E C Press E to execute ping Press C to only clear the display S Cancel the ping command Press S or Ctrl C during the ping execution to cancel it Q Return to the previous menu Fig 4 9 11 Display during Ping Execution PN28480K Local Management System Ping Execut...

Страница 200: ...e them for network management Fig 4 9 12 System Log Each event displayed on this screen links to an SNMP trap An event for which a trap is set is displayed here The relationships with traps are described below PN28480K Local Management System Switch Tools Configuration System Log Menu Entry Time YYYY MM DD HH MM SS Event COMMAND N ext Page P revious Page C lear System Log Q uit to previous menu Co...

Страница 201: ...ze Pkts Indicates that receiving the packet under 64 Bytes Received the error packets Oversize Pkts Indicates that receiving the packet over 1518 Bytes Received the error packets Fragments Indicates that receiving Fragment frame Received the error packets Jabbers Indicates that receiving Jabber frame Received the error packets Collisions Indicates the detecting Collision Cannot send the packets Pi...

Страница 202: ...ndicates that the monitoring function stopped RADIUS Info Accept Login via RADIUS Indicates that the login operation was executed via RADIUS and was successful Error Reject Login via RADIUS Indicates that the login operation was executed via RADIUS and was rejected RADIUS Timeout Indicates that the login operation was executed via RADIUS and was timeout SNTP Info SNTP update to yyyy mm dd hh mm ss...

Страница 203: ...he configuration file 1 and 2 is broken and the configuration is initialized Copy configuration 2 to 1 is failed Indicates that detected the configuration file 1 is broken the copying the configuration file 2 to 1 is failed Copy configuration 1 to 2 is failed Indicates that detected the configuration file 2 is broken the copying the configuration file 1 to 2 is failed Save of configuration 1 is fa...

Страница 204: ...ndicates that IP address setting operation was executed via IP setup interface function and was failed Because it takes over 20 minutes from booting Info Console timeout Indicates that console was time out Telnet Timeout IP xxx xxx xxx xxx Indicates that telnet from the host with IP address xxx xxx xxx xxx was timeout SSH Timeout IP xxx xxx xxx xxx Indicates that SSH from the host with IP address ...

Страница 205: ...m exception in thread THREAD freeMem FREE_MEM System information indicating that exception handler is called in the Switching Hub THREAD indicates the thread name and FREE_MEM indicates the free memory capacity Duplication of IP address IP ADDRESS MAC ADDRESS Indicates that IP address of Switching Hub is already used and conflicting Logout by user Indicates that connection via console was terminat...

Страница 206: ...206 recovered from Indicates that SFP status recovered from threshold High Indicates that upper limit Low Indicates that lower limit Alarm Indicates the alarm Warning Indicates the warning ...

Страница 207: ...ing is Disabled Enabled The function is enabled Disabled The function is disabled Available commands are listed below W Enable disable the Watch Dog Timer function Press W The command prompt changes to Enable or Disable Watch Dog Timer E D Press E to enable the function Press D to disable it Q Return to the previous menu PN28480K Local Management System Switch Tools Configuration Watch Dog Timer M...

Страница 208: ...this screen the command prompt shows Save current configuration Y N Press Y to save the configuration Press N to cancel it If you don t save the configuration on this screen it will be deleted when the system is rebooted or turned off Fig 4 10 1 Save Configuration to Flash screen Confirmation to save PN28480K Local Management System Main Menu Save Configuration to Flash Save current configuration ...

Страница 209: ...ig 4 10 2 Saving Configuration to Flash screen Completion of save PN28480K Local Management System Main Menu Save Configuration to Flash Saving configuration to flash is successful press any key to continue ...

Страница 210: ...Fig 4 11 1 On this screen you can use the command line for configuration instead of the menu screen For configuration procedure refer to the separate volume Operation Manual CLI Enter logout at the command prompt to return from CLI to menu screens Fig 4 11 1 Command Line Interface CLI M48eG ...

Страница 211: ...g Q on the Main Menu opens the login screen shown in Fig 4 2 1 If you access using Telnet pressing Q terminates the connection To login again follow the login procedures shown in the section 4 2 You are automatically logged out after a specified timeout period ...

Страница 212: ...000BASE T SFP 1 488 000 pps MAC address table 8K entries unit Buffer memory 512 KBytes Flow control IEEE 802 3x full duplex Back pressure half duplex Major functions IEEE 802 1Q Tag VLAN 256 VLANS max IEEE 802 1p QoS function 4 priority queues supported IEEE 802 3x Flow control Link aggregation Configurable up to 8 ports and 8 groups Port monitoring 1 n supported IEEE 802 1X Port Based Access Cont...

Страница 213: ... 2574 SNMP VIEW BASED ACM MIB RFC 2575 SNMP COMMUNITY MIB RFC 2576 IP MIB RFC 4293 IF MIB RFC 2863 Not support IfMIB IEEE8021 PAE MIB Not support dot1xPaeSupplicant Power supply specifications Power supply AC 100 240 V 50 60 Hz 2 5 A Power consumption Normally max 34 6 W min 13 7 W Environment specifications Operating temperature 0 50 C Operating humidity 20 80 RH no condensation Storage temperatu...

Страница 214: ...ured only with the software Easy Config In the software the item is displayed as Camera name Restrictions The time for accepting setting changes is limited to 20 minutes after power on to ensure security However you can change settings regardless of the time limit if the IP address subnet mask default gateway user name and password values are the factory defaults You can check the current settings...

Страница 215: ...r directly uses In addition if a downstream Switching Hub is connected with a device such as a hub without loop detection function and a loop failure occurs under the device the downstream Switching Hub shuts down the corresponding port to prevent the failure from extending to the entire network Fig 1 Example of configuration using loop detection function Downstream Switching H b 2 Downstream Swit...

Страница 216: ... Switching Hub causing loop will be blocked You need to examine this type of network configuration and Switching Hub settings Fig 2 Precautions in using loop detection function Downstream Switching Downstream Switching Upstream Switching Hub PC 1 PC 2 PC 3 1 2 3 Conditions of occurrence 1 Communications between PC1 and PC2 and between PC1 and PC3 are OK 2 A loop occurs in downstream Switching Hub ...

Страница 217: ...act 0 sysName R W sysName 0 sysLocation R W sysLocation 0 sysServices RO sysServices 0 sysORLastChange RO sysORLastChange 0 sysORID RO sysORID 1 sysORDescr RO sysORDescr 1 sysORUpTime RO sysORUpTime 1 1 2 TCP MIB object Access Identifier Remarks tcpRtoAlgorithm RO tcpRtoAlgorithm 0 tcpRtoMin RO tcpRtoMin 0 tcpRtoMax RO tcpRtoMax 0 tcpMaxConn RO tcpMaxConn 0 tcpPassiveOpens RO tcpPassiveOpens 0 tcp...

Страница 218: ...InTraps RO snmpInTraps 0 snmpOutGetResponses RO snmpOutGetResponses 0 snmpOutTraps RO snmpOutTraps 0 snmpEnableAuthenTraps R W snmpEnableAuthenTraps 0 2 IF MIB RFC2863 2 1 interfaces MIB object Access Identifier Remarks ifNumber RO ifNumber 0 ifIndex RO ifIndex port_num ifDescr RO ifDescr port_num ifType RO ifType port_num ifMtu RO ifMtu port_num ifSpeed RO ifSpeed port_num ifPhysAddress RO ifPhys...

Страница 219: ...ipReasmTomeout RO ipReasmTomeout ipReasmReqds RO ipReasmReqds 0 ipReasmOKs RO ipReasmOKs 0 ipReasmFails RO ipReasmFails 0 ipFragOKs RO ipFragOKs 0 ipFragFails RO ipFragFails 0 ipFragCreates RO ipFragCreates 0 3 2 ipAddrTable MIB object Access Identifier Remar ks ipAdEntAddr RO ipAdEntAddr ip_address ipAdEntIfIndex RO ipAdEntIfIndex ip_address ipAdEntNetMask RO ipAdEntNetMask ip_address ipAdEntBcas...

Страница 220: ... RO ipv6InterfaceReachableTime ipv6IfIndex ipv6InterfaceRetransmitTi me RO ipv6InterfaceRetransmitTime ipv6IfIndex ipv6InterfaceForwarding R W ipv6InterfaceForwarding ipv6IfIndex 3 8 ipSystemStatsTable MIB object Access Identifier Remar ks ipSystemStatsInReceives RO ipSystemStatsInReceives ipSysVersion ipSystemStatsHCInReceiv es RO ipSystemStatsHCInReceives ipSysVersion ipSystemStatsInOctets RO ip...

Страница 221: ...agCre ates RO ipSystemStatsOutFragCreates ipSysVersion ipSystemStatsOutTransmi ts RO ipSystemStatsOutTransmits ipSysVersion ipSystemStatsHCOutTran smits RO ipSystemStatsHCOutTransmits ipSysVersion ipSystemStatsOutOctets RO ipSystemStatsOutOctets ipSysVersion ipSystemStatsHCOutOcte ts RO ipSystemStatsHCOutOctets ipSysVersion ipSystemStatsInMcastPkts RO ipSystemStatsInMcastPkts ipSysVersion ipSystem...

Страница 222: ...OKs ipVersion IfIndex ipIfStatsReasmFails RO ipIfStatsReasmFails ipVersion IfIndex ipIfStatsInDiscards RO ipIfStatsInDiscards ipVersion IfIndex ipIfStatsInDelivers RO ipIfStatsInDelivers ipVersion IfIndex ipIfStatsHCInDelivers RO ipIfStatsHCInDelivers ipVersion IfIndex ipIfStatsOutRequests RO ipIfStatsOutRequests ipVersion IfIndex ipIfStatsHCOutRequests RO ipIfStatsHCOutRequests ipVersion IfIndex ...

Страница 223: ...r ks dot1dBaseBridgeAddress RO dot1dBaseBridgeAddress 0 dot1dBaseBridgeAddress RO dot1dBaseBridgeAddress 0 dot1dBaseNumPorts RO dot1dBaseNumPorts 0 dot1dBaseType RO dot1dBaseType 0 dot1dBasePort RO dot1dBasePort port_num dot1dBasePortIfIndex RO dot1dBasePortIfIndex port_num dot1dBasePortCircuit RO dot1dBasePortCircuit port_num dot1dBasePortDelayExce ededDiscards RO dot1dBasePortDelayExceededDiscar...

Страница 224: ...t1xAuthQuietPeriod R W dot1xAuthQuietPeriod port_num dot1xAuthTxPeriod R W dot1xAuthTxPeriod port_num dot1xAuthSuppTimeout R W dot1xAuthSuppTimeout port_num dot1xAuthServerTimeout R W dot1xAuthServerTimeout port_num dot1xAuthMaxReq R W dot1xAuthMaxReq port_num dot1xAuthReAuthPeriod R W dot1xAuthReAuthPeriod port_num dot1xAuthReAuthEnable d R W dot1xAuthReAuthEnabled port_num dot1xAuthKeyTxEnabled ...

Страница 225: ...nticating RO dot1xAuthAuthReauthsWhileAuthenticating port_num dot1xAuthAuthEapStarts While Authenticating RO dot1xAuthAuthEapStartsWhileAuthenticating port_num dot1xAuthAuthEapLogof fWhile Authenticating RO dot1xAuthAuthEapLogoffWhileAuthenticating port_num dot1xAuthAuthReauths While Authenticated RO dot1xAuthAuthReauthsWhileAuthenticated port_num dot1xAuthAuthEapStarts While Authenticated RO dot1...

Страница 226: ...ex etherStatsOctets RO etherStatsOctets etherIndex etherStatsPkts RO etherStatsPkts etherIndex etherStatsBroadcastPkts RO etherStatsBroadcastPkts etherIndex etherStatsMulticastPkts RO etherStatsMulticastPkts etherIndex etherStatsCRCAlignErrors RO etherStatsCRCAlignErrors etherIndex etherStatsUndersizePkts RO etherStatsUndersizePkts etherIndex etherStatsOversizePkts RO etherStatsOversizePkts etherI...

Страница 227: ...SecurityM odels RO snmpUnknownSecurityModels 0 snmpInvalidMsgs RO snmpInvalidMsgs 0 snmpUnknownPDUHandl ers RO snmpUnknownPDUHandlers 0 9 SNMP notification MIB RFC2573n 9 1 MIB object Access Identifier Remarks snmpNotifyTag R C snmpNotifyTag notify snmpNotifyType R C snmpNotifyType notify snmpNotifyStorageType R C snmpNotifyStorageType notify snmpNotifyRowStatus R C snmpNotifyRowStatus notify 10 S...

Страница 228: ...nsupportedSec Levels RO usmStatsUnsupportedSecLevels 0 usmStatsNotInTimeWind ows RO usmStatsNotInTimeWindows 0 usmStatsUnknownUserN ames RO usmStatsUnknownUserNames 0 usmStatsUnknownEngine IDs RO usmStatsUnknownEngineIDs 0 usmStatsWrongDigests RO usmStatsWrongDigests 0 usmStatsDecryptionErrors RO smStatsDecryptionErrors 0 11 2 usmUser MIB object Access Identifier Remar ks usmUserSpinLock R W usmUs...

Страница 229: ...Lock R W vacmViewSpinLock 0 vacmViewTreeFamilyMas k R C vacmViewTreeFamilyMask snmp_view_name vacmViewTreeFamilyType R C vacmViewTreeFamilyType snmp_view_name vacmViewTreeFamilyStor ageType R C vacmViewTreeFamilyStorageType snmp_view_name vacmViewTreeFamilyStat us R C vacmViewTreeFamilyStatus snmp_view_name 13 SNMP community RFC2576 13 1 MIB object Access Identifier Remar ks snmpCommunityName R C ...

Страница 230: ...cription Access Identifier Remar ks Cold Start Link up Down Login Failure Authentication Failure mnoBusAccessErrorNotifi cation ObjectID 1 3 6 1 4 1 396 5 5 1 6 mnoLoopDetection ObjectID 1 3 6 1 4 1 396 5 5 2 1 mnoLoopRecovery ObjectID 1 3 6 1 4 1 396 5 5 2 2 mnoDdmAlarmTrap ObjectID 1 3 6 1 4 1 396 5 5 1 4 0 1 mnoDdmWarningTrap ObjectID 1 3 6 1 4 1 396 5 5 1 4 0 2 ...

Страница 231: ...OOP HISTORY LED blinks in orange This is to notify that there is a port in which a loop is occurring or has been removed within 3 days 2 Communications are slow Communications with all ports are impossible or slow Are the communication speed and mode settings correct If the communication mode signal cannot be properly obtained apply half duplex mode Switch the communication mode of the connection ...

Страница 232: ... to the shop where you purchased this Switching Hub Product name Model No Product serial No 11 alphanumeric characters labeled on the product Firmware version The number after Ver labeled on the unit package Problem status Please give as concrete information as possible Within the warranty period Repair service will be provided in accordance with the conditions stipulated in the warranty card Plea...

Страница 233: ...ric characters labeled on the product Shop Sales company Tel Customer service contact Tel You can check the version on the screen described in section 4 5 of this document Panasonic Eco Solutions Networks Co Ltd 2016 Panasonic Eco Solutions Networks Co Ltd 2 12 7 Higashi Shimbashi Minato ku Tokyo Japan 105 0021 URL http panasonic co jp es pesnw english P0316 0 ...

Отзывы: