184
4.7.10.a. Set Leave Mode Menu
On the IGMP Snooping Configuration Menu, pressing "L" opens the Set
Leave Mode Menu as shown in Fig. 4-7-54. On this screen, you can set the
operation after receiving a Leave packet.
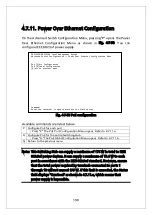
Fig. 4-7-54 Set Leave Mode Menu
Screen Description
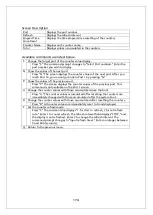
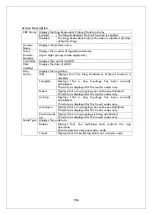
Leave Delay Time
Displays the waiting time after receiving a Leave packet.
Port
Displays the port number.
Mode
Displays the operation after receiving a Leave packet.
Available commands are listed below.
N Show the next page.
Press "N." The screen displays the next page.
P Show the previous page.
Press "P." The screen displays the previous page.
S Set the operation after receiving a Leave packet.
Press "S." The command prompt changes to "Select port number to be changed>."
Enter the port number you wish to configure. Then, the command prompt
changes to "Set leave mode (N/I)>." Press "I" to send a Leave packet to the router
port immediately after receiving it. Press "N" to wait for the specified Leave Delay
Time before sending it to the router port.
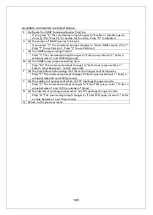
T Set the waiting time after receiving a Leave packet.
Press "T." The command prompt changes to "Set leave delay time>." Set the time
to wait after receiving a Leave packet in seconds between 1 and 10. (Factory
default setting is 5 seconds.)
PN23129K/PN23129A Local Management System
IGMP Snooping Configuration -> Set Leave Mode Menu
Leave Delay Time : 5 sec
Port Mode
------ ------------
1 Normal
2 Normal
3 Normal
4 Normal
5 Normal
6 Normal
7 Normal
8 Normal
9 Normal
10 Normal
-------------------------------- <COMMAND> -----------------------------------
[N]ext Page [P]revious Page [Q]uit to previous menu
[S]et Leave Mode Set Leave Delay [T]ime
Command>
Enter the character in square brackets to select option
Содержание Switch-M12PWR
Страница 6: ...6 malfunction When stacking Switching Hubs leave a minimum of 20 mm space between them is required ...
Страница 17: ...17 Fig 2 2 Mounting to Wall ...
Страница 20: ...20 function does not work Therefore use a cross cable to connect them ...
Страница 28: ...28 command If you enter a command or setting not available an error message is shown in the explanation field ...
Страница 30: ...30 ...
Страница 36: ...36 ...
Страница 49: ...49 ...
Страница 69: ...69 ...
Страница 78: ...78 Quit to previous menu Quits the Advanced Switch Configuration Menu and returns to the Main menu ...
Страница 81: ...81 setting and the management VLAN status of VLAN ID 1 is UP ...
Страница 96: ...96 Press S Q Return to the previous menu ...
Страница 98: ...98 ...
Страница 122: ...122 Q Return to the previous menu ...
Страница 125: ...125 ...
Страница 130: ...130 ICMP Type Displays the ICMP type ...
Страница 136: ...136 802 1p Priority Displays priority of IEEE802 1p TCP SYN Flag Displays the TCP SYN flag ICMP Type Displays ICMP type ...
Страница 156: ...156 Threshold Displays the threshold of the number of packets per second ...
Страница 173: ...173 Fig 4 7 49 Display of values accumulated after resetting the counters ...
Страница 185: ...185 Q Return to the previous menu ...
Страница 211: ...211 Q Return to the previous menu ...
Страница 232: ...232 IEEE8021 PAE MIB IEEE802 1X IEEE8023 LAG MIB IEEE 802 3ad ...
Страница 237: ...237 IEEE 802 3af standard ...
Страница 240: ...240 P0813 1084 ...


