172
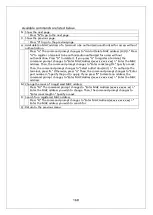
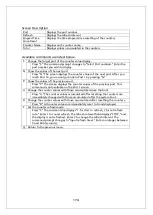
Available commands are listed below.
S Change the target port of the counter value display.
Press "S." The command prompt changes to "Select Port number>." Enter the
port number you wish to display.
N Show the values of the next port.
Press "N." The screen displays the counter values of the next port. After you
reach Port 14, you cannot go back to Port 1 by pressing "N."
P Show the values of the previous port.
Press "P." The screen displays the counter values of the previous port. This
command is not available on the Port 1 screen.
R Change the counter values with those accumulated after resetting the counters.
Press "R." The counter values are immediately changed with those
accumulated after resetting the counters. The time display field on the upper
right corner of the screen changes to Elapsed Time Since System Reset.
F Set the counter refresh mode.
Press "F." The comment line displays "1 for start to refresh, 2 for set refresh
rate." Enter 1 to cancel refresh. The refresh interval field displays "STOP," and
the display is not refreshed. Enter 2 to change the refresh interval. The
command prompt changes to "Input refresh time>." Enter an integer between
5 and 600 (seconds).
Q Return to the previous menu.
On this screen, you can display two types of counter values: Values
accumulated after booting this Switching Hub or rebooting it by
power-off/resetting (Fig. 4-7-48), and values accumulated after resetting
the counters using a command (Fig. 4-7-49). The values accumulated after
booting the Switching Hub are retained even after you reset the counter
values using a command.
PN23129K/PN23129A Local Management System
802.1x Access Control Configuration -> Statistics Menu
Port: 1 Refresh: 300 Sec. Elapsed Time Since System Reset: 000:00:00:00
<Counter Name> <Total>
TxReqId 0
TxReq 0
TxTotal 0
RxStart 0
RxLogoff 0
RxRespId 0
RxResp 0
RxInvalid 0
RxLenError 0
RxTotal 0
RxVersion 0
LastRxSrcMac 00:00:00:00:00:00
-------------------------------- <COMMAND> -----------------------------------
[N]ext [P]revious [S]elect Port Re[f]resh Mode Since [R]eset [Q]uit
Command>
Enter the character in square brackets to select option
Содержание Switch-M12PWR
Страница 6: ...6 malfunction When stacking Switching Hubs leave a minimum of 20 mm space between them is required ...
Страница 17: ...17 Fig 2 2 Mounting to Wall ...
Страница 20: ...20 function does not work Therefore use a cross cable to connect them ...
Страница 28: ...28 command If you enter a command or setting not available an error message is shown in the explanation field ...
Страница 30: ...30 ...
Страница 36: ...36 ...
Страница 49: ...49 ...
Страница 69: ...69 ...
Страница 78: ...78 Quit to previous menu Quits the Advanced Switch Configuration Menu and returns to the Main menu ...
Страница 81: ...81 setting and the management VLAN status of VLAN ID 1 is UP ...
Страница 96: ...96 Press S Q Return to the previous menu ...
Страница 98: ...98 ...
Страница 122: ...122 Q Return to the previous menu ...
Страница 125: ...125 ...
Страница 130: ...130 ICMP Type Displays the ICMP type ...
Страница 136: ...136 802 1p Priority Displays priority of IEEE802 1p TCP SYN Flag Displays the TCP SYN flag ICMP Type Displays ICMP type ...
Страница 156: ...156 Threshold Displays the threshold of the number of packets per second ...
Страница 173: ...173 Fig 4 7 49 Display of values accumulated after resetting the counters ...
Страница 185: ...185 Q Return to the previous menu ...
Страница 211: ...211 Q Return to the previous menu ...
Страница 232: ...232 IEEE8021 PAE MIB IEEE802 1X IEEE8023 LAG MIB IEEE 802 3ad ...
Страница 237: ...237 IEEE 802 3af standard ...
Страница 240: ...240 P0813 1084 ...


