


131
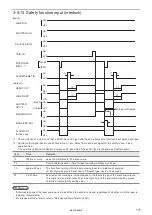
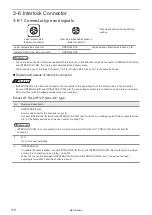
4.
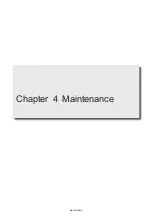
Install a new O-ring (L) in the inside groove of the protection glass.
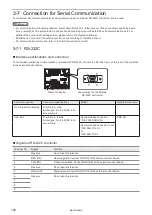
O-ring
LP-ACV60
LP-ACV50 / LP-ACV52 / LP-ACV55
Groove
O-ring
Groove
ワㄐㄕㄊㄆ
• The O-ring cannot be reused. Be sure to use new one. Replacement O-rings are attached with the laser marker and with
the replacement protection glass.
• Be sure to fit an O-ring in the inside groove of the protection glass without twisting it.
• To keep the sealing performance of the O-ring, store it following the below notes.
• Do not expose the O-rings to the direct sunlight and high humidity.
• Store the O-rings in a dustless area and pay attention that no organic solvents is applied to them.
• To prevent the deforming, do not hang the O-rings during storage.
5.
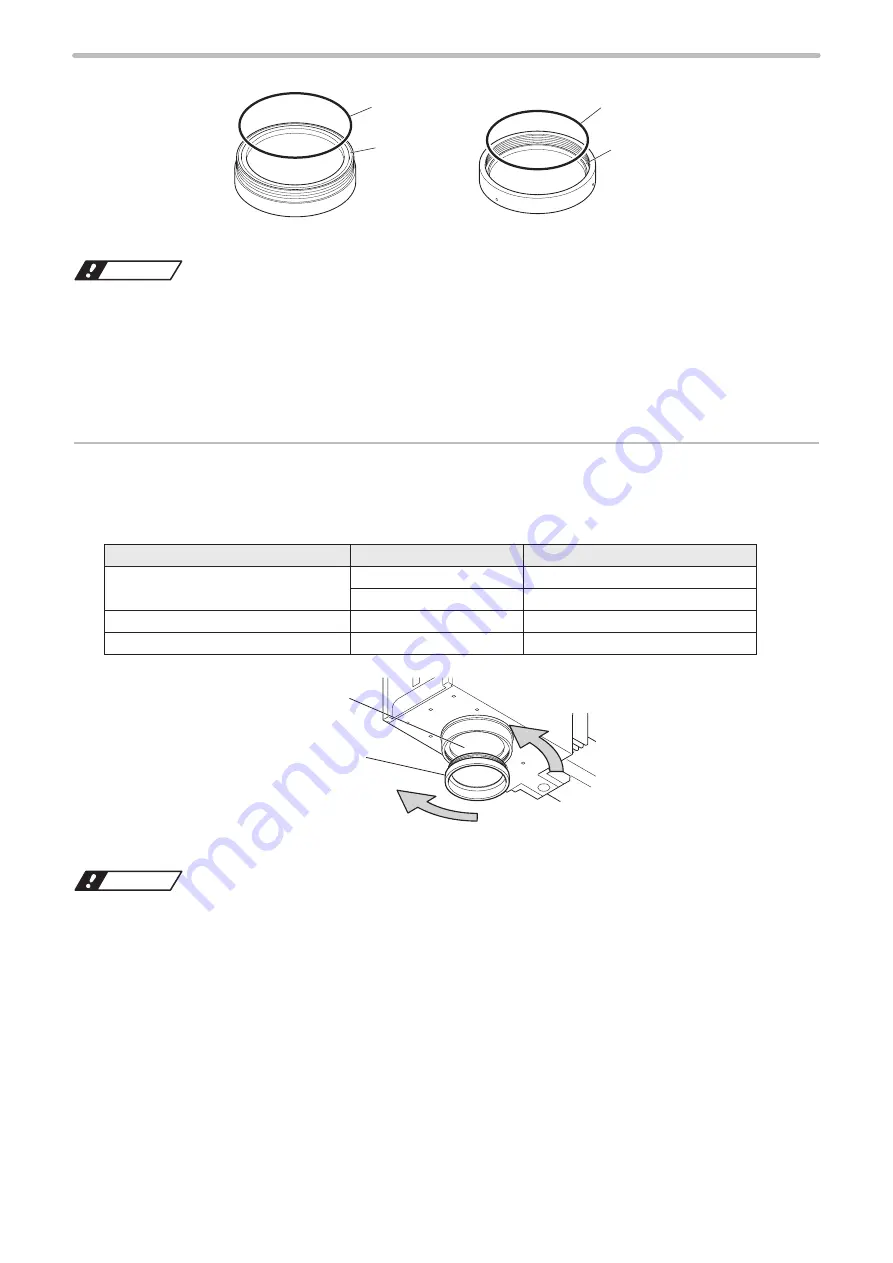
Install the protection glass to the laser emission port.
Tighten the protection glass until a resistance is felt. From that point, tighten the following length (circumference).
Be sure to tighten the glass properly and without looseness. If the cover is not tightened enough, the product
oilproofness may not be ensured.
Laser marker model
Protection glass model
Tightening length (Circumference)
LP-S200/LP-S500/LP-S500W
LP-ACV50
more than 75mm
LP-ACV60
more than 40mm
LP-S202/LP-S502
LP-ACV52
more than 65mm
LP-S205/LP-S505/LP-S505W
LP-ACV55
more than 70mm
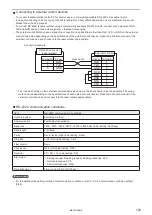
Protection glass of the laser
emission port
Loosen: Turn in a counter-
clockwise direction.
Tighten: Turn in a clockwise direction.
Lens
(Laser emission port)
ワㄐㄕㄊㄆ
• Do not touch the lens and the glass surface of the laser emission port and the protection glass at installing or removing.
• Tighten the protection glass slowly with the equal tightness.
• If the cover is difficult to be tightened, use a commercially available belt wrench. In that case, avoid scratching the glass
surface of the laser emission port.
• Do not operate the laser marker without the protection glass on the laser emission port.
ME-LPS-SSM-8
Содержание LP-S Series
Страница 15: ...15 MEMO ME LPS SSM 8 ...
Страница 26: ...26 Chapter 1 Specification ME LPS SSM 8 ...
Страница 41: ...41 Chapter 2 Preparation ME LPS SSM 8 ...
Страница 78: ...Chapter 3 Connection for External Control ME LPS SSM 8 ...
Страница 126: ...Chapter 4 Maintenance ME LPS SSM 8 ...
Страница 148: ...Troubleshooting ME LPS SSM 8 ...
Страница 169: ...Index ME LPS SSM 8 ...
Страница 172: ...172 MEMO No 9000 0066 16V ME LPS SSM 8 ...
Страница 173: ...No 9000 0066 16V ...


