12.
Connecting to other equipment
332
∫
Transferring pictures to a PC
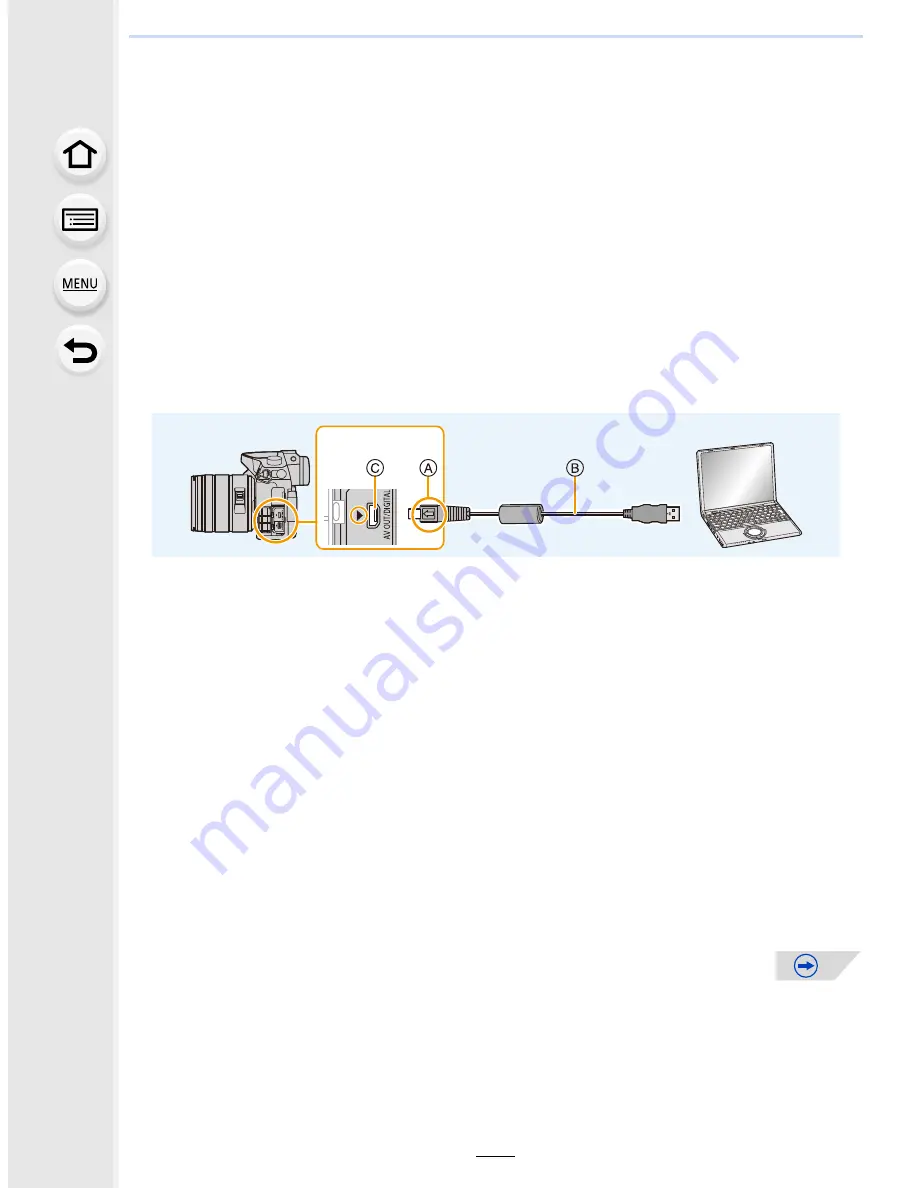
1
Connect the computer and camera with the USB connection cable
(supplied).
•
Please turn this unit on and your PC before connecting.
•
Turn the monitor toward you.
•
Check the direction of the terminals and plug in/out straight holding onto the plug.
(It may result in malfunction by the deforming of the terminal if it is plugged in obliquely
or in wrong direction.)
Do not connect devices to incorrect terminals. Doing so may cause malfunction.
•
Do not use any other USB connection cables except the supplied one or a genuine
Panasonic USB connection cable (DMW-USBC1: optional).
2
Press
3
/
4
to select [PC], and then press [MENU/SET].
•
If [USB Mode]
(P64)
is set to [PC] in the [Setup] menu in advance, the camera will be
automatically connected to the PC without displaying the [USB Mode] selection screen.
•
When the camera is connected to a PC while [USB Mode] is set to [PictBridge(PTP)], a
message may appear on the PC screen. In that case, close the message, and remove
the USB connection cable safely, and then set the
[USB Mode]
to [PC].
3
Copy the images to a PC using “PHOTOfunSTUDIO”.
•
Do not delete or move copied files or folders in Windows Explorer.
When viewing in “PHOTOfunSTUDIO”, you will not be able to play back or edit.
Preparations:
Install “PHOTOfunSTUDIO” to the PC.
A
Align the marks, and insert.
B
USB connection cable (supplied)
C
[AV OUT/DIGITAL] terminal
•
The color of the terminal is gold.


