41
•
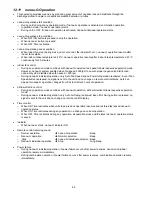
nanoe-G
check
mode
o
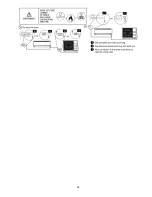
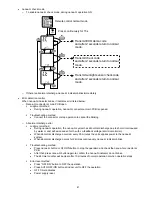
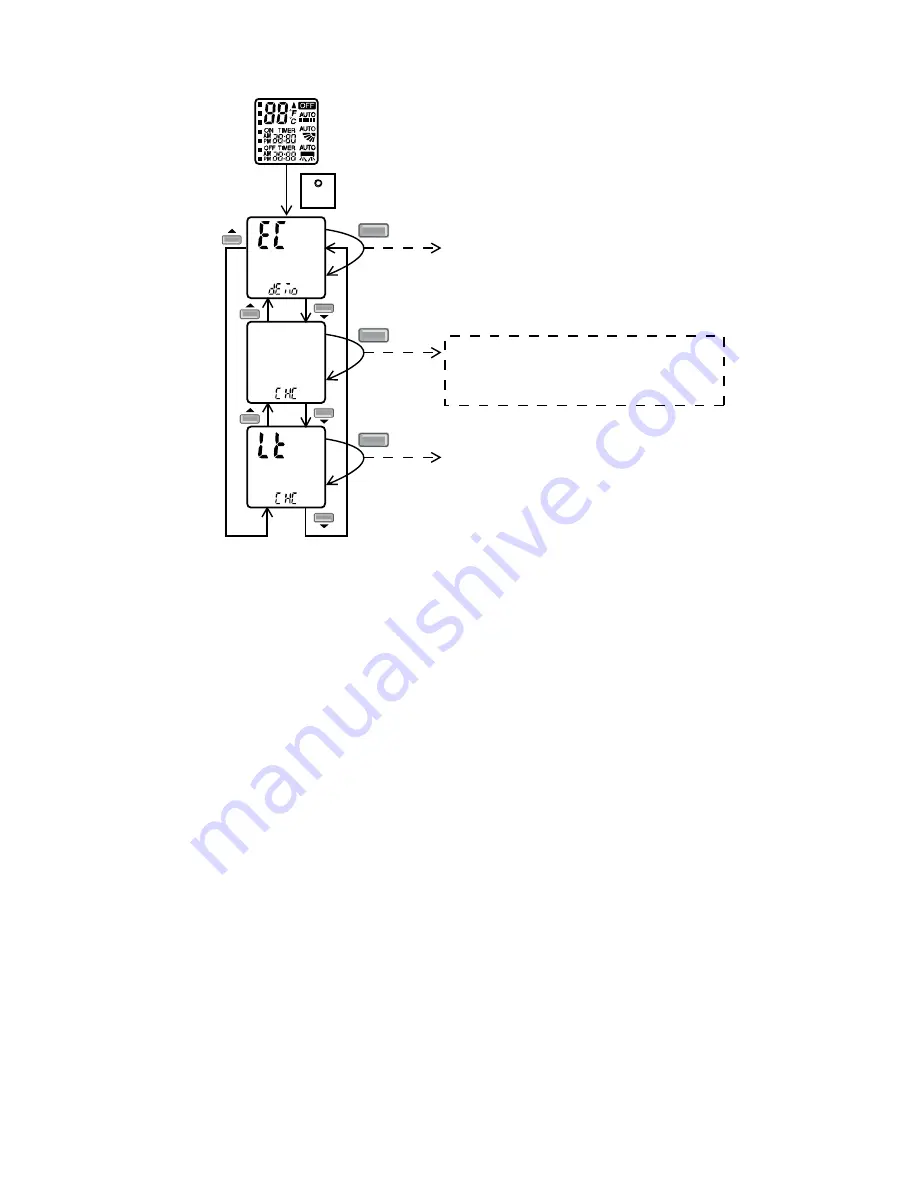
To enable nanoe-G check mode, during nanoe-G operation ON:
SET
SET
Transmit ECO demo code
and after 2 seconds return to normal
mode.
Press continuously for 15s
SET
Transmit check code
and after 2 seconds return to normal
mode.
SET
Transmit sunlight sensor check code
and after 2 seconds return to normal
mode.
Remote control normal mode
o
If there is abnormal discharge, nanoe-G indicator blinks immediately.
•
Error detection control
When nanoe-G indicator blinks, it indicates error listed below:
o
Nanoe-G connector at main PCB open
Judgment
method
•
During nanoe-G operation, nanoe-G connector at main PCB is opened.
Troubleshooting
method
•
Connect the connector or stop operation to cancel the blinking.
o
Abnormal discharge error
Judgment
method
•
During nanoe-G operation, the nanoe-G system has abnormal discharge due to short-circuit caused
by water or dust adhesion and so forth, with Lo-feedback voltage (at microcontroller).
•
When abnormal discharge occurred, every 30 minutes the unit supplies power to the nanoe-G
system.
•
When abnormal discharge occurs for 24 times continuously, nanoe-G indicator blinks.
Troubleshooting
method
•
Press nanoe-G button or OFF/ON button to stop the operation and check the nanoe-G connector at
PCB.
•
After that, press nanoe-G button again to confirm the nanoe-G indicator do not blinks.
•
The 24 timer counter will be clear after 10 minutes of normal operation or when operation stops.
Error reset method
•
Press “OFF/ON” button to OFF the operation.
•
Press AUTO OFF/ON button at indoor unit to OFF the operation.
•
OFF Timer activates.
•
Power supply reset.
Содержание CS-AE9NKE
Страница 12: ...12 4 Location of Controls and Components 4 1 Indoor Unit 4 2 Outdoor Unit 4 3 Remote Control ...
Страница 13: ...13 5 Dimensions 5 1 Indoor Unit ...
Страница 14: ...14 5 2 Outdoor Unit ...
Страница 15: ...15 6 Refrigeration Cycle Diagram ...
Страница 16: ...16 7 Block Diagram ...
Страница 17: ...17 8 Wiring Connection Diagram 8 1 Indoor Unit ...
Страница 18: ...18 8 2 Outdoor Unit Resistance of Compressor Windings CONNECTION 5RD132XBE21 U V 1 897Ω U W 1 907Ω V W 1 882Ω ...
Страница 19: ...19 9 Electronic Circuit Diagram 9 1 Indoor Unit ...
Страница 20: ...20 9 2 Outdoor Unit ...
Страница 22: ...22 10 1 3 Receiver Printed Circuit Board 10 1 4 High Voltage Power Supply Printed Circuit Board ...
Страница 23: ...23 10 2 Outdoor Unit 10 2 1 Main Printed Circuit Board ...
Страница 29: ...29 ...
Страница 91: ...91 Figure 3 Figure 4 16 1 1 3 To remove discharge grille Figure 5 ...
Страница 92: ...92 16 1 1 4 To remove control board Figure 6 16 1 1 5 To remove cross flow fan and indoor fan motor Figure 7 ...
Страница 93: ...93 Figure 8 Figure 9 ...
Страница 94: ...94 Figure 10 ...

