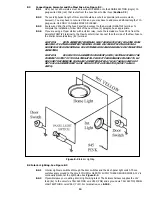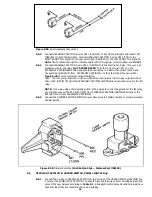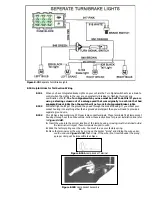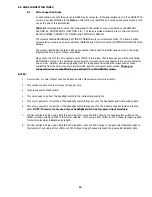
In addition to your regular tools, you will need, at least, the following tools:
Crimping Tool
Note: Use a quality tool to avoid over-crimping.
Wire Stripper
Test Light or Volt Meter
Electric Drill
1-1/4" Hole Saw
Small (10 amp or less) Battery Charger
5.0
PRE-INSTALLATION AND GENERAL HARNESS ROUTING GUIDELINES
The installation of your wire harness mainly consists in two parts:
The physical routing and securing of the wire harness, wires, and groups.
The proper connection of the individual circuits.
These two major tasks are not separate steps, but are integrated together. That is, you will route some wires and
make some connections, route some more wire and make some more connections.
We cannot tell you how to physically route the harness in your automobile. That depends a great deal upon the
particular make/model of automobile and to what extent you want to secure and conceal the harness. We do offer
some general guidelines and routing practices starting in Section 5.2, GENERAL installation instructions in Section
6.0, and precise instructions concerning the electrical connections you will have to make in beginning in Section
7.0. To help you begin thinking through the installation of your wire harness, read the following sections:
5.1
Familiarize yourself with the harness by locating each of the harness sections in the following list.
(Whenever a particular harness section is referred to in these instructions it is shown "all caps": ENGINE
SECTION A)
ACCESSORY SECTION SWITCHES
TURN SIGNAL SECTION
ACCESSORY SECTION B+
HEADLIGHT SECTION A
DIMMER SWITCH SECTION
HEADLIGHT SECTION B
ENGINE SECTION
IGNITION SWITCH SECTION
ENGINE SECTION A (Single, 10 ga. red wire)
INSTRUMENT PANEL SECTION
ENGINE SECTION A
RADIO SECTION
TAIL SECTION
HAZARD SWITCH SECTION
PANEL LIGHT SECTION
Note: For complete information concerning the individual circuits and wires that make up the harness
SECTIONS, see Section 9.0.
5.2
Decide where the fuse block will be mounted. The Painless Wire Harness is designed for the fuse block to be
mounted on the driver's side, under the dash.
5.3
Decide which of the following circuits you will be using in your system and where the harness groups or
wires will be routed:
ROUTING LOCATION AND PLACEMENT
Emergency Flashers
Horn
Dome Lights
Lights
Air Conditioner
Electric Cooling Fan
Coil
Turn Signals
Radio Ignition Switched Power
Radio Constant Power
Gauges
Accessories
6
5.4
Where will the following harness groups be routed?
Содержание 90542
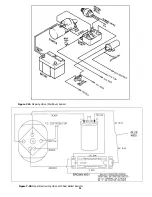
Страница 11: ...Figure 7 2A Mopar Ignition Start Run System Figure 7 2B Mopar Electronic Ignition with Dual Ballast Resistor 11...
Страница 22: ...22...
Страница 23: ...23...


