23
23
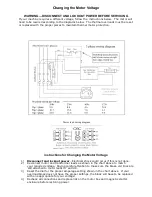
Adjusting Crosscut Travel Parallel to Arm Tracks (continued)
After making the left and right adjustments, tilt the motor to a 45
o
bevel cutting position and make cuts in a
2”
x
4”
piece of
material. If tooth marks appear the motor is too high or low in the rear yoke:
If after making these adjustments the blade continues to heel, particularly if the blade heels on both sides of the material, the
blade may require tensioning. If the blade must be re
-
tensioned contact your local distributor.
Square the Saw Travel with the fence board
Place a square against the fence board and along the path of the blade. Pull the saw carriage as though making a crosscut
and observe the position of the blade in relationship to the square. If the crosscut line is not square adjust as follows:
Caution! Disconnect and lockout power supply before making any adjustments or alignments.
A.
If marks are made on the bottom side of material:
1.
Release the bevel clamp handle.
2.
Loosen the right and bottom lock nuts on the
rear yoke trunion bushing.
3.
Unscrew the left set screw about 1/6th turn and
screw in the same amount the set screw located
on the bottom of the yoke trunion.
4.
Tighten the lock nuts, engage the bevel clamp
handle and recheck.
B.
If marks are made on the upper side of material:
1.
Release the bevel clamp handle.
2.
Loosen the right and left lock nuts on the rear
yoke trunion bushing.
3.
Unscrew the bottom set screw about 1/6th turn
and screw in the left screw the same amount.
4.
Tighten the lock nuts, engage the bevel clamp
handle and recheck.
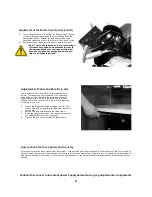
1.
Loosen the arm clamp handle (A).
2.
Loosen set screws (B).
3.
Move saw carriage along square to determine necessary adjustment.
4.
If the blade moves toward the square as it comes forward; disengage the miter latch (C), unscrew the rear adjusting
screw (D) 1/8 of a turn and screw in the front adjusting screw (D) 1/8 turn. If blade moves away from square go to
instruction #6.
5.
Engage miter latch and recheck. If saw travel is now square, tighten set screws and engage arm clamp.
6.
If the blade moves away from the square as it comes forward: disengage miter latch (C), loosen the front adjusting
screw (D) and tighten the rear adjusting screw (D). Engage the miter latch, recheck and repeat as needed.
7.
After saw travel has been properly aligned tighten the set screws (B) to lock adjusting screws in place.
A
D
C
B
Содержание 3531-01
Страница 11: ...11 11...

