16
16
Operating Instructions
Moving the Arm Horizontally and Vertically
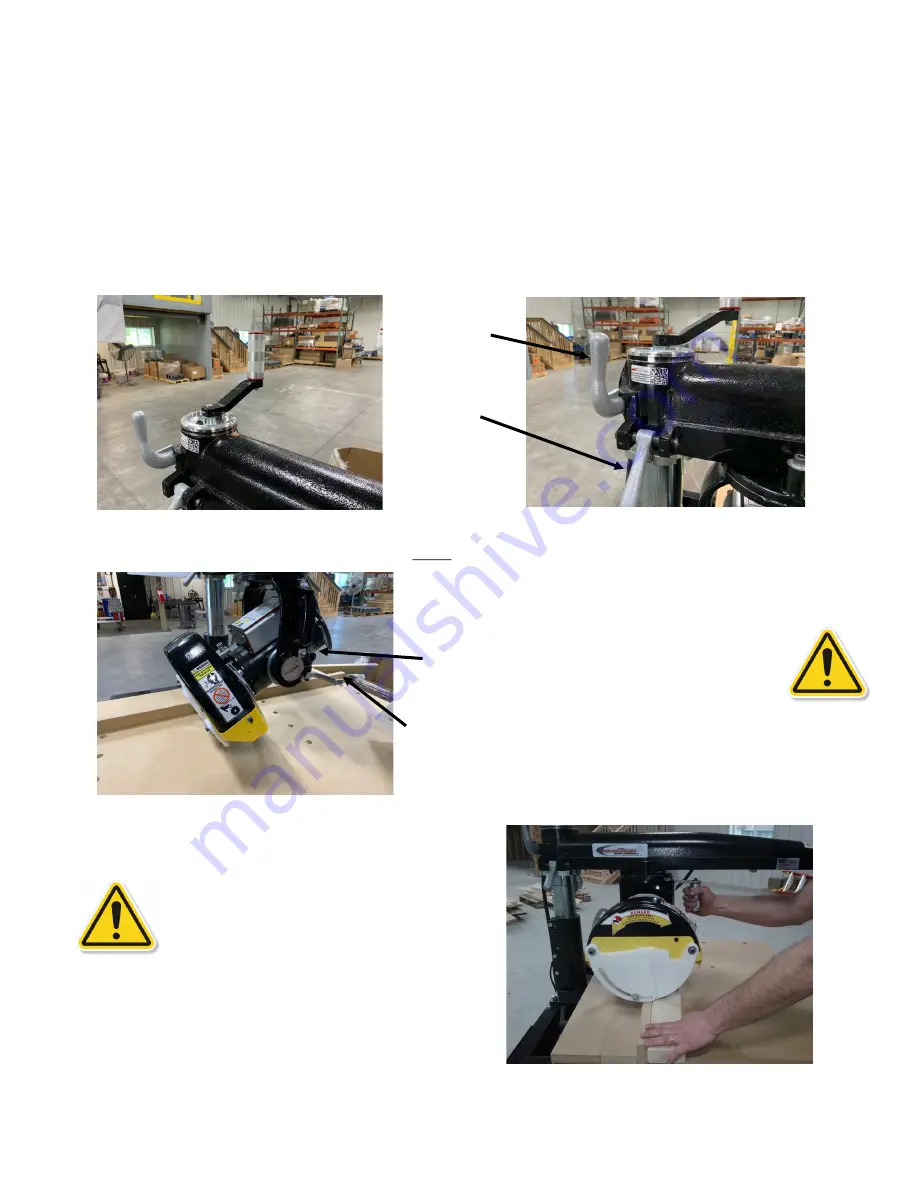
The elevating crank is used to raise or lower the arm to accommodate cutting operations (see below left). Do not adjust the
height of the saw with the base / clamp handle tight (see page 9 for location) or while the motor is running. Change the posi-
tion of the arm for miter cutting is done by pulling the arm clamp handle (A) forward and lifting the miter latch handle (B).
Observing the miter scale, swing the arm either right or left to the desired angle. The arm can quickly be located at the 0
o
and
45
o
marks by using the indexing slots machined into the column ring. When you have located the saw at the required position
engage both the miter latch and the arm clamp.
!!! CAUTION !!!
BOTH UPPER AND LOWER GUARDS MUST REMAIN IN PLACE FOR SAFE CUTTING OPERATION
.
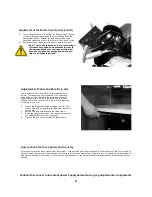
Rotating the Motor to Bevel Cutting
Position
Raise the arm to allow the saw blade sufficient clear-
ance above the table top. Release the bevel clamp
handle (A) and pull the bevel index pin. (B) The motor
can now be moved to a bevel position as indicated on
the bevel scale. Un
-
Lock the motor by releasing the
bevel index pin (possible only at 0
o
, 45
o
and 90
o
) and by
locking the bevel clamp handle.
Cross Cutting
Lock the arm in the 0
o
position. Place the material
securely against the guide strip–
keep hands well away
from the blade. Draw the saw blade across the materi-
al. After the cut has been completed return the blade
behind the guide strip. Observe this order of operation
for all cross cuts. Never push the saw blade into the
material. Pull the blade slowly and firmly across the
material from the rear of the arm using the operating
handle. The saw blade should cut into the table about
1/16”
when cutting through the material. Raise the
anti
-
kickback to just clear the material being cut.
Adjust for varying wood thickness or warped material.
A
B
A
B
Содержание 3531-01
Страница 11: ...11 11...

