


124
Chapter 5 Operation
VIDEO SYSTEM OTV-SI
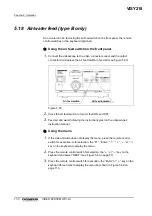
5.
Press the remote control switch for execution, the “Enter”, “
” or “
” key
on the keyboard. The image will be stored in the OEP-3’s or OEP’s memory.
The image will be printed when the OEP-3’s or OEP’s memory page is filled.
Using the remote control switch that is assigned to
“RELES”
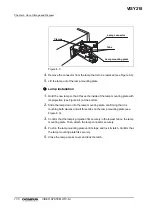
1.
Assign the “RELES” function to one of the remote control switches on the
videoscope or camera head following the instructions given in Section 5.9,
2.
Press the OEP-3’s or OEP’s MENU button and use the “
”, “
”, “
” or
“
” button to select “FUNCTION SETUP”.
3.
Set “RM2 FUNC” to “C&PRINT mode” and “AUTO LIVE” to ON.
4.
Press the remote control switch for FREEZ. The image will be stored in the
OEP-3’s or OEP’s memory. The image will be printed when the OEP-3’s or
OEP’s memory page is filled.
Using the keyboard
1.
Press the OEP-3’s or OEP’s MENU button and use the “
”, “
”, “
” or
“
” button to select “FUNCTION SETUP”.
2.
Set “RM2 FUNC” to “C&PRINT mode” and “AUTO LIVE” to ON.
3.
Press the “F4” key on the keyboard. The image will be stored in the OEP-3’s
or OEP’s memory. The image will be printed when the OEP-3’s or OEP’s
memory page is filled.
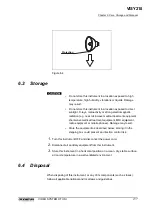
When the menu is not displayed, pressing the remote control
switch for “RELES” or the “F4” key on the keyboard displays
“RELESE” at the bottom left of the video monitor screen.
VISY218
Содержание OTV-SI
Страница 2: ...VISY218...
Страница 6: ...Contents iv VIDEO SYSTEM OTV SI VISY218...
Страница 148: ...142 Chapter 7 Troubleshooting VIDEO SYSTEM OTV SI VISY218...
Страница 156: ...VISY218...
Страница 159: ...INSTRUCTIONS COMPACT TROLLEY TC C2 VISY218...
Страница 171: ...VISY218...
Страница 172: ...VISY218...
Страница 173: ...VISY218...