8 [Administration] Tab Page
172 [Setup] Item List
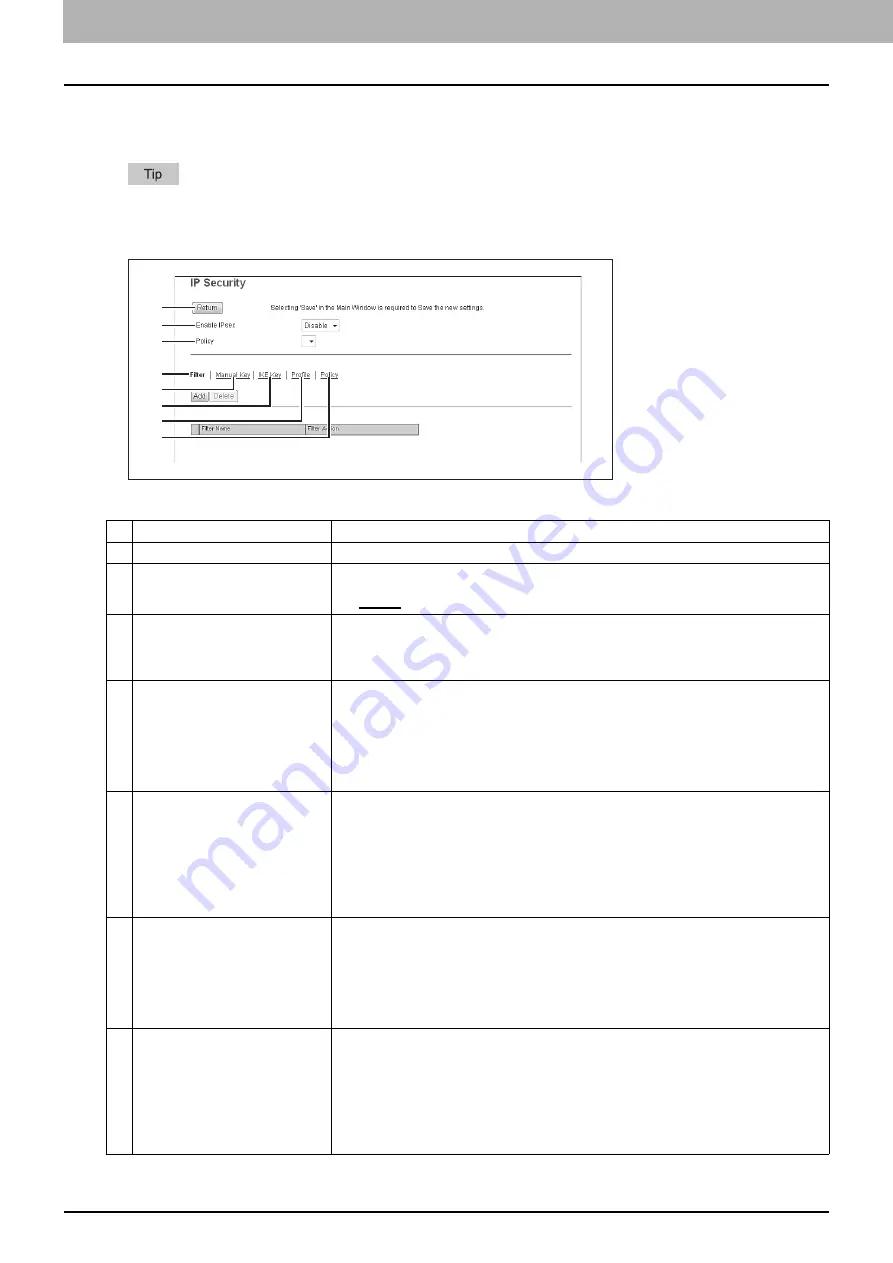
Setting up IP Security
With the IP security function, you can enable data encryption communication using IPsec (IP Security Protocol).
With the [Flush Connections] button, if the keys for IPsec communication are leaked or a security violation occurs, you
can manually delete (flush) the current session with the flush connection function and start a new session. If you want
to delete the information of SAD (Security Association Database) for any reason, you can delete it in the same way.
Item name
Description
1
[Return] button
Closes the [IP Security] screen.
2
Enable IPsec
Specify whether or not to enable IPsec.
y
Enable
— Enables IPsec.
y
Disable
— Disables IPsec.
3
Policy
Select a policy to use in IPsec.
To enable data encryption communication using IPsec, you must first create IPsec policies
according to your system environment.
P.182 “[Add Policy] / [Modify Policy] screen”
4
Filter
Creates a filter for the IPsec environment.
[Add] button
— You can add a filter on the [Add Filter] screen.
P.174 “[Add Filter] / [Modify Filter] screen”
[Delete] button
— Select filters to delete and click the [Delete] button to delete them.
Filter Name
— Click a registered filter name to modify its content.
P.174 “[Add Filter] / [Modify Filter] screen”
Filter Action
— Displays the action of the registered filter.
5
Manual Key
Set the IPsec manual key.
[Add] button
— You can add a manual key on the [Add Manual Key] screen.
P.176 “[Add Manual Key] / [Modify Manual Key] screen”
[Delete] button
— Select manual keys to delete and click the [Delete] button to delete
them.
Manual Key Name
— Click a registered manual key name to modify its content.
P.176 “[Add Manual Key] / [Modify Manual Key] screen”
Encryption Algorithm
— Displays the registered encryption algorithms.
6
IKE Key
Set the IPsec IKE key.
[Add] button
— You can add an IKE key on the [Add IKE] screen.
P.178 “[Add IKE] / [Modify IKE] screen”
[Delete] button
— Select keys to delete and click the [Delete] button to delete them.
Key Name
— Click a registered key name to modify its content.
P.178 “[Add IKE] / [Modify IKE] screen”
IKE Type
— Displays the registered IKE types.
7
Profile
First create a filter and a manual key or IKE key according to your IPsec environment, and
then create profiles by combining them.
[Add] button
— You can add a profile on the [Add Profile] screen.
P.180 “[Add Profile] / [Modify Profile] screen”
[Delete] button
— Select profiles to delete and click the [Delete] button to delete them.
Profile Name
— Click a registered profile name to modify its content.
P.180 “[Add Profile] / [Modify Profile] screen”
Profile Mode
— Displays the registered profile mode.
1
2
3
4
5
6
7
8
Содержание MC780f
Страница 1: ...User s Manual TopAccess Guide ...
Страница 21: ...1 Overview 20 Accessing TopAccess 6 The TopAccess website appears ...
Страница 25: ...1 Overview 24 Access Policy Mode ...
Страница 29: ...2 Device Tab Page 28 Displayed Icons ...
Страница 103: ...5 Registration Tab Page 102 Registration How to Set and How to Operate ...
Страница 345: ...8 Administration Tab Page 344 Registration Administration tab How to Set and How to Operate ...
Страница 368: ...11 APPENDIX This chapter contains the following contents Installing Certificates for a Client PC 368 ...
Страница 375: ...11 APPENDIX 374 Installing Certificates for a Client PC ...
Страница 380: ...January 2013 45511102EE Rev1 ...


