


OBO Bettermann
42 | EN
Installing the isCon® system
5 3
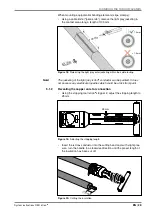
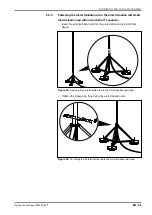
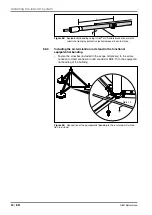
Fastening the air-termination rod in the air-termination
rod stand
5 3 1
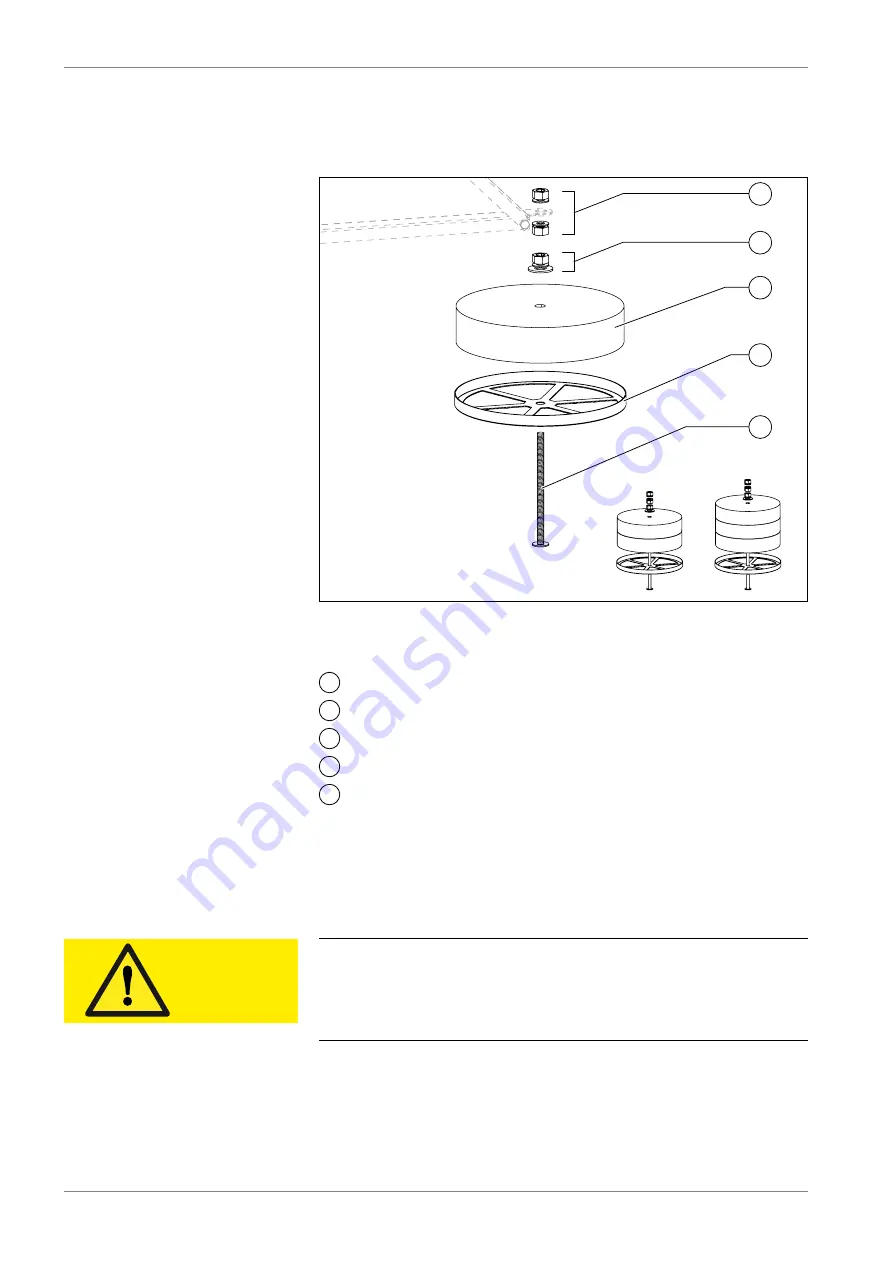
Mounting the concrete plinth
1
2
3
4
5
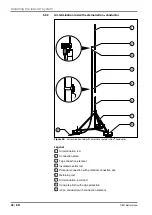
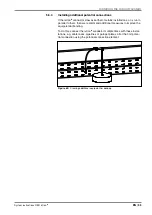
Figure 44:
Concrete plinth with fastenings
Legend:
1
Hexagonal nuts (with washers) for height compensation
2
Lock nut (with washer and plate)
3
Concrete plinth
4
Edge protection
5
Threaded rod
• From below, push the threaded rod through the opening of the edge
protection and the concrete plinth and fix it with the lock nut.
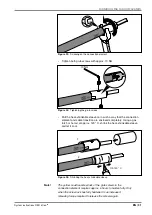
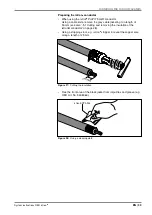
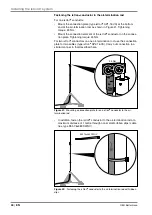
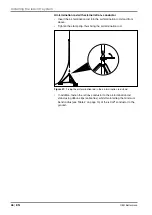
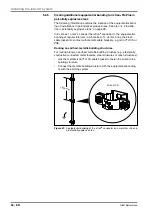
5 3 2
Erecting the air-termination rod stand
See also “„3.3 Insulated air-termination rods“ on page 12
CAUTION
Risk of crushing when erecting the air-termination rod stand!
When erecting the air-termination rod stand, hands and other limbs may
be crushed by moving parts.
When erecting the air-termination rod stand, do not reach between mov-
ing parts!
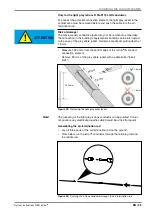
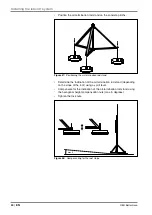
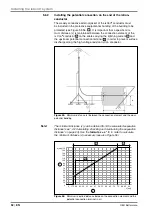
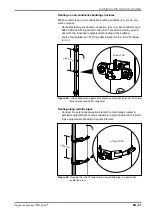
Note!
To determine how many concrete plinths must be used in the isFang air-
termination rod system, we recommend asking a planning office to carry
out the static calculations.
You can find further information on wind speed
zones in the OBO TBS lightning protection guide and national directives.
Содержание isCon BA 45 SW
Страница 1: ...01 2018 EN isCon System instructions Building Connections...
Страница 60: ...OBO Bettermann 60 EN Mounting variants x 1 2 6 5 3 4 Figure 65 isCon conductor connected to metallic parapet...
Страница 66: ...OBO Bettermann 66 EN Own notes...
Страница 67: ...System instructions OBO isCon EN 67 Own notes...


