


S
ECURING
Y
OUR
P
ATCH
M
ANAGEMENT
S
ERVER
- 336 -
9.
Click
Properties
.
S
TEP
R
ESULT
:
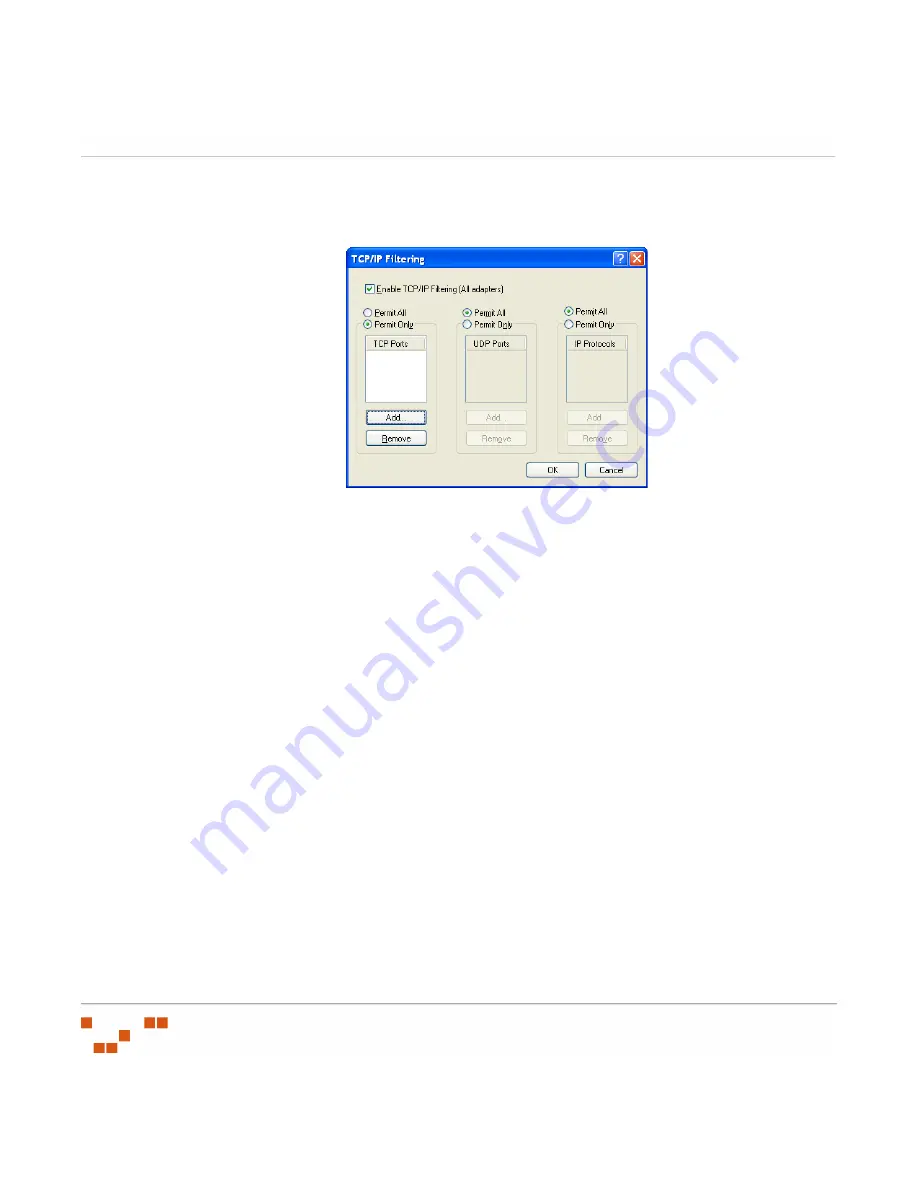
The
TCP/IP Filtering
window opens.
Figure B-4:
TCP/IP Filtering
10.
Enable the
Enable TCP/IP Filtering (All Adapters)
option.
11.
Select the
Permit Only TCP Ports
option.
12.
Add TCP ports
443
and
80
to the listing of permitted ports.
a.
Click
Add...
S
TEP
R
ESULT
:
The
Add Filter
window opens.
b.
Type
443
in the
TCP Port
field.
c.
Click
OK
.
S
TEP
R
ESULT
:
The
Add Filter
window closes.
d.
Repeat steps a, b, and c to add port
80
.
NOTE
:
No other ports are required, although you may want to enable additional
ports to allow DNS, TS, or VNC.
13.
Select the
Permit Only UDP Ports
option, leaving the UPP Ports window blank since no
UDP ports are required.
14.
Close the open windows.
A
FTER
C
OMPLETING
T
HIS
T
ASK
:
With all ports locked (except for ports 80 and 443), it will be necessary to add entries to your
Proxy or HOSTS file for the necessary Novell websites and the Global Subscription Server.
Содержание ZENWORKS PATCH MANAGEMENT 6.4 SP2 - SERVER
Страница 1: ...User Guide ZENworks Patch Management 6 4 SP2 ...
Страница 44: ...USING ZENWORKS PATCH MANAGEMENT 28 ...
Страница 138: ...WORKING WITH DEPLOYMENTS 122 ...
Страница 212: ...USING GROUPS 196 ...
Страница 236: ...REPORTING 220 ...
Страница 308: ...CONFIGURING DEFAULT BEHAVIOR 292 ...
Страница 332: ...USING THE AGENT 316 The Agent Control Panel opens Figure 10 19 Agent Control Panel ...
Страница 354: ...SECURING YOUR PATCH MANAGEMENT SERVER 338 ...


