7.1
Scanned Photo Jammed in the Scanner
Use one of the procedures described below to remove the jammed photo according to the
location of the jam.
•
Take particular care not to use excessive force to remove a jammed photo as this could
damage the photo.
•
First remove any photos that remain in the auto-feed hopper and eject tray and then switch
off your PC and the scanner before using the procedures given below.
•
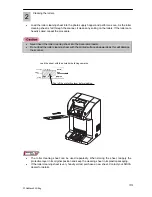
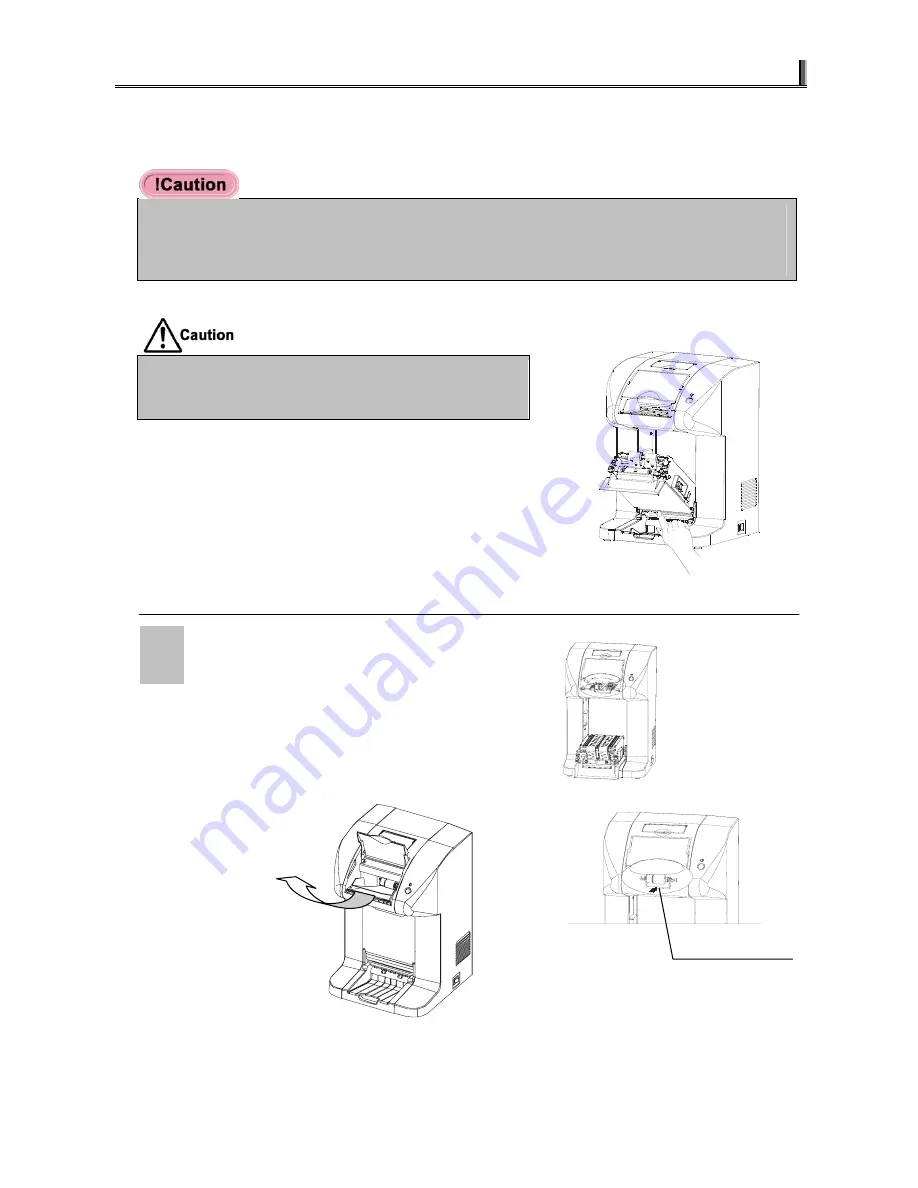
When opening the front cover, take care not to trap
your fingers between the eject tray and the front
cover.
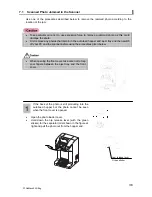
If the back of the photo is still protruding into the
auto-feed hopper but the photo cannot be seen
when the front cover is opened.
1
Jam release lever
•
Open the photo loader cover.
•
Hold down the nip release lever (with the green
sticker) for the separator roller shown in the figure at
right and pull the photo out from the hopper end.
Green sticker
36
P1SeManu220-Eng

