


028
www.ruggedaq.com
DATALOGGER
NI400
NI400
029
www.ruggedaq.com
DATALOGGER
NI400
NI400
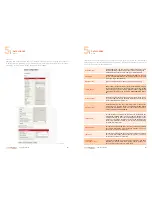
If you select this function without the presence of the internal modem, an
error (E7
)
appears on the display:
NOTE
: NI400 has to be in “STOP” or “CONFIG” mode before using this function.
Otherwise NI400 shows error E3.
RTC Date Time Viewer (b)
Pressing
Enter key
in in RTC Date Time Viewer, the NI400 shows in this order:
YY-MM-DD hh.mm.ss
The most significative second digit is showed only once, with just less significative digit
showed.
The “dot” on the display means that the seconds showed are first 10 of the new minute
(01, 02, 03 and so on).
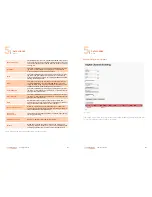
FTP Test (C)
If FTP Parameters are set, the NI400 will test connection and file sending.
The csv file is named ftpTestFile_YY_MM_DD__hh_mm_ss.csv
It contains Mobile operator name and signal level.
Email Test (d)
If SMTP parameters are set, the NI400 will test connection and mail transmission.
Measure and send Test (e)
If any between FTP and SMTP action are set, the NI400 will perform an acquisition and will
send recorded data.
E3
E7
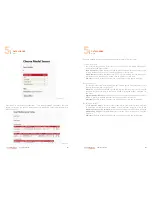
HOW TO CONNECT THE NI400 TO PC
The NI400 can be found in:
RUN mode
: stand-by (NI400 timed), waiting for an acquisition.
CONFIG mode
STOP mode
ERROR state
Connect the PC trough the USB cable to the miniUSB port of the NI400. From this moment
and as long as the USB cable is disconnected, the power supply will be taken from the PC.
Select item
8
from display menu and click enter.
Letter
A
will appear on display, meaning that the NI400 is correctly set up in STOP state.
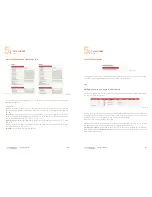
After that, flashing number
0
will appear on display meaning that the NI400 is waiting for
a connection. The NI400 waits for connection for 30 sec. After 30 sec., you should repeat
connection procedure from point 1 to start a connection.
Start PC connection by clicking on connect button in the connection window (see the par.
NI400 local connection).
After connection, number
0.
will appear on display.
Open Browser and enter address
192.168.125.1
Enter NI400
Username
and
Password
. (see the par. “NI400 default setting”)
Now it is possible to surf the configuration pages
USB device
Figure 18
3
3