BIOS
104
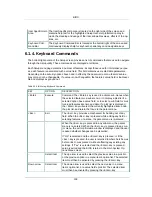
Left and right
arrows
Select Menu
The left and right arrow keys are used to move between the ma-
jor menu pages. The keys have no affect if a sub-menu or pick
list is displayed.
<Tab>
Select Field
The <Tab> key is used to move between fields. For example,
<Tab> can be used to move from hours to minutes in the time
item in the main menu.
-
Change Value The minus key on the keypad is used to change the value of the
current item to the previous value. This key scrolls through the
values in the associated pick list without displaying the full list.
+
Change Value The plus key on the keypad is used to change the value of the
current menu item to the next value. This key scrolls through the
values in the associated pick list without displaying the full list.
On 106-key Japanese keyboards, the plus key has a different
scan code than the plus key on the other keyboard, but will have
the same effect.
F8
Previous Val-
ues
Pressing <F8> makes the following message to appear:
Load Previous Values?
Yes/No
If Yes is highlighted and <Enter> is pressed, all Setup fields are
set to their previous values. If No is highlighted and <Enter> is
pressed, or if the <Esc> key is pressed, the user is returned to
where they were before <F8> was pressed without affecting any
existing field values.
F9
Setup Defaults Pressing <F9> makes the following message to appear:
Load Optimized Defaults?
Yes/No
If Yes is highlighted and <Enter> is pressed, all Setup fields are
set to their default values. If No is highlighted and <Enter> is
pressed, or if the <Esc> key is pressed, the user is returned to
where they were before <F9> was pressed without affecting any
existing field values.
F10
Save and Exit Pressing <F10> makes the following message to appear:
Save configuration and exit?
Yes/No
If Yes is highlighted and <Enter> is pressed, all changes are
saved and Setup is exited. If No is highlighted and <Enter> is
pressed, or the <Esc> key is pressed, the user is returned to
where they were before <F10> was pressed without affecting
any existing values.
Содержание Demos R420 M2
Страница 1: ...Netberg Demos R420 M2 server User manual...
Страница 2: ...Netberg Demos R420 M2 server User manual...
Страница 12: ...1 Chapter 1 Safety Information...
Страница 19: ...8 Chapter 2 About the Server...
Страница 32: ...21 Chapter 3 Installing Hardware...
Страница 68: ...Installing Hardware 57 3 16 2 To install the strong plate Reverse the steps above to install the strong plate...
Страница 93: ...82 Chapter 4 Connectors...
Страница 95: ...Connectors 84 Figure 4 1 Mainboard Overview...
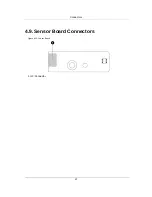
Страница 108: ...Connectors 97 4 9 Sensor Board Connectors Figure 4 13 Sensor Board 1 I2C Connector...
Страница 109: ...98 Chapter 5 Cable Routing...
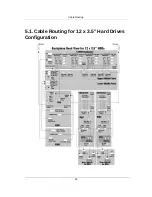
Страница 110: ...Cable Routing 99 5 1 Cable Routing for 12 x 3 5 Hard Drives Configuration...
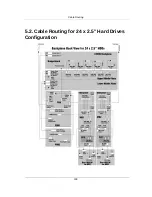
Страница 111: ...Cable Routing 100 5 2 Cable Routing for 24 x 2 5 Hard Drives Configuration...
Страница 112: ...101 Chapter 6 BIOS...
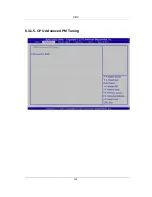
Страница 125: ...BIOS 114 6 3 1 5 CPU Advanced PM Tuning...
Страница 172: ...BIOS 161 6 4 2 View FRU Information...
Страница 176: ...BIOS 165 Menu Fields Settings Comments Network Device BBS Priorities 1...
Страница 182: ...171 Chapter 7 Rail Kit Assembly...
Страница 186: ...Rail Kit Assembly 175 Figure 7 3 Tightening the Thumbscrews...
Страница 187: ...176 Chapter 8 Troubleshooting...

