


Disassembly and Reassembly 3-29
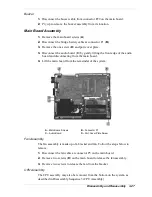
4.
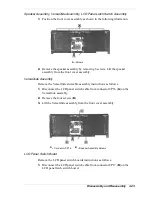
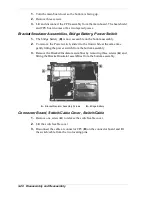
Remove one screw (
A
) to release the connector board from the bottom
assembly.
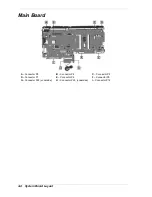
A – Screws
B – Connector CP8
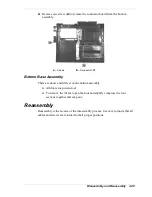
Bottom Base Assembly
There are doors and tilt feet on the bottom assembly.
All doors snap in and out.
To remove the tilt feet open the foot and slightly compress the four
sections together and snap out.
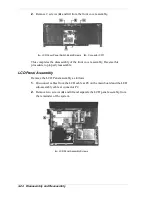
Reassembly
Reassembly is the reverse of the disassembly process. Use care to insure that all
cables and screws are returned to their proper positions.
Содержание Versa LX
Страница 1: ...NEC Versa LX Notebook Computer VERSA LX S E R V I C E A N D R E F E R E N C E M A N U A L...
Страница 57: ...3 Disassembly and Reassembly Required Tools and Equipment Disassembly Reassembly...
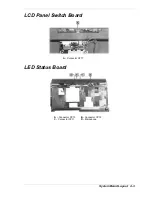
Страница 86: ...4 System Board Layout Audio Board Connector Board LCD Panel Switch Board LED Status Board Main Board...
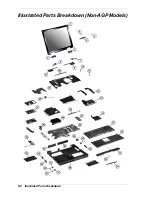
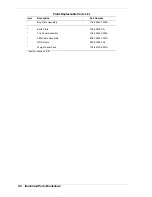
Страница 91: ...5 2 Illustrated Parts Breakdown Illustrated Parts Breakdown Non AGP Models...
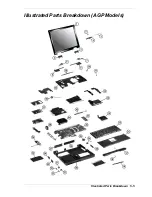
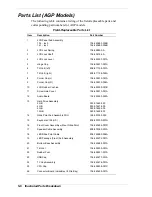
Страница 94: ...Illustrated Parts Breakdown 5 5 Illustrated Parts Breakdown AGP Models...
Страница 102: ...7 Troubleshooting Quick Troubleshooting Helpful Questions...
Страница 112: ...9 Specifications System Components Pin Assignments Connector Locations Memory Map Interrupt Controllers...
Страница 138: ...NEC Computer Systems Division Packard Bell NEC Inc 1 Packard Bell Way Sacramento CA 95828 0903 819 200064 000 3 99...


