


3-14 Disassembly and Reassembly
6.
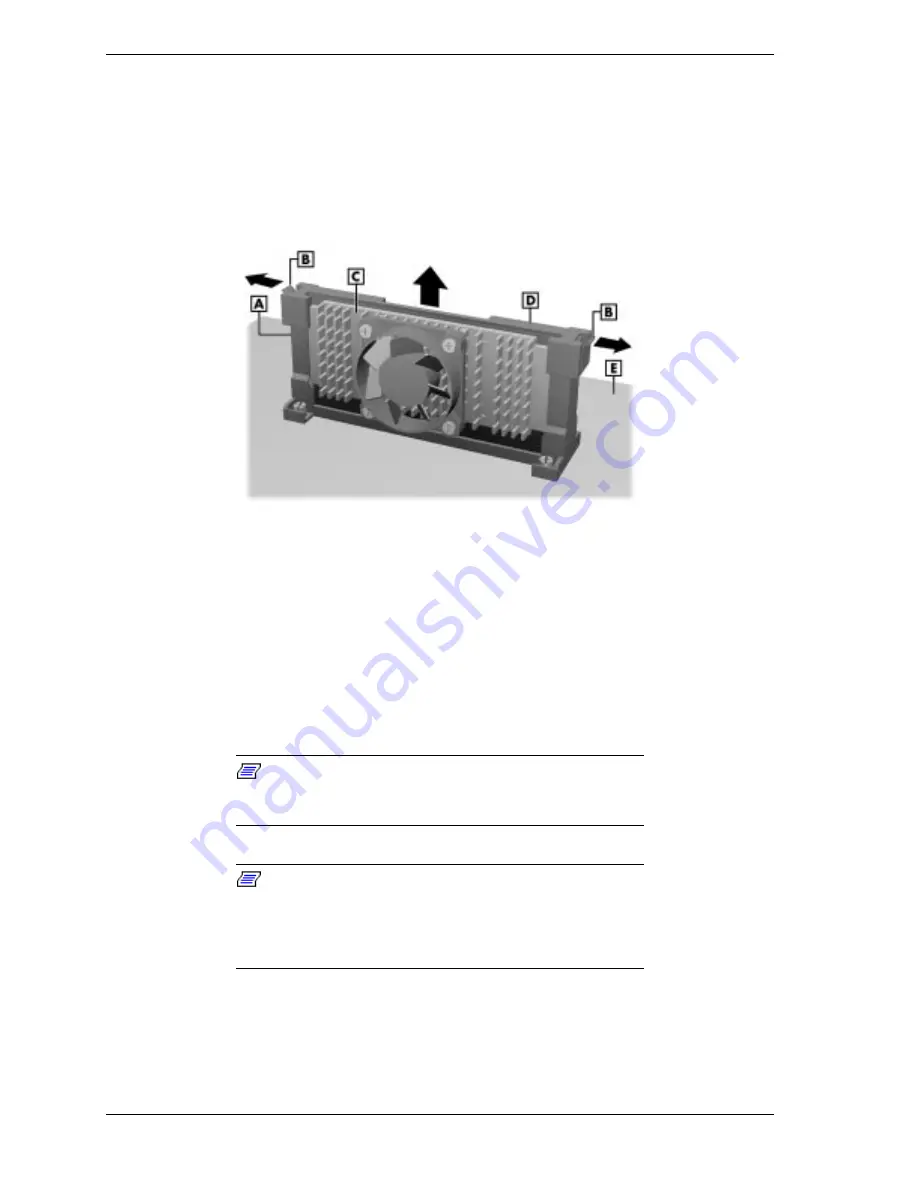
Remove the retaining bar holding the cartridge to the retention mechanism
by simultaneously pressing out on the tab at each end of the bar while lifting
the bar up (see the following figure).
7.
Grasp each end of the cartridge and carefully pull it out of its socket and
retention mechanism.
Removing the Celeron or Pentium III Processor
A – Retention Mechanism
D – Retaining Bar
B – Tabs
E – System Board
C – Processor Cartridge
8.
Store the cartridge in an antistatic bag.
9.
Install the upgrade processor (see “Installing the Celeron or Pentium III
Upgrade Processor Cartridge”).
Installing the Celeron or Pentium III Upgrade Processor Cartridge
Install a Celeron or Pentium III processor cartridge as follows.
Note: NEC CSD recommends that you print out or write
down your current BIOS Setup parameters and store the
information in a safe place before installing a processor.
Note: If you are upgrading from a Pentium II processor to
a Celeron or Pentium III processor, you must obtain a
retaining bar to place over the processor cartridge. See
Section 9, “NEC CSD Information Services,” for information
on contacting NEC CSD for this part.
1.
If you are replacing the processor cartridge currently in your system, remove
the cartridge (see “Removing the Celeron or Pentium III Processor
Cartridge”).
Содержание POWERMATE 8100 Series
Страница 17: ...1 System Overview Configurations Features Components ...
Страница 131: ...4 System Board Connectors Jumpers and Sockets Components Pin Assignments Resources ...
Страница 183: ...6 Illustrated Parts Breakdown Parts and Options Field Replaceable Unit FRU List Illustrated Parts Breakdown IPB ...
Страница 189: ...7 Preventive Maintenance System Cleaning Keyboard Cleaning Mouse Cleaning ...
Страница 193: ...8 Troubleshooting Checklist Diagnostics ...
Страница 204: ...9 NEC CSD Information Services Service Telephone Numbers Technical Support Product Information FaxFlash Service ...


