


Upgrading Your System 4-53
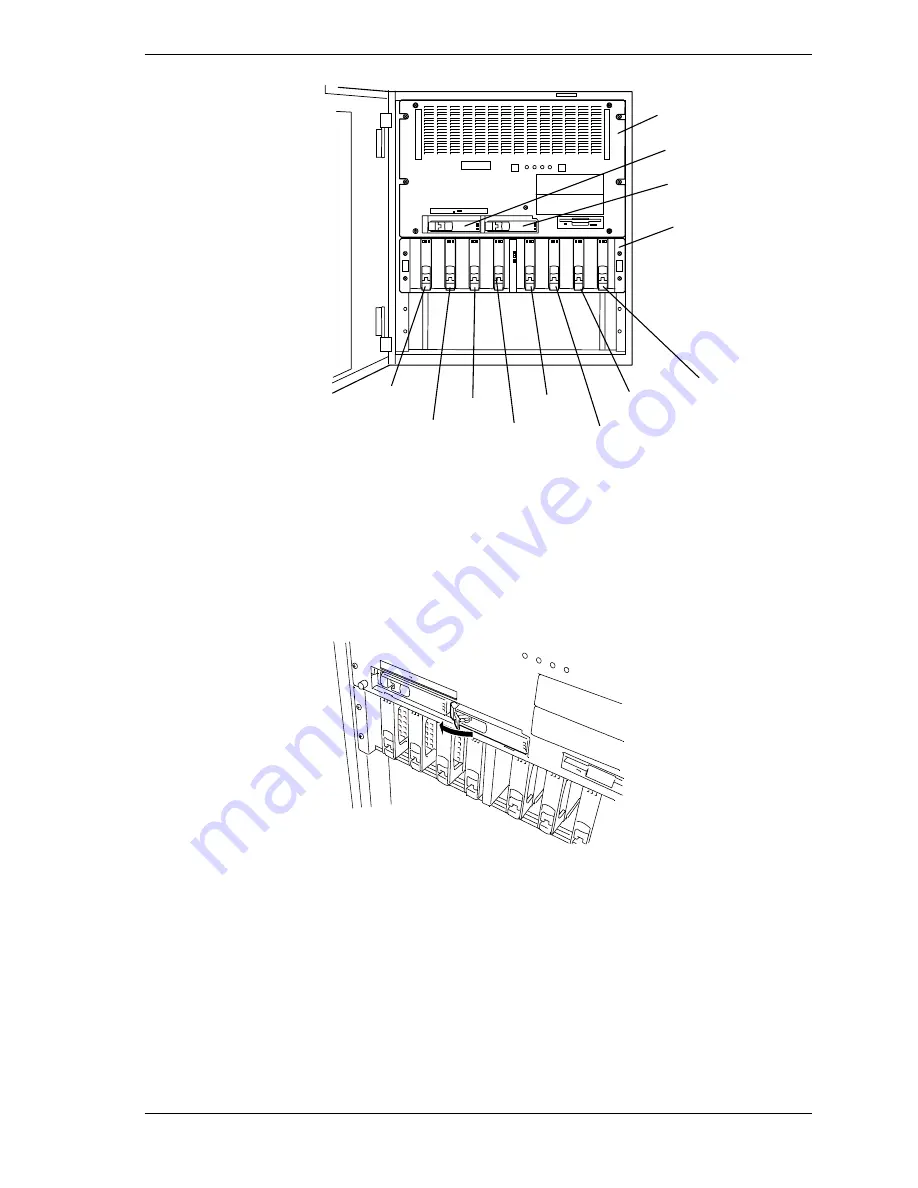
BSU
ID0
ID1
DEU
ID0
ID1
ID2
ID3
IDB
IDA
ID9
ID8
Figure 4-58. Hard Disk Drive Bays
5.
Grasp the handle of the hard disk’s carrier and unlock the lever located at the
bottom of the carrier handle, see Figure 4-59. The hard disk carrier will
come out approximately 1/2-inch so that its handle is fully accessible in
order to pull the carrier the rest of the way out of the bay.
Figure 4-59. Removing a Hard Disk Drive
6.
Remove the hard disk drive and place it in an antistatic wrapper.
7.
If another hard disk drive is not going to be installed into the vacant slot then
a cooling sponge must be. This will ensure proper system cooling.
8.
Plug in the power cords and power up the system.
Содержание Express5800/180Ra-7
Страница 1: ... U s e r s G u i d e EXPRESS5800 180Ra 7 ...
Страница 2: ...xxx ...
Страница 3: ... U s e r s G u i d e EXPRESS5800 180Ra 7 ...
Страница 10: ...viii Contents ...
Страница 94: ...3 28 Configuring Your System ...
Страница 134: ...4 40 Upgrading Your System A B C Figure 4 43 Recabling the SCSI Interface Cable ...
Страница 166: ...4 72 Upgrading Your System ...
Страница 206: ...5 40 Problem Solving ...
Страница 207: ...A Specifications Basic System Unit BSU Disk Expansion Unit DEU ...
Страница 212: ...A 6 Specifications ...
Страница 218: ...B 6 Interrupt Request PCI IRQ Device I O Port Address Assignments ...
Страница 229: ...D ROMPilot BIOS Error Codes ROMPilot BIOS Error Codes ...
Страница 232: ...D 4 ROMPilot BIOS Error Codes ...
Страница 242: ...10 Glossary ...
Страница 246: ...4 Equipment Log ...
Страница 250: ...Index 4 ...
Страница 251: ...xx ...
Страница 252: ... 456 01516 000 ...


